UPDATE: Reviews section refreshed, redesigned, searchable: Go take a look
I've decided to recon a set of older Fox Float 32 lowers, 26", that have been hanging about forever. They are/were excellent forks, but the lowers were heavily paint-chipped and very tatty.
My first attempt at doing this is now complete, but I'm not too happy. The finish is very soft, much more so than I would have thought. Dang 🙁
What I did was:
-rubbed them down to bare metal
-thoroughly cleaned and dried
-Day 1: sprayed 6 light coats of primer (acrylic grey)
-Day 2: sprayed 6 light coats of colour (acrylic semi-gloss black)
-Day 3: sprayed 6 light coats of acrylic lacquer
Now I'm on day 4, and I noticed a small run of lacquer down at the brake mounting. Even lightly rubbing it with fine sandpaper, I'm right back to the metal :/
What have I done wrong?
thx....
Standard spray paint isn't the best for bike related objects, even the 2K stuff.
It might go against the DIY ethos but I ended up giving mine to a mate who worked at a car autobody shop and the results were fantastic. They've held up to years of riding and still look great. Didn't cost much either as they were already spraying a black car. Might be worth ringing around a few local to you to see if they'd help you out.
Possibly not letting the paint harden between coats and rubbing down is why you are rubbing straight through it. Or using too rough a grade of paper.
To get really good paint you should bake it on (except 2K which does air harden) - but not in your oven (it will make it stink). Plus the paper to use should be 1200 grit or similar (and wet it).
It is often cheaper to get it done professionally if you talk to the right person.....
Thanks all- I'll see if I can possibly find a paint shop who'd do them for me. Or maybe let the paint really harden, not sure.
god..i remember watching that sam pilgrim video... Numpty!
DrP
I'd have suggested bignosecustoms who did a few frames on here and my lowers, but I think he's stopped doing it now 🙁
The job he did on my lowers is amazing to be honest.
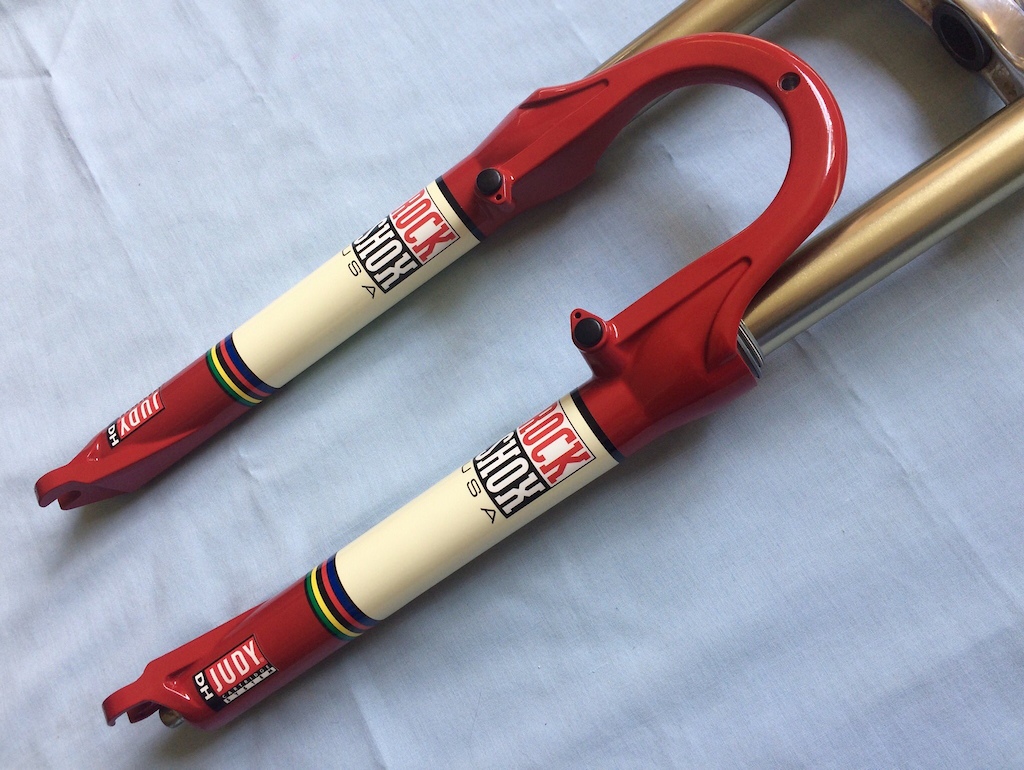
As said above, a rattlecan spray job is always going to be a little fragile but best to leave a week at least between recoats if you need to rub out any imperfections. Once done let them harden (preferably in sunlight . . . yeah right) for a couple of weeks before rebulding. I did these retro Judy XLCs recently and they're holding up pretty well.

Surprised more people don't paint their lowers, I'm sick of black on black on black forks, I've got some spare Rockshox Yari I'm gonna strip n polish then 2k clearcoat, might try stripping the crowns as well, there's a place in stockport called yourspraypaints that sells a less dangerous 2k adc.
Get them powder coated?
..Then invisiframe them
I'd say the OP's not leaving it long enough. It took weeks for my road bike to harden off once re-painted (rattle cans).
Take your time and don't rush it. 5 months post painting and the paint is nice and hard now.
Yep, doing it in a garage, even in summer, with rattle cans you will need days and days for the paint to 'go off'.
A back street paint shop could have them whizzed up in 2 pack and low baked to a lovely and very durable finish for not much at all. I love DIY'ing anyhting and I've painted all sorts but theres a time and place for the right kit!
I'm far from a painting expert, but I'm pretty sure you need to start with Acid / Etch primer on aluminium items (which I presume your fork legs are).
Thanks all. Seems the trick is to let the paint cure sufficiently, I'd just been following the application guide for how frequently to apply coats. I might well approach a local body shop and see if they can sling them in next time they're doing any kind of black or dark grey work.
These lowers are apparently magnesium alloy.
Quick update:
Stripped the lowers off the forks, paint off (again), and then baked them in my kitchen oven between layers (primer, colour coat, lacquer). Did them at about 80 degrees for 40 mins or so.
Finish is good, and seems quite hard.
Quicker quick update-
Applied the stickers. Looked good. The perfectionist in me noted that one was a baw-hair off, alignment wise. I gently lifted one corner of said sticker to move it, and....
....the underlying paint came off, all the way to the metal.
Back to the old drawing board.
Oh man I feel your pain! 😀 Been there so many times. The number of times I’ve said to myself ‘why couldn’t I just leave it alone?!’…
Those Judys look pretty damned good though!
Ha, they sure do!
Lightly 'key' the bare magnesium with a blue scotchbrite pad to dull the surface then acid etch prime (Upol #8).
The lack of acid etch is the reason for poor adhesion.
Lightly flatten/key between each rattle can layer or get someone to 2k it.
Acid etch prime? Ok, will do, thanks RNP.
Yup, magnesium alloys are way less "sticky" for normal paint. They also oxiside really fast so you want to get your paint on it as soon as possible after stripping to bare metal.
TBH it's one of those things I can do, and have done with some good success, but I probably won't do again. Or I'll aim low- use something like krylon fusion paint so it gives a nice finish without clearcoats, I love this stuff.
But even the factory finish on forks tends to get dinged up so I figure why aim for a really high quality finish when it's inevitably going to get smashed off a rock. Weirdly I don't mind at all having scrapes and scratches on the factory finish, if they're badges of honour then my 36s could lift Thor's hammer... but but when I painted my old boxxers every scratch offended me 🙂
Thanks all. I've ran out and picked up some of that Upol etch primer. First I've heard of Krylon Fusion Paint and I'm intrigued.
1st (light) coat of Upol is on....
3rd coat of Upol applied. Roughly 45 mins between coats. I'll probably add another 2 coats on tonight, and then I think it will be well covered. It seems to go on well, which is interesting and must be to do with the etching process.
I'm unsure what to do next after mucking it up steadily up to now. Is it ok to start doing layers of colour tomorrow morning? Or should I bake the forks first?
All advice is good 🙂
Jesus man you sure love those forks.
DON’T paint them yet! The etch primer needs to be left a long time before you apply any more paint. I’d give it a few days..
Thanks Timbog- ok, will do.
(Jkomo- Its become me vs them now.)
I’d recommend mend getting onto specialistpaints.Com. And buying they’re 2k rattle an kits, you’ll have them done in a day and you won’t sand anything other then the primer and then the lacquer (after a day or two of hardening)
I think you’re onto a hiding to nothing using anything else.
Thanks Pimpingpimp. I had a browse around their site, but couldn't see any 2k paint- lacquer and primer, was that what you meant?
I’m sure they used to do 2k canz (that’s what they call them, I’m not “street”) but they do this.
And then
https://specialistpaints.com/collections/kustom-canz-custom-aerosol-cans/products/base-canz
And then 2k clear to top it off.
No messing around with drying or oven baking. You should be able to get some decent etch primer elsewhere if they don’t do it, but I suspect if you message them they’ll have what you need.
Excellent, cheers.
I tried to update this post, but the forum magic is wilting, so:
All good now. A rub down to metal, a few coats of etch primer and then a 48 hour wait.
And then a few coats of colour, and a 5 day wait. And finally, a few coats of the excellent 2k clear coat from Specialist Paints, and the finish is pretty good. More importantly, it seems tough. I know they're forks and will get dinged up, but they're a huge improvement on the scabby state they were in.
Thanks for all the help and recommendations. Painting is hard.
I think it took me about a week to paint some rebas about 10yrs ago - I did a thread on here about the process, but I can't find it in my history as it was ages ago....
Just lots of flattening back each coat.
