You may be aware of [i]"retroshift"[/i], now known as [i]"Gevenalle"[/i] and their thumbies mounted on drop levers product... like this:
[img] 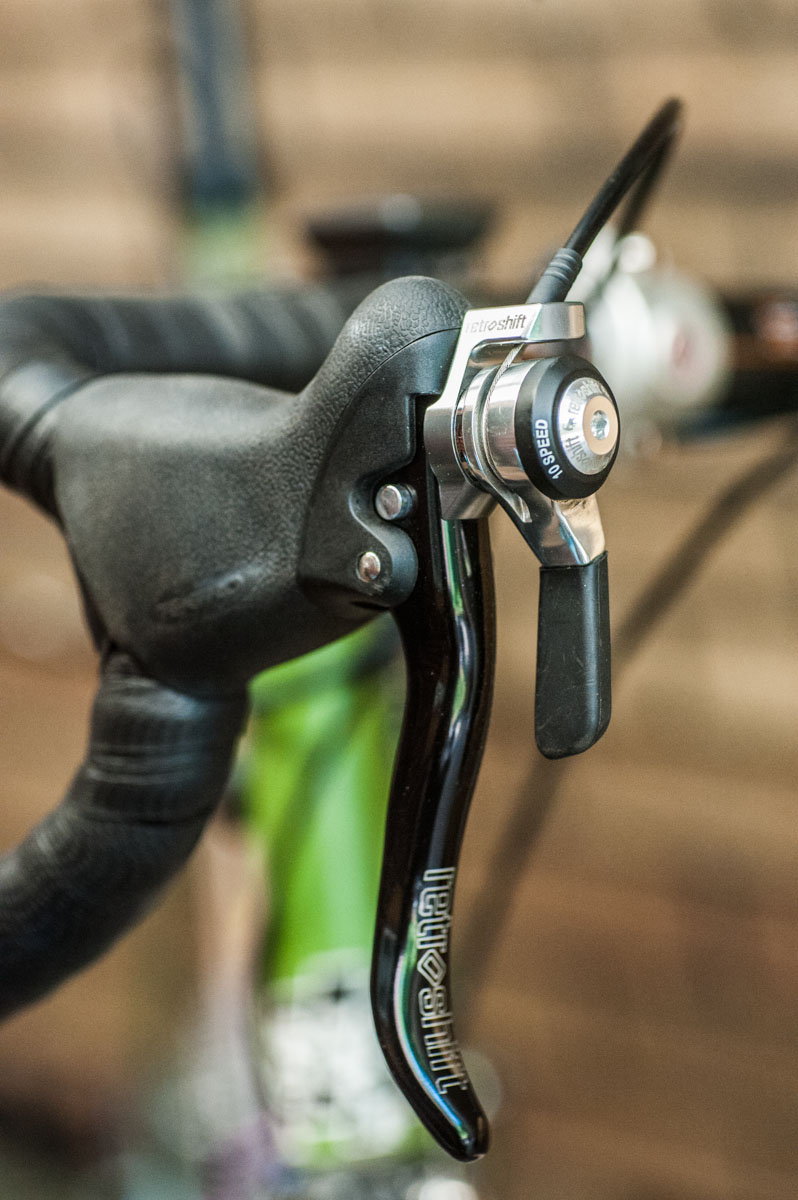 [/img]
I've fancied getting some for a while but starting at ~£115 (plus potential tax, importing them from the US) they've seemed a bit on the pricey side for something I just wanted to try out.
So I thought I would try bodging my own version on the cheap.
Like the Gevenalle I used Tektro RL520 brake levers, they're cheap (under £20 a pair) a good shape and I already have a pair on my commuter so I know I get on with them.
[img] 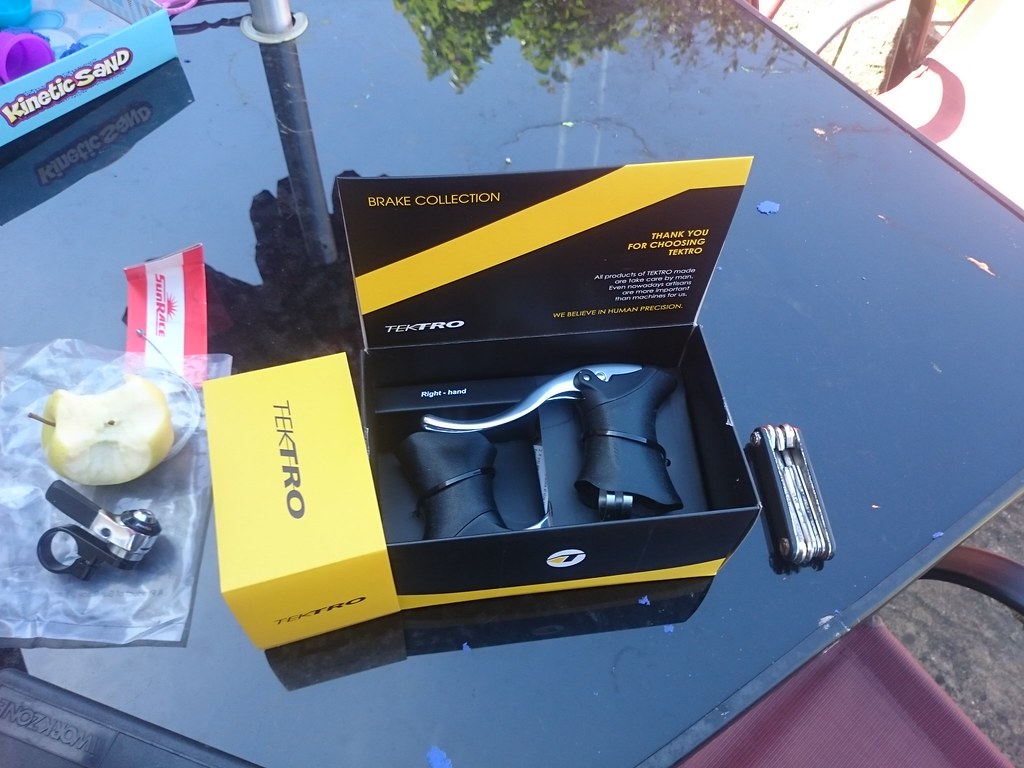 [/img]
Obviously I needed a thumbie to canibalise, Gevenalle us microshift, which are surprisingly expensive looking about I found Sunrace/Sturmey Archer do a range including 8 and 9 speed indexed jobbie again these can be found for ~£20-25.
I opted for the 'M96' 9 speed indexed RH shifter:
[img] 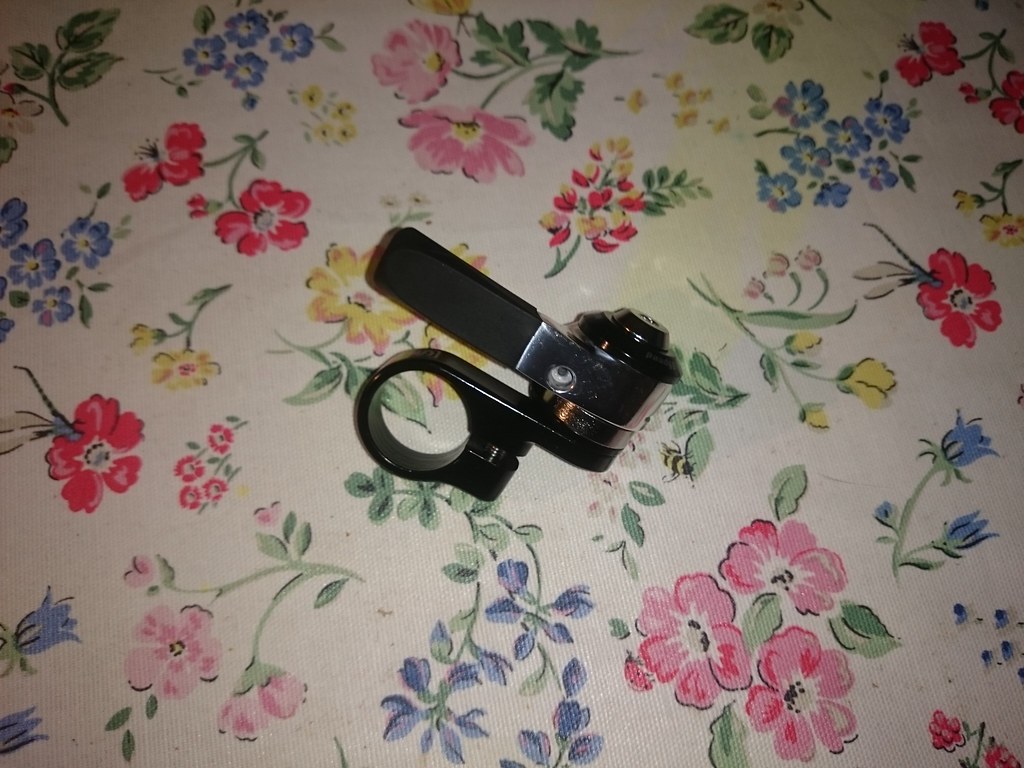 [/img]
Which I promptly pulled apart:
[img] 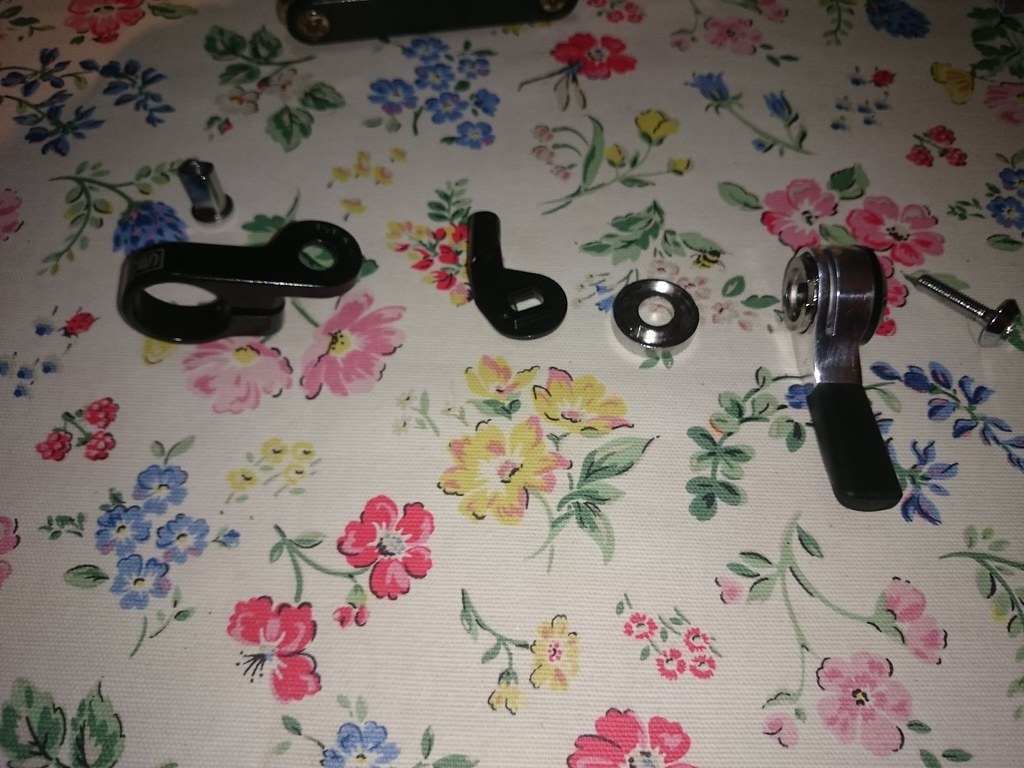 [/img]
Basically the lever arm is an integrated unit with the indexing mechanism built in, there is a cable stop plate and it all mounts/rotates on the clamp/backing plate with a flat sided shoulder bolt. All I had to do was modify the clamp/backing plate so I could fix it to the brake lever blade...
I did most of the following by eye with a Dremel.
First I added some extra detents to the mounting plate so I could place the cable stop/lever in the right orientation relative to the brake lever/hood, and I chopped off most of the clamp.
Before:
[img] 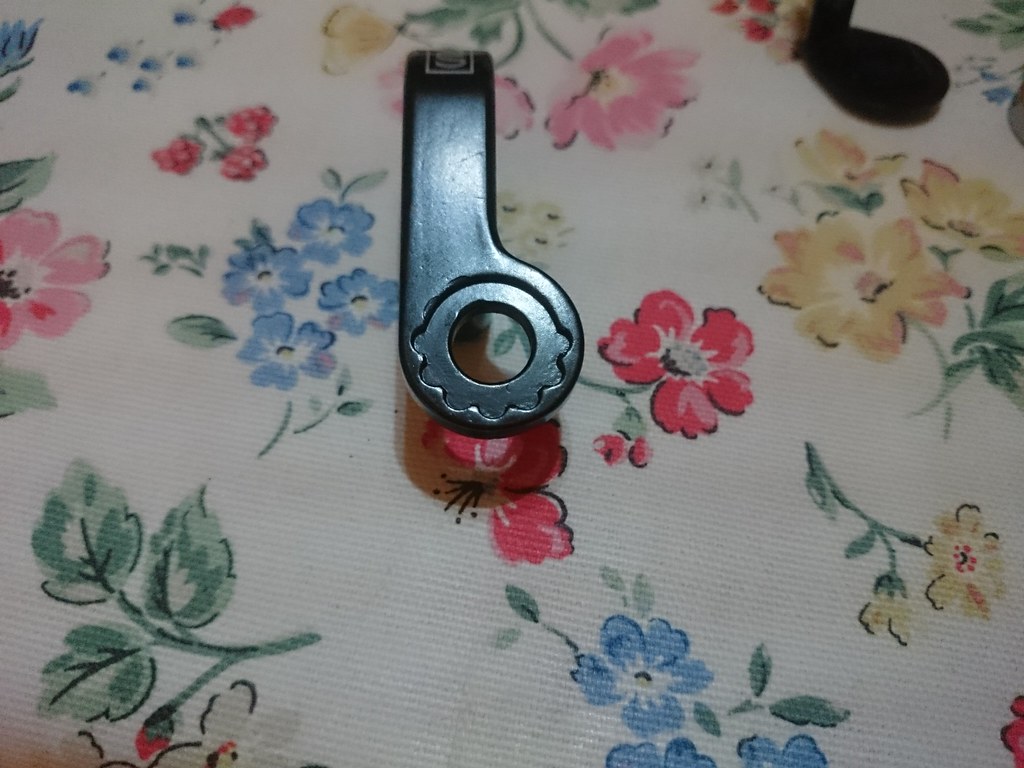 [/img]
After:
[img] 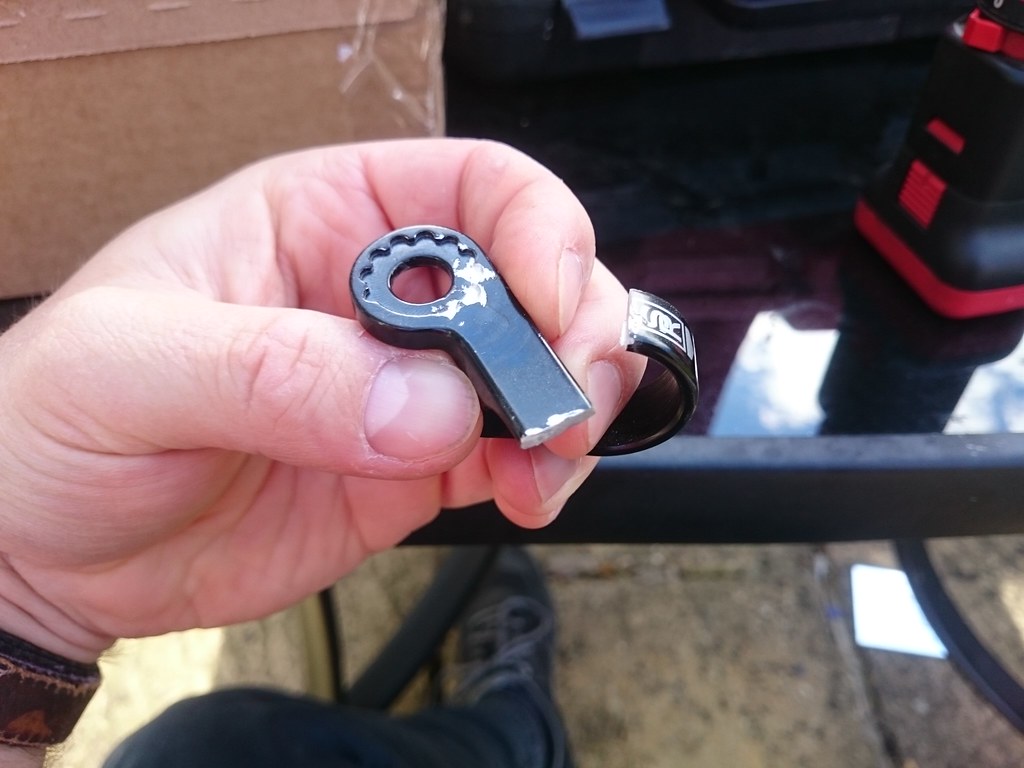 [/img]
[img] 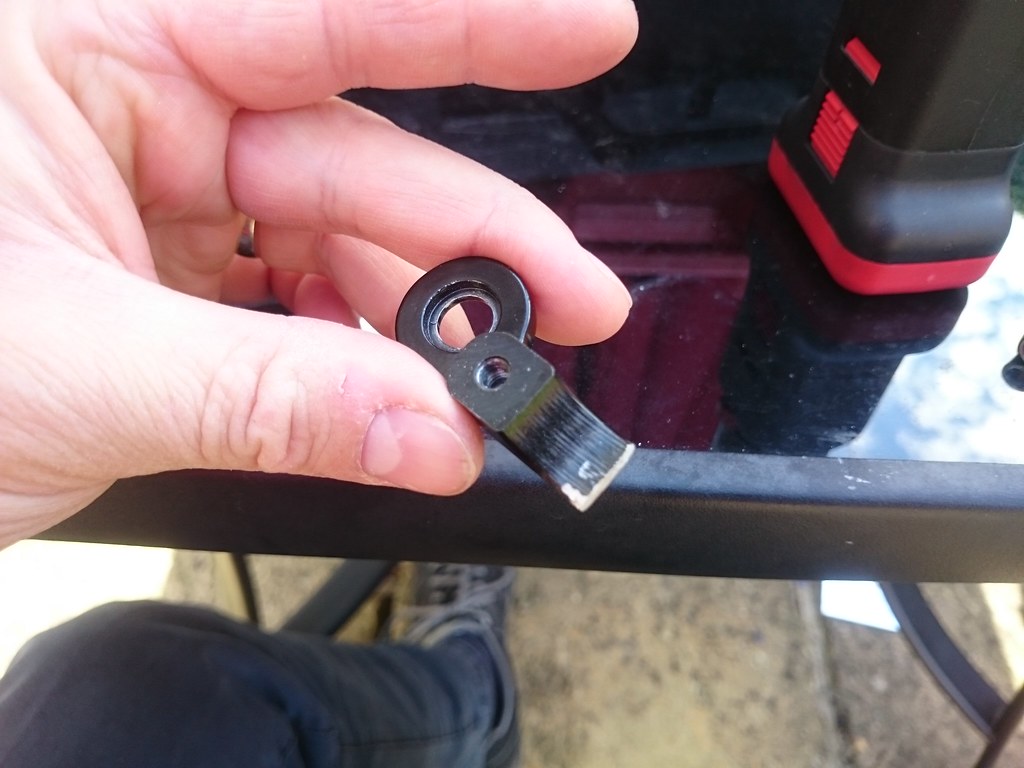 [/img]
Next I decided I was going to use the existing M5 tapped hole from the original clamp to secure the plate to the brake lever blade, the front of the blade has some curvature which I was going to recess the plate to roughly match and keep it from rotating. The larger grinding cylinder for the Dremel roughly matches the blade profile:
[img] 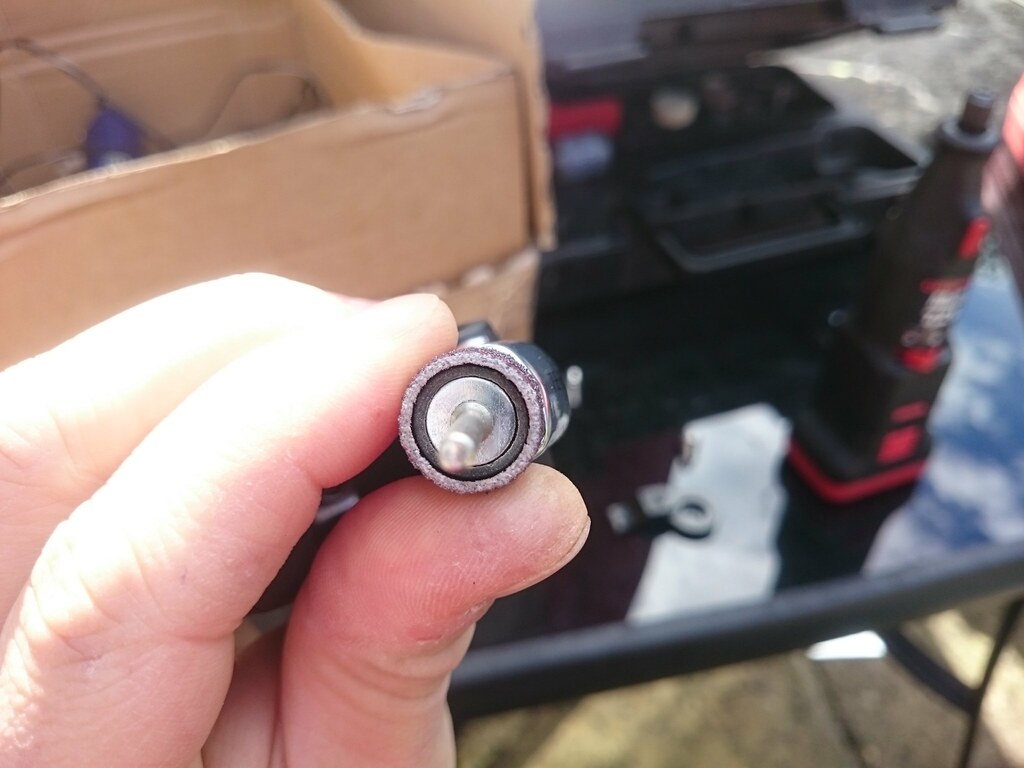 [/img]
And once the radius was ground in:
[img] 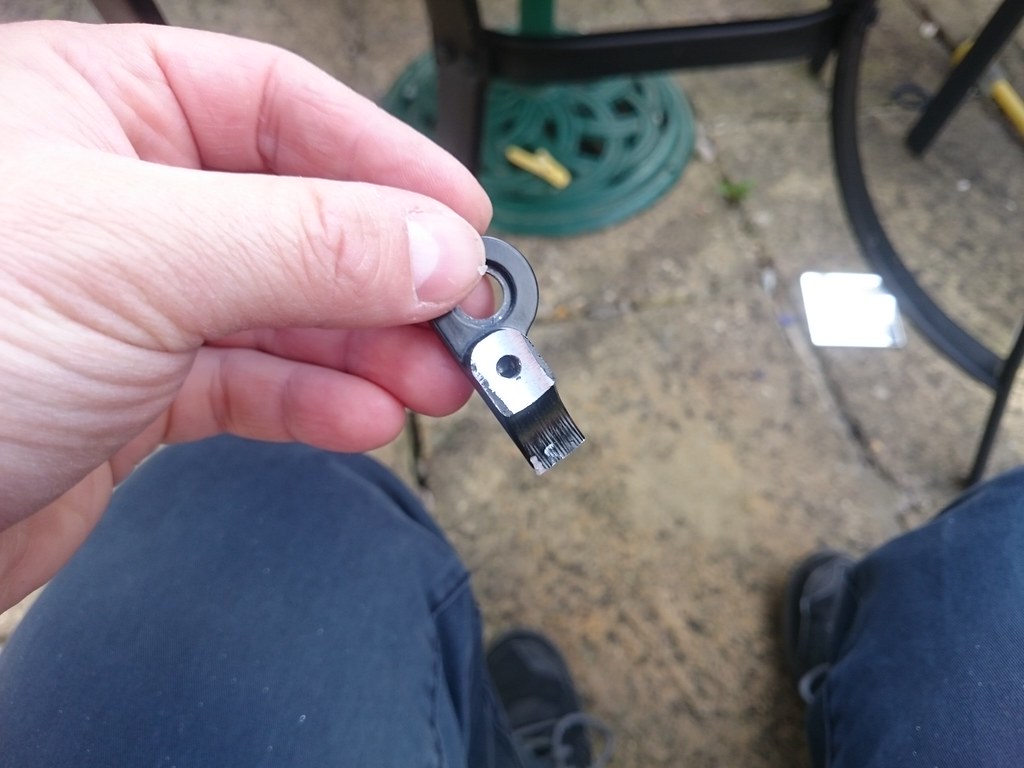 [/img]
[img] 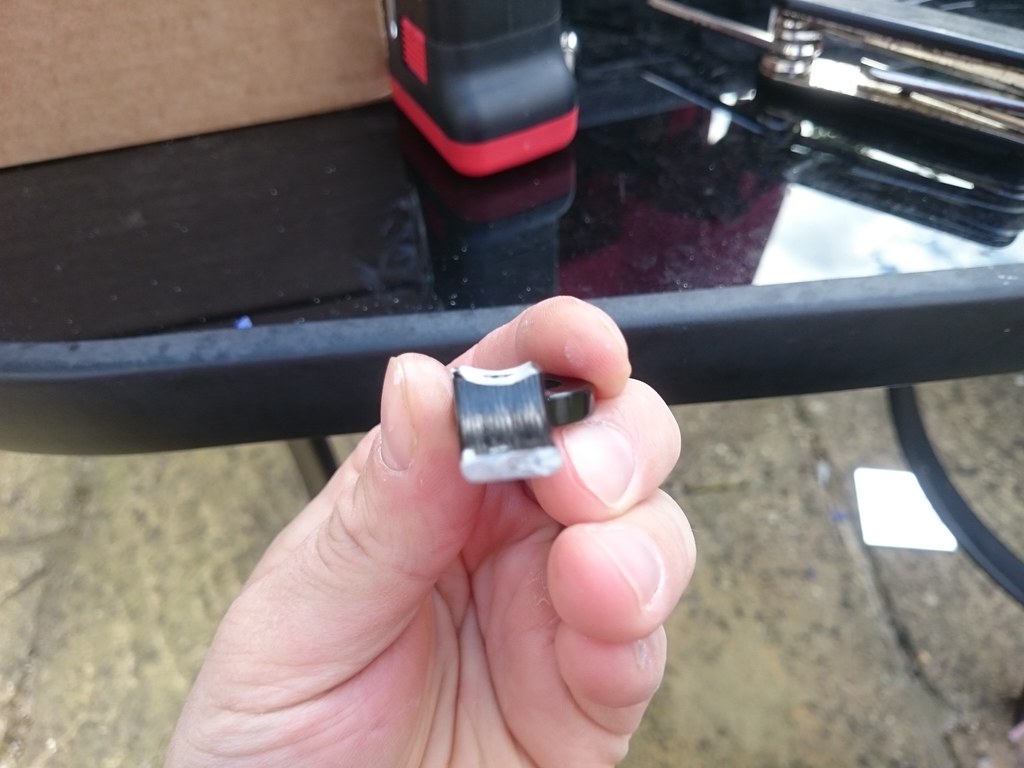 [/img]
Offered up on the lever:
[img] 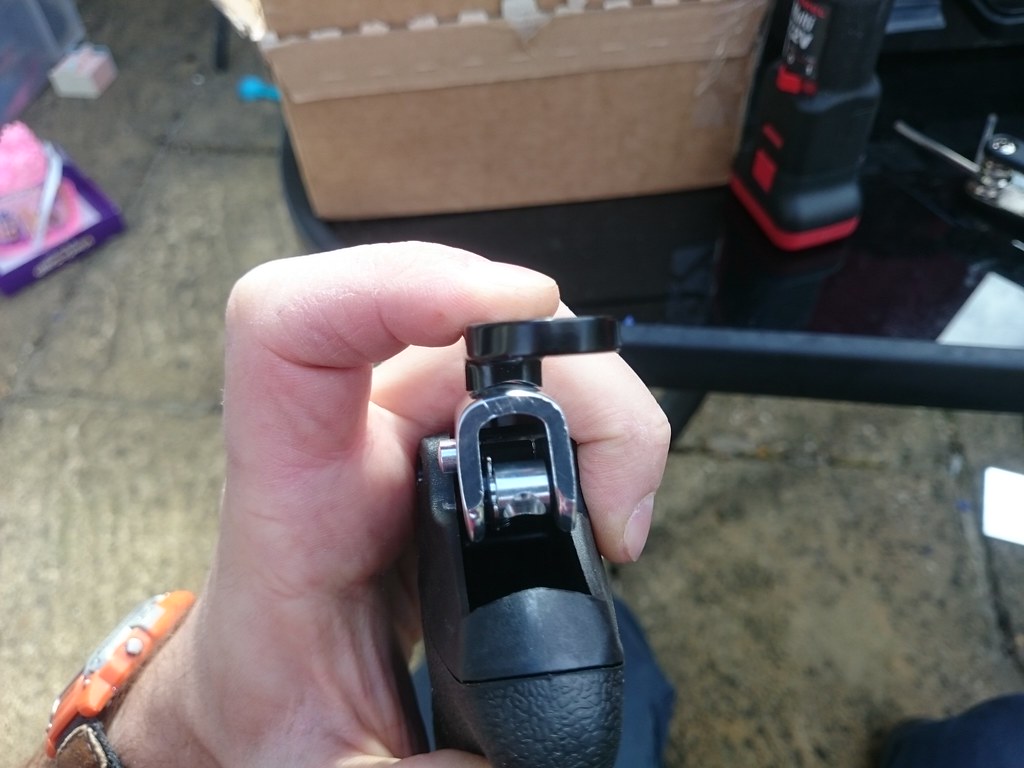 [/img]
[img] 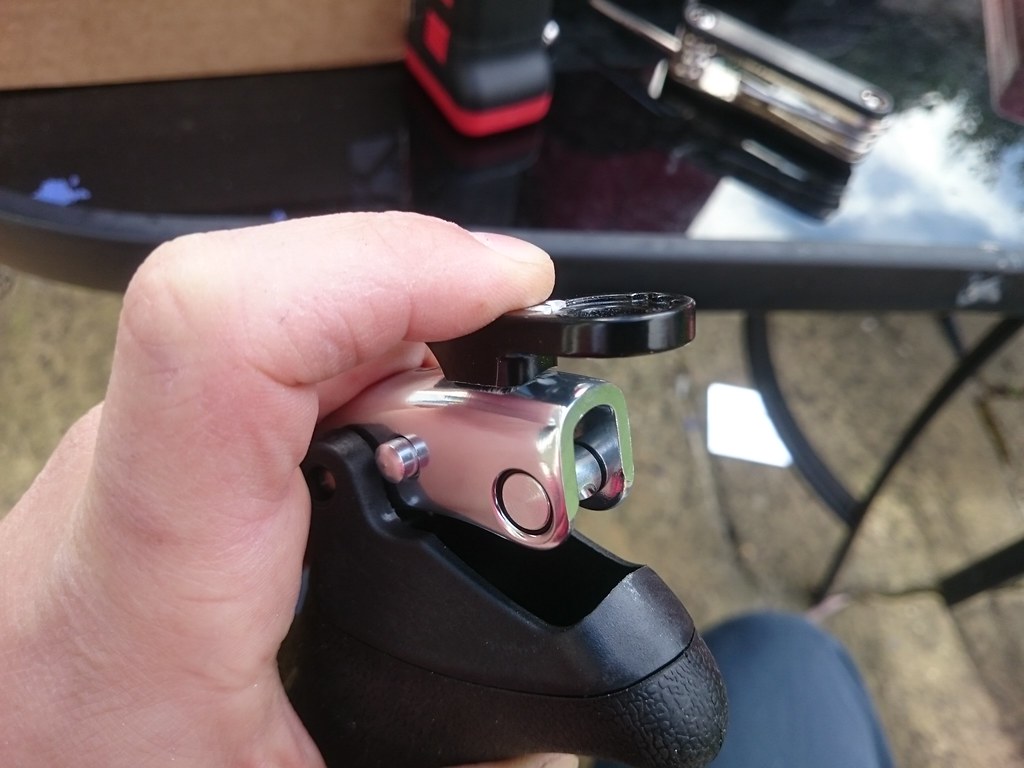 [/img]
I then went on to modifying the brake lever.
Pop the circlip and remove the cable stop:
[img] 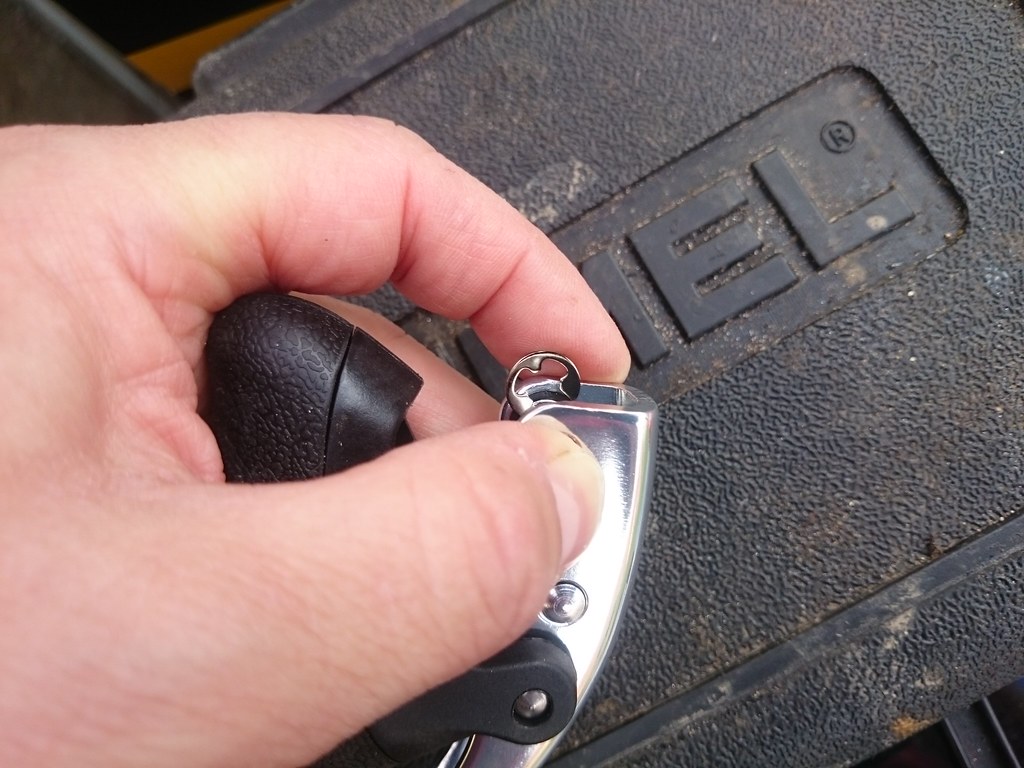 [/img]
[img] 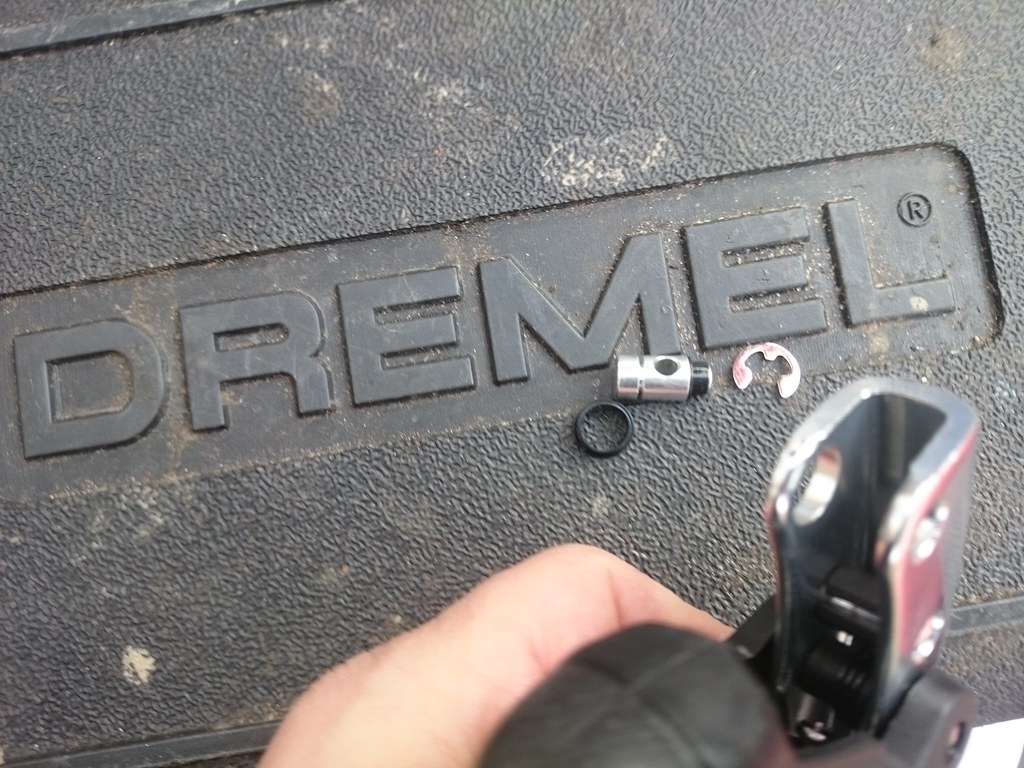 [/img]
I had decided to drill a 5mm hole on the 'E' of the 'TEKTRO' logo:
[img] 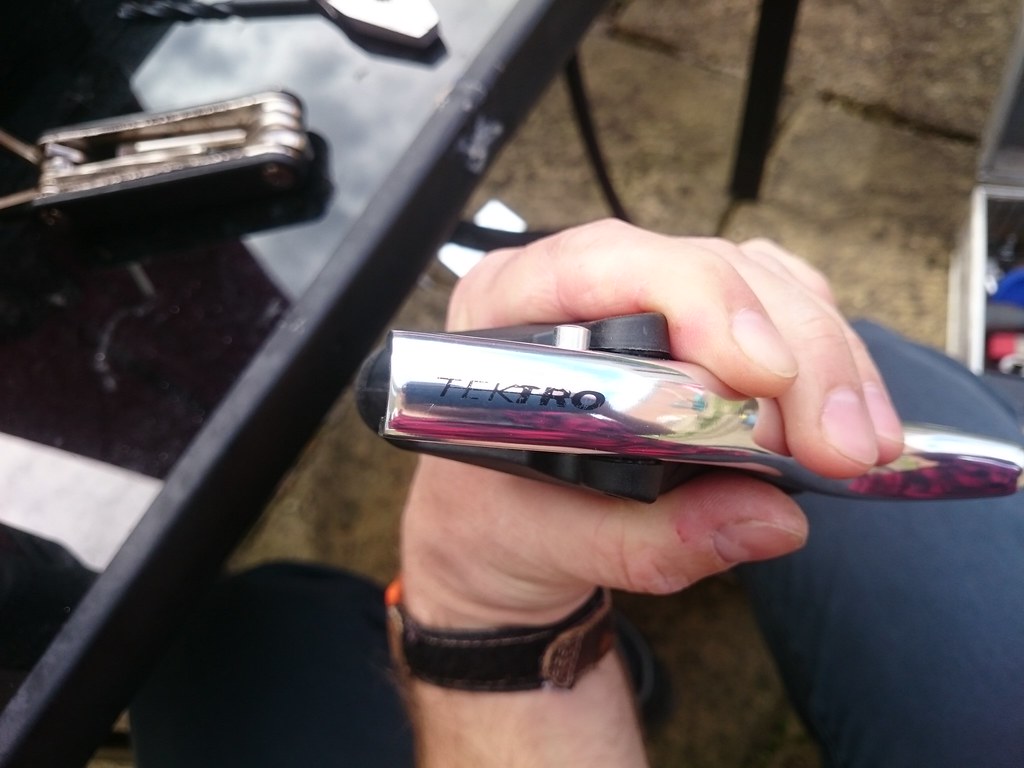 [/img]
[img] 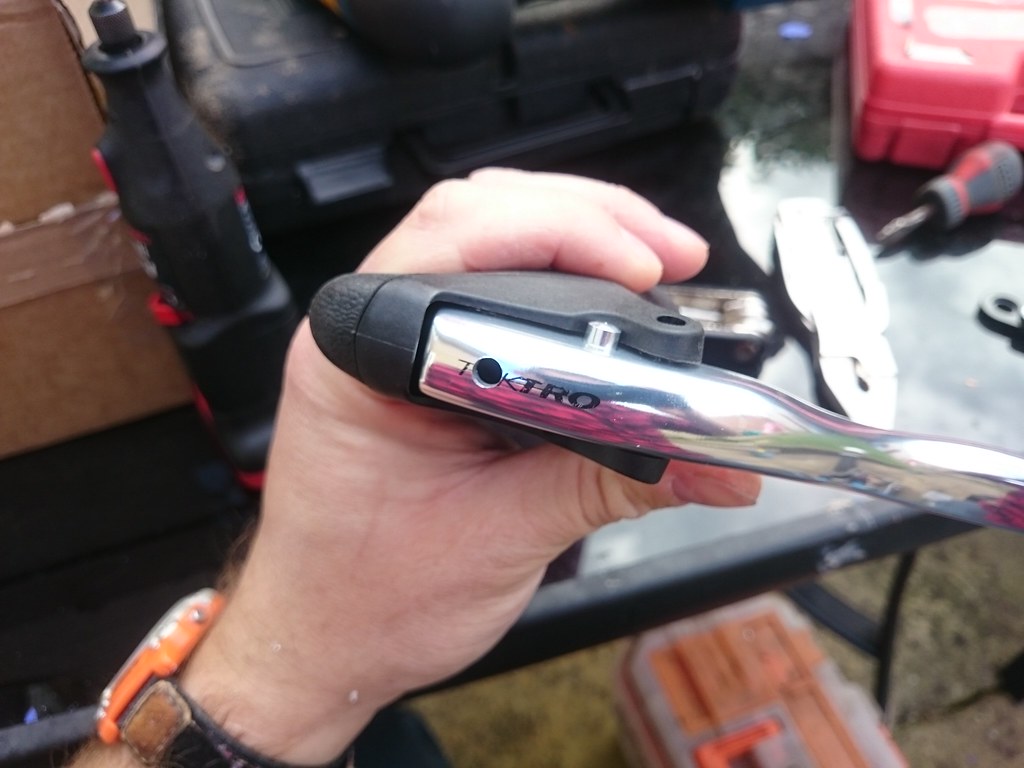 [/img]
[img] 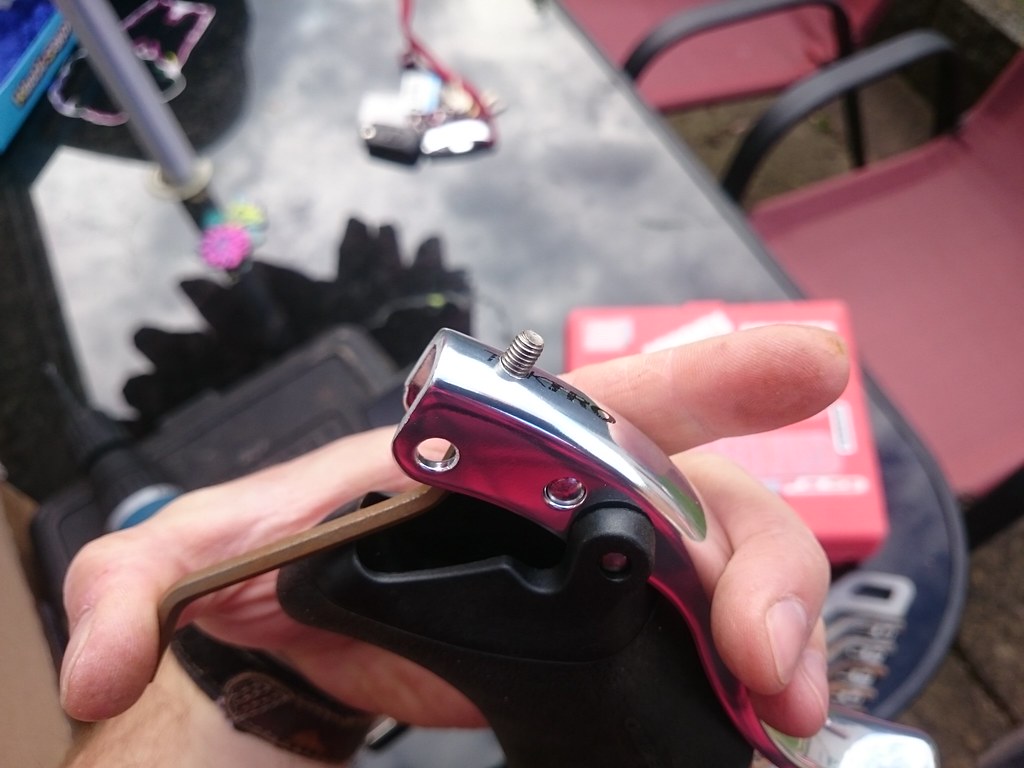 [/img]
Plate bolted on:
[img] 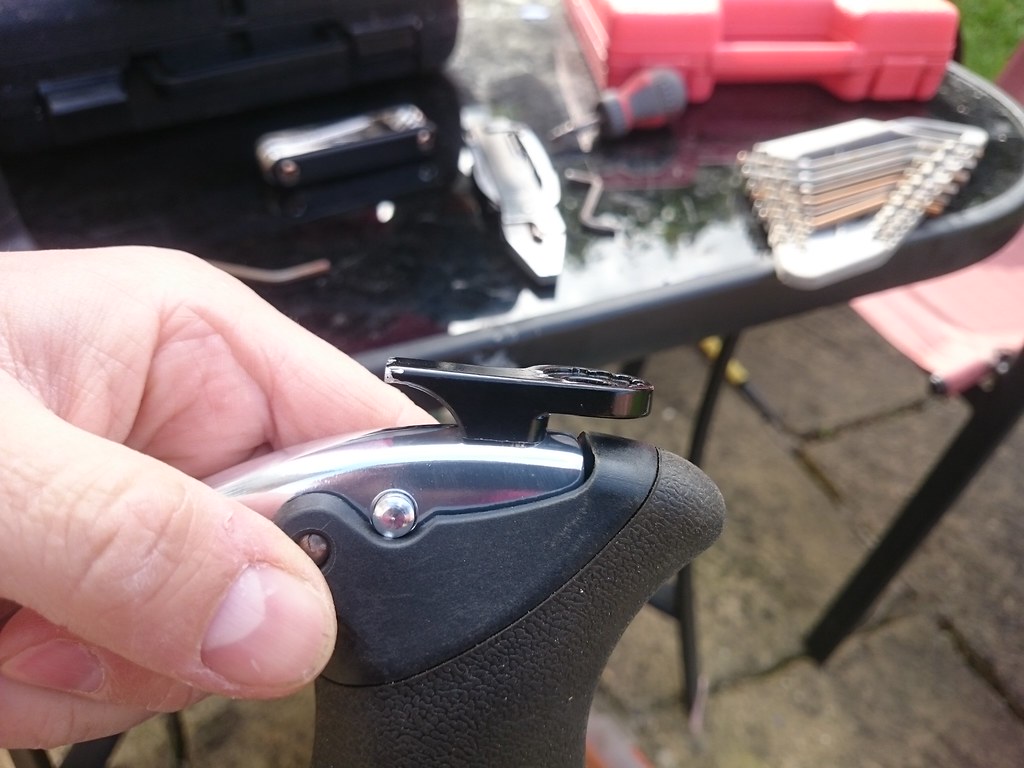 [/img]
[img] 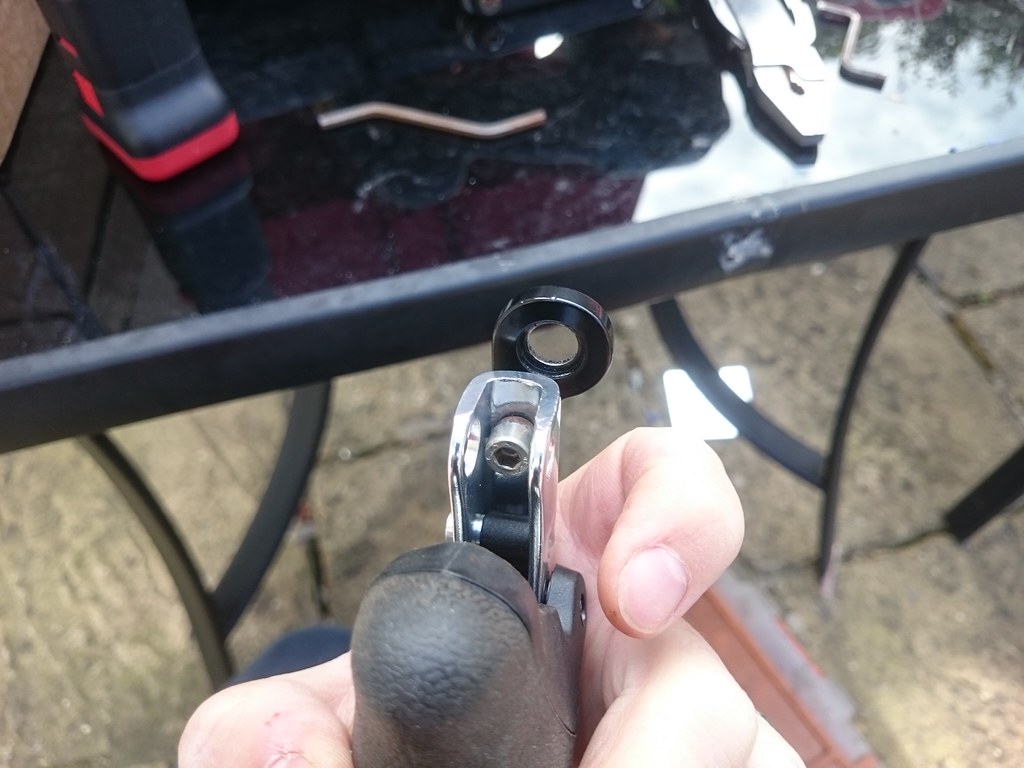 [/img]
[img] 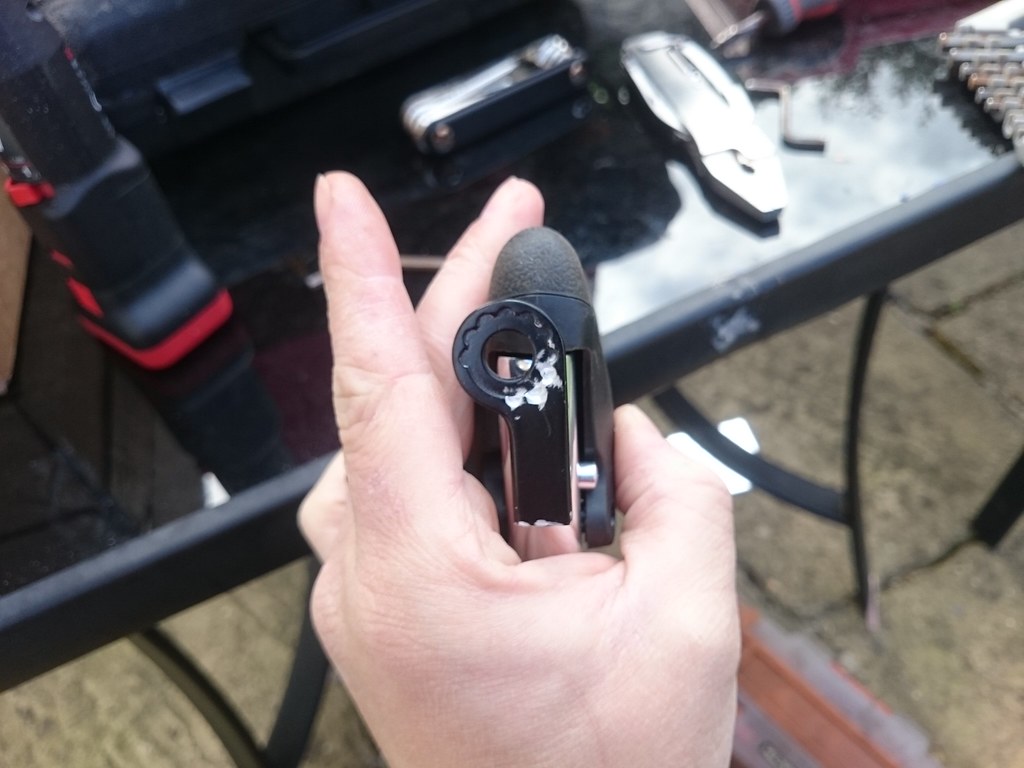 [/img]
And with the full gear lever assembled on:
[img] 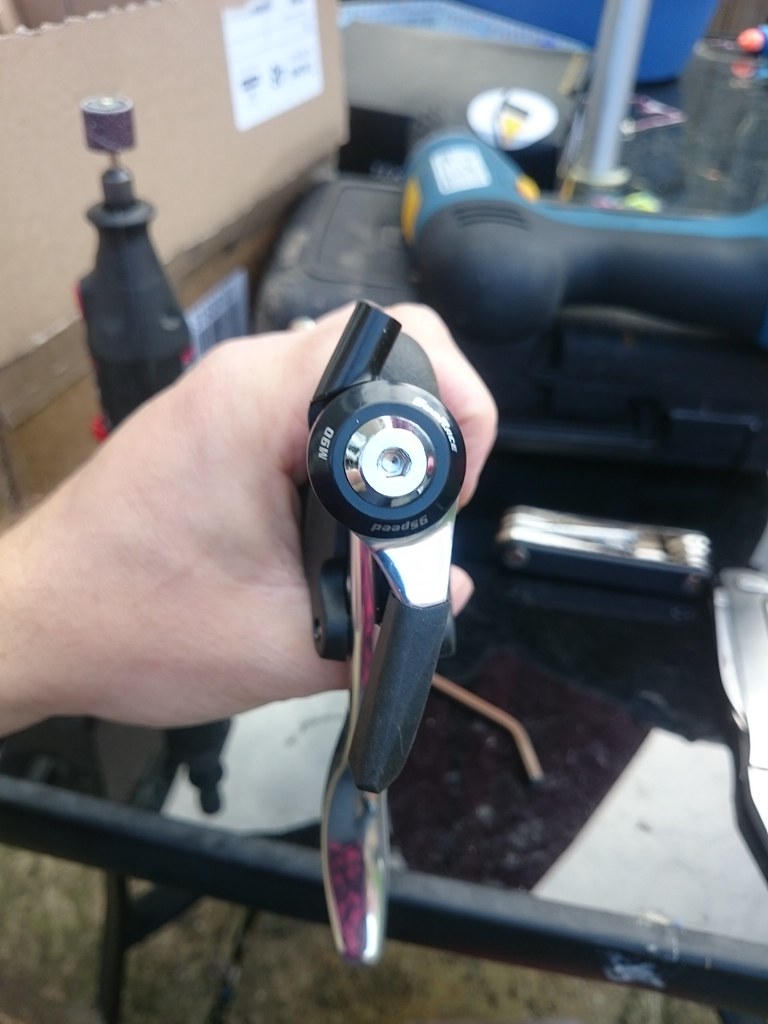 [/img]
[img] 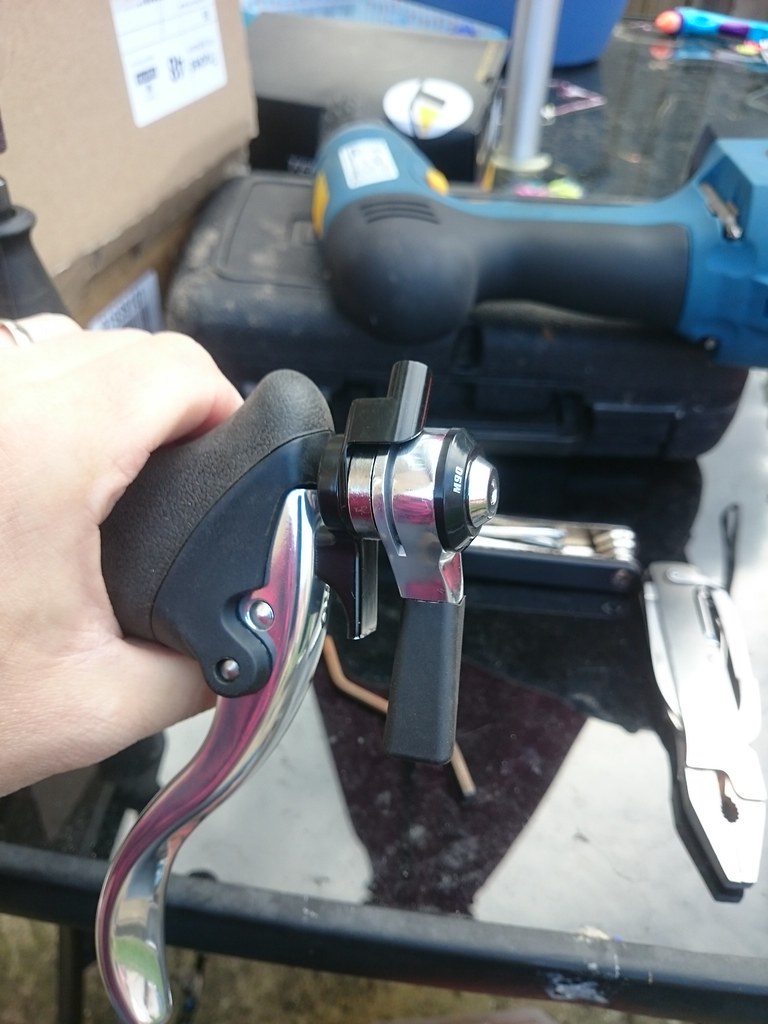 [/img]
It all seemed to go together pretty much perfectly...
I Disassembled it all and tidied up the mounting plate with a slitting disc and grinding wheel to get rid of any sharp edges and burrs, then I took all the black paint finish off with a wire wheel so it would roughly match the lever blade:
[img] 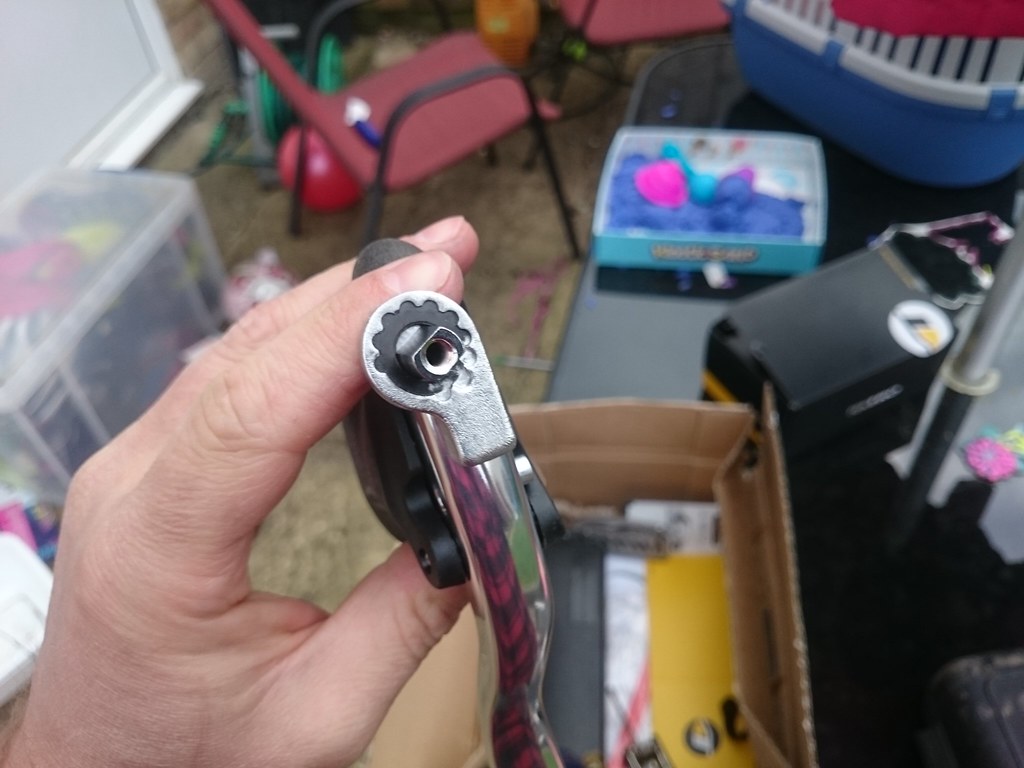 [/img]
[img] 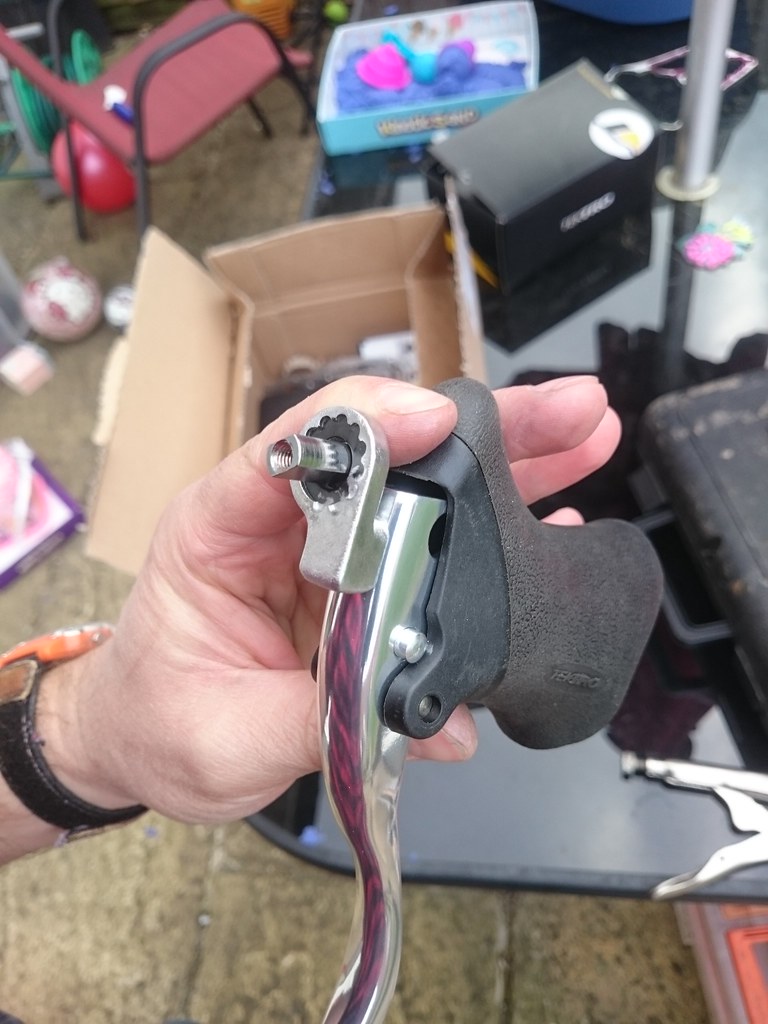 [/img]
And Reassembled again:
[img] 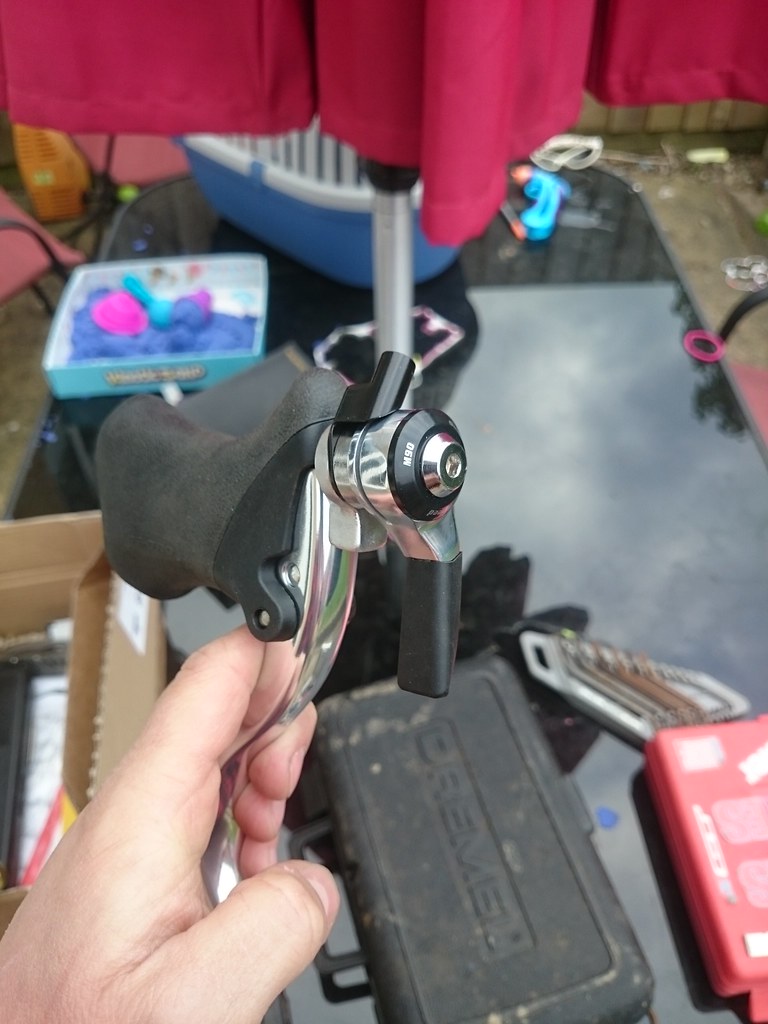 [/img]
[img] 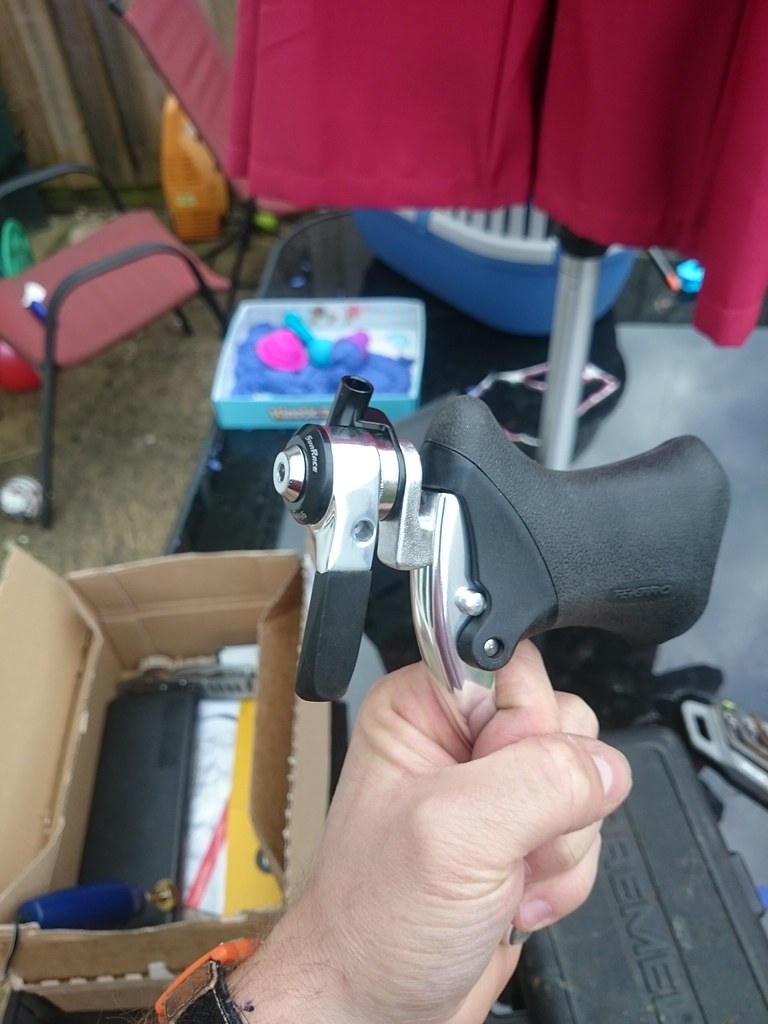 [/img]
[img] 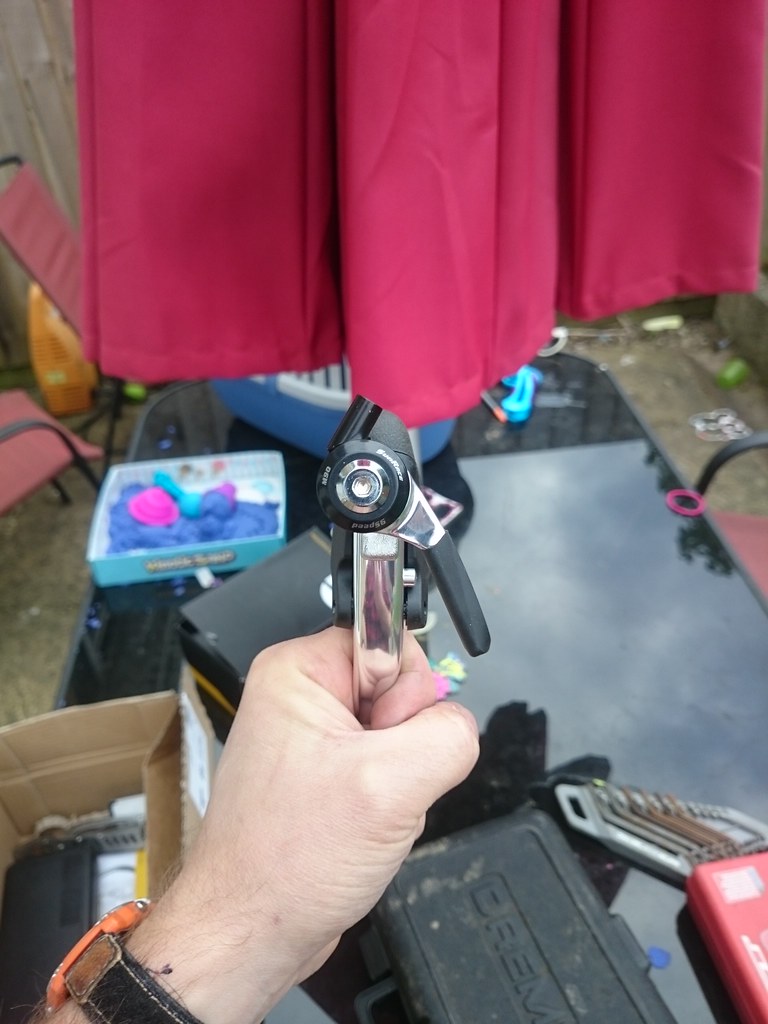 [/img]
[img] 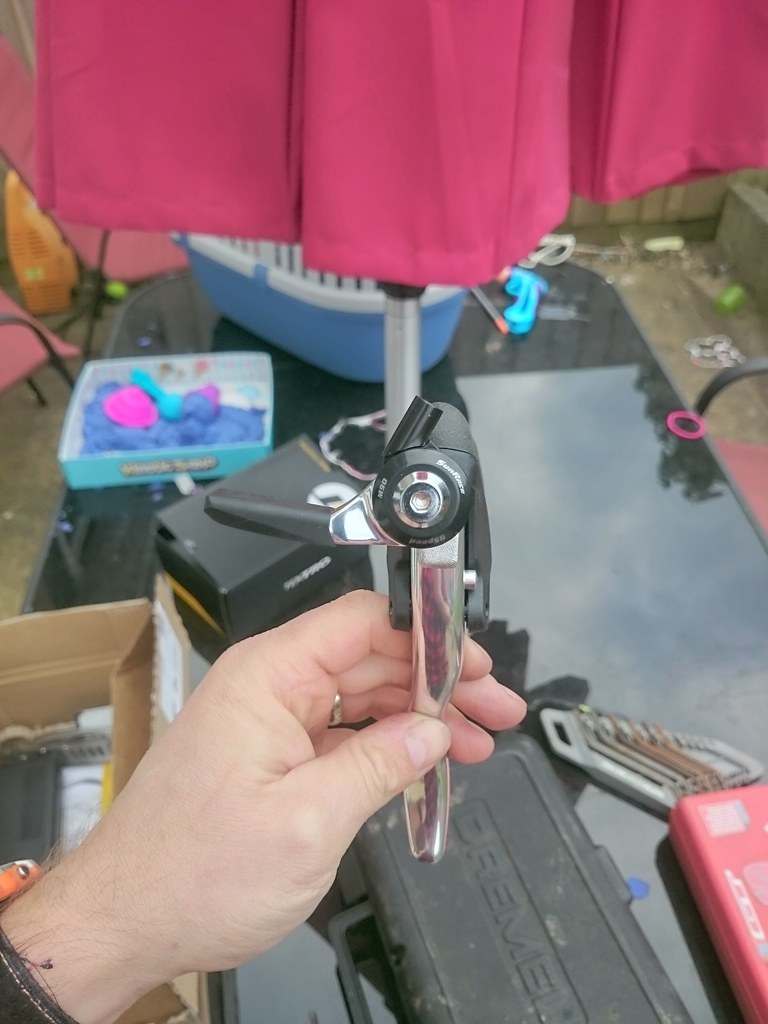 [/img]
And the cable stop refitted:
[img] 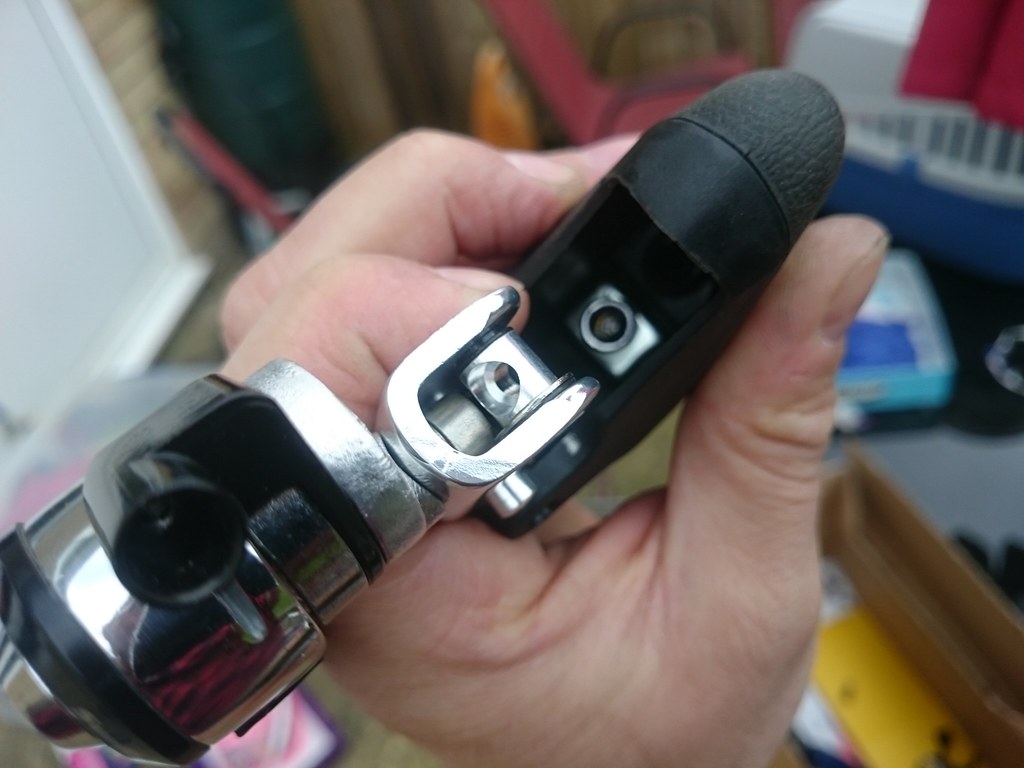 [/img]
Comparison with the unmodified RL520 on my commuter:
[img] 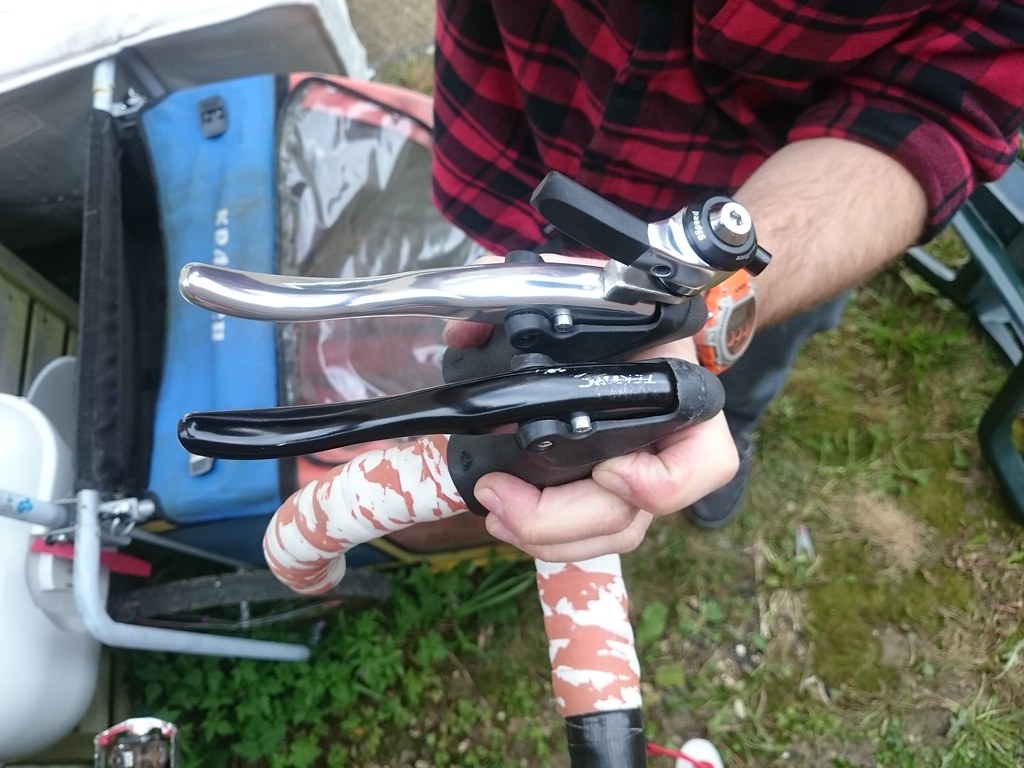 [/img]
[img] 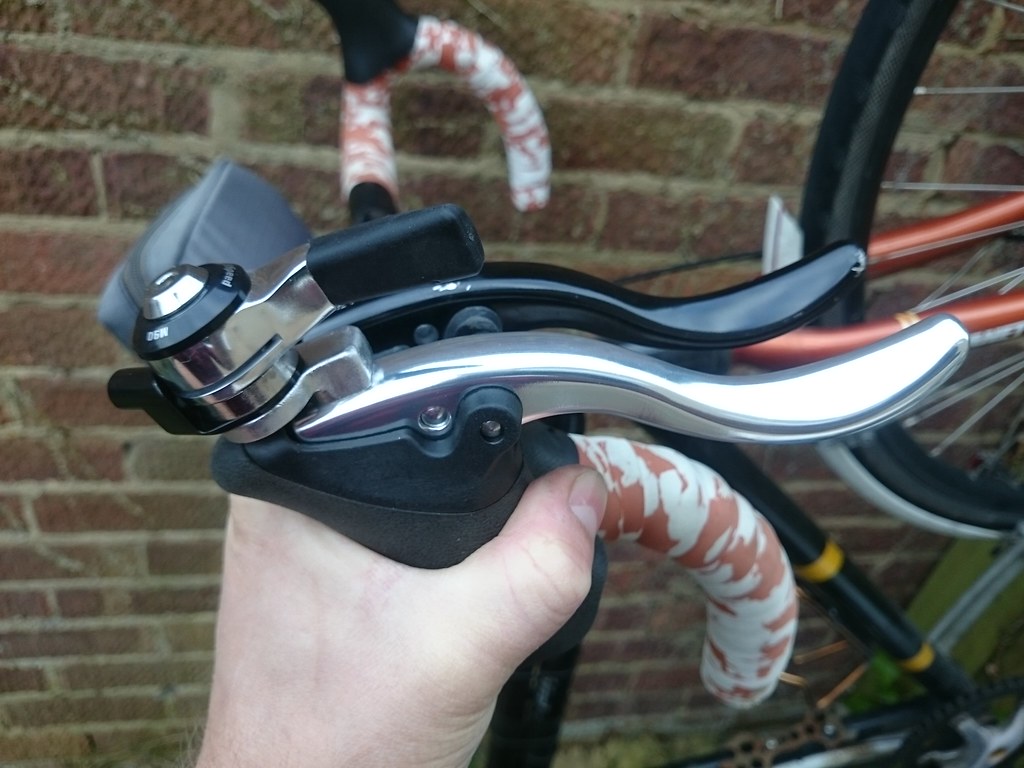 [/img]
[img] 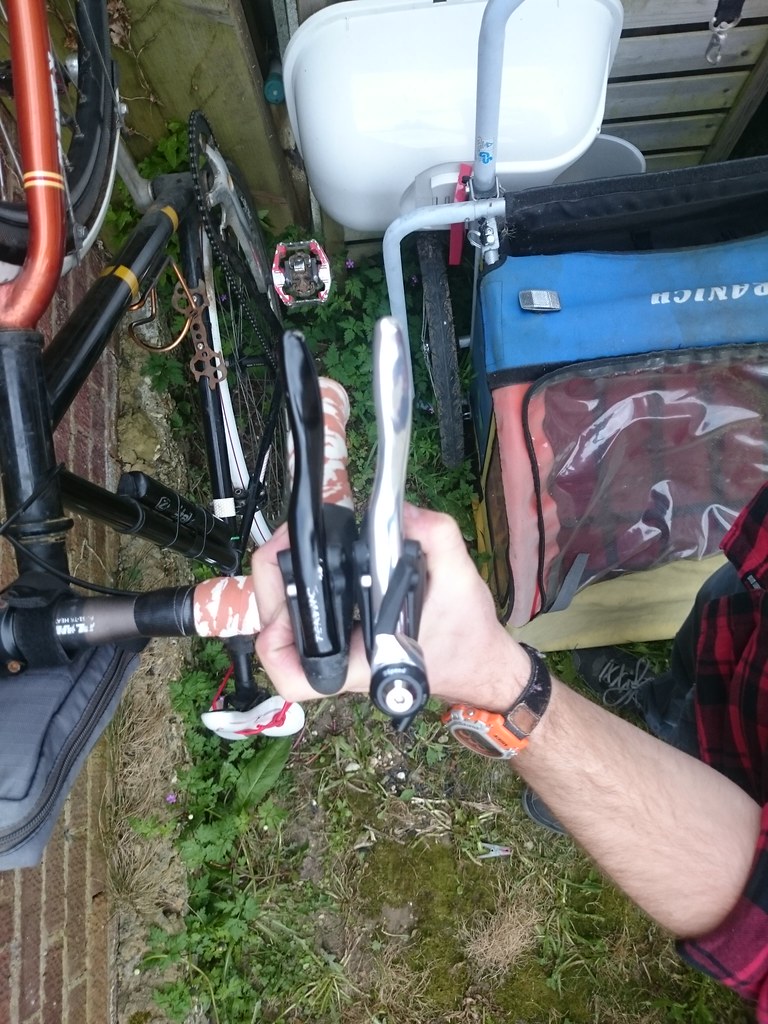 [/img]
That's it so far, an evening well spent.
Hopefully I will be able to fit and try it out later this weekend and I can report back on it then.
If it works it's a ~£75 saving over the proper ones...
Props due to you!! Thats a bang tidy job! I can see a new career in the offing (Perhaps) Nice one 😀
At the rate of one lever every three hours, I don't think I'll be quitting the day job just yet, but cheers...
Awesome!
Good bit of dremmelling .
This is something I've often considered doing, especially as ,being strongly left handed, I've always fancied rear shifting with my left hand.
Would there be space under the lever to mount the shifter there, or would it foul the brake action?
Food for thought indeed...
(Wanders off in the pre dawn light to dig through a spares box, whilst OH curses from the bedroom)
Clever git!!!!!! 🙂 (this is a compliment as I am a little jealous of your skills)
Cookeaa that is a top class fettle, much to be admired there and unlike most of us you finished the job completely, painted and polished.
Where's the Like button?
This is something I've often considered doing, especially as ,being strongly left handed, I've always fancied rear shifting with my left hand.
Would there be space under the lever to mount the shifter there, or would it foul the brake action?
Interesting question, I see no real reason a rear shifter couldn't be mounted on the LH side, I don't know how intuitive the operation would be, but it could be worth a try...
I did also consider modifying the hood so I could mount the lever inboard and be able to route the cable under the tape, Suntour did a shifter that clamped there waay back in the day, it had a two lever arms to make it easier to operate, it might have worked with the SR shifter, but at limits of travel the lever might have been tricky to reach and I would probably have to fashion and epoxy in some sort of backing plate to stop it chewing up the plastic hood.
It's also worth noting that SR's catalogue shows they do the same RH shifter in friction (but I couldn't find one anywhere).
LH friction shifters are available, it might be possible to adapt one to operate at rear mech I suppose...
I really wanted to minimise the amount of modifications to the brake lever too as that's a bit more safety critical, so a single 5mm hole isn't too bad.
Really lovely job OP.
I really wanted to minimise the amount of modifications to the brake lever too as that's a bit more safety critical, so a single 5mm hole isn't too bad.
Pffftttt,levers need far more drilling to look retro!
[img] https://encrypted-tbn3.gstatic.com/images?q=tbn:ANd9GcQi1WLOChjK8JzH9OFqR_AqYlk8gD-e3V-JiTL_yMGls4nA4yzHyw [/img]
Great job, nothing ghetto about it!
I took the coward's way out and chucked a rapidfire trigger shifter on my drop bar commuter 🙂
I took the coward's way out and chucked a rapidfire trigger shifter on my drop bar commuter
I have done the same with an old 8speed trigger for the turbo bike I am assembling, necessity often seems to create some interesting solutions...
Actually all of my, currently in progress, bodges seem to be focused on winter projects...
Top work sir 🙂
Nice work. I have gevenalle / retroshift on 2 bikes. I might consider this for a laugh on another as I have all the bits you used kicking about
Very nice. Charlie the Bikemonger is the UK distributor for Gevenalle and I'm very pleased with mine. Would a serrated washer help prevent rotation of the mount on the lever?
Looks well done, but genuine question: Why? I don't get it.
Is it too get the indexing right with an MTB rear mech?
Charlie the Bikemonger is the UK distributor for Gevenalle
I wish I had known that, I had assumed I would need to order them from the states, Cheers.
Would a serrated washer help prevent rotation of the mount on the lever?
It might be an option if it does Start to loosen, I did consider drilling and tapping right through or even opening it up to M6 for more thread engagement and/or adding some epoxy to retain everything...
Just took it for a spin round the block and it's solid so far. I'll see how it goes.
Why? I don't get it.
Is it too get the indexing right with an MTB rear mech?
Nope, I was using a 4500 STI before, the RL520 levers are better (IMO) for cable discs, and having a shifter mounted at the lever rather than the barend is preferable too, it's mechanically very simple and should be easier to fix than an STI. But mostly because I can.
Photos of it fitted:
[img]  [/img]
[img] 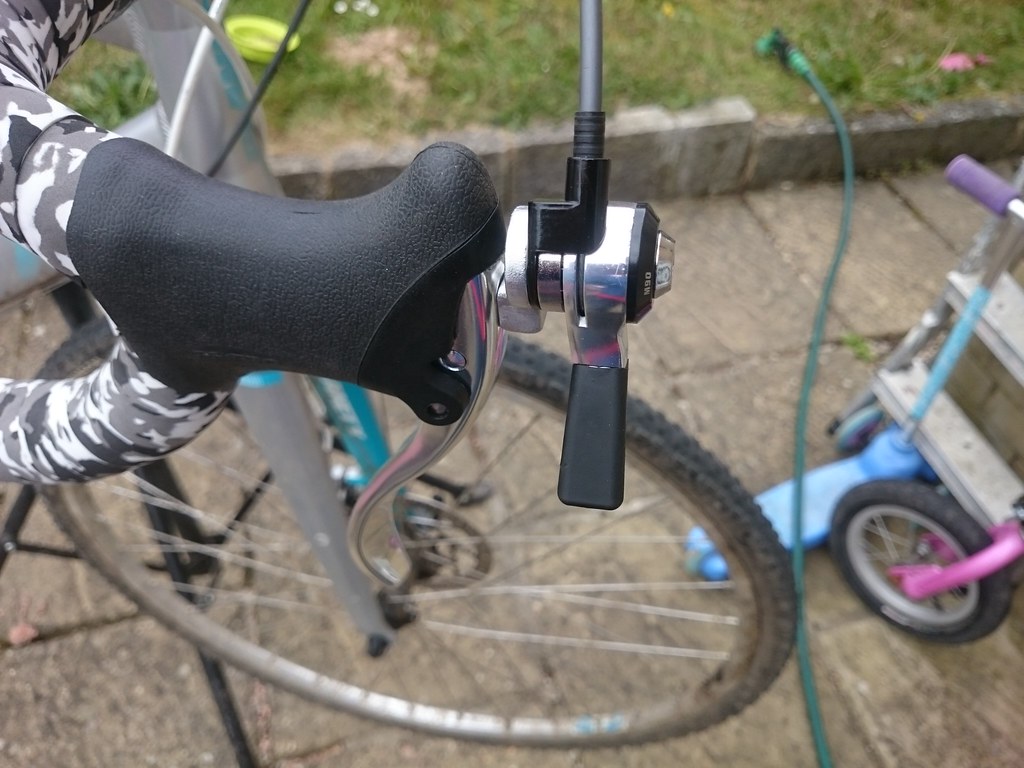 [/img]
It sort of requires different hand positions to shift throughout the range but it works surprisingly Well:
[img] 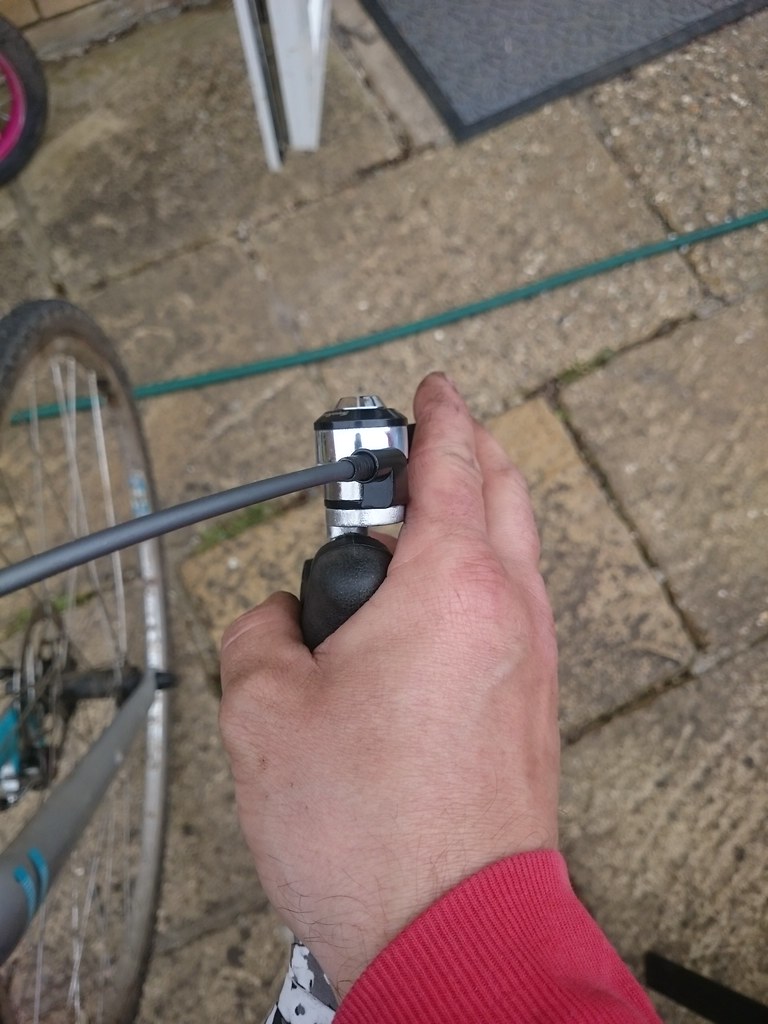 [/img]
[img] 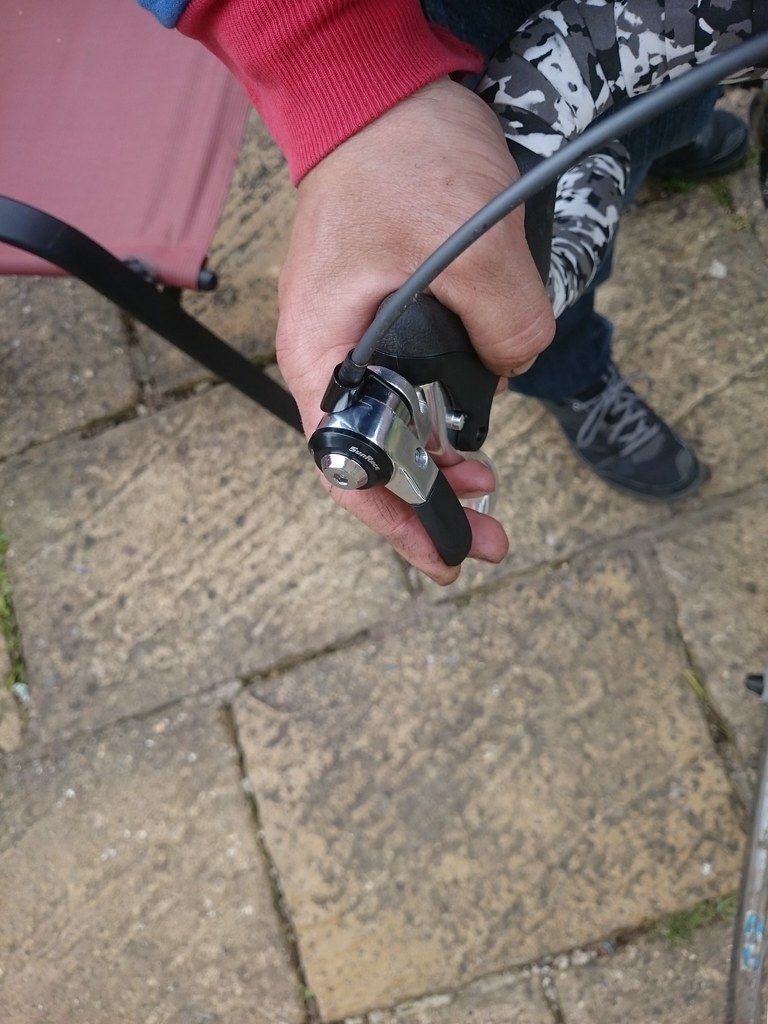 [/img]
[img] 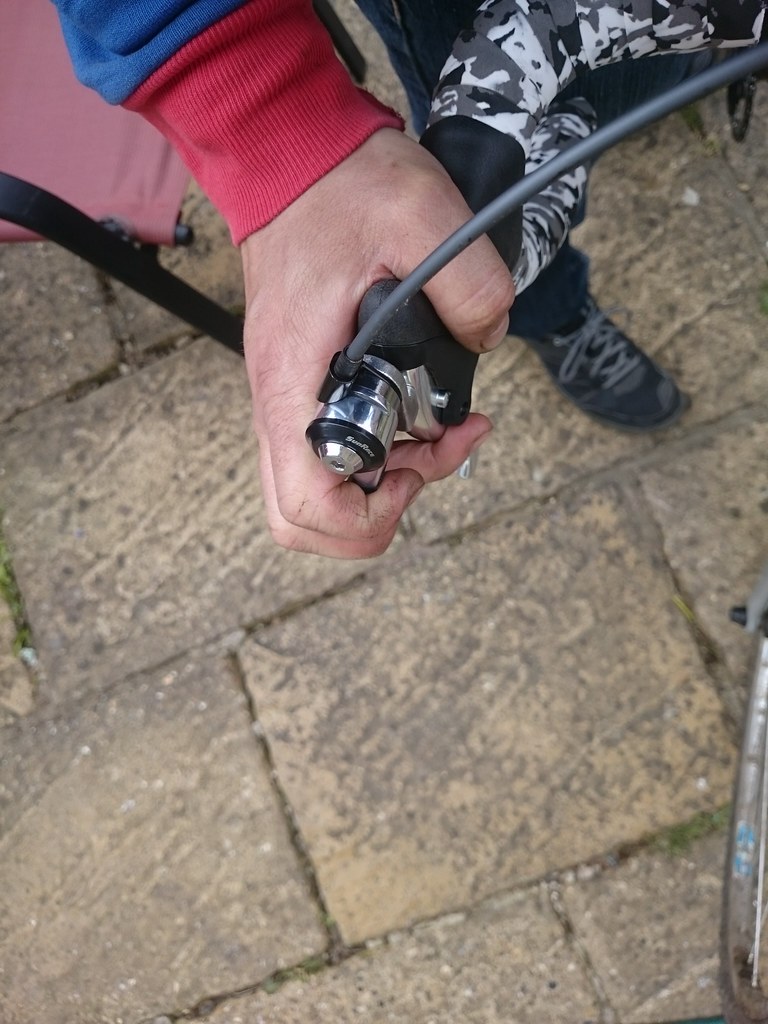 [/img]
[img] 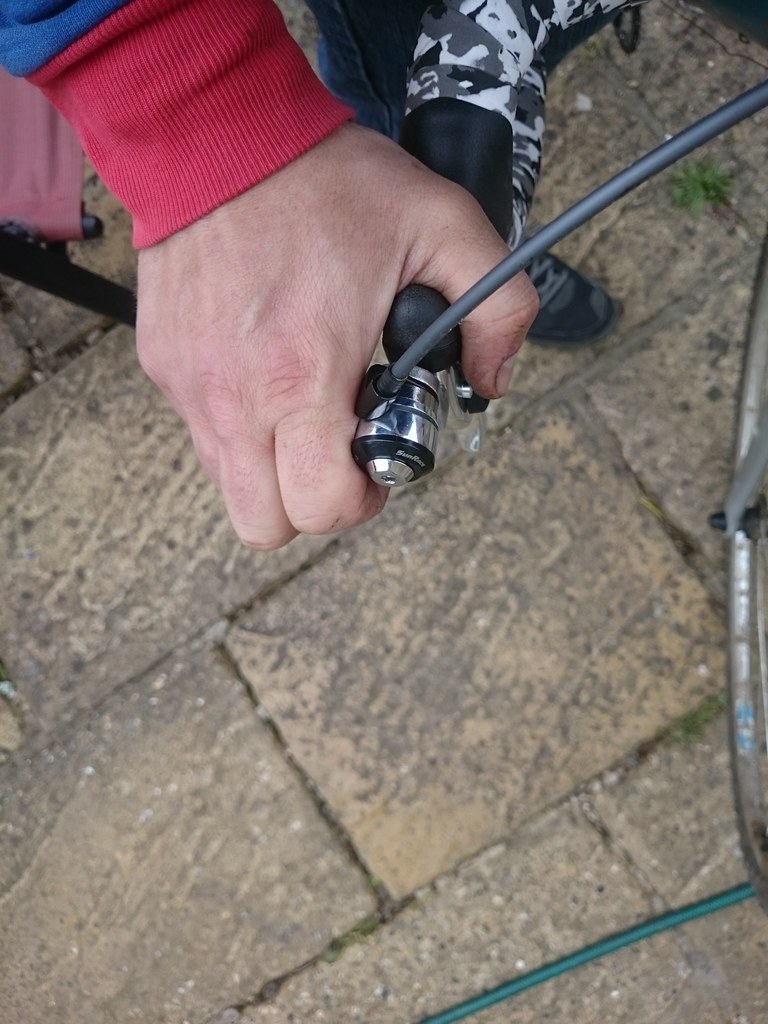 [/img]
Top bodging, sir!
I'm particularly impressed that you convinced Laura Ashley to loan you her dining table for some of the first pictures 😉
Further update, took it for a shakedown ride, 22 miles and it worked well... Apart from starting to come loose at about 10 miles in, it didn't stop being usable but I did start using it a bit less, and I was slightly concerned it might wobble off and go in the front wheel during the last couple of miles...
So I have to fix this issue, my plan is to drill through the plate, open it out to 6mm dia and then tap the hole in the brake lever, I will also grind the mounting plate back Moreton bring it closer to the hood, hopefully this will also give me a face to press a dowel pin/block into to give the gear lever something better to react against...
The original solution was never going to be good enough, it was just me being a lazy whatsit...
I'm particularly impressed that you convinced Laura Ashley to loan you her dining table for some of the first pictures
Cath Kiddson apparently, who can tell the difference though? Floral prints, silly markup it's all pretty much the same...
Was bored after lunch so went raiding the spares bin, one thumbie mount and shimano bar end, some tektro levers.
The bits I had seemed to all line up if I offset the shifter to the inside, so I went for that. Few pics to compare with my actual Gevenalle / Retroshift levers
Probably need to build a bike to use them now though...
[URL= http://i626.photobucket.com/albums/tt348/shawnmcfarlane/IMG_1612_zpsjkxmaldr.jp g" target="_blank"> http://i626.photobucket.com/albums/tt348/shawnmcfarlane/IMG_1612_zpsjkxmaldr.jp g"/> [/IMG][/URL]
[URL= http://i626.photobucket.com/albums/tt348/shawnmcfarlane/IMG_1610_zpswzzwxahr.jp g" target="_blank"> http://i626.photobucket.com/albums/tt348/shawnmcfarlane/IMG_1610_zpswzzwxahr.jp g"/> [/IMG][/URL]
[URL= http://i626.photobucket.com/albums/tt348/shawnmcfarlane/IMG_1611_zpsmc4fuplm.jp g" target="_blank"> http://i626.photobucket.com/albums/tt348/shawnmcfarlane/IMG_1611_zpsmc4fuplm.jp g"/> [/IMG][/URL]
Some damned good modifying there mate!
Must get a real dremel one day, rather than the rubbish cheap copy I have.
Yet more bodgery.
Drilled through, ground it back further, and pressed in a dowel pin (actually a pin from an old chain):
[img] 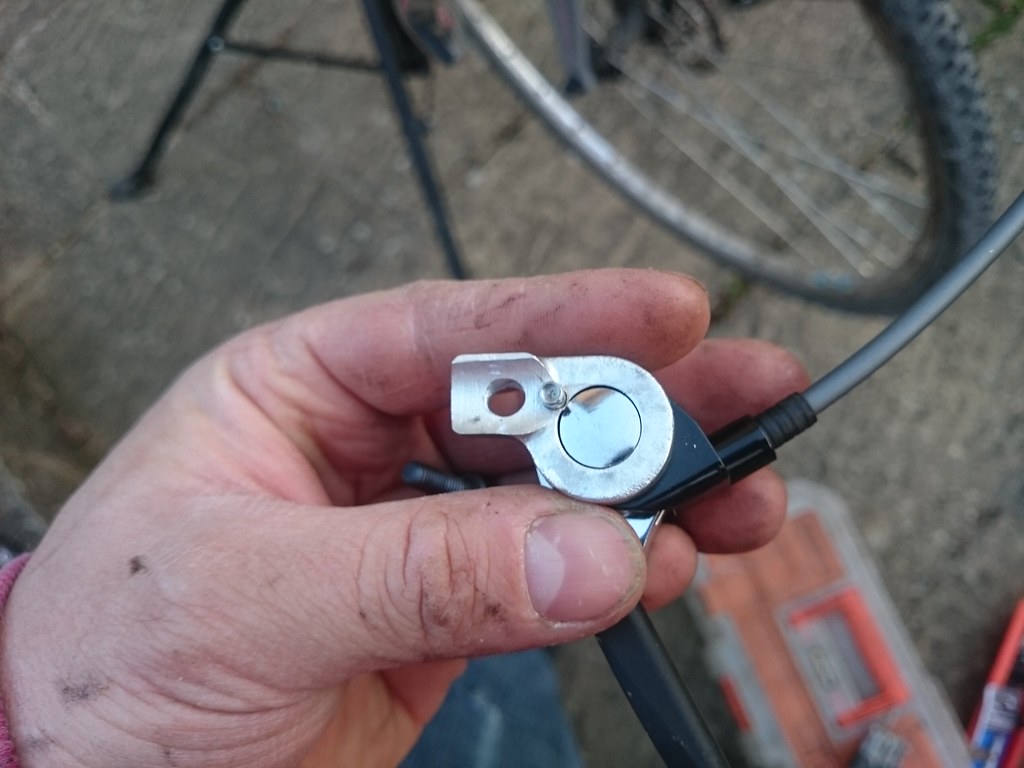 [/img]
Tapped out the hole, put in a helicoil, and drilled a hole for the dowel:
[img] 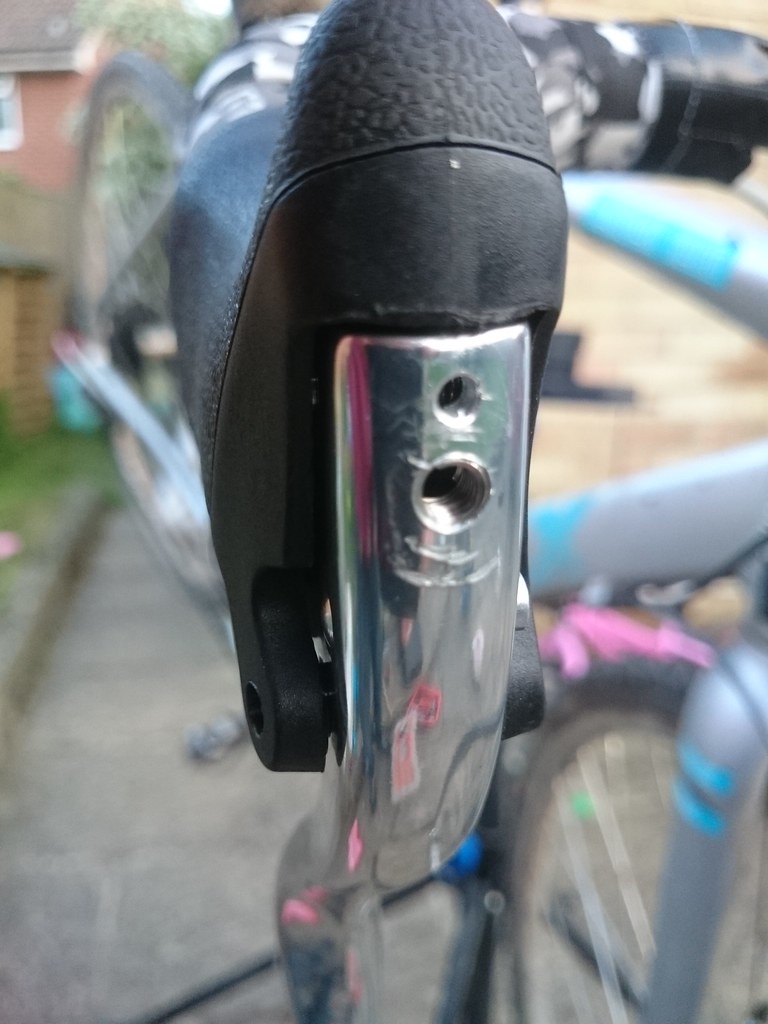 [/img]
Also found an old Ti bolt to hold it all on:
[img] 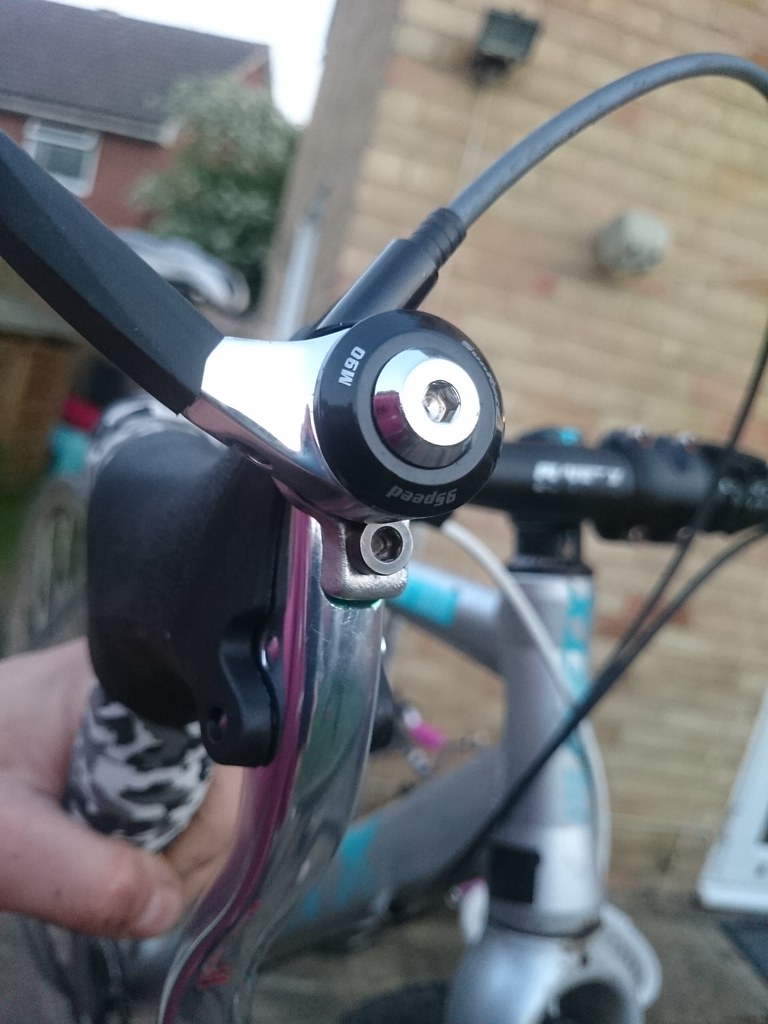 [/img]
Seems pretty solid, and at least if it does Start to come loose I can tighten it up again...
Nice going.
Would never have thought of using the chain pin as a dowel! 😀