Forum Replies Created

Viewing 40 posts - 41 through 80 (of 226 total)
  • Using an eSIM To Stay Connected In Remote Locations While Hiking Or Biking
  • supremebean
    Free Member

    I was going to fit a couple of rods in to two of the holes in the arch and epoxy them in. That was until i realised that the fork crown (2019 revelations) comes lower than the arch when the fork is bottomed out, so will hit the guard.

    supremebean
    Free Member

    The tree one?

    supremebean
    Free Member

    Excellent video.

    Yoann is hilarious in most of his vids, bit more serious on this one though.

    His ‘ secret behind my flat brake levers’ video had me in kinks, as did the one when he was singing nursery rhymes on the trail.

    supremebean
    Free Member

    I’d actually taken that as a given, but good point. I pull a good few up that are siliconed down or expanding foam, as some plumbers think you’re trying to glue them down, rather than make them stable and solid.

    As for the sticky edge seal, it’s crap and I don’t consider it required or even a good thing, a properly boarded and tanked wall with the tray siliconed properly doesn’t need this.

    I agree 👍

    The first time i watched a video from that skill builder guy above he laid a tray and it was cracked the next day when he came back to the job. There was quite a few comments below the video saying “should have used CT1”, “just silicon it down”.🤣

    supremebean
    Free Member

    That’s for diy’ers and poor tradesmen. A good install doesn’t require these fancy seals. If water gets through to the point where it hits that seal, the same thing is going to happen as above. The water will just make its way along that secondary seal and exit the corners. No point in having all these fancy seals, trays and tanking etc if the most important finishing sealant is done wrong, or if other steps of the install have been done wrong. If all steps of the install are done in the correct manner, there is no chance of leaks.

    supremebean
    Free Member

    I have been fitting bathrooms for 26 years. Blazing-saddles is correct, although he missed the first step out which is to bed the tray down. Not stick/glue or silicon down, bedded on mortar, as per tray instructions. Any of these steps missed out will result in a failed install and is just a matter of time before it shows.

    What’s this ‘various seal systems’ that are a lot better?

    supremebean
    Free Member

    I have a large mudhugger that came with a barely used, 8 month old 2nd hand bike that i bought. I have no use for it, mail in profile if anyone wants to buy it.

    I never used it myself and removed it immediately when i got the bike home. Only thing i have to say about it is that i was impressed with the rigidity of it when trying to flex it with my hands.

    supremebean
    Free Member

    25mm/m is correct, 18mm/m is the minimum.

    supremebean
    Free Member

    Does the 14cm measurement include the thickness of the floorboards?

    supremebean
    Free Member

    Yes, that’s what I did. Its the big blue spacer in the air chamber. Mine is from a lapierre zesty so yours may be a different colour. I think they come in grey on certain bikes. Check you have enough tyre/seatube clearance before doing so though. I changed my 140mm 29er zesty in to 160mm 29er (spicy essentially) by swapping the spacer out and changing the revelation fork air spring.

    supremebean
    Free Member

    The damper tube is hollow, the compression rod fits inside and the 2 o rings are what stops the oil coming up through the tube and out through the rear of the dial. The ifp air chamber is below the oil in the damper body. If the ifp seal has failed the air will come out mixed with the oil.

    supremebean
    Free Member

    👍 No probs. Just to add, the oil is under fairly high pressure from the ifp so will kinda fizz out a bit. If you are sure there was air being released, it may be the case that the ifp seal has failed as well as the comp rod orings. Yes a service should fix it.

    supremebean
    Free Member

    Blown o-ring on the compression rod. There is 2 tiny o-rings on the rod and if they fail that’s why the oil and air come out from behind the rebound dial. When i had my shock apart to alter the stroke, i noticed that they were very dry, and the rod was hard to pull out, so i put a light coating of grease on them. The lockout lever seemed to move a lot more freely than before after greasing them.

    Page 34 fig 4 https://www.servicearchive.sram.com/sites/default/files/techdocs/gen0000000006011_rev_b_2018-2020_deluxe_service_manual_english_0.pdf

    supremebean
    Free Member

    I ordered a part from bikeinn on the 1st, still not arrived yet. When I tracked the parcel it was sent from Spain and arrived in Wales on the 9th. Presumably they have a premises of some sort in Wales where they then forward the parcel from. I would imagine if they have premises in the UK its to get round brexit problems, maybe?

    Edit: actually I just checked again, it wasn’t delivered to Wales at all, it was Bletchley from Spain via France. I read the Welsh writing on the royal mail track and trace page not realising it is just a link to change to Welsh language. Doh!

    supremebean
    Free Member

    Did you attach the pump to the adapter before screwing it in to the valve? Was there a whoosh of air? The air chamber below the ifp is very small, mine is approx 22mm from the bottom of the tube (75mm from top) and is pumped up to 420psi. When I attached the adaptor without the pump, it gave a wee whoosh of air and was emptied. I don’t think you can just plug the pump in and get a reading as the air chamber probably isn’t that much bigger than the pump hose capacity so it’s just going to give you a false reading. I think you have emptied it, try pumping it up.
    Also, do you have a pump that will go high enough? There is a pressure chart on the sram deluxe service page for the different sizes of shocks. You will need this info before pumping it up.

    supremebean
    Free Member

    I think most timed fans can be overridden by flicking the switch quickly. After i turn my light off a quick yank of the cord on, then off, and the fan stops. Same with my PIR outside light. I can override the sensor and switch the light on permanently from the switch by flicking it off then on from the on position. Try it, if it doesn’t work first time try doing it at different speeds as i get the timing wrong sometimes and i have to do it again.

    supremebean
    Free Member

    Sounds like your bath needs support under that side. Some plastic baths need support all the way round because they flex too much. No amount of silicone/fixall/bath seal strip will fix it permanently until it has support. I usually screw battens to the wall to prevent this. Bit difficult to do after the bath has been fitted but if you can take the bath panel off, you could make up a square frame of suitable sized timber at the correct height to jam it up. Even a square of plywood would do. Get forever white silicone from toolstation and a finishing tool.
    All surfaces must be bone dry after cleaning/prep and before silicone application. Especially the grout lines.

    supremebean
    Free Member

    I don’t bait my traps anymore, I just put them in strategic places on their trails. I have created ‘bottle necks’ using bits of wood behind filing cabinets and shelves etc in my garage, with the traps at the end. You have to get smart with them if they aren’t taking the bait. The traps I use have a platform that sets the trap off when the little blighters step on it.

    supremebean
    Free Member

    `A Photo would probably be helpful.

    At a guess it is plastic coated 8 or 10mm copper and you have pierced the plastic sheathing an not the copper, otherwise you would have water coming out. Don’t worry about piercing the plastic sheath if this is the case.

    ETA;I just measured a bit of coated 10mm pipe, comes up as 14.6mm.

    supremebean
    Free Member

    Forget ice cubes and those blue block things. Coke bottles filled and frozen is the best in my experience. Make sure you buy a big enough box for this though.

    supremebean
    Free Member

    I use a waeco coolice. Mostly for keeping mackeral frozen for sea fishing when I head over to skye. It will last about a week, as long as i don’t open it! As soon as you open these boxes and remove stuff they all start to defrost.

    supremebean
    Free Member

    It will just be a dry o ring. When you turn the spout the ring will be distorting, that’s why the water is coming out. Happens a lot on new taps, expensive or cheap,
    hence why I usually grease the rings up upon installation. Take spout off and inspect the o-ring, if it looks OK, get some silicon grease and cake it on. Spray stuff won’t last long, better with a thick grease from a tube or tub.

    supremebean
    Free Member

    I would fit a hopper first and then shape the lead in to it.
    Edit:Just looked at the 2nd photo, do you mean coming off the flat roof or pitched? Hopper off the flat roof and gutter all the way along the pitched.

    supremebean
    Free Member

    Definitely a no go zone just now, I was fishing off cromarty pier tonight and could see the flames from there as it got darker. Could see huge clouds of smoke before darkness. Looked like 4 or 5 separate fires. Mostly west of the monument and high up but the smoke is heading east so the trails will definitely be affected.

    supremebean
    Free Member

    Is the valve actually damaged? Looks like it just needs a new washer to me. The washer should come up to the edge of the washer seating disc (called a jumper). If the spindle just turns and the jumper doesn’t move up and down easily, it will be because the washer has worn away and the jumper has come out of its thread inside the body. It may also need a bit of a clean up and grease on the spindle and washers inside the body. Just remove the circlip and push the spindle through the body to gain access. You will need 3/4 tap washers and silicone grease (not the spray type).

    supremebean
    Free Member

    My caddy droplinks were the same with torx socket on the end of the link bolt. I used a pair of mole grips on the other side of the bolt to hold the round flange  bit. I had to use a set of grips to close the mole grips as it needed to be tighter than  i could get by hand.

    I also bought a better quality set of links which have spanner flats on the round bit that i used the mole grips on, they are much easier to remove.

    supremebean
    Free Member

    Keep a small can of brake cleaner with it to give the spout a quick clean before stowing away, my can has a metal spout with a rubber insert and it stinks if i don’t clean it first before putting it into my van.

    supremebean
    Free Member

    There is a grub screw in the handle, loosen it off and remove handle. There may be a couple of plastic bits to remove behind the handle (remember the orientation of these parts when removing),then the larger chrome shroud should come off. Two screws holding it on to the wall behind the shroud.

    supremebean
    Free Member

    If it happens in all apartments i would be checking the main shut off valve.

    The only way to find it is to isolate each apartment and try reproducing the noise. If the noise persists after ruling out all apartments, then it’s the main valve.

    supremebean
    Free Member

    Is there a basin or bath? What’s the flow like on them? If they are poor, how long before hot water comes through? Does the water come through as hot as elsewhere?

    supremebean
    Free Member

    Personally i would not use PIR for under floors or in loft spaces. It can be done , but its not easy, especially retrofitting. I have seen the damage it can cause if not done correctly. Not worth it imo. Iv’e been told a few  stories lately from tradesmen and others in the industry regarding problems in this area.

    Dpc run perpendicular to the joists and nailed to the underside with 500mm spaces between, Rockwool inbetween joists sitting on dpc.

    supremebean
    Free Member

    Hi Stennah, I just measured 139mm eye to eye on full compression, thats with the linkages just touching each other.

    Wheel will not hit seatube, plenty of clearance there.

    supremebean
    Free Member

    Pump to motor coupling would be my guess.

    Its just a bit of plastic and simple to replace if you can find one.

    supremebean
    Free Member

    He will have to phone HMRC and register (could maybe do it online now) for CIS. He will have to get a UTR (unique tax reference) before doing any subbie work, i think. It’s been 8 years since i went through it all, so may be different now.

    Edit: Beaten to it^^

    supremebean
    Free Member

    Most modern shower wastes have a removeable grating which gives access to the trap. Can you post a photo of the waste?

    supremebean
    Free Member

    But it seems that the guy caught on film starting the scuffle by slapping a girl there

    I’m no fan of JRM or tories whatsoever, but i’m not sure that’s true.

    The video i saw he was lifting his arm to protect against a punch that was about to be thrown by the girls fella, who was standing behind her. His fore arm hit her on the chin as he lifted up to defend the punch, but she was not punched or slapped as she claimed. It was undoubtedly accidental.

    Edit: found the video.https://www.youtube.com/watch?v=qKX2g61ZZTw

    supremebean
    Free Member

    No need for PTFE, there will be washers on the flexi. Will go together kinda like a shower hose to a shower head if you know what i mean. What type of hot water system do you have? Is it the incoming water main valve, or a smaller isolating valve?

    supremebean
    Free Member

    Sorry, male connectors.

    Yes to the next query.

    are there various different pushfit makes and all have their own peculiarities and different tools?

    Yes, but they all fit on to 15mm copper.

    Hep2o is the only make that needs a demounting tool. In fact, i can get the fittings off without it, just need 2 flat screwdrivers. It’s just a ring like the one on your bends except it’s hidden inside the fitting.

    Here’s the other side of the hep connector:

    supremebean
    Free Member

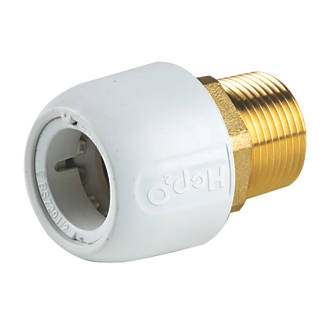
    1. The other end of that male connector is 15mm pushfit, ie pipe pushes in that end. I would remove bends completely and push male boilers on to where the bends were. Yes, flexi tails would be easier for you. Finger tight then 1/4 turn on to the male with a spanner. No need to go daft when tightening.

    2. Only if you want to remove them (hep demount tool). If you buy a tap with copper tails you wont need the the Male connectors. You just need to cut tails to same size as existing tails and re-fit in to the top of the bends.

    3. Yes tap comes with all parts needed.

    4. I’ll leave that for you to decide, fitted them but never had to live with one so can’t comment on good or bad they are. Screwfix is fine. Forget cheap tat on ebay.

    supremebean
    Free Member

    Yes. And surely whisky rather than whiskey?

    Eh?

    ETA: Ignore, gotcha!

Viewing 40 posts - 41 through 80 (of 226 total)