Forum Replies Created
-
Who won the Surly Grappler in 502 Club Raffle?
-
 Mike_DFree MemberPosted 9 years ago
Crikey, I’ve neglected this thread. Where was I? /reads back.
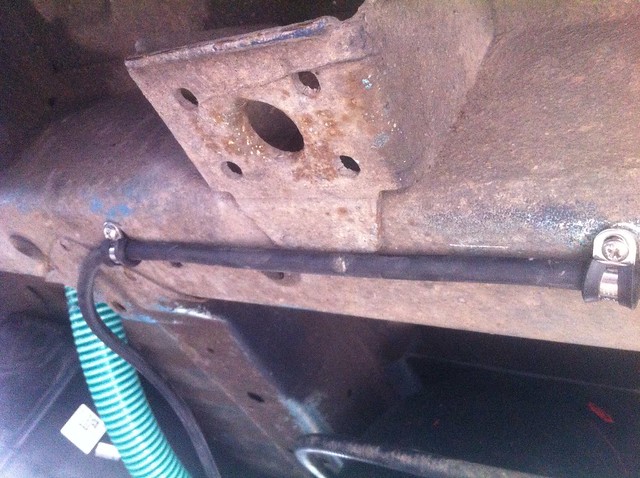
Oh yes, the saga of the flooding engine bay. Investigations (based largely around tipping buckets of water down the windscreen) revealed that a healthy proportion of rainwater would end up here:

That’s a bracket hanging off the middle of the scuttle that holds some sort of actuator that’s something to do with the EGR valve. Yeah, showing off my MAD MECHANICAL KNOWLEDGE there. The water coming off there ends up on top of the engine and is trapped by the shape of the head. Genius. But not as good as where most of the rest of the water goes:
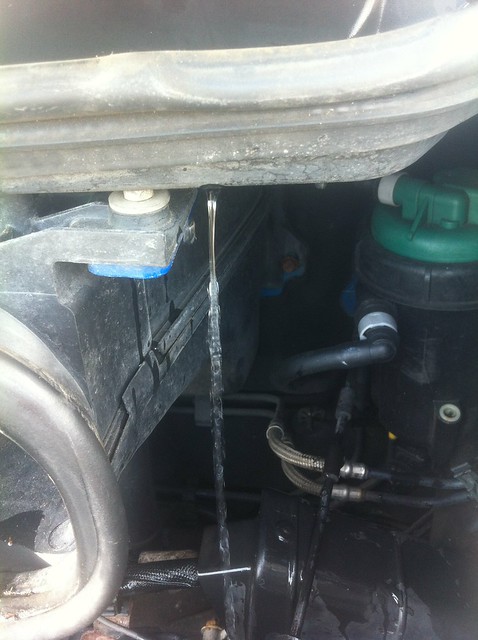
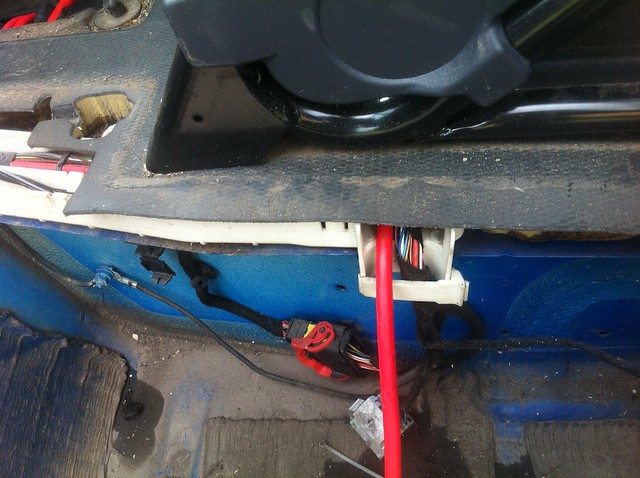
That’s the nearside of the engine bay. Look down a bit at where that stream’s ending up:
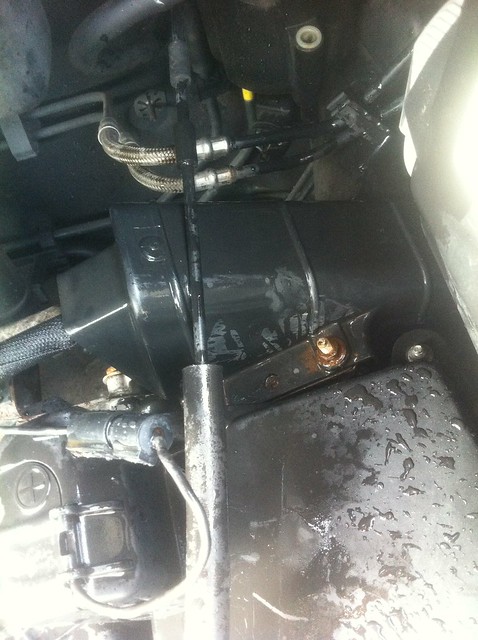
It’s aimed with unerring accuracy straight at the plastic cover over the connector between the main wiring loom and the ECU. Hmph.
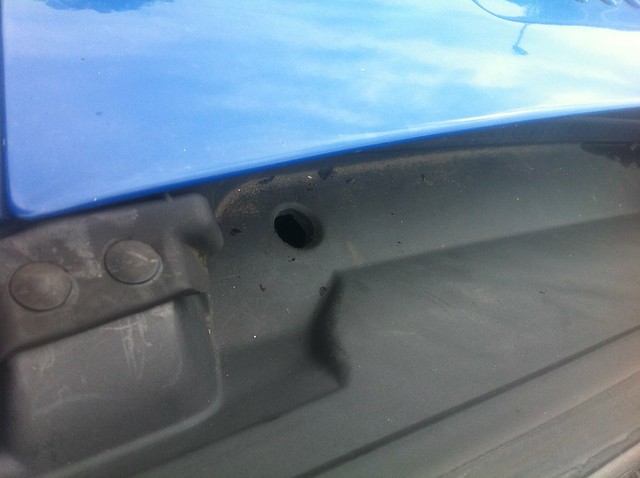
There’s a plastic cover over the scuttle at the bottom of the screen, which I took off for a closer look. I guess there’s a semblance of a seal in there. OK, no, there isn’t:
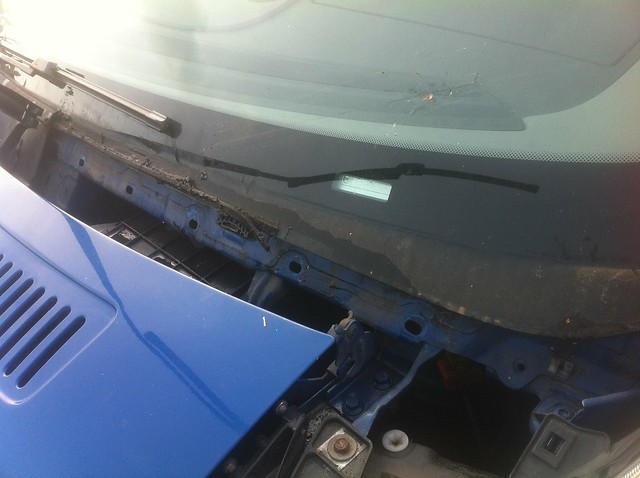
The cover’s also in two pieces, overlapped in the wrong direction so that water attempting to run off along the designed-in slope towards the offside tends to go through the gap instead — that’s where the dribble onto the top of the engine is from. Much Sikaflexage later and the cover was sealed to its other half, sealed to the windscreen on the back and for good measure, sealed along the top edge too:

Next order of business was to get rid of the water that should now be gathering in the scuttle cover. As I said, it’s supposed to run off to the offside and through a drain hole, but there’s only a hole on one side, the slope isn’t that substantial and if the van’s not dead level (like, for instance, parked on the camber on the left of a road, as if that could ever happen…) the water just sits there.
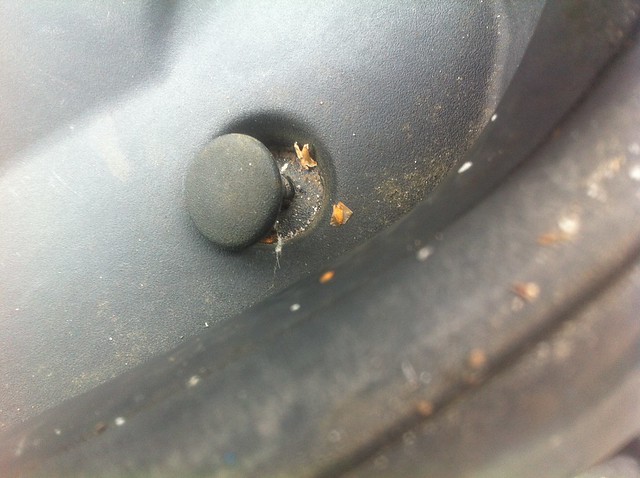
Fortuitously, there’s a blanking plug stuck in a handy-looking hole on the nearside, so I took that out:
Drilled the hole out a bit bigger:
And gooped in a usefully-sized spigot tube thing I found in the plumbing box (it’s actually an insert that you push into PVC pip before using push-fit connectors):

More rummaging in boxes of left-over tat revealed a handy length of corrugated pipe, which got gooped and ziptied onto the pipe insert thusly:
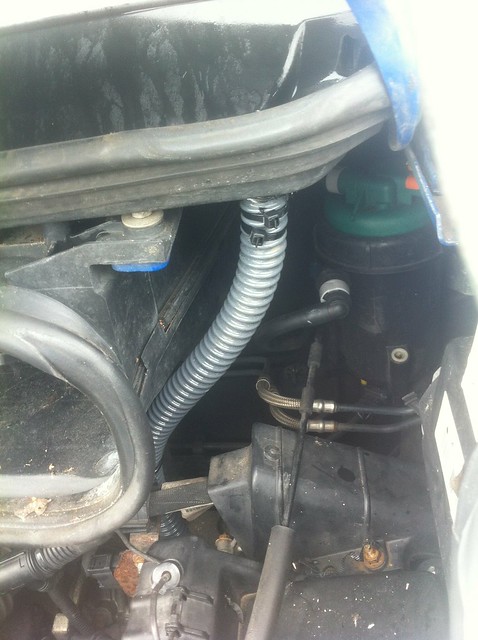
It’s routed down through the engine bay to exit by the front wheel, pretty much mirroring how the standard drain on the other side works:

Yeah. FACTORY. Kinda.
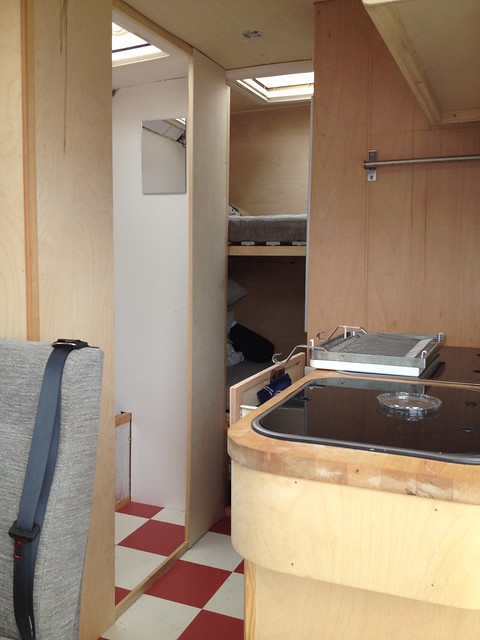
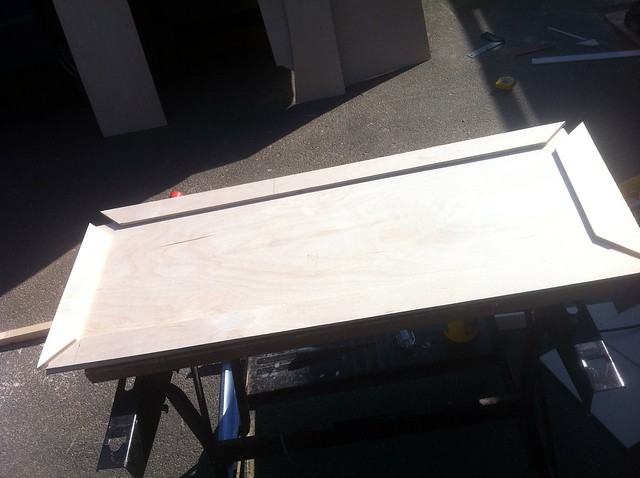
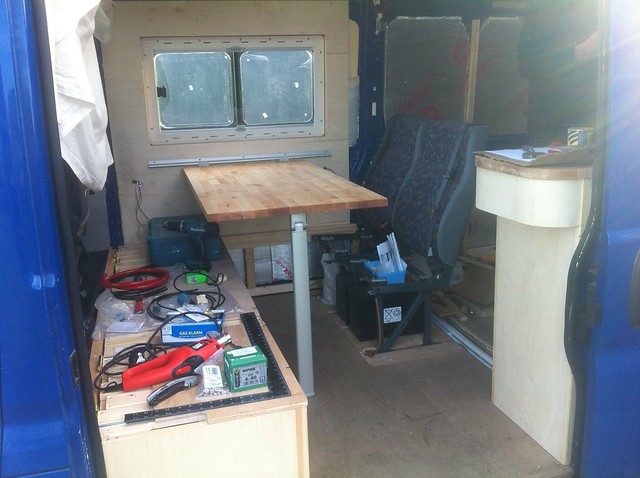
Buoyed by this achievement, I tackled a little “tidying” job. The table top still had square corners and was a bit wide to boot, so I attacked it with a circular saw to narrow it a bit and then rounded the corners with a router. Those of a delicate tool-use sensibility may wish to look away:

That’s the router fence with the plate reversed and inverted, a couple of blocks of wood glued together and a random bolt stuffed into a blind hole on the back of the table top to rotate around. Surprisingly, it kept the alignment pretty well:

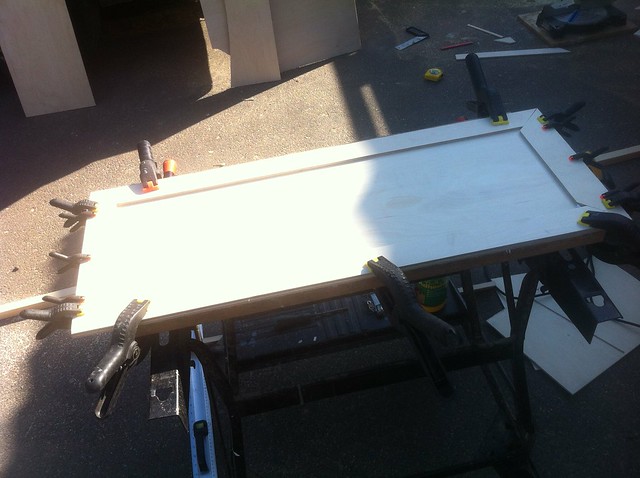
Repeat on the other corner, put the leg back on:
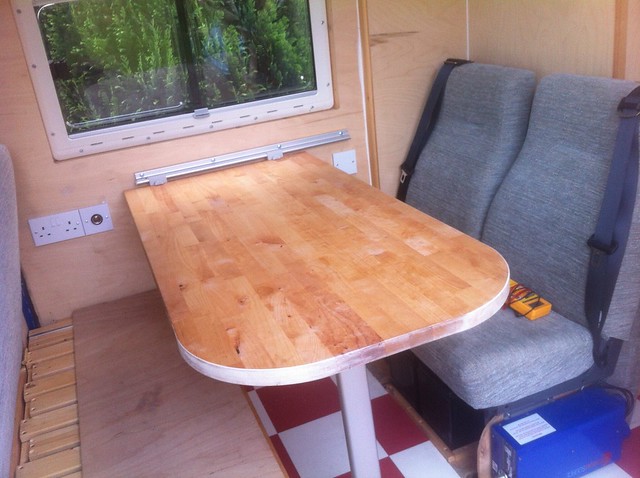
Much better, especially for moving into the back part of the van which was a bit of a squeeze between table and kitchen before. The table still needs a load of weight taking out of it, it weighs as much as a small child at the moment.
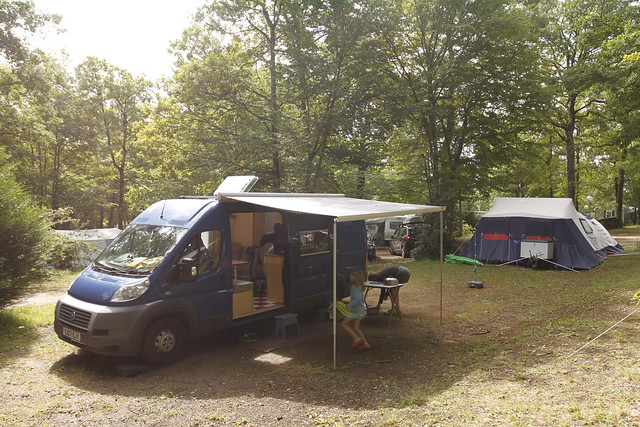
In amongst all this we returned to France at October half-term — we were meant to go to Disneyland in the summer but the breakdown scuppered that, so we’d promised the kids we’d go back. Did it on the (relative) cheap by taking food with us and camping in the car park. Which turns out to be quite a popular option:
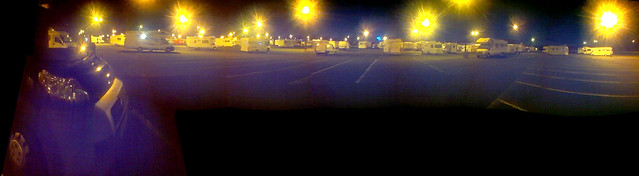
It actually worked really well — parking’s included with the annual passes we bought, it’s really close to the entrance so we went in first thing, came out at lunchtime when it got busy, had a meal, chilled out for a bit and went back later in the afternoon when it was quieter again. Beats overpriced hotels and crappy grub 🙂
Mike_DFree MemberPosted 10 years agojwt: Went to that show last year, it’s a good opportunity to pick up ideas. We made a couple of changes based on what we saw there, although mainly to avoid things we didn’t like in pro vans — originally the fridge was going to be on the floor, but having looked at a few we decided that we didn’t want to be grovelling in a narrow aisle to get things out of it.
We did think of getting an extra-high van and putting in a drop-down bed at the front, but the vans were too expensive. Maybe next time 😉
mick_r: Good tip, thanks — looks ace 🙂 We went through France on this occasion, I’ve got relatives near Dijon so we did a stopover there. Definitely planning to do Switzerland again, though…
As for finished, I suspect they’re never really finished. If we can get the rest of the interior in and painted by the first anniversary of getting the van (ie middle of December) I’ll be pretty happy.
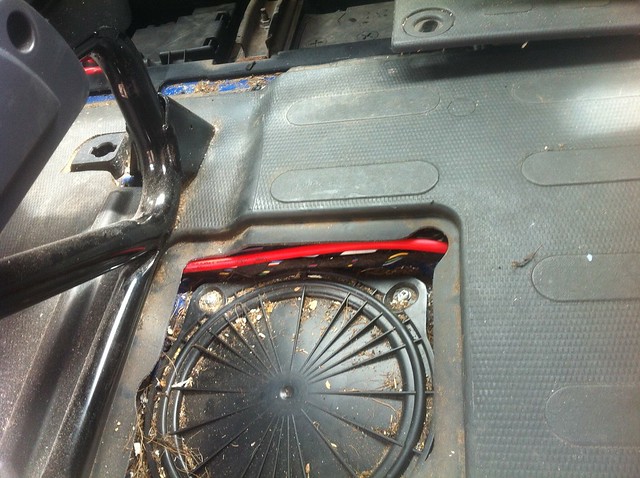
spooky: That looks ANGRY. Have they changed much beyond the front? Dimpled rubbery stuff is on the shortlist for a boot floor.
rockhopper70: There’s a massive pile of receipts that we’ll pluck up the courage to add up one day. Kind of lost track of hours, beyond “a lot”. I reckon we’re looking at £12-13k (including the base van) by the time it’s done. I don’t think DIYing is in any way a profit-making exercise, but if and when we sell it I’m hoping the net cost of ownership will become very reasonable. The plan is to get a good few years use out of it 🙂
Mike_DFree MemberPosted 10 years agoCamping Jungfrau it is — well spotted 🙂
wingnuts: Our house has plenty of missing skirting boards and unpainted bits 😉
Mike_DFree MemberPosted 10 years agoI do need to weigh it at some point 😉 I’m hoping we’ll have at least 500kg of payload, which would mean an unladen weight of 3t. IIRC the empty van was (on paper) just under 2.2t, giving 800kg for the conversion. Which sounds a lot, but then the batteries alone are nearly 50 kg, the rear seats are 30-odd, the LPG tank is 20 I think… It mounts up.
Mike_DFree MemberPosted 10 years agowhere are all the James Huangs and Mike Davis??
Hello 🙂 James is all over BikeRadar. I’m not doing any editorial work any more, because I found myself increasingly unable to do a job of which I was happy in the time that the fee would permit. It’s pretty much a job for staffers or people with either very low overheads or other sources of income. It was a fun 20 years, though 😉
Mike_DFree MemberPosted 10 years agoBeginning to slightly lose track of what got done when now, but no matter. PLOUGH ON. Here’s the (unfinished) overhead locker for the kitchen, which, helpfully, my Dad made while I was faffing about with other bits:

In the interests of lightness, the doors are hollow — what you see there are 12mm ply frames, which then got skinned with 3mm ply to give this:
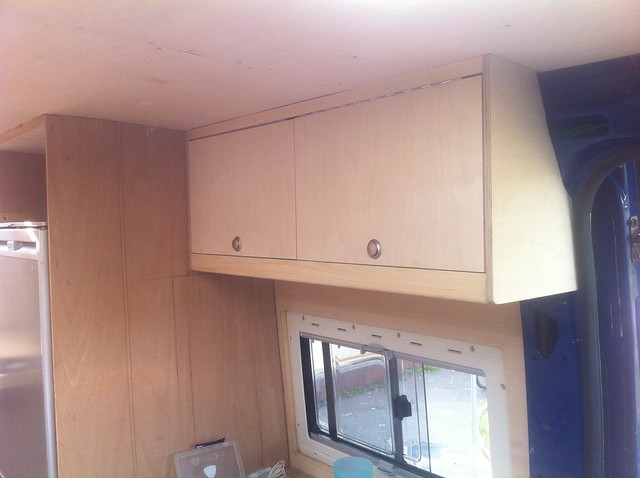
So the whole kitchen now looks like:
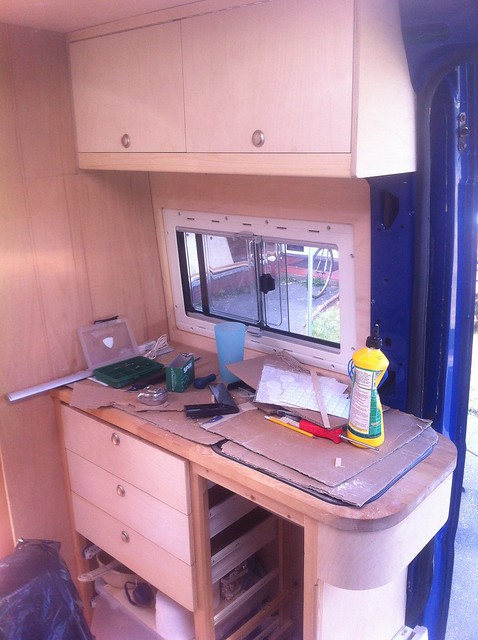
You’ll have to imagine away the pots of glue, boxes of screws and random tools.
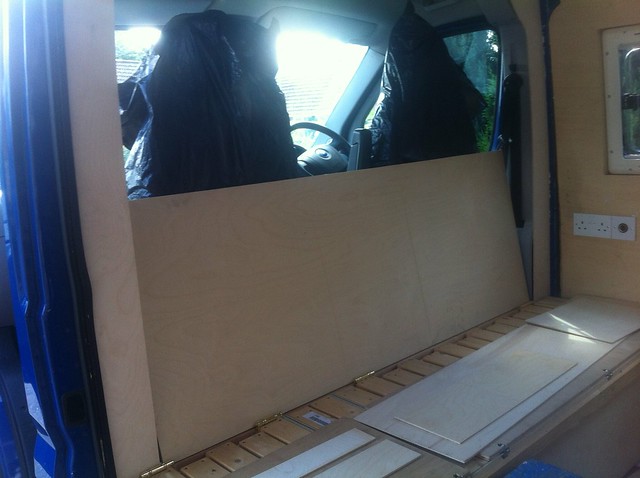
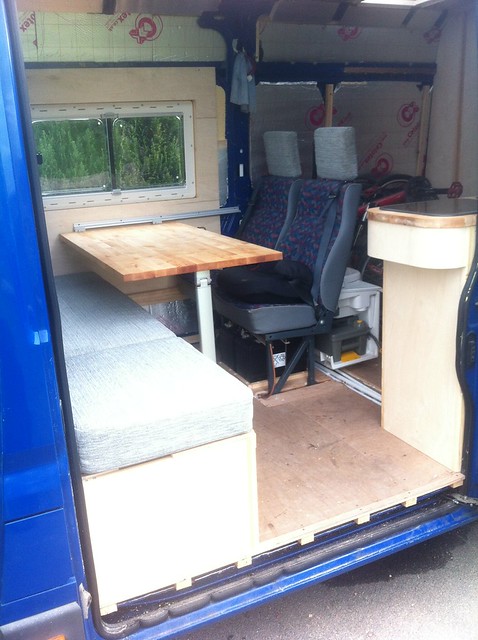
While parents were helping out, father-in-law made a backrest for the bench seat:
And MiL upholstered it:
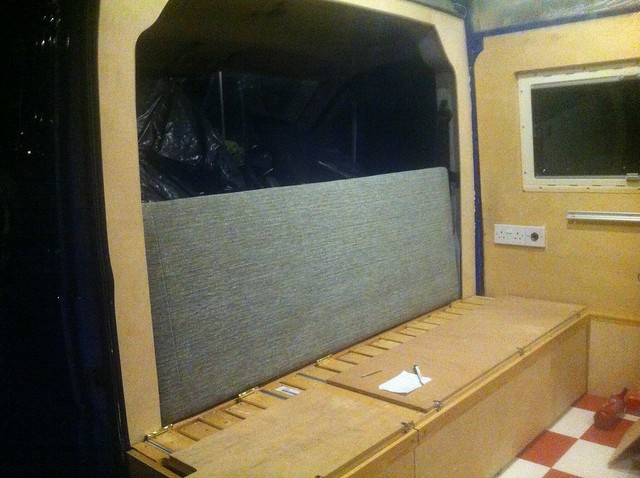
It’s made the seat way more comfy for relaxing in. The backrest is supported by a couple of short lengths of webbing attached to the B pillars — when driving it sits vertically, when parked up we can just roll the cab seats forward a bit and let it tip back to a comfy angle. We’ve sacrificed the ability to easily climb through from the cab but we were mostly walking round to the sliding door anyway. If it’s really chucking it down it’s still possible to scramble over, just not terribly dignified 😉
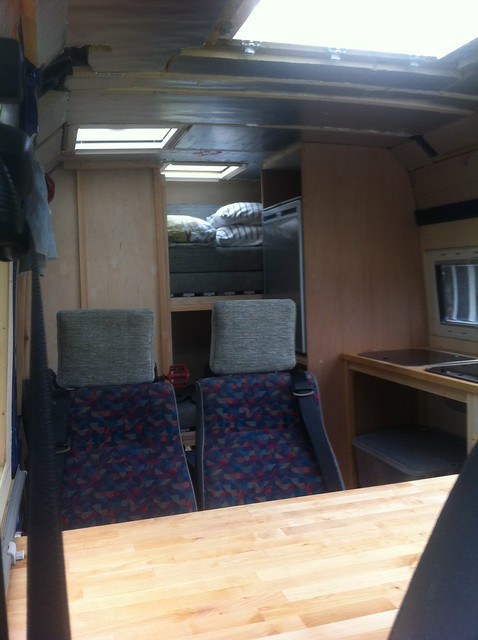
At this stage the interior was almost looking vaguely finished, if you don’t count the lack of washroom door (or indeed washbasin) and various other details:
So then we went on holiday, which was ace:
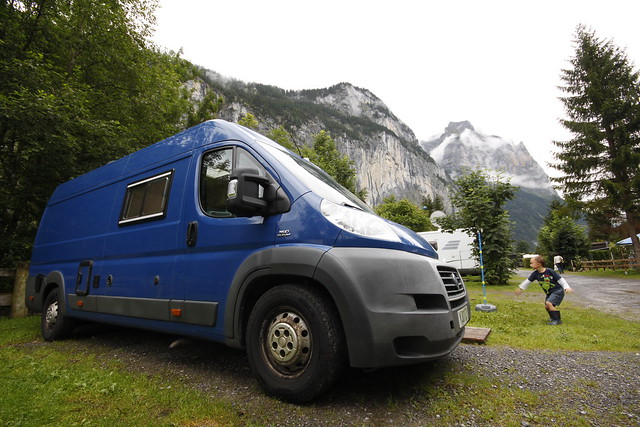
(really must paint up those wheels…)
Although there was a minor hiccup on the way home:

Which resulted in us having to leave the van at a French Fiat dealer while we came home in a (very small) hire car:
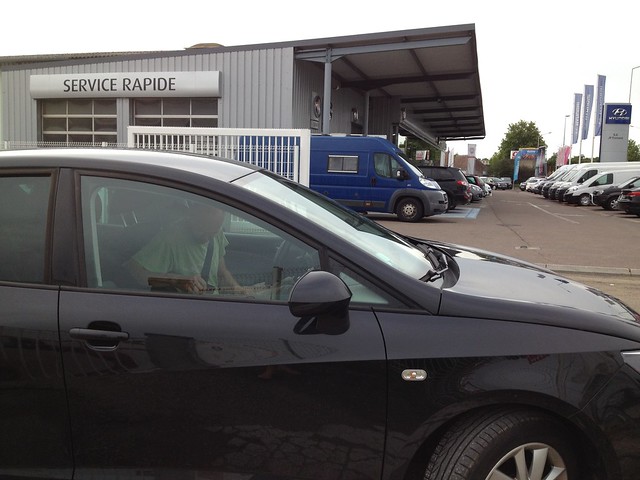
That’s me trying to work out where the gear lever is.
It took the best part of a month for the van to rejoin us in the UK, but only a couple of days for a local garage to fix it. Water had got into the injector loom and made the ECU most unhappy, with properly torrential rain in France being the final straw. Fortunately the ECU survived (despite what the French garage initially said) and the repair was considerably less financially painful that we’d been fearing. Coming up in a future instalment: Sorting out Fiat’s woeful efforts at drainage 🙂
Mike_DFree MemberPosted 10 years agoThe main part is just under 1.9m across and about 0.5m deep, but I need to do the part under the bunks as well which is something like 1m x 0.7m. Ish 🙂
Mike_DFree MemberPosted 10 years agoI’d use heavy duty industrial vinyl (like bus / wet room flooring). Google Polyflor etc. A 1m x 2m strip was something like £50 when I last bought some. It isn’t cushioned so forks won’t rip it.
Sounds good. I’ll look into it 🙂
Mike_DFree MemberPosted 10 years agoCheckerplate is the obvious answer, but it’s not particularly cheap (if I go for aluminium) and I’m not entirely sure if I like it or not. On the other hand, it’s the boot floor, I probably don’t have to like it 😉
Mike_DFree MemberPosted 10 years agoThey were the cheapest panels I could find from a UK supplier, they’ve been fine so far. We’re using 2 x 100W ones.
Boot space needs some sort of suitable flooring, not quite worked out what to do there yet 🙂
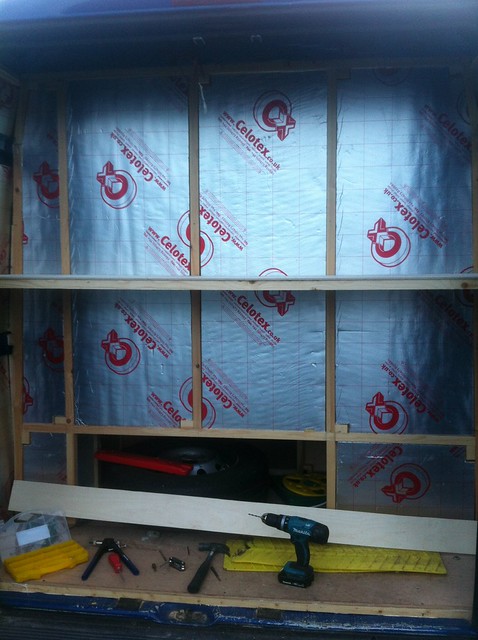
Mike_DFree MemberPosted 10 years agoUp to this point the boot/garage space was distinctly unfinished, being all exposed timber and insulation. Got around to sorting that, first by lining the doors:
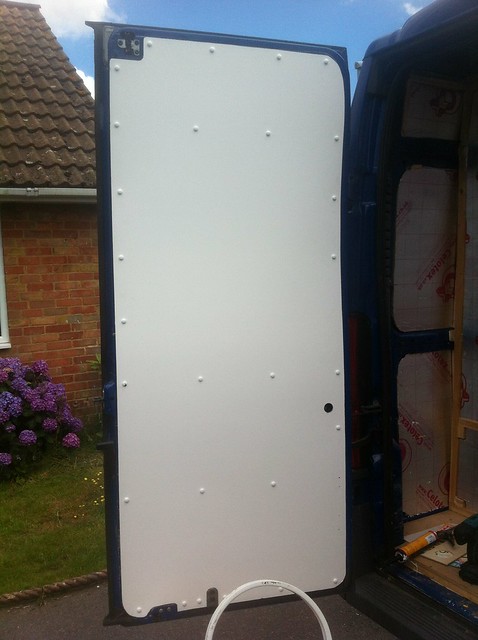

(the little round holes are to access the stay releases so you can open the doors 180 degrees) and then lining the rest of the space:
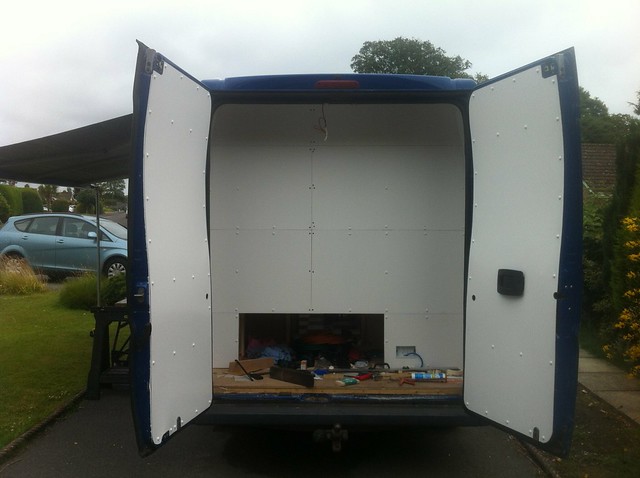
It’s a bit jigsawish because we were using up offcuts from the washroom — the stuff comes in 8×4 sheets which isn’t really a very convenient number for the inside of a van. We’ll be covering the joins with some PVC strip eventually. Redid the shelf as two shelves as discussed:
The vertical bits are temporary, I’ll be making a ply panel with access holes in it to go there. We made the useful discovery that if you take one pedal off then three bikes will go on the bottom layer, which is potentially handy.
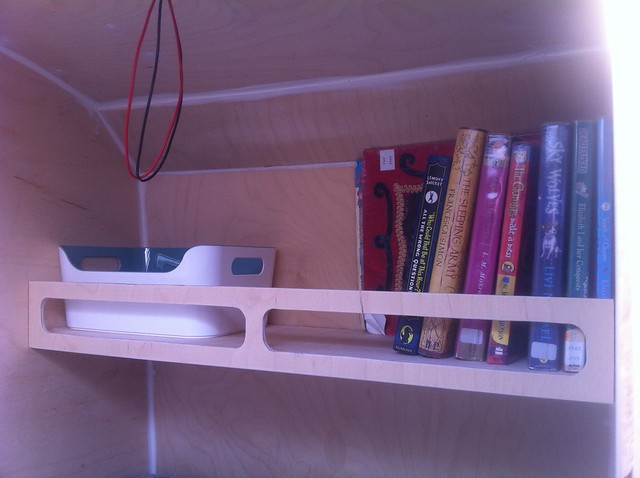
Made a couple of shelves to go over the foot end of the bunks for the kids to keep books/toys/etc:
4mm ply base and front with a 15×12 batten to join them (underneath the front edge), supported on more 15×12 batten on the sides of the van. Seems stiff enough:
And put in a surround to cover the front door pillars where the bulkhead used to be:
 Mike_DFree MemberPosted 10 years ago
Have you got a link to the ebay seller of the solar panels?
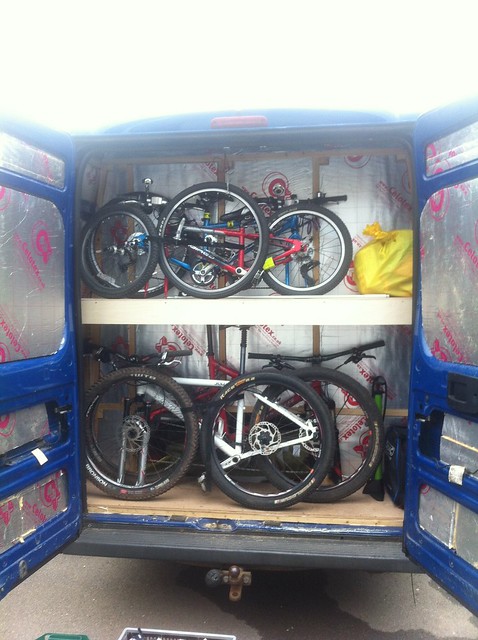
Go for a double shelve but size it using Ikea or similar plastic storage boxes.
Good plan. It’s now double shelved but in a kind of “make it so the bikes go in” way and spacing them at what they end up as. With any luck we’ll find some boxes that’ll fit 😉
Postscript: Trip to Lakes wholly successful, and even managed to sort the minor smoking issue that we had — the van had been belching black smoke under power for a bit, but having hoofed it up a couple of Lakeland passes it magically cleared 😉
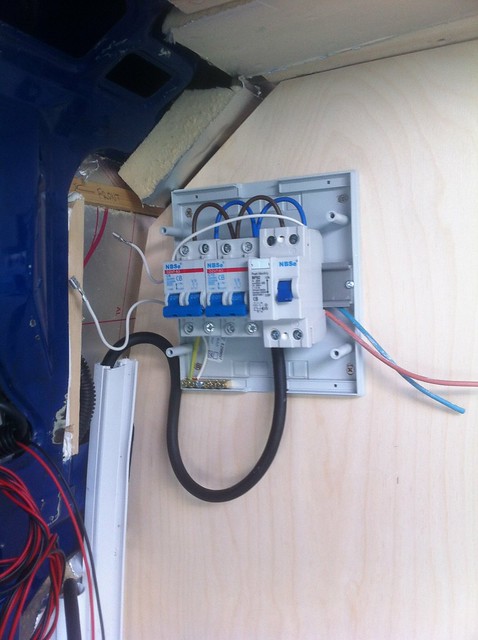
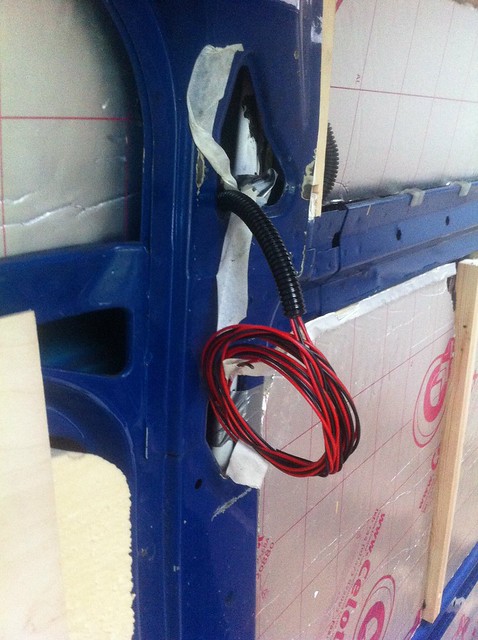
Mike_DFree MemberPosted 10 years agoBlimey, I’ve neglected this — my profound apologies. Imagine a wibbly-wobbly back-in-time effect and we end up here, fitting a mains hookup:
I’m not wild about it being right up against that bodywork seam, but it’s actually inside a pillar on the other side and there’s basically no scope for it to be anywhere other than where it is. Inside the cable heads up the wall and ends up here:
I hardly need to point out that the wiring isn’t finished in this picture 😉 From there cables head out to various locations, including the water heater at the back, a connection for a charger under the seats and a couple of sockets:
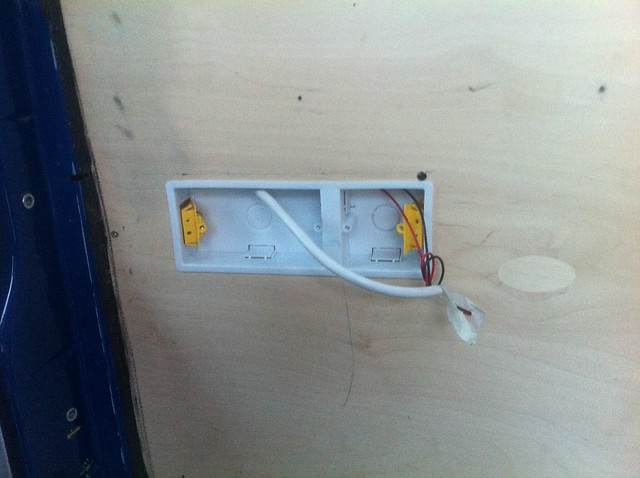
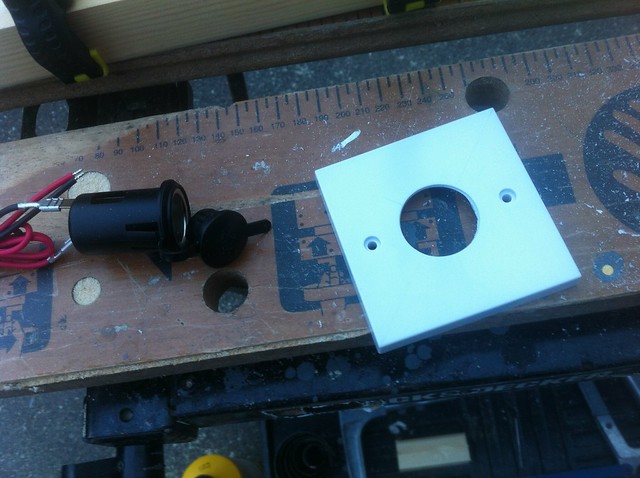
The single space next to the socket is for a 12V socket, which is made from a normal cigar lighter socket mounted in a standard blanking plate:
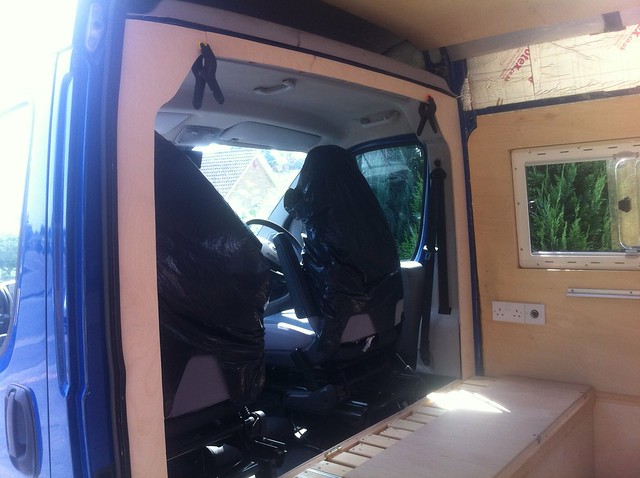
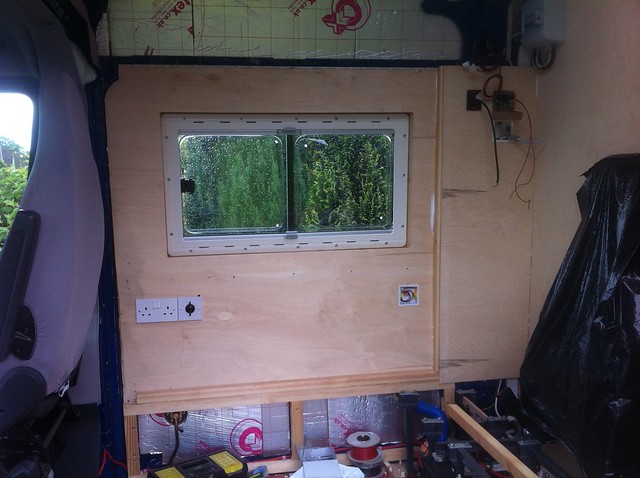
At this stage there was a whole load of exposed wiring (and bodywork and insulation) between the ply panel around the front window and the front washroom wall. So I made this bit:
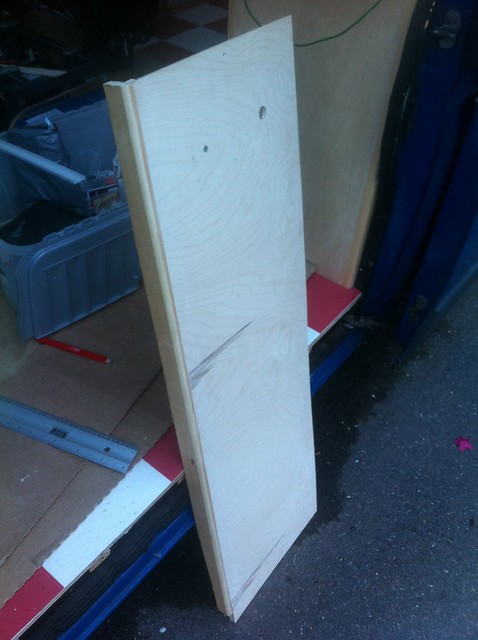
Which goes here:
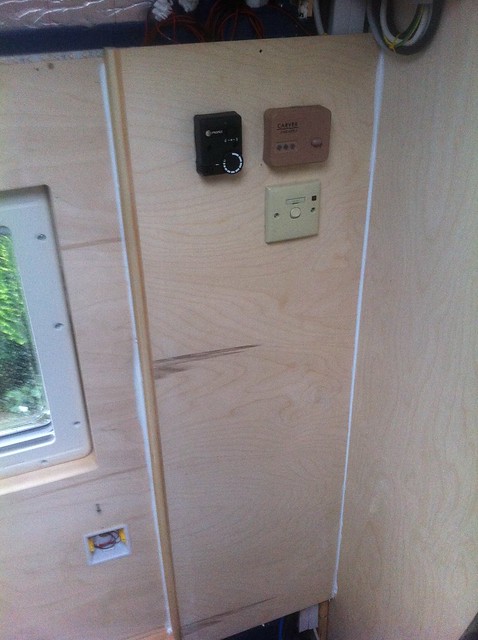
Propex control top left, water heater gas control top right, water heater mains switch bottom right — those are the nasty brown controls that came with the (second-hand) water heater, I’ll be changing them for nicer ones in The Fullness Of Time (which is pretty damn full). The overall effect is something like this:
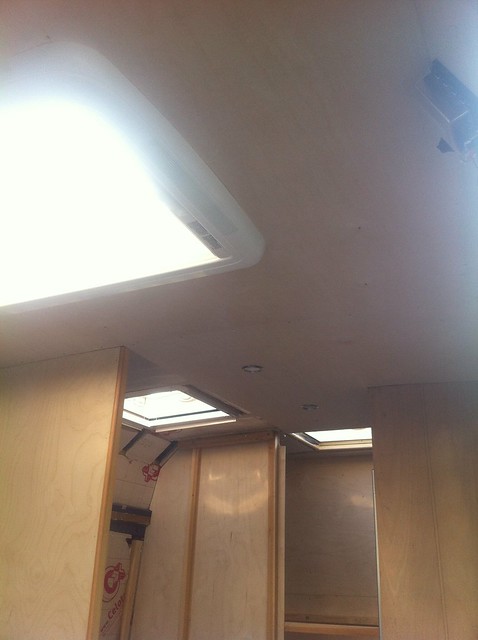
The space above the panelling will all be taken up by overhead locker, eventually. In a bid to hide some more bare insulation before our summer holiday, I started making a ceiling:

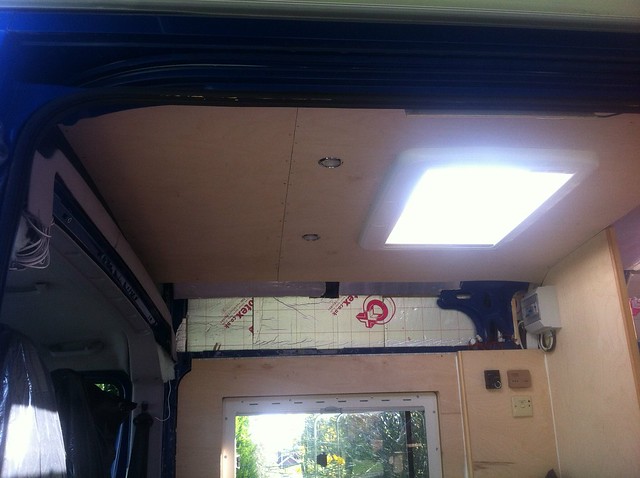
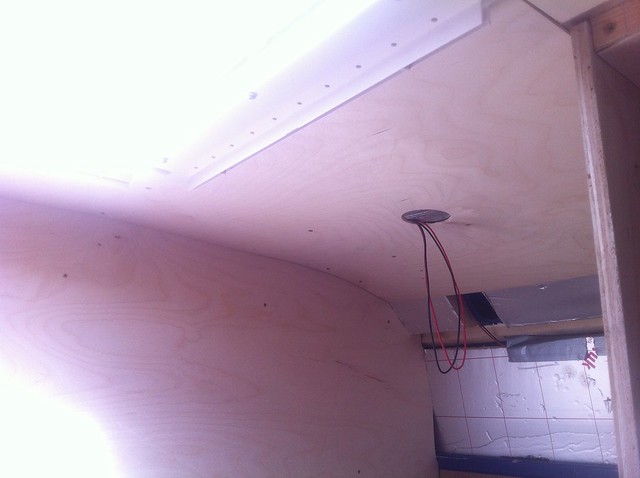
It’s 3mm ply, which is light and bendy and follows the curve of the roof nicely. Lights are recessed LEDs. Another bit further back:
Not forgetting to route lighting wires first:
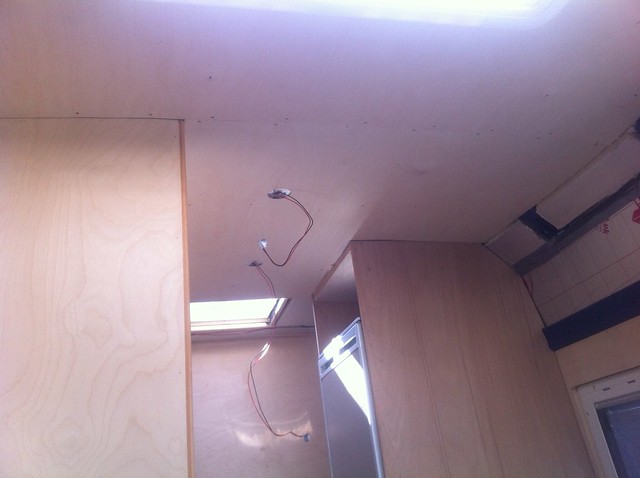
Not looking bad:
A final piece over the rear bunks:
And while I was at it, lining the walls — this was an arse of a job because we’d put the bed frames in and then put walls up so the frames wouldn’t come out in one piece, so I had to dismantle them and then put them back together in situ:

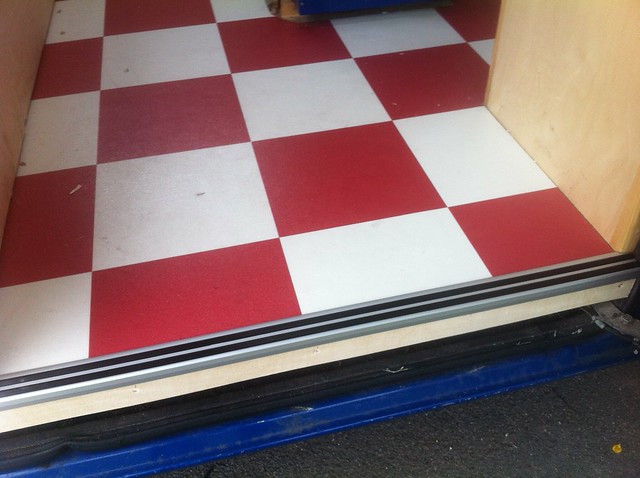
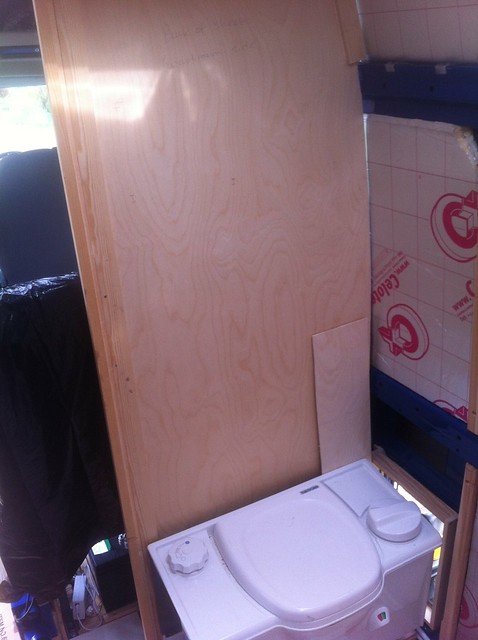
Once it’s filled/sanded/painted it’ll be pretty tidy. On the subject of tidy, a couple of little tidying jobs — finish off the edge of the floor at the sliding door:
Line the gap between the toilet cassette hatch and the actual toilet:
Rebuilt the temporary framework in the rear washroom wall and stuck some insulation in it mainly because there was some lying around (but it also stops the hollow wall sounding hollow):

And line out with PVC/ply stuff:

Line the outside wall and make a start on framing for the inside wall and door frame:
And that’ll probably do for this update. More soon, there’s a bit of a backlog 😉
Mike_DFree MemberPosted 10 years agoI think it’s fair to say that the original books have not, in some ways, aged well 😉
Mike_DFree MemberPosted 10 years ago/checks down back of sofa for hitherto-unsuspected enormous stash of loose change
Mike_DFree MemberPosted 10 years agoStruck a nerve there 😉
I’ll just leave this here:
http://www.campingduletty-benodet.com/english/accueil.html
They’ve got big posh tents you can hire, not really very much like camping at all 😉
Mike_DFree MemberPosted 10 years agoThere is some kind of colour concept at play. The main thing is that the kids love it 🙂
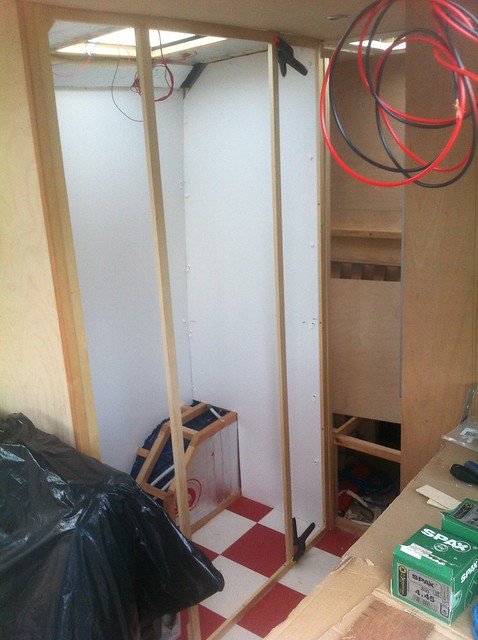
Mike_DFree MemberPosted 10 years agoWhile the seat/bed was out, we put a floor down. It’s 3mm vinyl in what some might consider a fairly brave pattern:
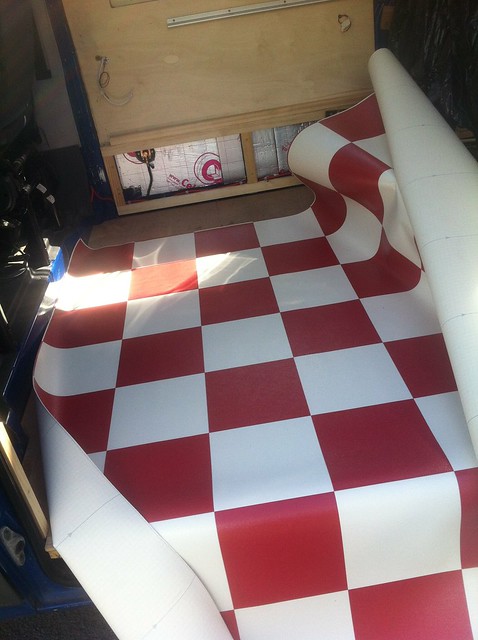
Measure, mark, trim, repeat:
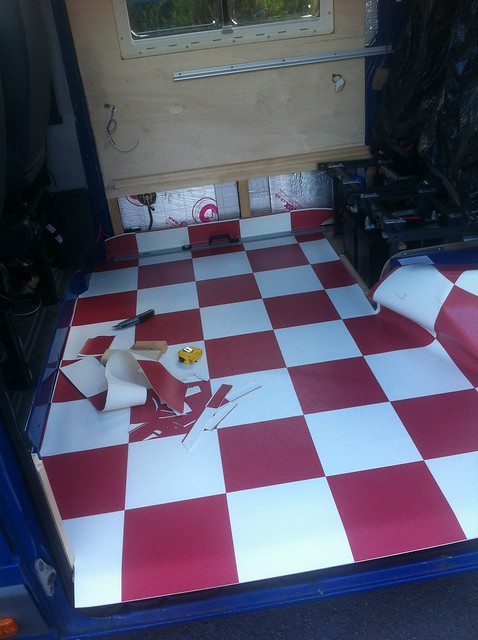
Getting there:
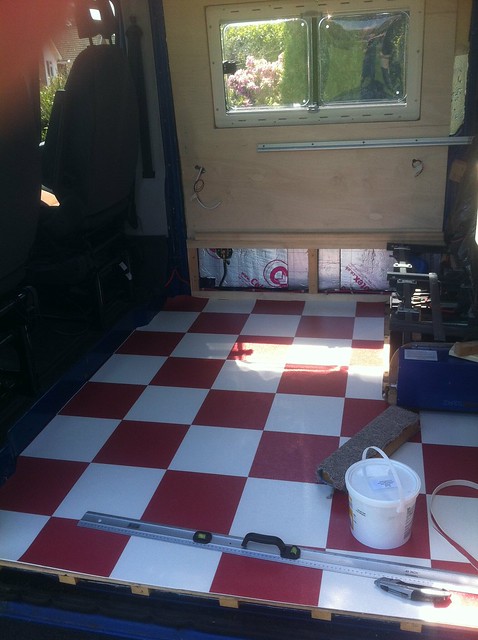
Seats back in:
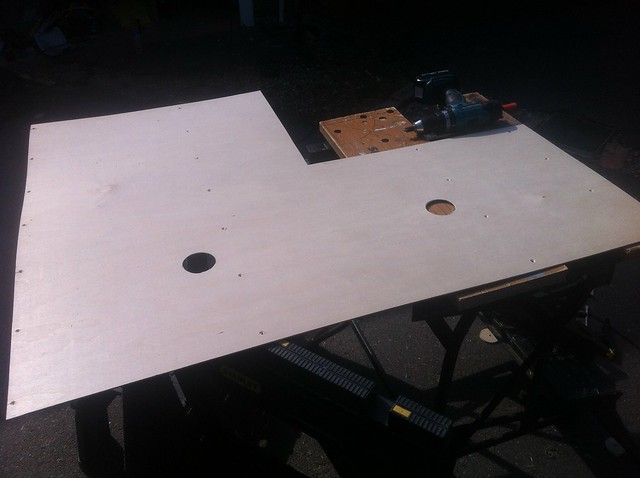
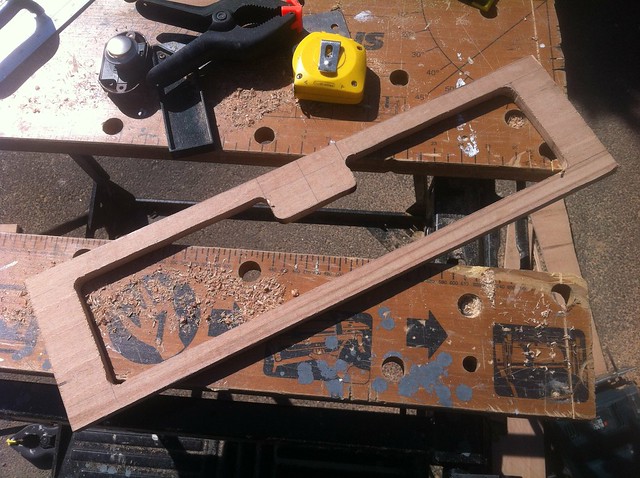
Fiddly job. Next, front wall of the washroom. Here’s a sheet of 4mm ply cut to the appropriate shape:
Then out with the router to round off the edge of a length of timber and to put a 4mm rebate in that the ply gets glued into:
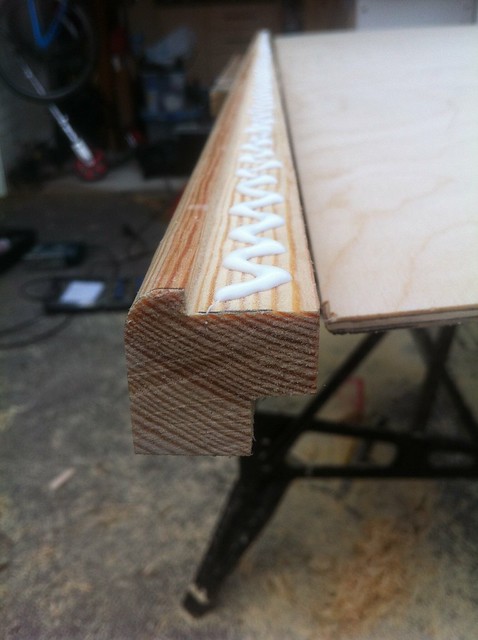
With the corner post on and in place:
And from the other side, with the loo offered up in position:
Added some more framing around the edges of the ply and secured it to the van — screwed down into the floor, up into the usefully-positioned ceiling battens, sideways using metal brackets into the horizontal ribs in the van wall.
On the other side of the wall, ie the inside of the washroom, we’re using hard glaze ply — it’s 3mm plywood with a sprayed-on coating of PVC, so it’s waterproof and impressively hard-wearing:

Also around this time, with a multi-hundred-mile trip to the Lakes imminent, we decided that new tyres were in order. Turned out the local tyre place wasn’t hugely busy, so we ended up with four or five fitters on the job at once and All Of The Jacks:
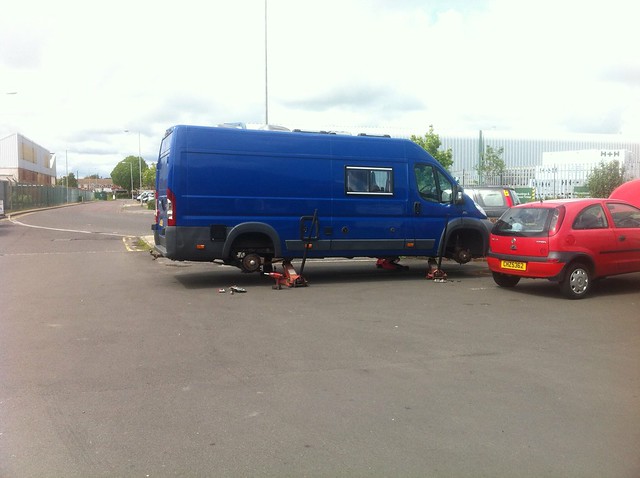
Formula 1? Pfft.
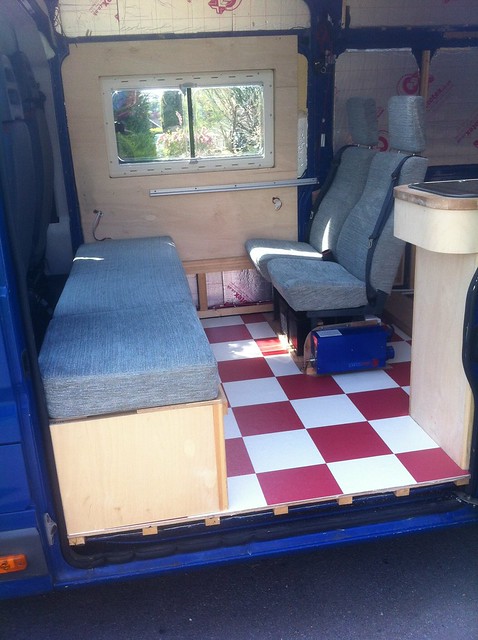
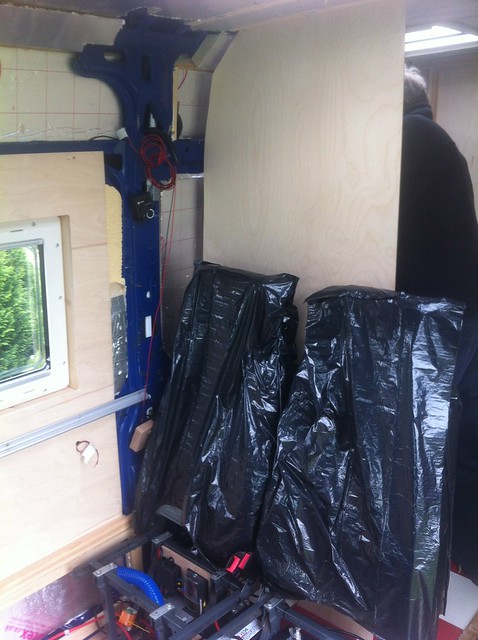
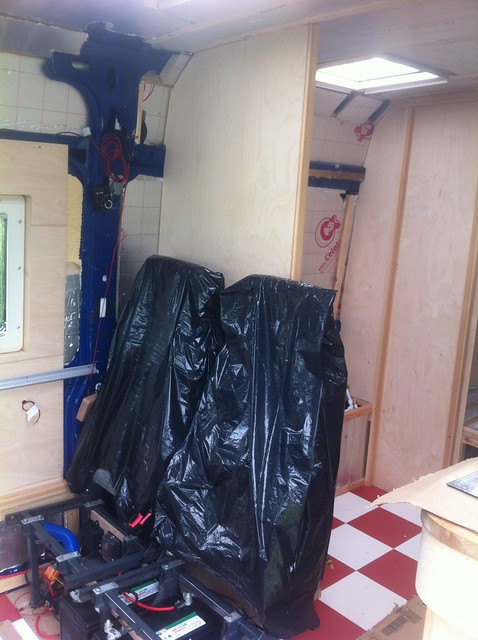
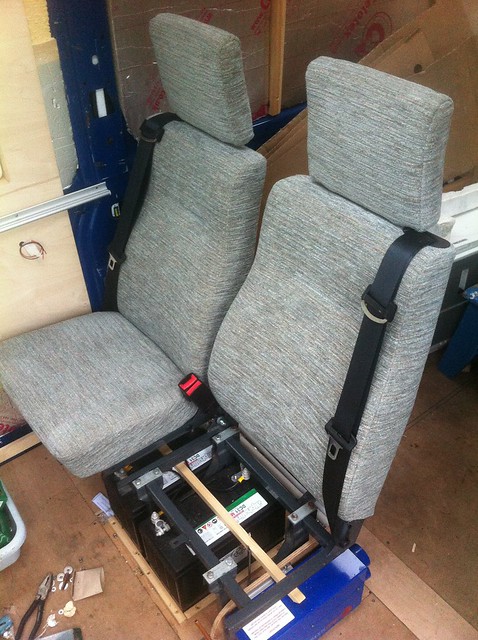
Mike_DFree MemberPosted 10 years agoRight, where was I? This has been covered really, but here are the rear seats (as re-covered by mother-in-law) showing batteries and stuff underneath. That’ll be all getting boxed in, eventually.
With a weekend away coming up, I bodged up a shelf in the boot space with left-over stuff. Battens across front and back:
Plywood on top:
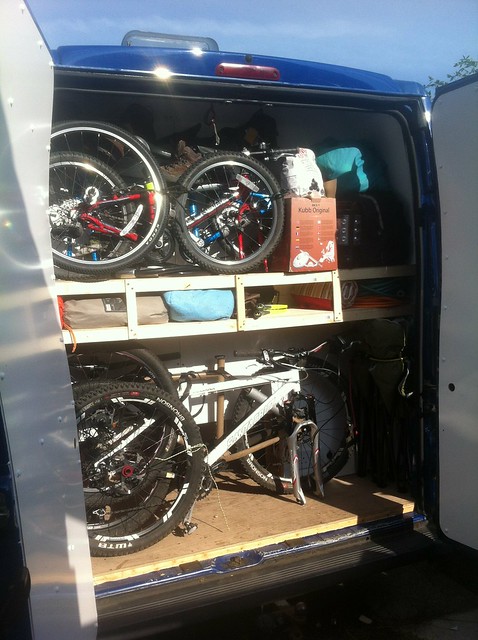
It was a bit flexy like that, but another piece of ply on edge across the front stiffened it up beautifully for very little extra weight. Here with a child’s bike for testing purposes:
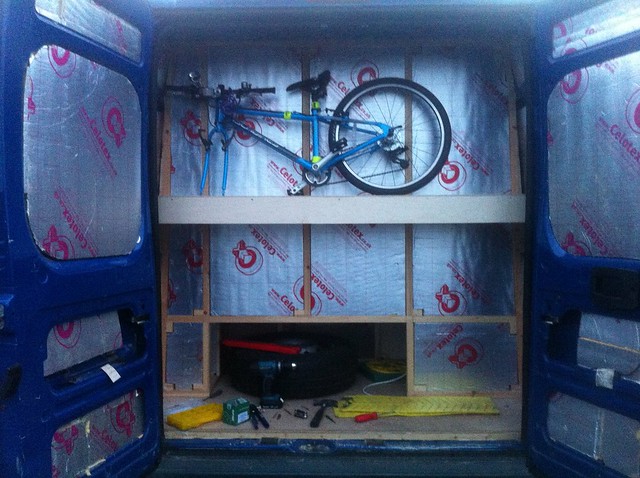
And packed to go away with four bikes on board:
Having prototyped this, the finished version will probably have a double shelf so odds and ends (shoes, pumps, hookup lead, blah) can go between the two pairs of bikes. It’ll need the seats to be taken out of the lower bikes to give a bit more vertical space, but I don’t think that’s a big deal.
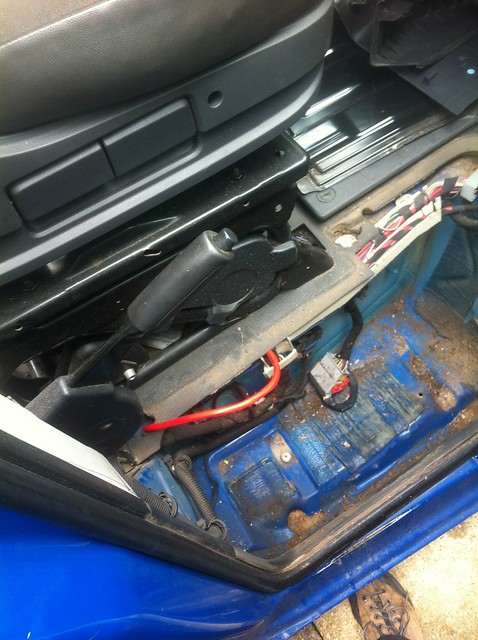
Next up, the split charge setup. This connects the leisure batteries to the vehicle battery while the engine’s running, so the alternator charges the LBs as well. With that and the solar panels, we should be OK for power. The LBs are quite a way from the vehicle battery (which lives under the passenger footwell for some reason), so some fat wire is called for:
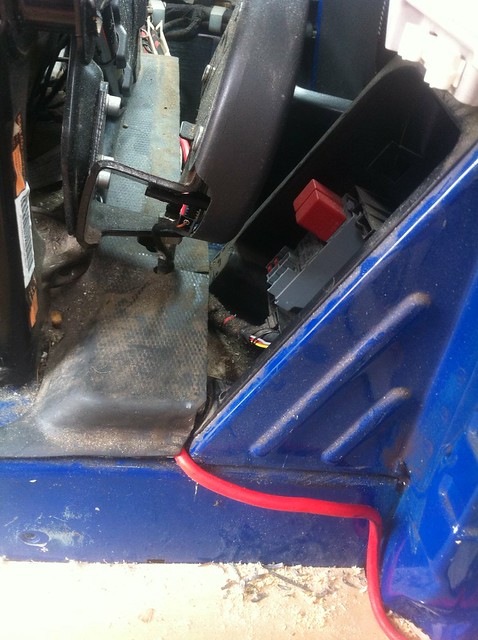
That’s 16sq mm welding cable, which is actually surprisingly easy to work with. Usefully, the van has existing cable routes across the cab under the front seats, so I could run the cable under the passenger seat as shown above, then pick it up in the middle where there’s a hatch to access the top of the fuel tank:
And continue under the driver’s seat:
From there it can come back into the main bit of the van and around the edge to the rear seats:
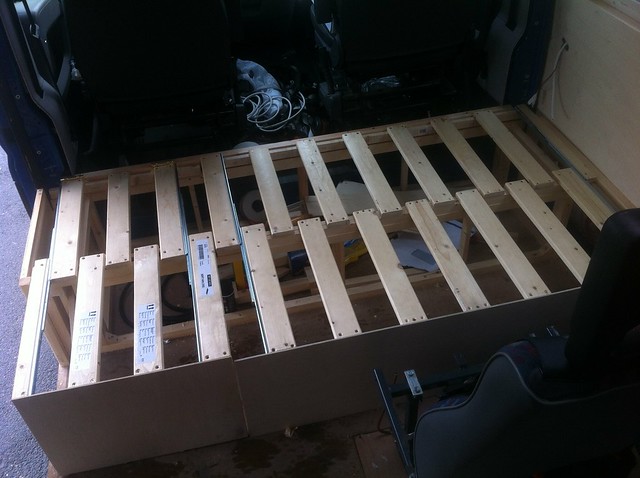
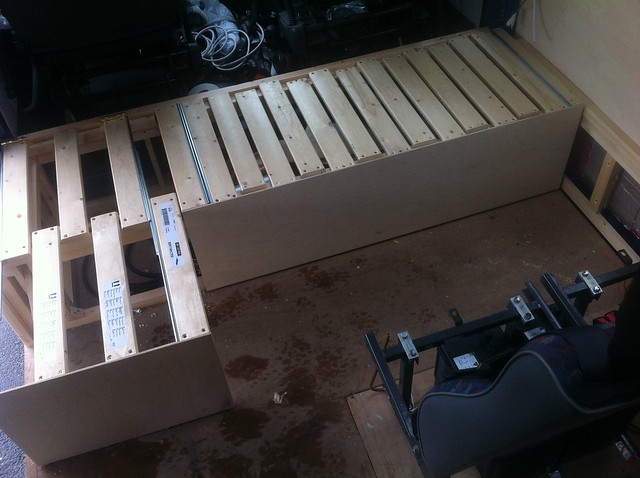
To gain access to this corner we had to take the seat/bed out. Fortunately, and not a little amazingly, despite having been built in situ we could take it out in one piece:
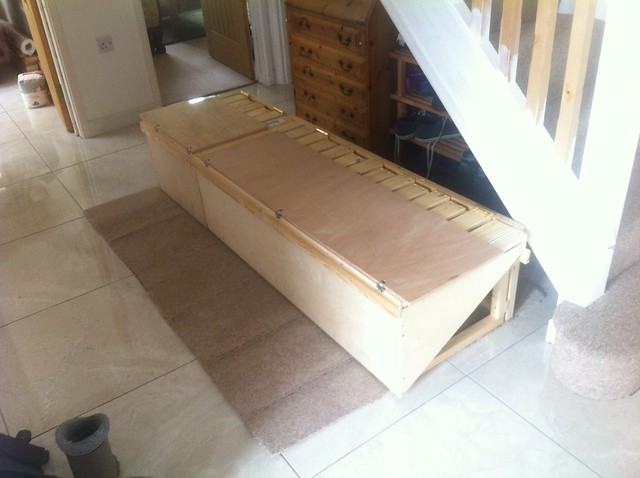
It’s not as heavy as I thought it might be either, which is reassuring. Do need to weigh the whole thing at some point just to check…
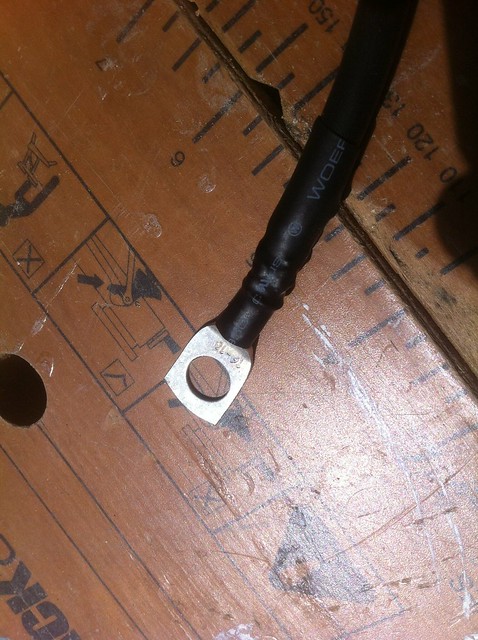
To connect the fat wires to useful things, it needs ring connectors on the ends. I’m using crimp connectors, but because ones this size really need an (expensive) hydraulic crimp tool I soldered the cables in instead with a micro blowtorch off ebay. Worked great until it stopped working, but it was only £2 😉 Bit of heatshrink to finish off:
The wire connects to the +ve of the vehicle battery via a big fuse at one end, and to this unholy agglomeration at the other end:
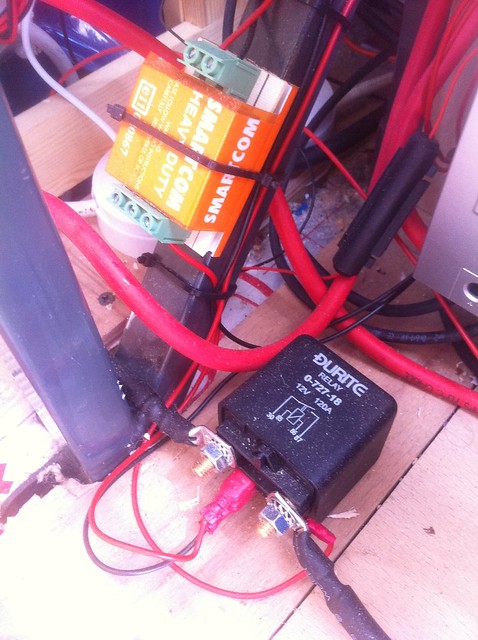
Yes, I need to tidy my wiring :/ The setup uses two relays. The orange Smartcom one is voltage-sensitive. With the engine off, the voltage across the VB is lowish and the relay’s off. Start the engine, the voltage goes up, the relay energises. The downside of the Smartcom is that, despite saying “heavy duty” on it, it’ll only handle 30A. So it in turn triggers the black proper-heavy-duty relay that’s good for 120, so we can get as much charge as possible.
From the relay the feed goes into this fusebox:
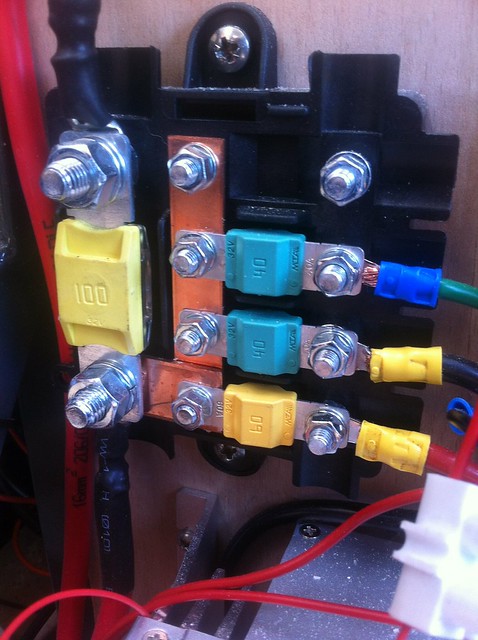
The wire out of the top connects to the LBs, which are wired in parallel. The other wires on the right are one from the solar charger, one to the fridge (which is the biggest power draw in the van) and one to another fusebox to which a whole bunch of other stuff is connected:

Then there’s the Earth Point Of Destiny tucked away behind the seats, which really, really, really needs tidying up a lot:
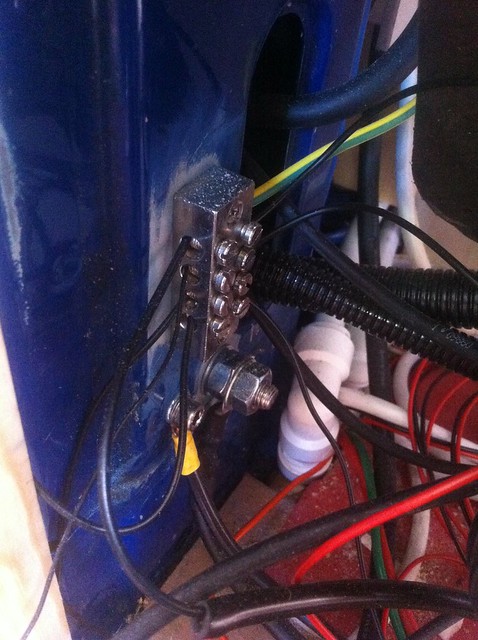
A lot of this stuff has been chucked in just before going away on trips, I’ll be gradually redoing it more tidily… The big nuts are the LB ground, which is on an M10 bolt through a section of a pillar. The metal earth block is screwed to a patch of bodywork with the paint rubbed off. There are also a couple of other earth points in other places in the van so that not everything has to come back to here, which saves a lot of wire…
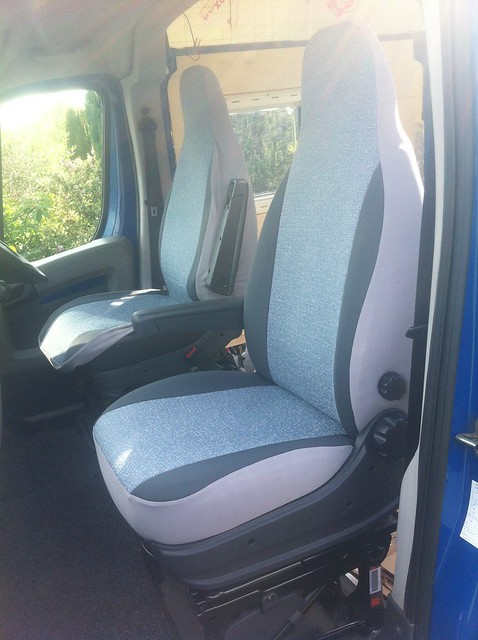
We also got some seat covers from ebay, which could have looked a bit rubbish but we took all the plastic off the seats first and refitted it afterwards, so they actually look pretty good:
More soon!
Mike_DFree MemberPosted 10 years agoGrahamS has already posted all my “favourite” examples of idiotic warning stickers. Except this one, which deserves some kind of award:
 Mike_DFree MemberPosted 10 years ago
Can I just chip in here to say that I’m quite clever and have no idea what “plastic communist” means?
Mike_DFree MemberPosted 10 years agoIf only I had the time and skill to do something like this.
Skills can be acquired, it’s not like I knew how to do a lot of this stuff before I started 🙂 Time is definitely an issue, though. Everything takes at least twice as long as you’d think…
What finish are you putting on the ply doors?
We’re going to paint all the interior ply some variant of white, probably normal kitchen/bathroom paint with a roller, with plenty of sanding to get it nice and smooth.
Mike_DFree MemberPosted 10 years agoAs long as you’re not in a hurry, and you supply an empty van with a big bag of money in the back 🙂
Mike_DFree MemberPosted 10 years ago/looks at to-do list
Don’t think you need worry about it ending any time soon 😉
 1Mike_DFree MemberPosted 10 years ago
So at the end of the last thrilling instalment we were actually using the van for camping. And jolly splendid it was too, even in its very unfinished state. Turned out that the insurance company wanted at least a hint of cupboard door to sign it off as converted, so here goes:
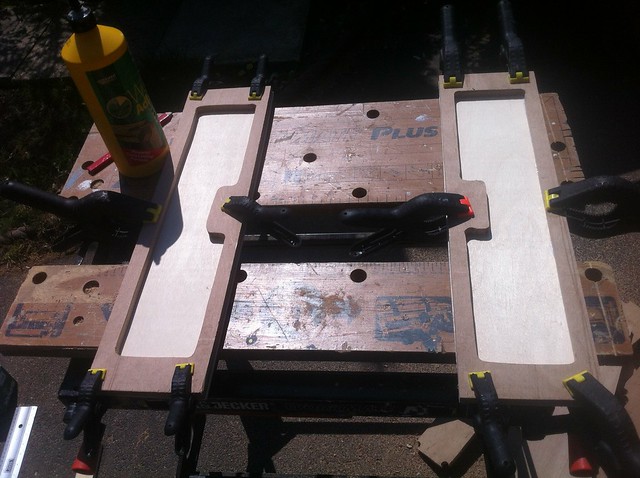
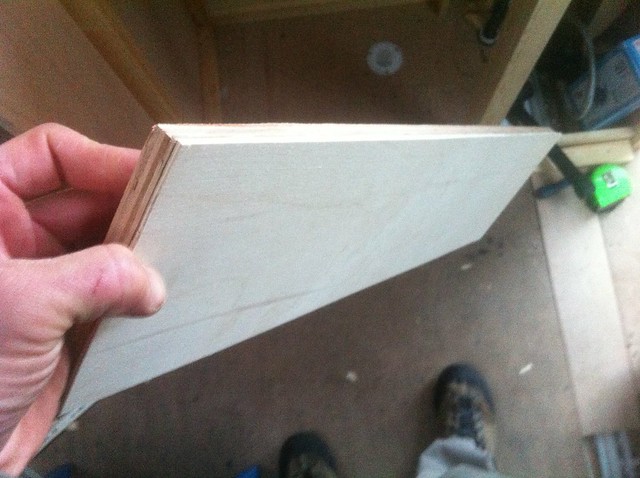
Again, we’re trying to keep the weight down, so the cupboard doors are hollow. They need to be a particular thickness to line up flush with the corner of the kitchen unit, so this one’s made of two skins of 4mm ply with strips of 6mm around the edges. Glue and clamp:
Glue an inner skin on and offer up in the hole:
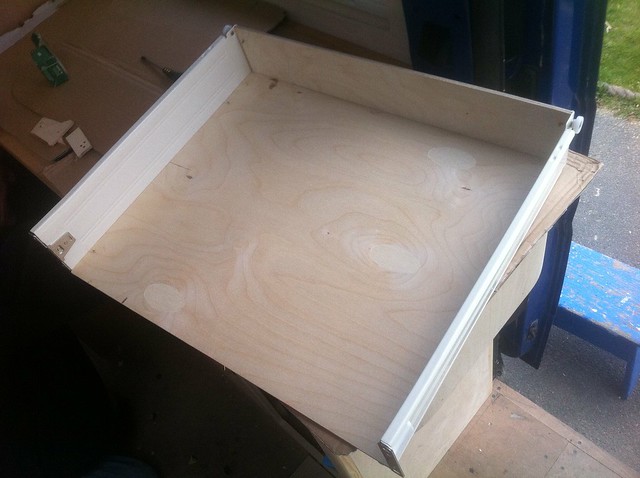
Hinges and a latch and stuff need adding, of course… Similar deal with the draw fronts, except these don’t have a back. Cut out a frame from 12mm ply:
And a few more:
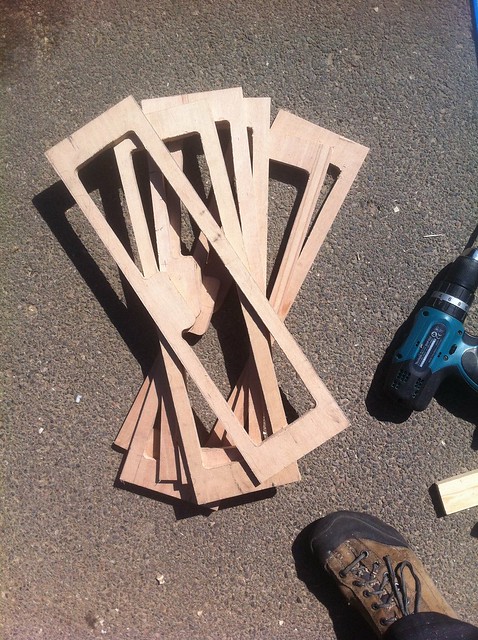
Glue on 4mm ply skins:
And the result is something that looks suitably chunky but doesn’t weigh much:
I left the thin ply slightly proud around the edges, I’ll plane it down later. Drawer fronts need drawers, and this is where we cheated ever so slightly:
That’s a drawer kit from Screwfix — you get the sides, runners, and brackets to hold the front and add front, bottom and back to suit. They’re steel, but pretty thin steel. My back-of-envelope sums suggested that the weight penalty over making them entirely out of ply is about 5-6kg for every drawer in the van (and there’ll be nine of them) which seems a fair compromise because it’d take me FOR EVER to make plywood drawers from scratch and also I’d go mad.
Some drawers in, one latch in place, next to the cupboard:
They need a bit of adjustment and alignment, but you get the idea.
Quick shot of the temporary wiring I did before Dartmoor, just to get the fridge, water pump and a light up and running:
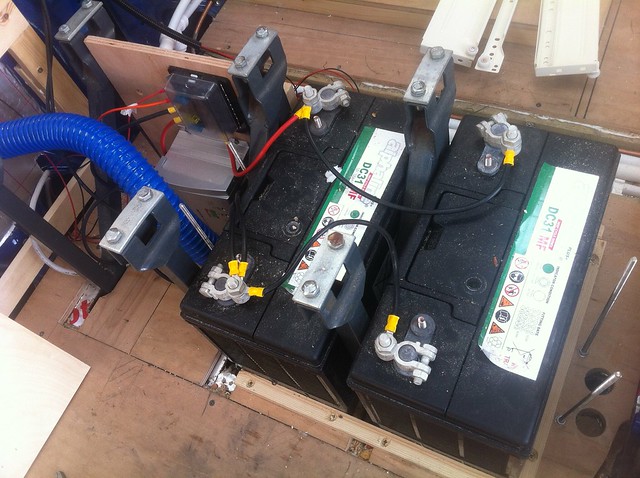
This is all under the rear seats. At this stage the only thing charging the batteries were the solar panels on the roof — the charger is the grey box vaguely top left under the fuse box. It’s an MPPT charge controller, which does clever voltage juggling to get the most out of the panels. The batteries are held in by a timber lip around the floor and (not pictured) a pair of thick plywood plates across the top attached to those bits of threaded rod (which go right through the floor with big washers and nylocs underneath). Pretty much all the wires you see came out later on when the split charge setup went in, of which more later…
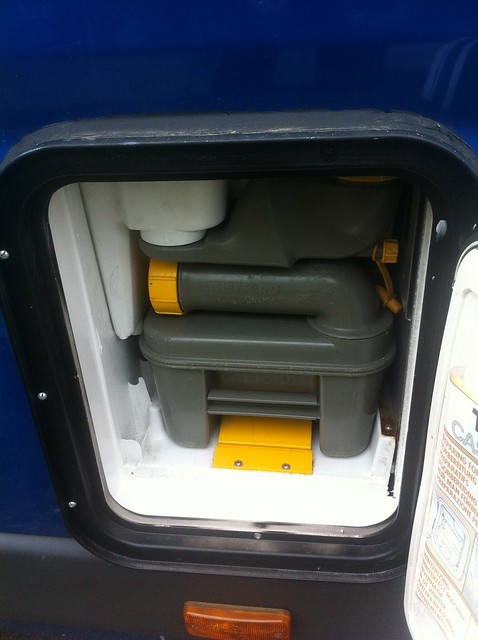
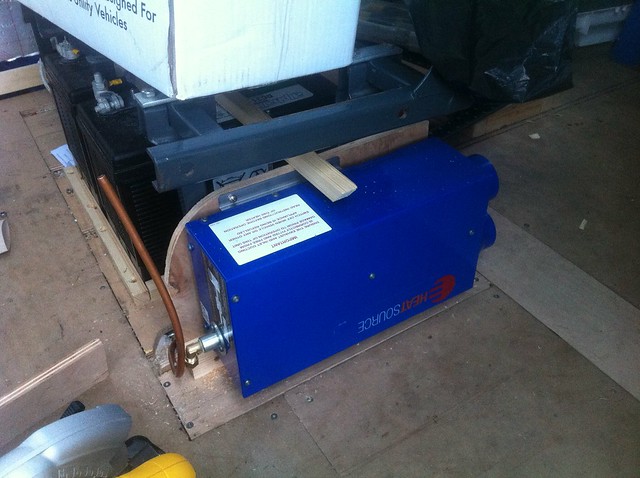
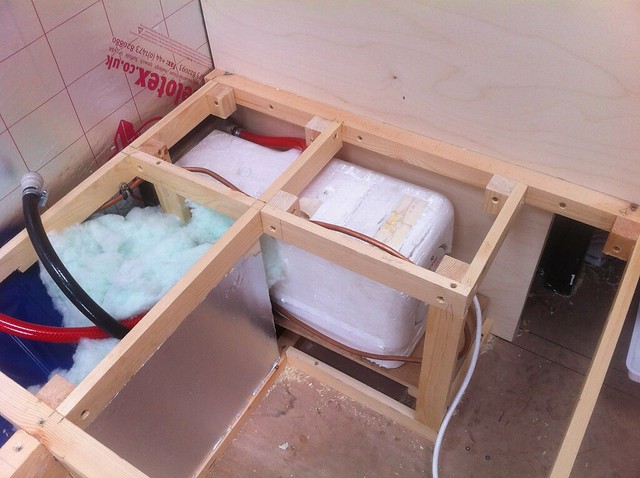
Next up, the heater. We chose a Propex gas heater for a couple of reasons. First, they’re cheaper than diesel-fuelled Eberspachers. Second, I didn’t particularly want to start tapping into the van’s fuel supply. Third, we’ve got loads of gas on board anyway. And fourth, we had one in the previous van that had been there for twenty years and never missed a beat. First up, more holes:
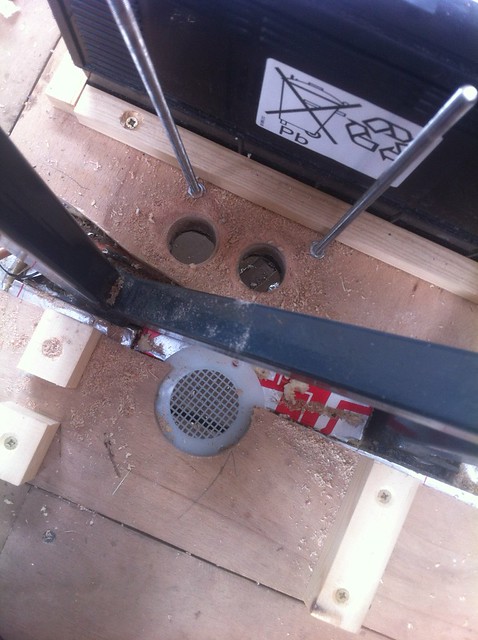
The mesh one is a gas drop-out vent — butane/propane is heavier than air, so if there’s a leak it behaves like water and you need somewhere for it to get out of the van. There is (or will be) one of these underneath anywhere there’s a gas connection. The other two holes are for the air inlet and combustion exhaust — the Propex is room sealed, drawing in air for combustion from outside the van and exhausting similarly. The ideal way to mount it is flat to the floor with the inlet/exhaust spigots straight through the holes, but we don’t have space for that so we’ve got the second-best up-on-edge position:
Connected up the inlet and exhaust pipes, fed them out underneath, connected gas pipe, hooked up some power. With all the gas connections now made, this seemed as good a time as any to bite the bullet and fill the LPG tank. Checked all the connections again, made sure the gas alarm was working and headed to the petrol station. The tank cost £19 to fill which is very economical compared to the Campingaz refills we’re used to using. Anyway, all the gas appeared to go into the tank and nothing exploded. Back home and presto:
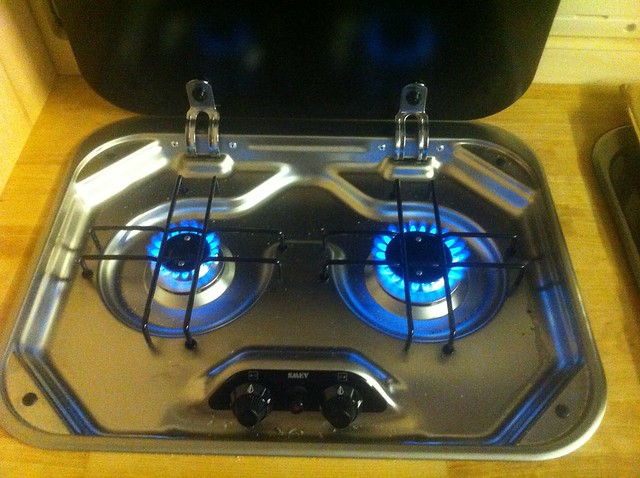
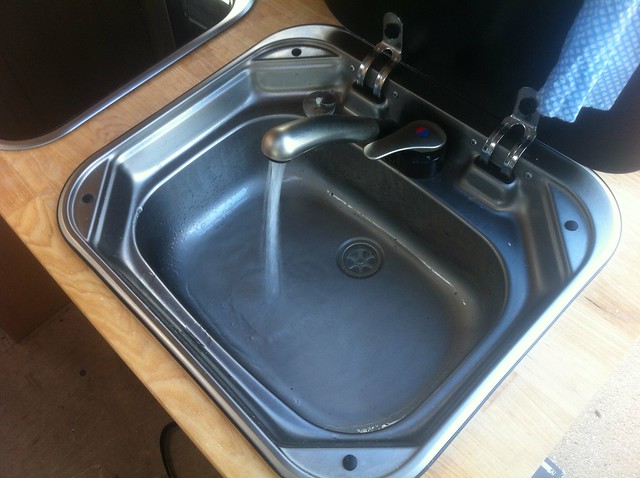
Oh yeah. Now we’re cooking. And so on. You can’t tell from the picture, but this is hot water:
And the Propex? Er, nothing. Just a flashing light on the controller, which when decoded was saying “combustion fault”, ie the burner wasn’t lighting. Checked everything, tried again. Nowt. The main fan (the one that recirculates the air inside the van) would run, but no heat. Internet research suggested that sometimes the second fan (which draws in combustion air for the burner) can stick if it’s not run for a while, like for example while sitting on a shelf in a warehouse. Seemed like a plausible scenario, so:
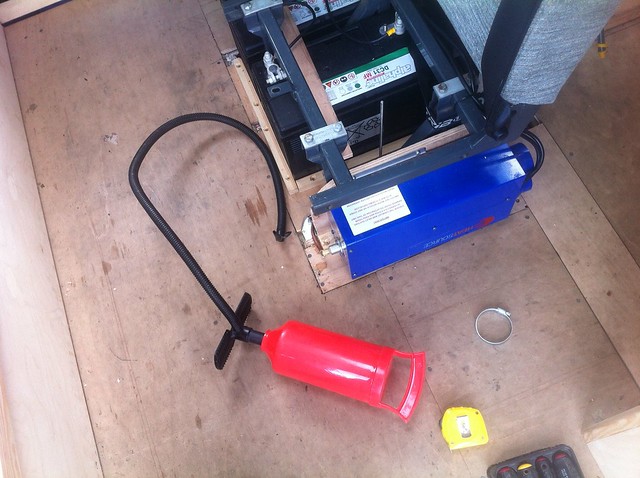
Dug out the pump for our inflatable canoes, pulled the inlet pipe off, stuck the pump hose in and gave it a few healthy blasts. And would you believe it, it actually worked. Yay the internet!
Mike_DFree MemberPosted 10 years agoI don’t know for sure but I think the fines can be quite a bit more than that, like £1500 but I might have got that wrong.
It’s “up to £60” per absence, ie per day. I suspect £1,500 comes from taking two kids out for a fortnight’s holiday (and rounding up for headline purposes 😉 ).
Mike_DFree MemberPosted 10 years agoI got the Decathlon one a couple of years back, it’s a pretty decent gilet in its own right as well as ticking the legal box.
Mike_DFree MemberPosted 10 years agoaround 750 entirely off road miles per year.
It surely doesn’t need a full set of new bearings on that kind of mileage?
Mike_DFree MemberPosted 10 years agoOne advantage over a tent, as someone on that thread mentions, is that most of your kit is stowed in the trailer. No need to pack the car before setting off.
You can get the same effect more cheaply by using an ordinary tent and carrying it in a trailer 🙂 Quicker to put up too…
Mike_DFree MemberPosted 10 years agoEasily sorted:
Heh 🙂 Doesn’t help much with the more immediate issue of the homeowner getting their own car off the drive, mind 😉
Mike_DFree MemberPosted 10 years agoSome people who live near our local school have had parents park on their driveways. Not across the end, actually on, behind the owner’s car. I can’t begin to understand the universe-sized sense of entitlement that would lead someone to think that that was OK.
Mike_DFree MemberPosted 10 years agoI like how you made the double bed, clever idea!
I’m pretty proud of the bed, I have to admit. A fair bit of head-scratching went into it 😉
Mike_DFree MemberPosted 10 years agoMm. I wouldn’t want to have to take it all out to put into another van 🙂 Although actually (so far) most of it could be removed intact if it came to it.
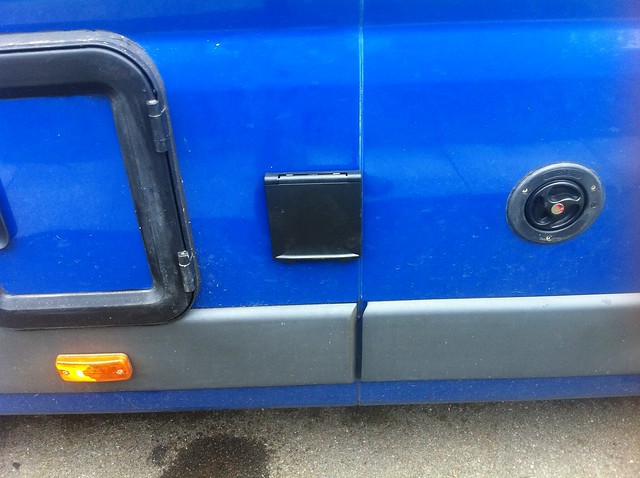
Mike_DFree MemberPosted 10 years agoTook a break from woodwork to do some gas plumbing. Yes, I’m doing my own gas plumbing – minimal number of joints, drop-out vents all over the shop, copious quantities of leak-detecting goop and a hard-wired gas alarm, it’ll be fine. Took off another bit of plastic trim from the outside, glad I did, all this stuff fell out:

Made another hole much like all the other holes and ended up with this:
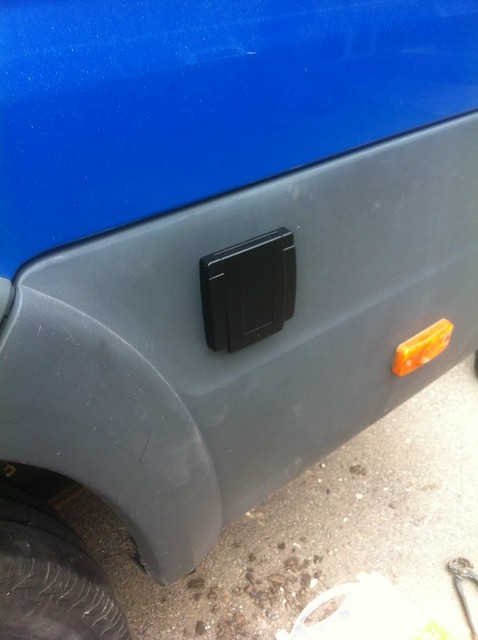
which is an external gas point so we can plug a barbecue in. It’s one of those distinctly non-essential extras that’s kind of there because it’d be a right ballache to put in afterwards…
At the other end of the system, a regulator goes on the end of the LPG tank:
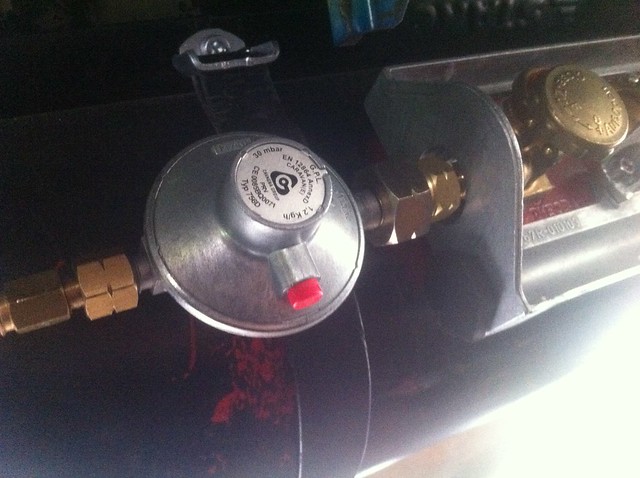
and some plastic-covered copper pipe connects to that to bring gas into the van. Much clippage underneath:
The pipe comes up through the floor and into the end of this mighty manifold of magnificence:
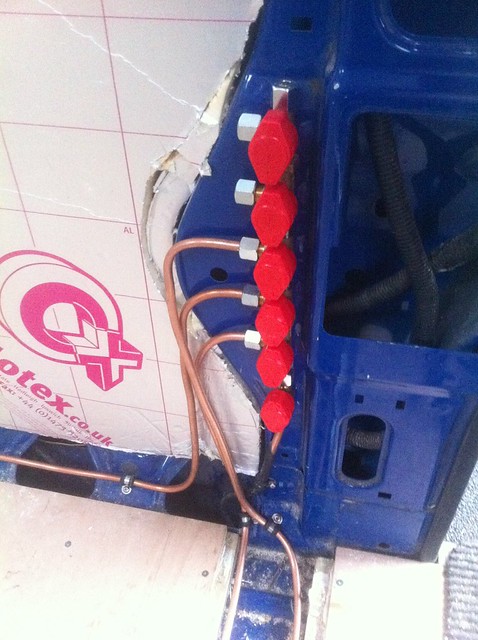
Bottom tap is an extra inline one that shuts off everything at once, then the manifold has a connection each for air heater, water heater, BBQ point, stove and the oven that we’ll probably not actually bother buying or fitting in the end 🙂
Also made a start on the wiring, there’s an awful lot of this kind of thing going on:
More on wiring at a later date, it’s great fun. Honest.
Reached a point where things needed to be definitely upright. We’re using the floor as a datum (because the drive’s not quite level) so everything needs to be perpendicular to the floor. Made an enormous set square to help:
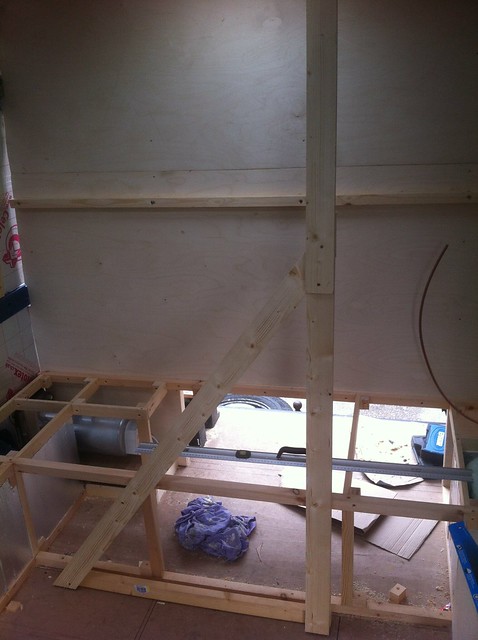
This is all around the time we had a bit of a massive push/panic — the 120 day insurance deadline was hoving into view, and we had a holiday booked at the same time, so we needed something that (a) ticked all the insurance boxes and (b) was usable for five nights camping. It also coincided with some grotty weather, so it was a good job we managed to score a (relatively) cheap roll-out awning:
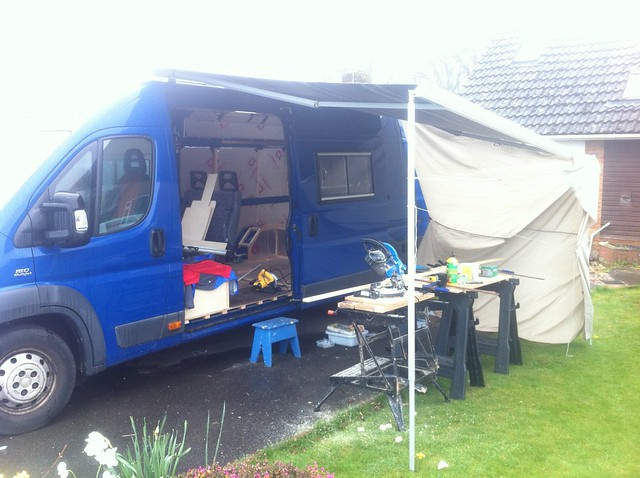
It was listed on ebay as “used” but it had never been fitted and was still in the box. Bargain! It sits on brackets that attach to the roofrack fittings, so no drilling, which made a pleasant change.
Sorted out all the connections to the water heater — plumbing is mostly standard domestic 15mm push-fit polypipe stuff (because easy, and had a big roll left over) with adapters to connect caravan-style hoses just before the appliances, which all need rubber hose (of varying sizes, just to add to the fun).
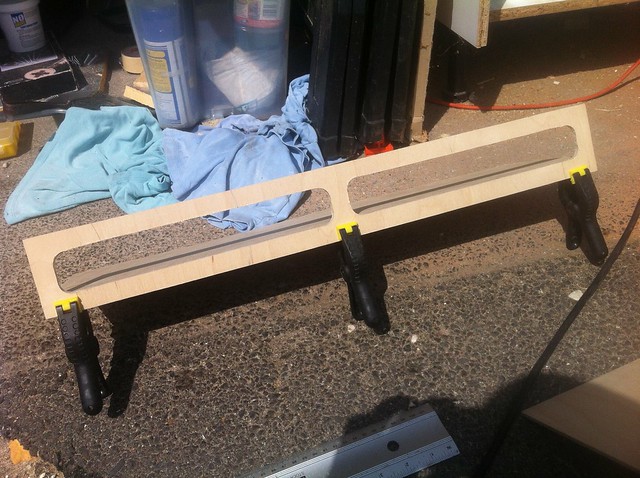
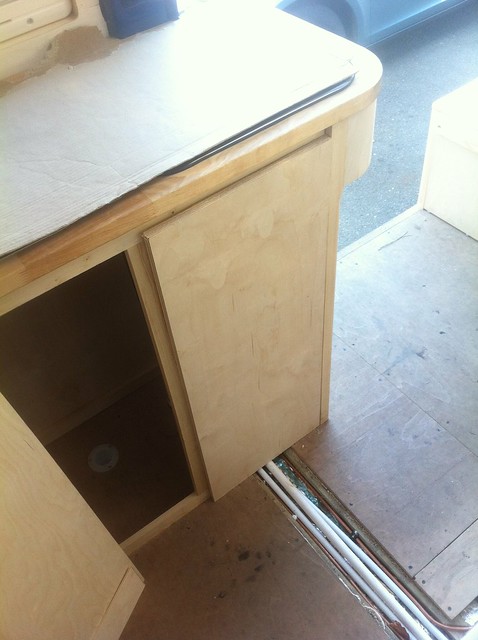
Back to furniture. To fit everything in, the kitchen needs to slightly overlap the sliding door and also the bed, which means it needs to have a funky cantilevered overhanging bit. Because we clearly have an aversion to making things easy, we decided that it needed a nice curve on it. Unleash the G-clamps:
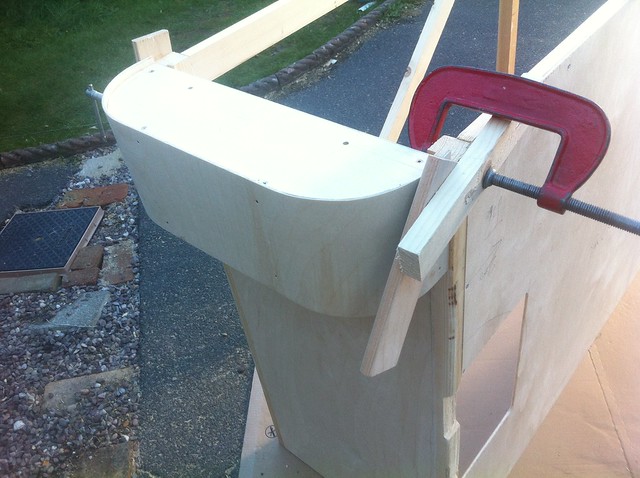
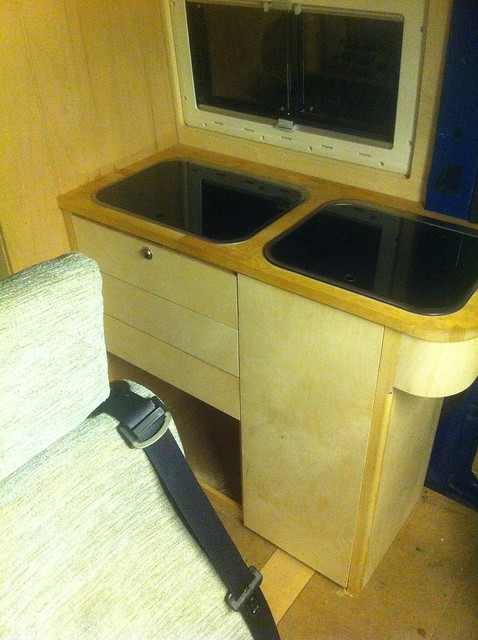
Top and bottom are 6mm ply, the curved face is 3mm ply with the grain going the appropriate way, pinned and glued into the 6 – we’ll fill the pin heads later. That’s probably about the tightest radius that normal 3mm ply will do. Put a back panel on it, cut some big holes in some 28mm Ikea wood-block worktop and in it goes:
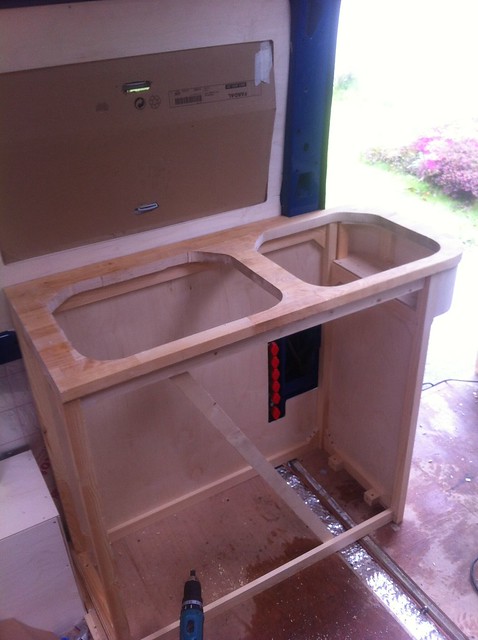
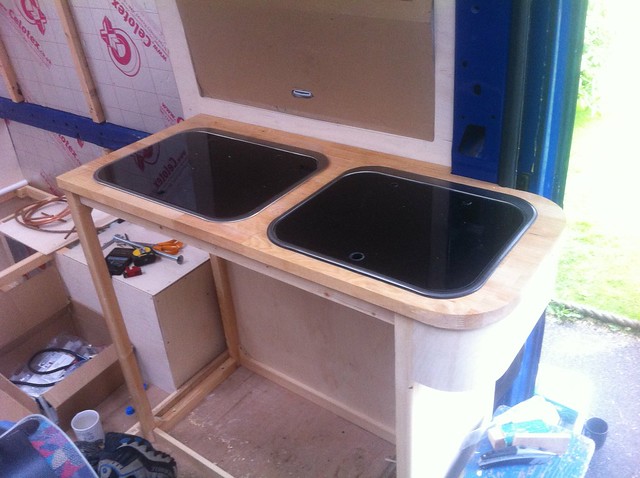
Holes are to accommodate the stove and sink:
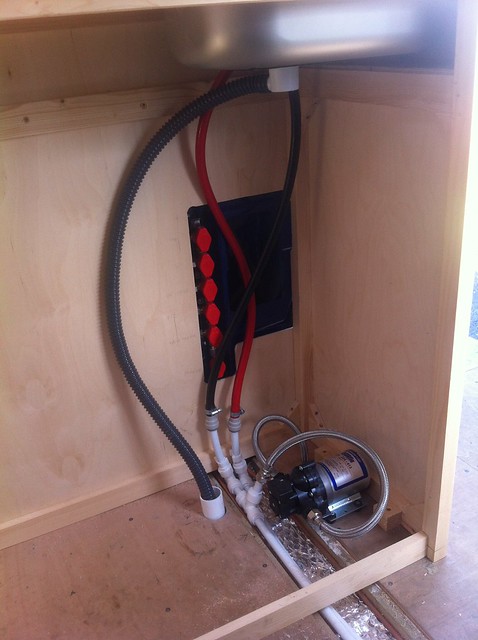
and a bunch of pipes and a water pump hide underneath:
Next to that bit of kitchen there’s a tall unit to accommodate the fridge and more cupboards. We’re severely constrained on width here — the bunks can’t be any narrower, the kitchen can’t be any narrower or any further forward and the fridge has to fit, so the super-light framed construction had to give way to two sheets of 12mm ply:
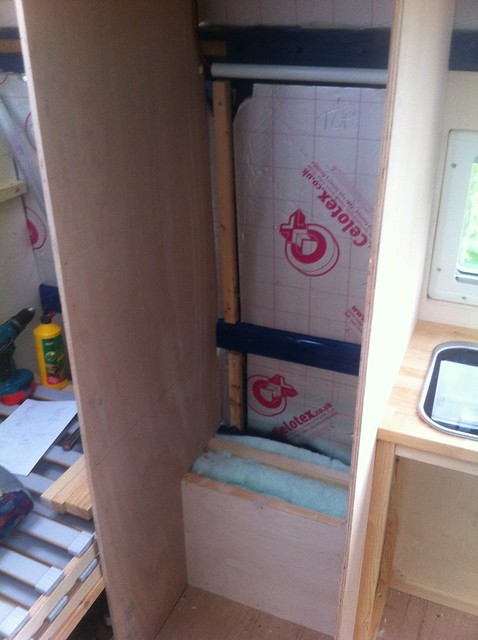
Having struggled with the space constraints of a teeny-tiny fridge in our previous van, we wanted to go large on this one:
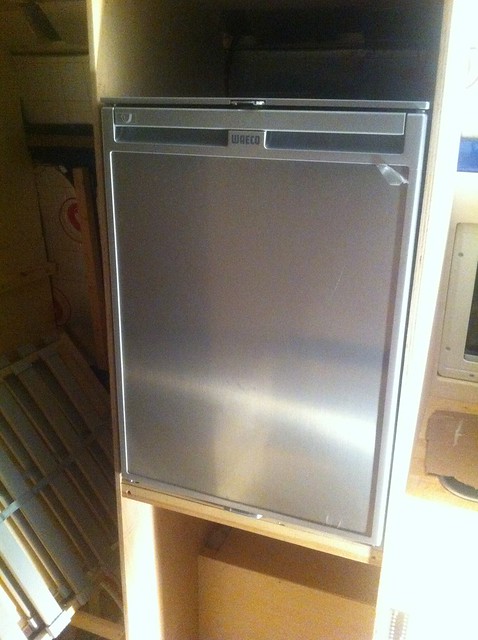
It’s a Waeco CR110 compressor fridge, mounted high up so you don’t have to grovel in the aisle. It’ll take a week’s food for four of us no problem. It’s also the single most expensive thing in the van :/
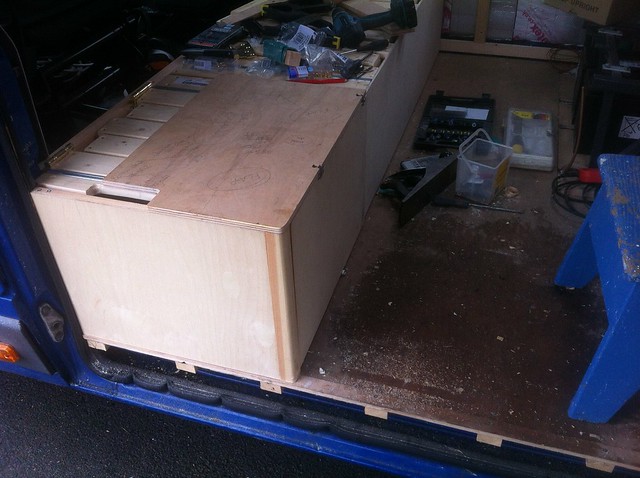
Conscious of the fact that we would actually need something to sleep on, the bed needed finishing. Front panels for the sliding sections:
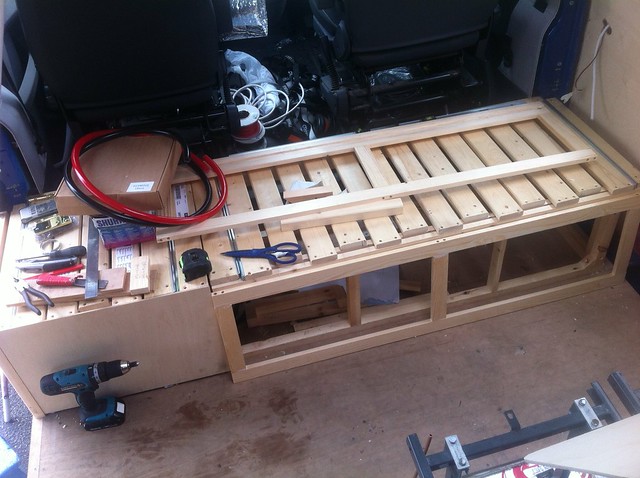
Looks like this when pushed in:
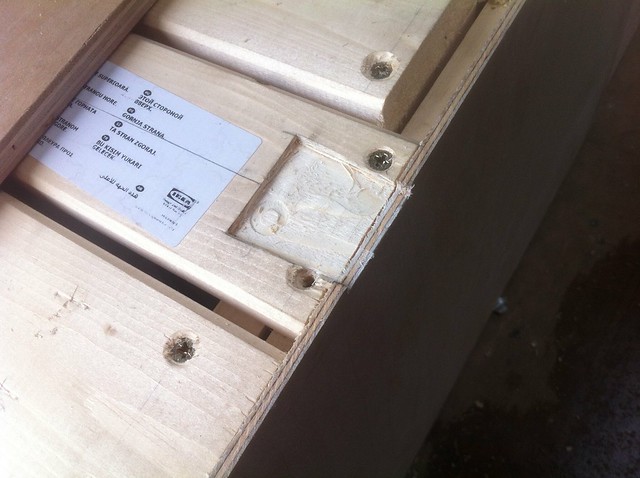
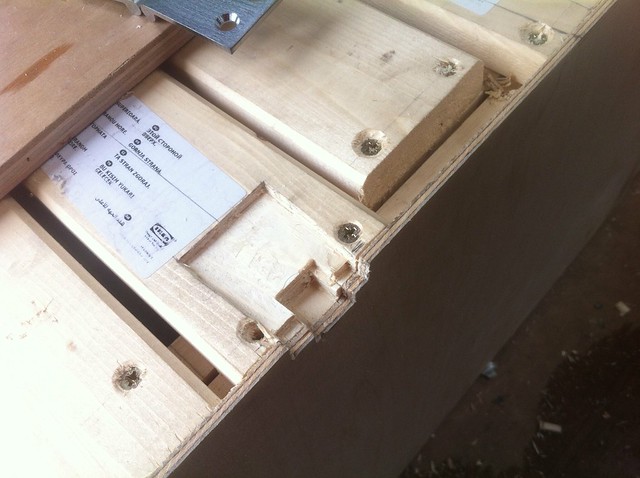
Pulls out thusly — the front panels act as legs to hold it up:
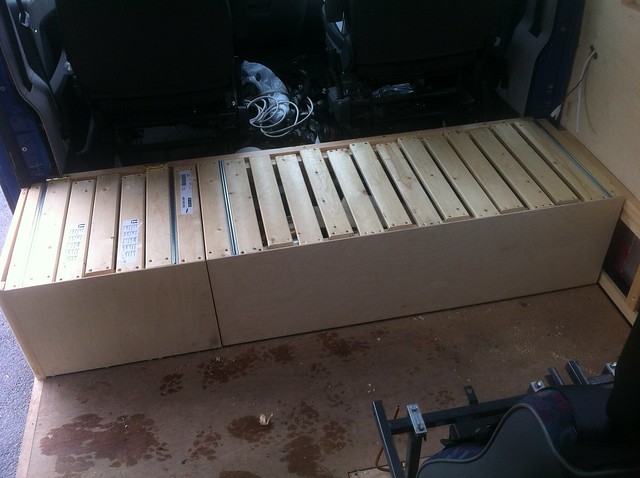
Or you can just pull out the short bit:
Still needs more width, though, which is made up with two sheets of ply on counterflap hinges. These are a PITA to fit, because they’ve got a double knuckle and need recessing and clearancing and all sorts. Chisel and router action:
More:
Hinge sits in like so:
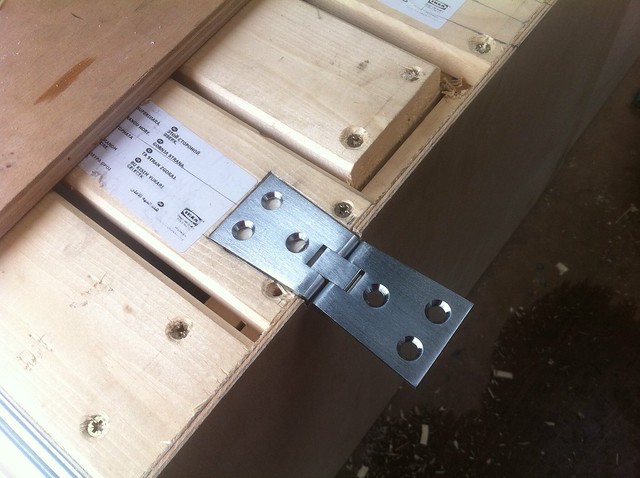
Then repeat a bunch of times until you end up with this:
Slide out:
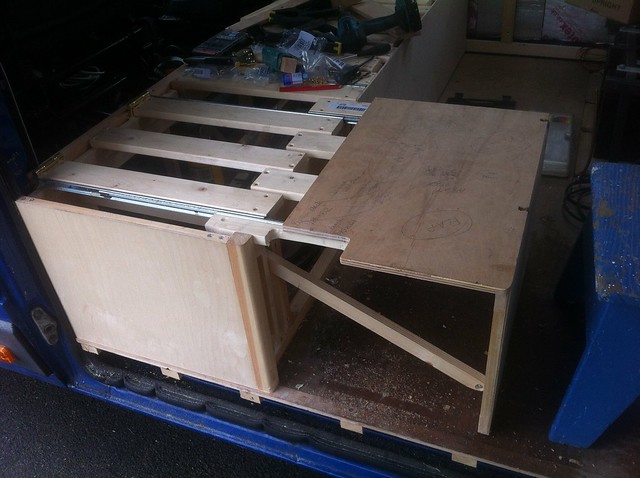
Unhinge:
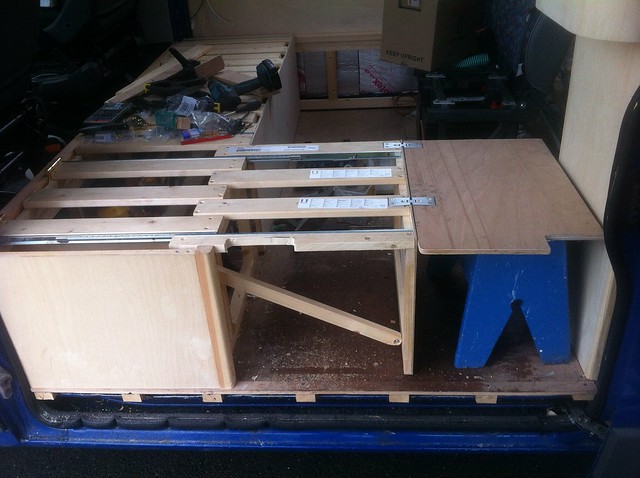
Eventually there’ll be a support on the end of the kitchen unit, fortunately that stool is just the right height… In this configuration you get an L-shaped seat around where the table will be, and it also lets two adults sit with their feet up. The large section has a flap too, which overlaps the travel seats — happily the seat cushions are secured by a single handwheel bolt under the front edge, so they’re easy to take out. That means that the bench seat and the travel seats are the same height.
Made a quick table from the rest of the worktop — it’s ludicrously heavy, I plan to rout out the back of it quite a lot to get the weight down:
With all the cushions in it’s like this:
In bed mode it’s like this:
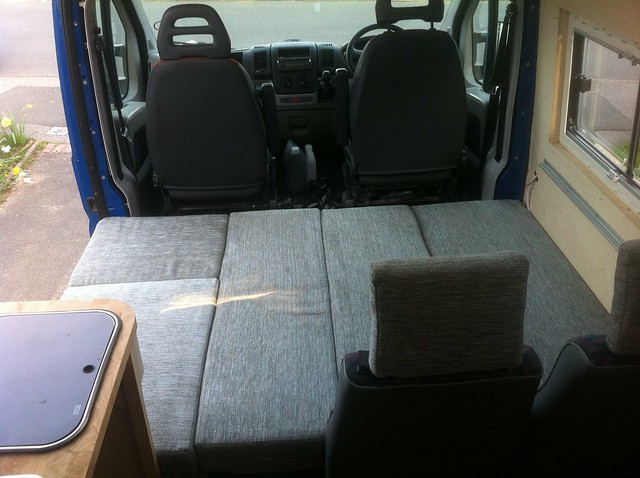
The bed’s only just long enough, really (it’s 187cm long) but that’s as much width as we’ve got inside the van. It’s a useful 130cm wide, which isn’t far off the width of a normal double and a lot roomier than our previous van. We spent a fair bit of time working out the cushion sizes so that the gaps don’t coincide with shoulders or hips. The two narrow cushions in the middle stow under the bench, the wide one on the right goes on top as the seat cushion, the square one top left stays where it is and the other one stows behind the travel seats.
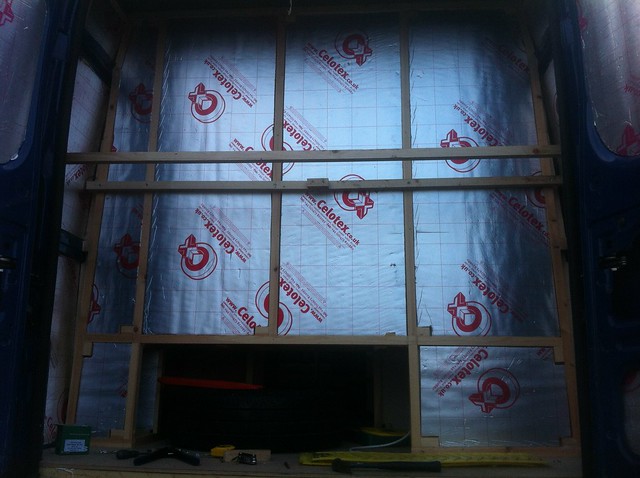
Put a wall up at the back to hold the upper bunk up:
And that was as much as we had time to do. Took a bunch of photos to satisfy the insurance company that it had a bed/stove/water/gas etc, lobbed some stuff in the back:
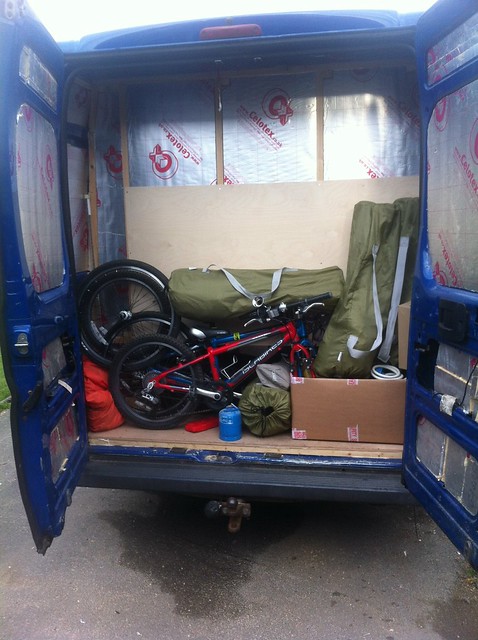
and cleared off to Dartmoor for a few days:
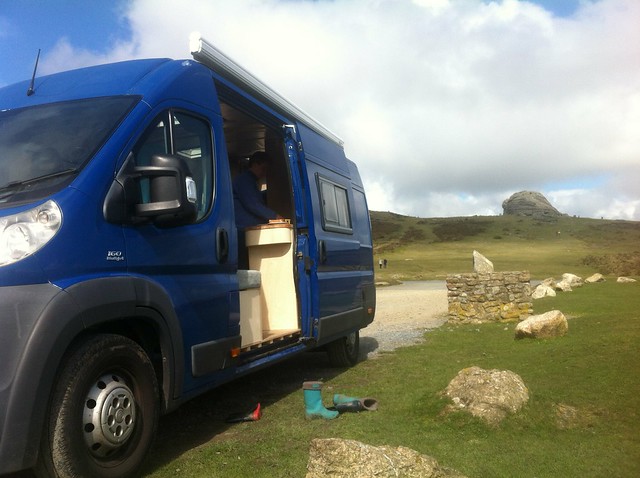
To be honest, it was very basic at this point — gas plumbing wasn’t finished, so we had to use a camp stove and gas bottle outside — but we had running water, a bodged-in light and the fridge worked. It was good 🙂
Mike_DFree MemberPosted 10 years agoTrails with recommended wheel sizes? That is bonkers.
Or, just possibly, a bit of guerilla sticker action 😉
Mike_DFree MemberPosted 10 years agoIf you want a professionally-done, fully-featured one in good nick, £6k+. Up into five figures for a late-model Westfalia or something. SWB fine for two adults and a tiny. LWB pop-tops are pretty rare. Lots of shonky DIY stuff around, but also some nicely-done ones. Watch out for chancers who’ve stuck shiny alloys on, bunged a sofa bed and some chipboard inside and marked it up £3k. Consider high tops — less cool, more practical (unless you need to go into multi-storeys a lot…).