Forum Replies Created
-
Leaked document reveals MTB World Cup plans for 2025
-
 Mike_DFree MemberPosted 9 years ago
I’ll just leave this here:
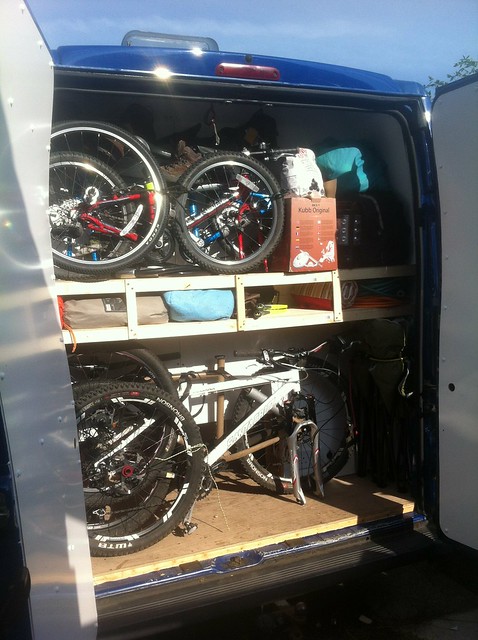
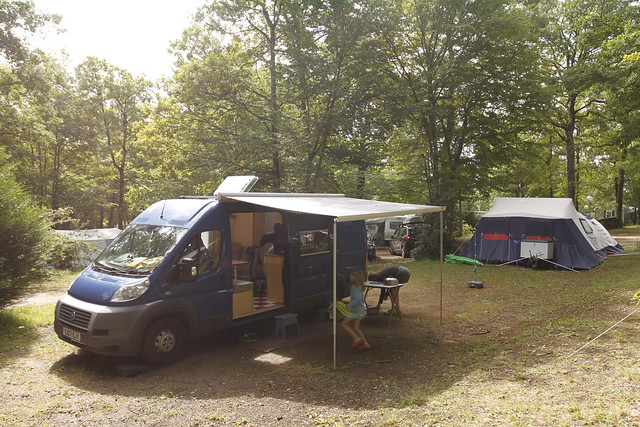
The upper bikes are kids’ ones, but the space is big enough for adult ones. If you take a pedal off you can put three bikes in the lower space. Obviously it’s a bigger van (XLWB Ducato) but it’s the height and width that counts for the bikes — if there’s only one of you there’d be plenty of room in a shorter, handier one.
T5 is tricky for your needs. I think the bikes are going to have to go flat under the bed somehow.
Mike_DFree MemberPosted 9 years agoThe hinges are counterflap hinges, mine came from Screwfix:
(always found that the tricky thing with hinges is knowing what all the different sorts are called…)
Bolts were Screwfix too:
I’ll have to look back to find where the runners came from, will get back to you on those 🙂
Mike_DFree MemberPosted 9 years agoAtera Strada again. Not found anything to beat it and I’ve tried a few.
(I do have one of these gathering dust in the shed if it’s of any interest…)
Mike_DFree MemberPosted 9 years ago+1 for All The Aires, used it for the first time the other week, couple of very fine spots. That and a Garmin satnav with lifetime European map updates would be a great combination for well under your budget 🙂
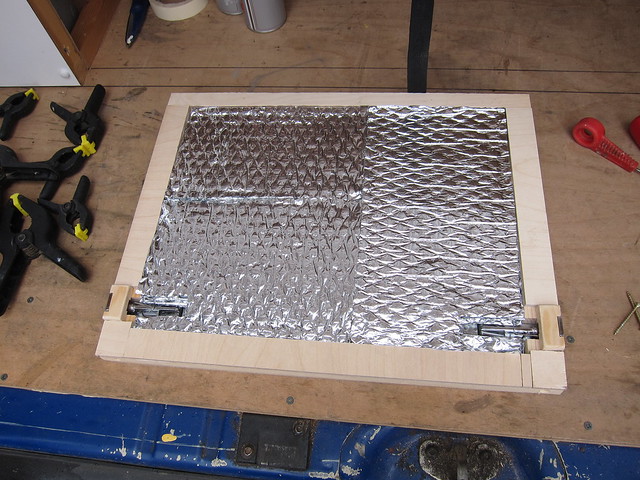
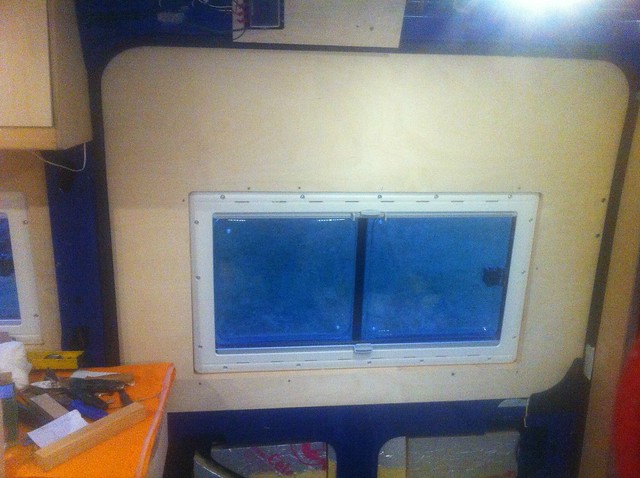
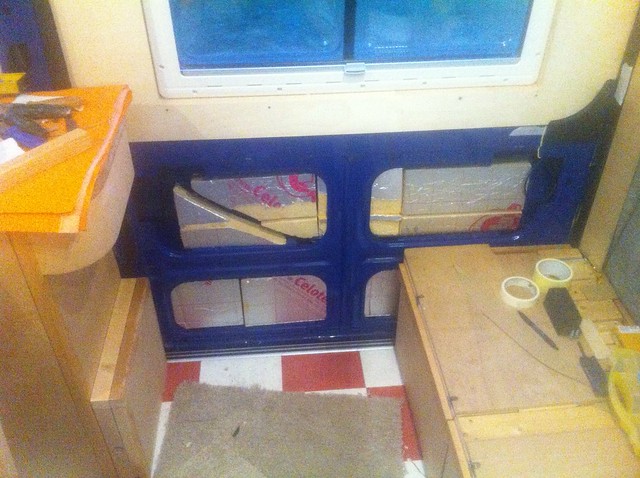
Mike_DFree MemberPosted 9 years agoUPDATE. We have a big boot space under the lower bunk, which was just open to the main accommodation. To stop stuff ending up in the wrong place (and to reduce draughts), I made a hatch. Frame:
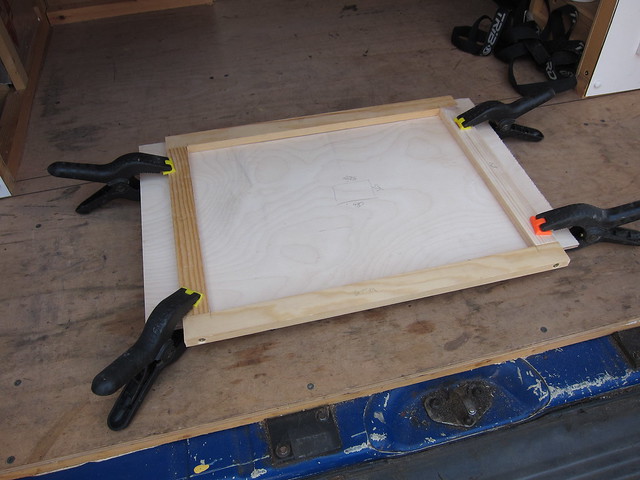
(here clamped to a bit of thick ply to keep it straight while the glue dries)
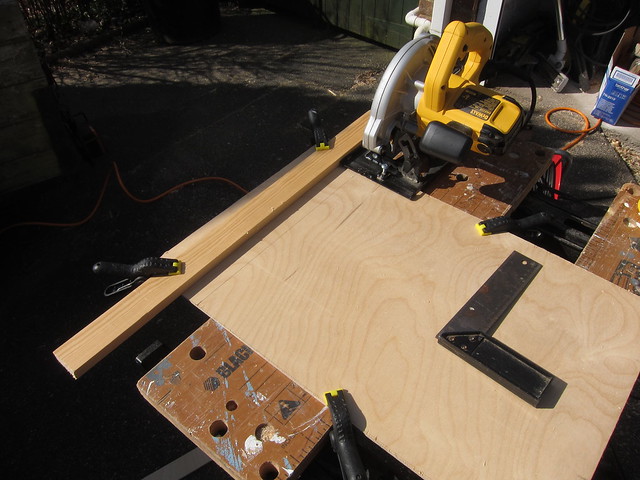
Cut out a piece of thin ply to glue to the frame:
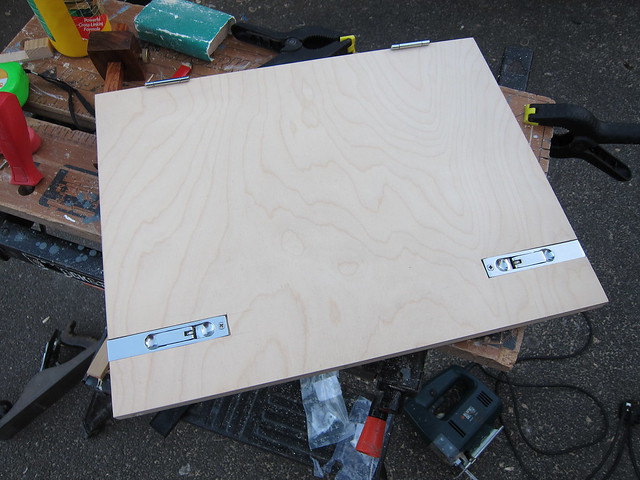
Needed something to keep it shut, and after a bit of deliberation went for flush bolts, usually used on one half of French doors. Looks quite sleek:
Filled with insulation:
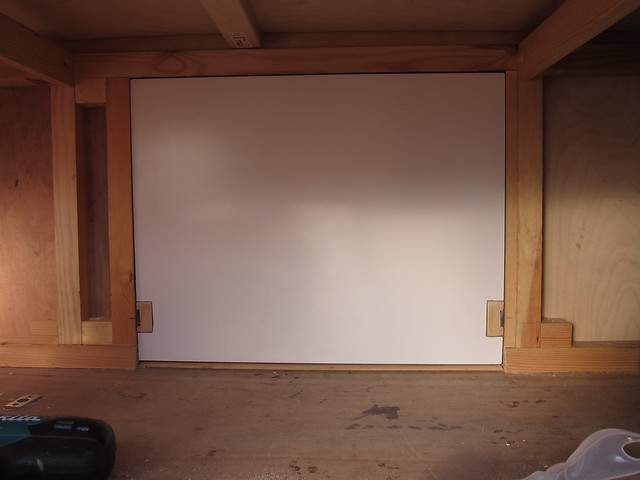
And in place, having glued a piece of the PVC-coated ply onto the back:

As it looks from inside the boot:
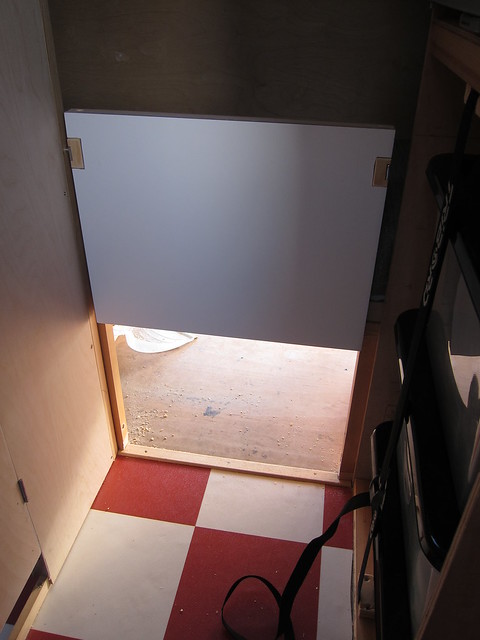
I drilled an extra hole so that one of the bolts can be used to hold the hatch open when needed:
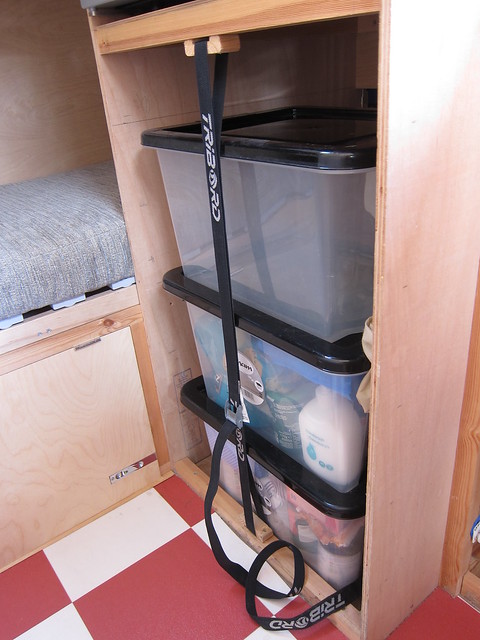
While I was rummaging around in the aisle, I remembered that this bit really needs some proper drawers eventually, although actually the temporary bodge works pretty well 🙂
In other news, we drove to the Alps to go skiing. Didn’t actually stay in it in resort, because the water tanks aren’t insulated and bad things would happen in consistent sub-zero temps. We did a night in an aire on the way down, one in Bourg St Maurice after our cheeky seventh day on the slopes, the inevitable couple of nights in the Disney car park and another aire night closer to Calais. It snowed a surprising amount for Easter:
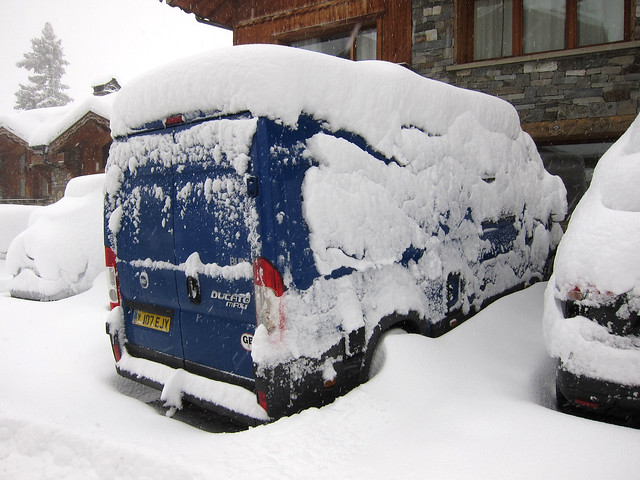
1,700 mile round trip, didn’t break down, happy with that 🙂
Mike_DFree MemberPosted 9 years agoMine’s been up five years, it’s been fine. Double-skinned, insulated, cosy 🙂
Mike_DFree MemberPosted 9 years agoDucato/Boxer/Relay? Wide enough for a 6ft bed crossways (just about), long enough (L3 or L4) for 4.2m lengths of timber (as long as you don’t mind the ends being between the front seats), 8×4 sheets will go on the floor between the wheelarches.
Thread plug 🙂 http://singletrackworld.com/forum/topic/family-friendly-bike-carrying-camper-build
Mike_DFree MemberPosted 9 years agoMost people are going to struggle to notice a difference with aero wheels. Everything else on the bike is the same, and the wheels don’t contribute much to drag anyway. You’re better off getting yourself a bit lower and tucking your elbows in.
Mike_DFree MemberPosted 9 years agoWhen I bought my (second hand) road bike, it had Ksyrium SL wheels. They’re about 1,600g, I think, so not that light by modern standards. They were fine, then the rims wore out. It was impossible to get replacement rims (because they were more than five years old…). Needed wheels in a hurry for a big ride, had little money, so bunged the Mavics on ebay as Spares or Repair and bought some dirt-cheap Shimano snotters from Merlin. They were £80 IIRC, and weigh the best part of 2kg.
I noticed the difference for roughly the first ten minutes. If there actually is a performance difference it’s not one I can measure. Subjectively, the bike’s marginally harder to hang back up in the shed 😉
Mike_DFree MemberPosted 9 years agoAlex: Bed is 130cm wide, so 7cm narrower than a standard double. It’s substantially wider than the rock’n’roll bed in our previous van 🙂
Mike_DFree MemberPosted 9 years ago🙂
There’s this as well — MiL has been busy and made a cab curtain. We wanted it completely out of the way when driving, so it’s held up by
neodymiumyumneodiumyymypowerful magnets stitched into pockets at the top and some steel washers self-tappered into a handy bit of trim: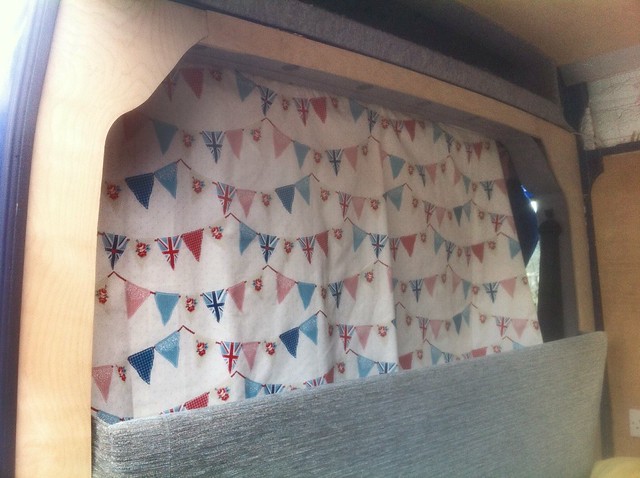
It does go all the way to the side, it was mid-putting-up in the picture…
Mike_DFree MemberPosted 9 years agoExtra update ‘cos I found some stuff I’d not posted..
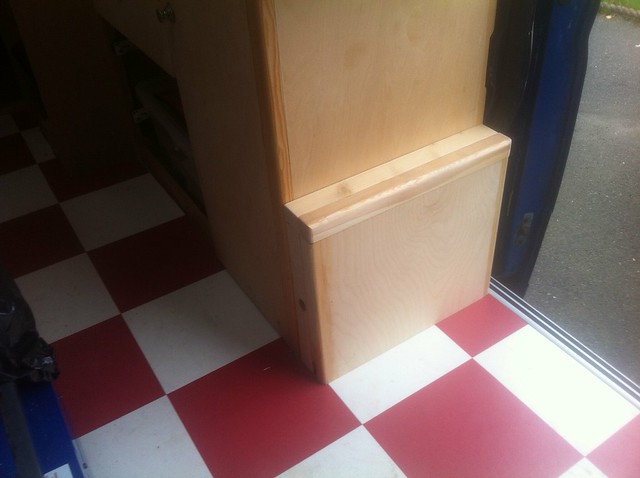
Ages ago I started making a slide-out support for part of the bed. The smaller hinged flap needs supporting at the end of the kitchen, and there needs to be an extending piece to come out into the aisle to hold up one end of the large flap. My first pass used crappy runners, so step one was to take it all apart again and use some better runners that actually hold it straight:

I’m not sure now why I decided to make the fixed part of the support sit outboard of the sliding part. Maybe because I just want to make things unnecessarily difficult? Here’s the fixed part before fitting:
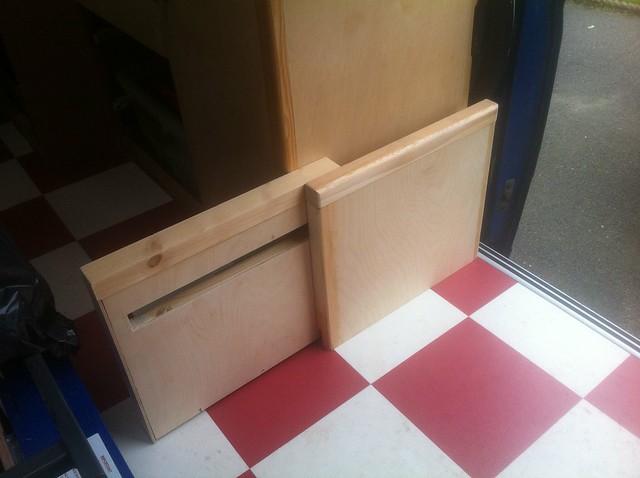
It’s held on by the ply closing panel at one side and by the timber stub at the other, which goes through the slot in the sliding piece. The finished thing looks like this when closed:
Opens like this:
And the bed flaps rest on it like so (just one shown here, I was standing in the way of the other one):
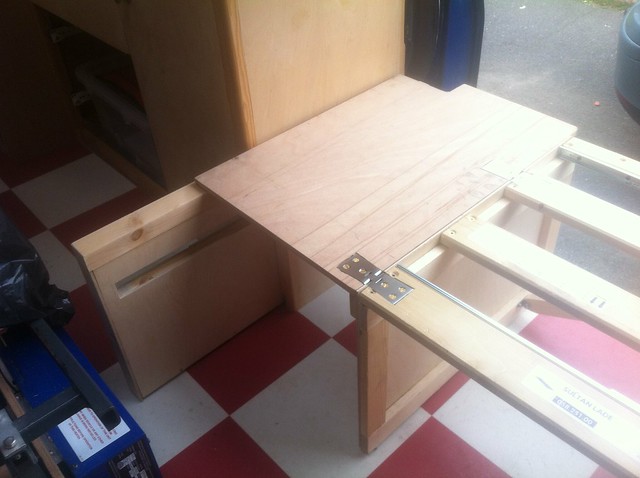
I had to do a bit of trimming and notching of the large flap so it cleared various corners and seatbelt brackets and could actually extend far enough to reach the support. While I was at it I drilled a bunch of holes in it:

This is mainly in the interests of getting some air circulating under the mattress, but it also saved about 400g in weight. Pretty trivial in the context of a 3,500kg van, but that’s a couple of extra bottles of beer we can carry 😉
The fully-deployed bed platform now looks like this:
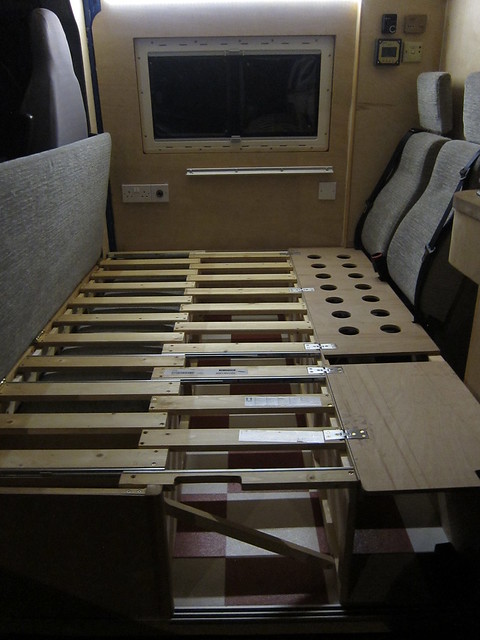
Pretty pleased with that 🙂
Mike_DFree MemberPosted 9 years agoDid you have to set such a high standard Mike D? I was perfectly happy with my stacking boxes and camping bed before your thread
STW: Raising the van conversion bar 🙂
And +1 for ventilation to combat condensation.
Mike_DFree MemberPosted 9 years agoThe most useful thing I’ve ever heard on this topic is to imagine that you’re pushing a shopping trolley off a cliff 🙂
Mike_DFree MemberPosted 9 years agoExpect one or two more updates shortly – heading to the Alps at Easter so keen to add a few things first. We’re not staying in it (except a night on the way down and a couple more at Disney on the way back), so I don’t need to worry about tank insulation or anything. Thankfully…
Mike_DFree MemberPosted 9 years agoYou’re welcome 🙂
Big level was borrowed from my Dad, he got it from a local hardware shop I think. It’s suffered a bit during this job and doesn’t have a handle any more. Or a level. So really it’s just a giant ruler now. Still v useful. Must find a replacement…
Mike_DFree MemberPosted 9 years agoSo after something of an over-winter hiatus, we’re back on it 🙂
First up, the washroom rooflight sprung a leak. Which was annoying. The only way to be sure of sorting it was to pull the whole lot out and start again:

Seems to have worked.
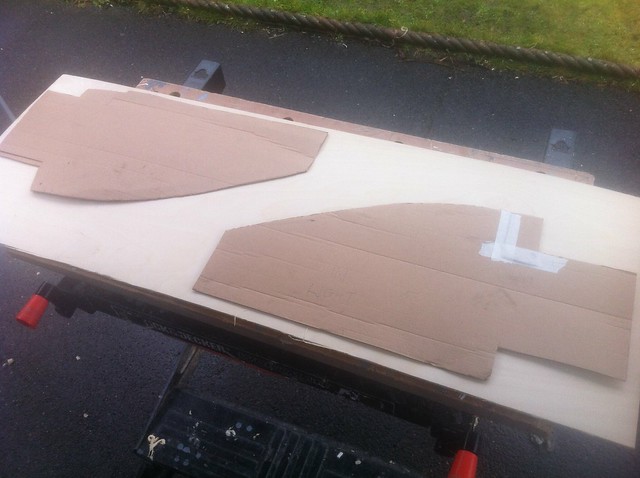
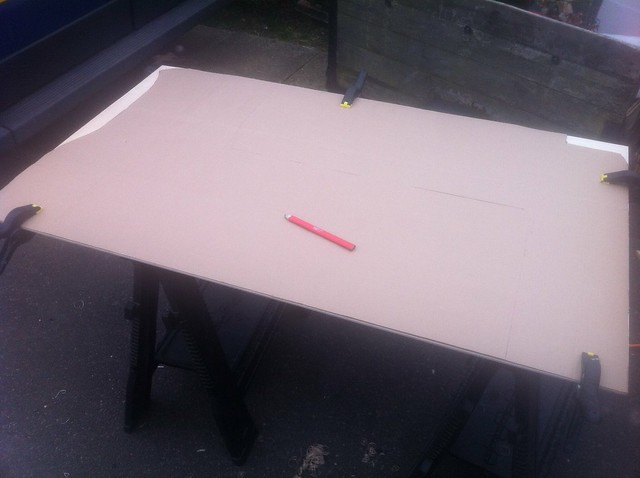
After that, we looked at tidying up the shelf over the cab a bit. Thus far it’s all been exposed insulation and a slightly manky plastic shelf. Made some cardboard templates:
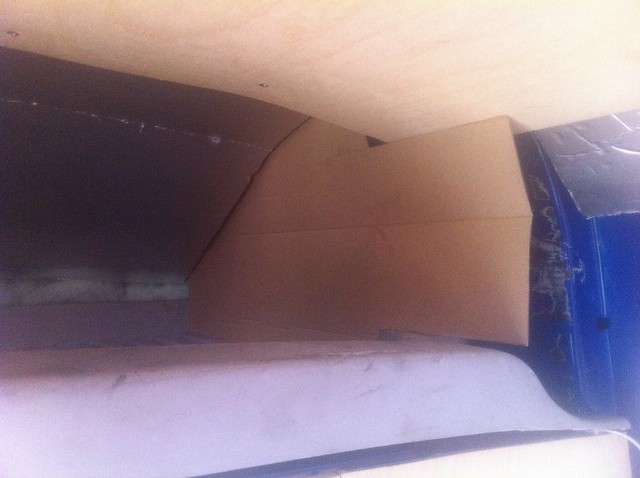
Transferred to a handy plywood offcut that was about the right size:
Cut out and stuck in:
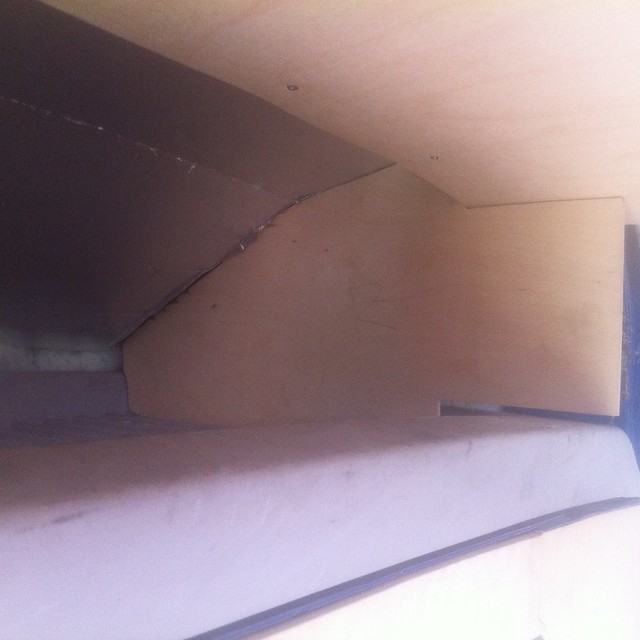
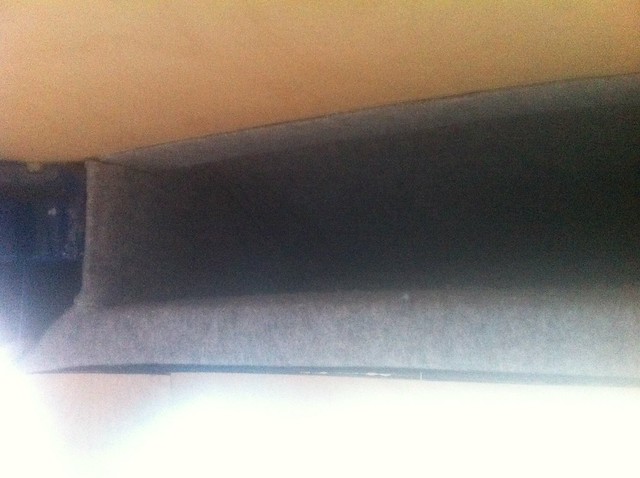
They’re Sikaflexed to blocks stuck to the van roof, and to the side of the plastic luggage shelf. Once they were set, Mrs D spent an afternoon getting dizzy on spray glue and lined the whole lot with magic stretchy carpet:
At some point there’ll be another ply panel as a face to the whole thing, we’ll come back to that…
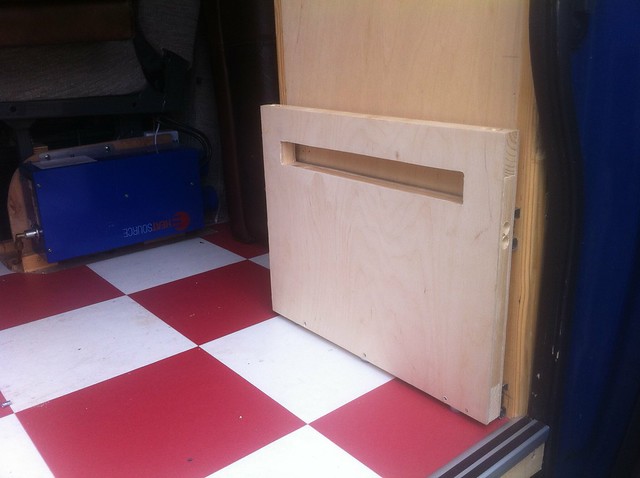
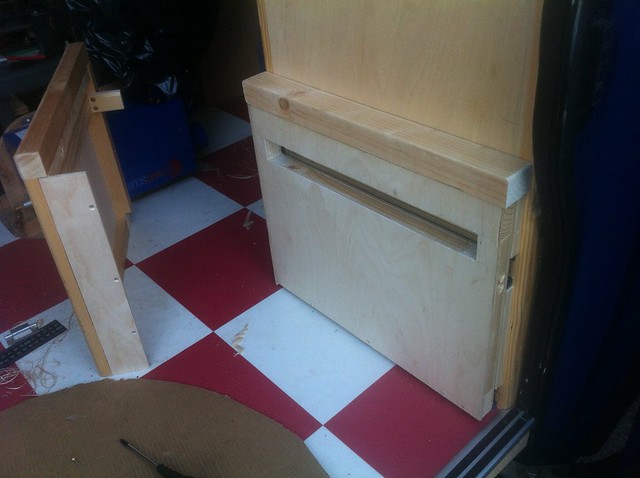
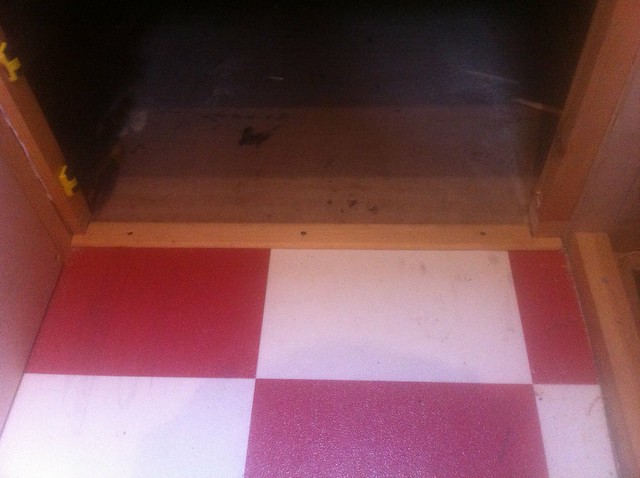
Made a start on an access hatch to go under the bottom bunk. At the moment there’s just a hole to the boot space. Put some new uprights in the appropriate places, chopped out the batten that ran across the floor:
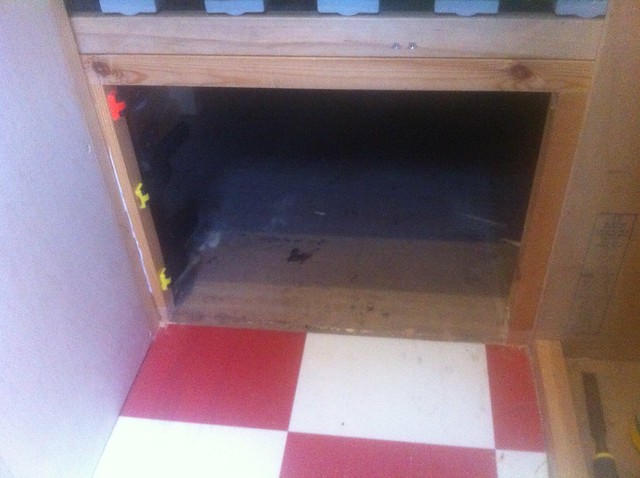
Put in a timber moulding to cover the edge of the floor — this’ll come out and go back in again once we’ve put some flooring in the boot.
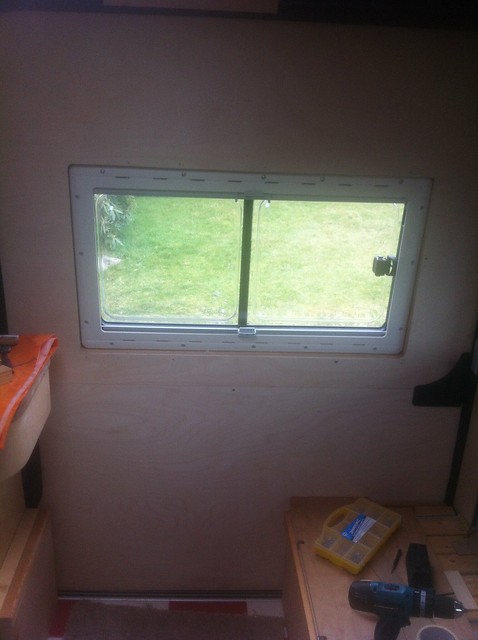
Started to make a door, but thus far it’s just two bits of wood so not really very interesting. Moved on to lining the sliding door, which I keep forgetting hasn’t been done:
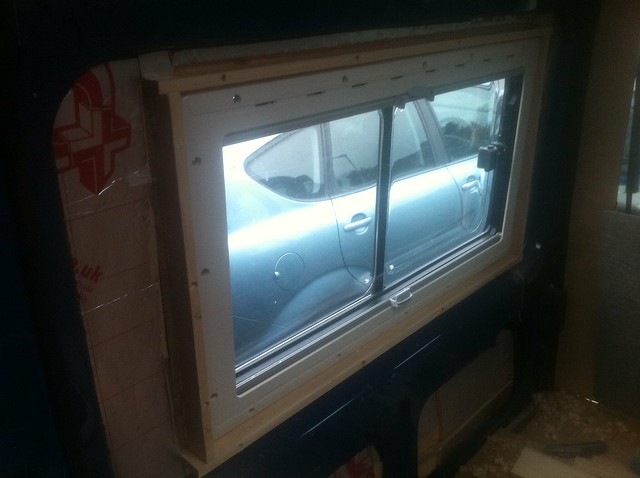
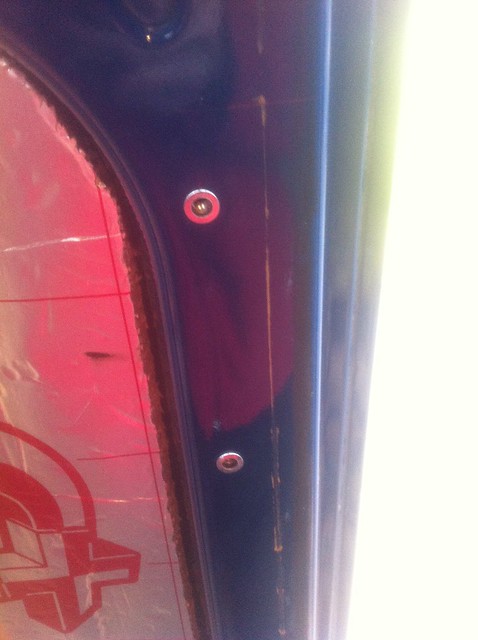
I’ve made a reveal around the window as per the other side of the van — the panel will be further in than the face of the window, so something needs to bridge the gap. Also boshed in a couple of rivnuts for an extra handle to make the door easier to shut from the inside. It’s big and heavy and not that easy to fully close:
After much measuring, marking, faffing and cutting:
Had to do it in two pieces, because the door’s 95mm wider than a standard sheet of plywood. Although it works better on that orientation anyway because the ply’s bendier on that axis and fits the curve of the door. The window aperture was marked out as close as I dared but left a few mm extra all round and will plane/sand it down flush later.
At this stage the bottom of the door still looked like this:
Oh yes. Homely. More cardboard, more plywood:
Fitting the lower panel was challenging, because with the door shut the front half is obscured by the bench seat. And with it open it’s outside the van. I ended up Sikaflexing half the door with it half open and the other half with it shut, then half opening it again to slide the panel in and holding it with one hand while boshing in a couple of temporary self-tappers to keep it all in place while the glue goes off. End result:
Marvellous. The join between the two sheets will be filled and sanded, and there’ll also be a padded panel across there which will hide it.
Mike_DFree MemberPosted 9 years agoI’m going to suggest getting the front end lower. Spacers out from under the stem to try out at no cost, flat bar if it feels like it’s working.
Mike_DFree MemberPosted 9 years agoYour are quite right, there was a recall for this but, alas it was not accross the board, only vehicles whose VIN number falls within a specific grouping were elligible, mine doesn’t. Fiat are not interested.
Ah, fair enough. Vaguely surprised, given that our 2007 3L Ducato was sorted out (only last year, previous owner had never got around to it…) FoC.
Mike_DFree MemberPosted 9 years agothen the spare wheel detached itself from the underside
There was a recall on the spare wheel stowage several years ago, so they should have sorted that for free 🙂
Mike_DFree MemberPosted 9 years agoI’ve used my own domain for years, have been through five or six ISPs, number’s never changed. I’ve also had the same mobile number since 1994 (except when they changed the dialling code from 04xx to 077xx 🙂 ).
Mike_DFree MemberPosted 9 years agoThe skinflint in me is wondering what the MPG is though…
Low-20s at a guess. It’s curiously cheap, though.
The seats/berths thing is often an issue. It wasn’t until relatively recently that coachbuilts came with proper belted seats in the back, and there are still lots of new ones on the market that sleep more than they can actually carry. Daft.
Mike_DFree MemberPosted 9 years agoBuy an old Talbot with a U shaped rear lounge! with toilet and shower facilities!
Bit hopeless for actually transporting two adults and a baby in safety, though, on account of insufficient seatbelts :/
Anyway, splendid idea in general, go for it. We bought this when we had one 2yo:

and used it for the next seven or so years. Youngest first went away in it at 8 weeks. Great times. And yes, it had a toilet (Portapotti in a cupboard, but did the job(bies)). We had an awning for extra space. Now that the kids are somewhat bigger (and we found ourselves bringing loads of bikes and inflatable canoes and things with us) we’ve gone a little bigger 🙂
 Mike_DFree MemberPosted 9 years ago
Get three tubes of cheap toothpaste and three paper plates. Ask for three volunteers. Tell them you need them to take part in a race, and a the count of three they need to get all the toothpaste out of the tube and on to the plate as quickly as possible. Count them in, watch them go.
One of them will think they’ve won. Then explain that that’s only the first part — the winner is the first person to get all the toothpaste back into the tube. Hilarity ensues.
Then explain that stuff posted on the internet is just like toothpaste — once it’s out, it’s out for good. If you want to make the point another way, get one child to Snapchat another one, get that one to screen grab the message and MMS it to a third. Presto — the “vanishing” Snapchat snap is preserved for ever. And take it from there.
Tried and tested 🙂
Mike_DFree MemberPosted 9 years agoI think this is where I plug my van thread 😉
Probably bigger/more equipped than you’re after, but ideas there for the taking if anything catches your eye…
Mike_DFree MemberPosted 9 years agoI didn’t have a great deal to do with Privateer towards the end, but I’m reasonably sure that its demise wasn’t as simple as “losing money”. Rouleur (the company, not the mag) changed hands (again, not as simple as that, but the ownership structure changed) and had a portfolio of a successful high-end road mag, lots of successful high-end road books, various spin-off high-end road merchandisey products… And an MTB mag that wasn’t particularly growing (although not plummeting either) and didn’t really fit in with the rest of the stuff. Focussing their efforts on the road stuff (and getting back a bit of the salary bill) made sense, really.
From what I know of the numbers, something along similar lines in terms of frequency, price and production values could be made to work as a standalone, low-overhead venture. Personally I have high hopes 🙂
(Oh, and cheeky plug — if anyone fancies a flavour of Privateer stuff, all my bits are here[/url] 😉 )
(And I don’t have a Jones…)
Mike_DFree MemberPosted 9 years agoThat’s just the stuff I can remember 😉 There’s a new incentive in that we want to get rid of our tatty conservatory, which is currently employed as a storeroom for van bits and sheets of plywood…
Mike_DFree MemberPosted 9 years agoJust ground everything to the van bodywork/chassis. The nearer the earth points are to the lights/appliances the less wire you need, but also fewer earth points are better in terms of troubleshooting. Ours has got one each side of the van. We used these:
Sand off a bit of paint somewhere, self-tapper (or bolt, if you can get access) it on, stick all the neg wires in it. Job bejobbened 🙂
Mike_DFree MemberPosted 9 years agoGo to Screwfix, get a caulking gun and a few tubes of Sikaflex EBT+. Mental strong. Lots of people also swear by Stixall from Toolstation — not tried it myself but it seems like essentially the same stuff. Stays a little bit rubbery when it’s set so it copes well with vibration. Our van is pretty much held together with it 🙂
Mike_DFree MemberPosted 9 years agoWay uncheap option, but XTR Di2 with the synchro shift gubbinses turned on.
Mike_DFree MemberPosted 9 years agoProbably finishing the washroom — put in shower tray, finish lining the inside, add lighting, basin, cupboard. Will mean dropping the waste tank to add another inlet. Also still need a lot of drawers and cupboard fronts making for the rest of the interior. And another overhead locker. And lining the space over the cab. And lining the sliding door. Boxing in under the travel seats. Tidying wiring. Control panel for lights and level gauges and stuff. MANY THINGS 🙂
Mike_DFree MemberPosted 9 years agoOh, and long-time followers will have noticed that we didn’t manage to get the interior finished and painted within a year — we’ve now had the van for 13 months. We did manage 33 nights away in it in 2014, though, which seems like a result to me 🙂