Forum Replies Created
-
Danny MacAskill and Chris Ball among 2024 Hall of Fame nominations
-
Mike_DFree MemberPosted 7 years ago
tooFATtoRIDE: If you’re still looking, go to https://www.gov.uk/government/uploads/system/uploads/attachment_data/file/210809/changes-to-seatbelt-installations-guide.pdf , scroll down to page 9 and look at “Specific requirements for M2 panel van conversions”. It’s actually the requirements for minibus converters, but the physics is the same. Perhaps weirdly, if you’re doing this for your own use there are no legal hoops to jump through.
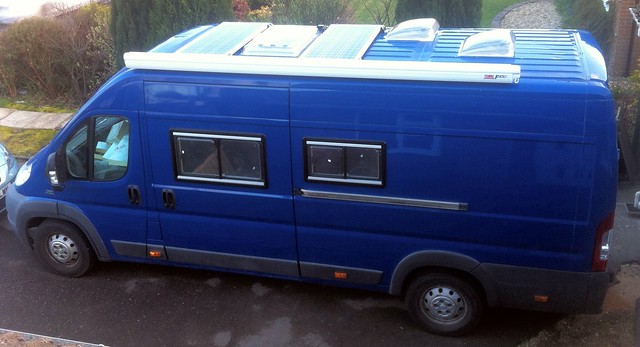
Mike_DFree MemberPosted 7 years agoOur Ducato is 6.4m long. It can be a bit of a faff to park (needs about 1.3 supermarket car park spaces) but it’ll go most places. Given that we’ve got things you’re not looking for (kids bunks, a washroom) you could easily have something shorter. For a two-berth I think I’d be looking at an SWB, medium roof Ducato/Boxer/Relay with a transverse bed at the rear over a bike garage.
Mike_DFree MemberPosted 7 years agoI used to be VAT registered (well below the threshold) because at the time it made excellent sense – on the flat rate scheme I could charge 20% VAT but only paid 11.5 or 12%. Some admin overhead but it was definitely worth it. No idea what the flat rate rates are these days, mind.
Mike_DFree MemberPosted 7 years agoIt’s an odd quirk of big minibuses that they often aren’t actually capable of carrying the weight of all the passengers 🙂 The payload for a twin-axle Transit minibus is apparently about 1,400kg, which is 82kg per passenger (including luggage). Wouldn’t be great for a rugby team 🙂
Obviously you’ve taken a load of seats out, probably saving 15kg or more per seat.
I still need to weigh mine…
[edit: Insurance/breakdown cover are likely to be slightly more awkward with a camper over 3.5t, but still doable – just less choice/more expensive]
Mike_DFree MemberPosted 7 years agoShould have a plate on it with the MGW. You’ll definitely want to check, depending on your license you might not actually be allowed to drive it…
[edit: Brief Google says MGW for one of those is ~4,100kg. Which is over 3,500kg. If you’ve got a post-1997 driving license you may have an issue. You could downplate it but then you’d have payload problems.]
Mike_DFree MemberPosted 7 years agoI have to admit I doubled up on the panels – they’re bolted down as well. I think the weak link is how well the paint is stuck to the van rather than the Sikaflex 😉
Mike_DFree MemberPosted 7 years agoFour 8×4 sheets of lighweight laminated ply is about 70kg, so not that much 🙂 Certainly considerably lighter than the seats that came out in the first place…
Mike_DFree MemberPosted 7 years agoI’m probably a bit distant, but FWIW most of the bits of wood in our van are either stuck in with Sikaflex. Some of them have a few self-tappers into hollow ribs in the van sides, although some of those were just to hold them while the Sikaflex sets. A few (the framing for the rear bulkhead, for example) are bolted into rivnuts. And also stuck in with Sikaflex 🙂
Essentially, in 95% of cases the answer to “how do I stick X to Y?” is Sikaflex 😉
Mike_DFree MemberPosted 7 years agoI wasn’t feeling very mechanically sympathetic when my efforts to replace a fuel leak-off pipe resulted in a sea of diesel across the drive and down the road 😉
Mike_DFree MemberPosted 7 years agoAlex: Routine servicing (which is a bit of a dilemma, as the official service intervals are over 20,000 miles which would be about every four years, so it gets done slightly more often than it ought…), brake pads, tyres. Needed a new engine battery a few weeks back (the one that came out was the original, so nearly 10 years old) and I’m about to embark on replacing the wiper motor. Also replaced a couple of catches and rollers on the sliding door.
Mark: That was Plan A, and I actually have marked-up blanking plates in the garage. But they’re stainless steel and having fitted one 12V outlet into one of them I decided life was too short 😉 Yours are v.tidy.
Mike_DFree MemberPosted 7 years agoOoh, crikey, an update!
Hidden from the casual observer for coughcough years has been this nasty jumble of nastiness that passes for a “switch panel” (there are switches, you just can’t see them because I undid the panel before taking the picture).
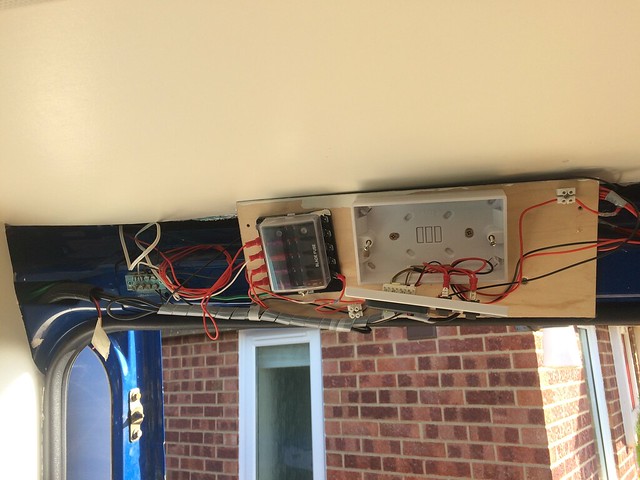
Various companies will charge zillions of pounds for switch panels, but I already had the actual switches and gauges and things, so just needed a tidy panel to mount them all in. A trip to Wickes yielded an aluminium door push plate for the princely sum of £3. Bargain.
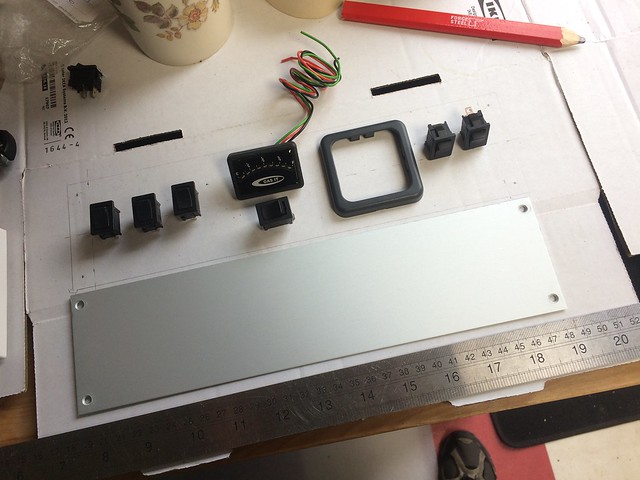
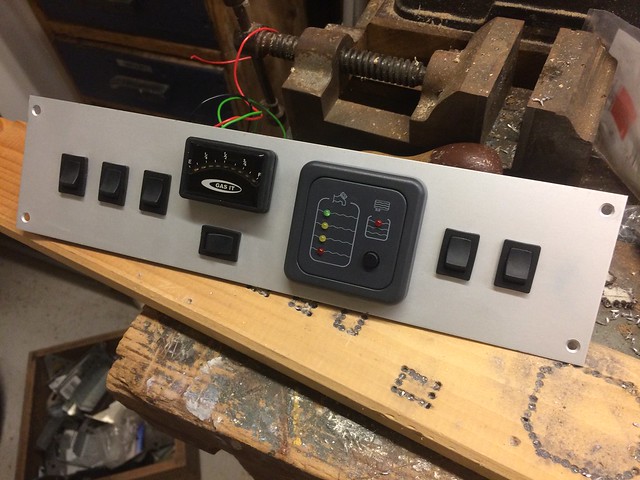
Having decided where everything will go (L to R: light switches, gas tank gauge, water and waste tank gauge, fridge, water pump) I smothered the plate in masking tape and marked it up:
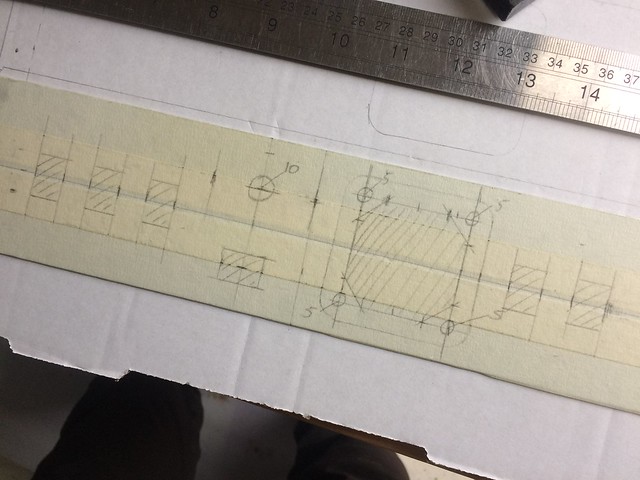
Drilled lots of holes, attacked with a Dremel, filing:
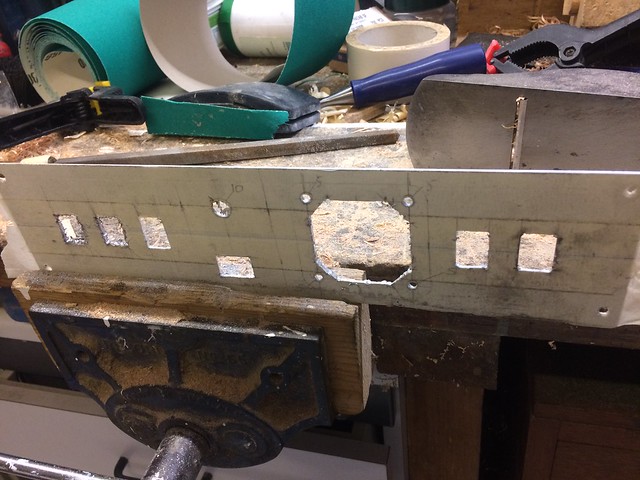
Peel the tape off, clean up, decide more filing needed:
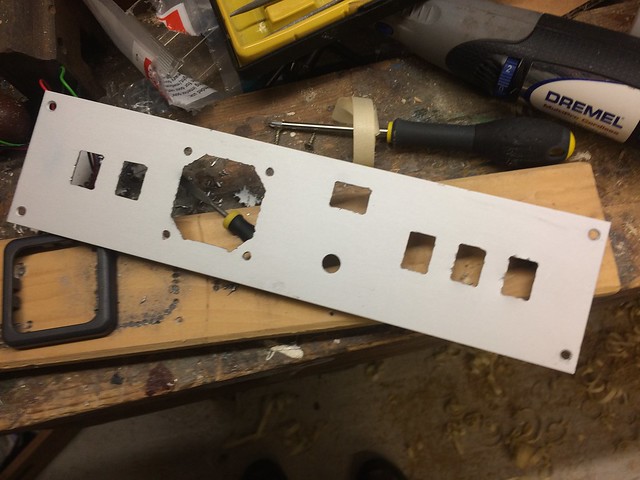
And then put all the bits in, with this actually rather pleasing result:
I used another plate (cut down a bit) to mount this little amplifier in:
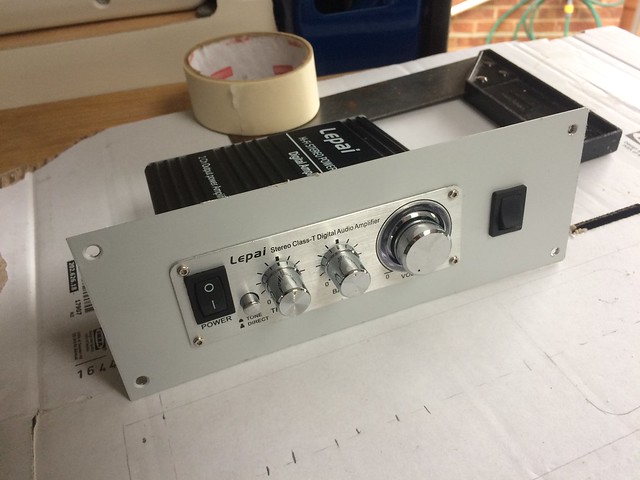
There’ll be a Bluetooth audio receiver tucked away so we can stream music from phones and tablets and things.
Side by side:
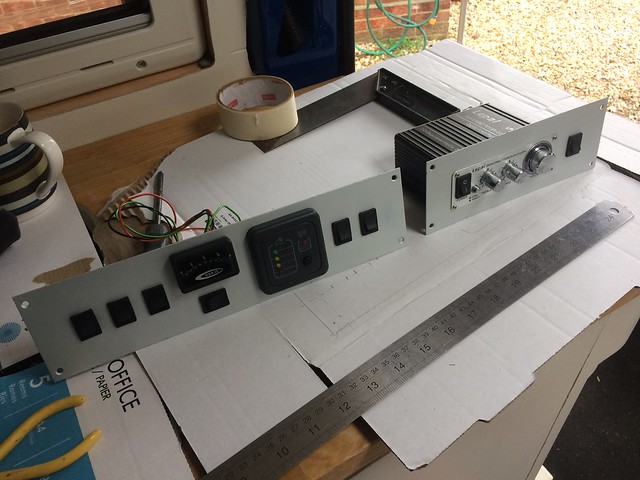
Looking OK, I think. Obviously they need somewhere to go in the van, which is the next bit…
Mike_DFree MemberPosted 7 years agoAh yes, weight. Erm, not yet 🙂 My eyeballing of the suspension when fully laden and back-of-envelope calcs suggest that it’s fine. I plan to weigh it next week, in fact, before adding the last few bits. You know, in case I have to leave them out 😉
As Alex says, the extra high top would probably help, although with the extra metal they’re a bit heavier again – I forget how much, 50-60kg springs to mind. That said, if you get one with the smaller engine you’ll get that back – our 3.0l lump apparently adds 90kg compared to the 2.2 :/
If you tweaked the layout a bit you might get a triple seat in the back, or fit a rear-facing one behind the front seats, or as suggested leave the double passenger seat in (although they’re not very adjustable or massively comfy). Five berths in a panel van conversion is tricky 🙂
Mike_DFree MemberPosted 7 years ago+1 for compressor fridges. The only time our similar setup has got close to letting us down was over a week in the bottom of a vertical-sided valley in Switzerland – the van didn’t see direct sunlight until the afternoon, and it rained about half the time. Still kept going, though 🙂
Mike_DFree MemberPosted 7 years agoWe used a Propex for heating and a second-hand Carver Cascade water heater for, er, hot water. Both running off an underslung LPG tank. Propex is the size of a big shoebox, Cascade is about as compact as an insulated 9l water tank can be. Hot water on tap seems like an unnecessary frippery but once you’ve had it it’s hard to go back 😉
Mike_DFree MemberPosted 8 years ago/tap tap
Is this thing still on?
Found some pics that don’t seem to have made it onto this thread. Wibbly-wobbly flashback effect to summer 2015 when the van made a brief appearance on the telly:

About 2km from the top of the Col de Cabre – minor climbs for the being-able-to-see-anything win 🙂
Nothing much happened then until spring, when I sorted out the hitherto rather temporary boot shelf. Dug out a bit of 6mm ply and enholerised:
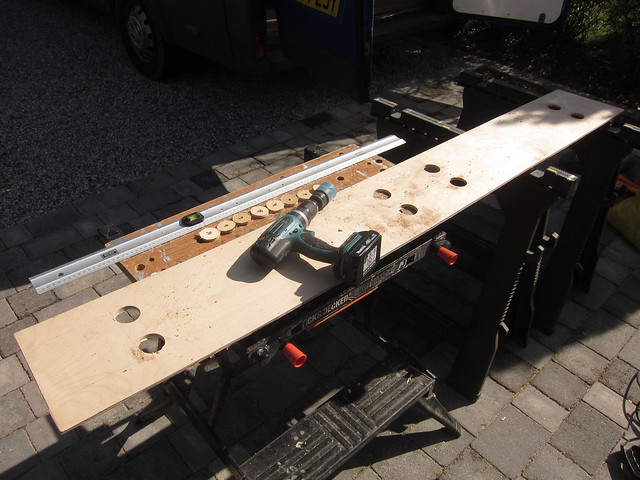
Used the router to join the holes:
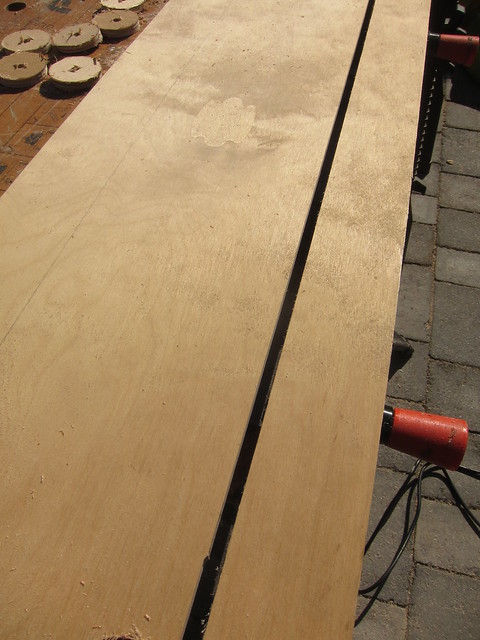
Offered up to check the fit:
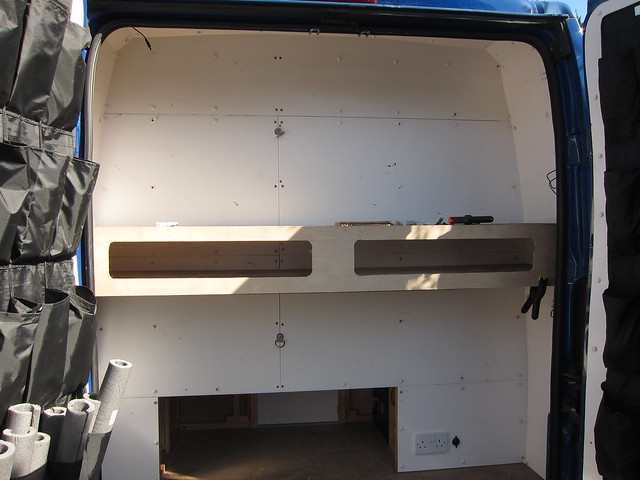
After pondering lots of options to cover the shelf (and floor), I took a chance on some checkerplate-style vinyl because it was cheap:
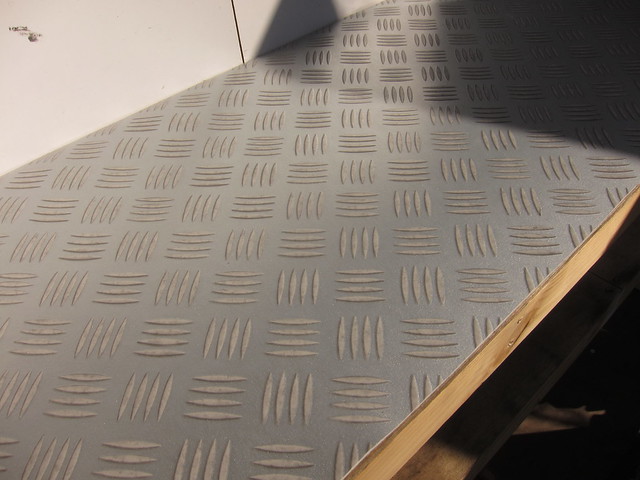
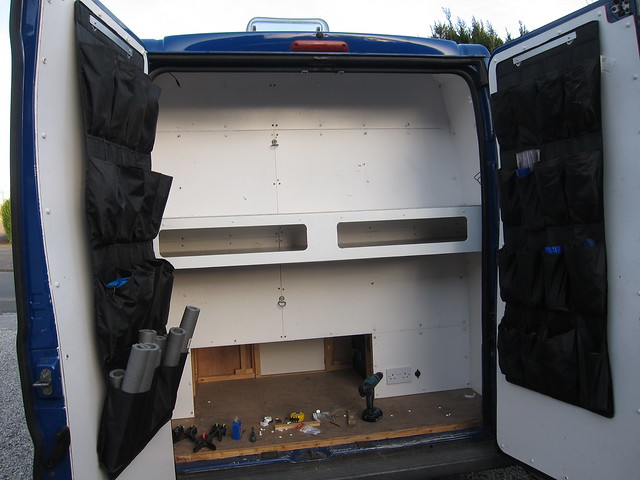
Lasting OK so far. Painted the panel and attached it properly:
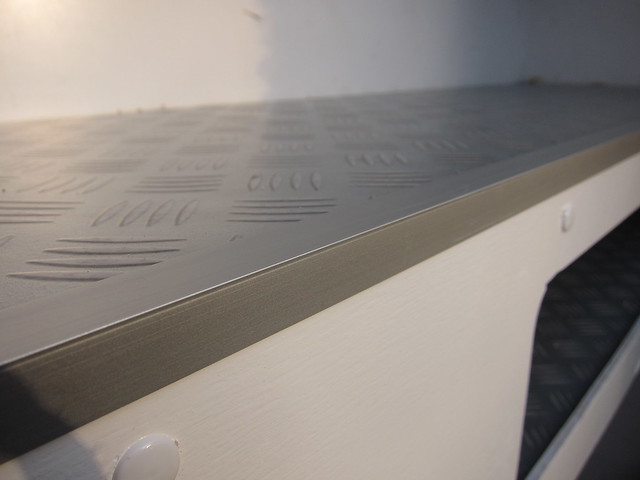
Added some anodised aluminium angle to finish off the corner:
Still a few finishing touches to come, stick with it 🙂
Mike_DFree MemberPosted 8 years agoLooking good 🙂 Are you carpeting the rest of the sliding door? I’d be mildly concerned about condensation on the exposed metal. Raised rear seats/floor/swivels very smart 🙂
Mike_DFree MemberPosted 8 years agoPlenty of room for a washroom/shower and inside bike storage in a 6.4m van 🙂
Alex: Forgot the VAT, oops 🙁
Mike_DFree MemberPosted 8 years agohttps://www.ebay.co.uk/itm/262406281207 – and you’d get a few hundred quid back selling on the ramp/winch/hand washer/etc 🙂
Mike_DFree MemberPosted 8 years agotymbian: Ours has a hatch under the bottom bunk and will still carry 4m lengths of timber. Ply sheets can be persuaded into the aisle via the side door (just). How many berths do you need? I did have all sorts of grand flip-up bunk/full-height bulkhead hatch ideas for carrying big stuff, but decided the need wasn’t worth the effort 🙂
Alex: Get on with it 🙂
Mike_DFree MemberPosted 8 years agoNice. Simple but effective, and full marks for speed – we’ve had ours 2.5 years and it’s not finished 🙂 I like the plastic crate storage. Happy to have vaguely helped by proxy 😉
(Should probably update my own thread at some point…)
Mike_DFree MemberPosted 8 years agoDon’t beat yourself up about the rooflights, ours have all been in and out at least twice 🙂
Floor is 12mm ply on 25mm battens with insulation between. Walls (and most of the furniture) are 4mm. Ceiling is 3mm. Basically everything is as light as seems reasonable, although I’m still wondering if we could have got away with 9mm on the floor. Bit late now, mind 😉
Black will look good, although a couple of weeks in the south of France last year reminded us of one reason why most professionally-built vans are white…
I know a washroom and hot water might seem like excessive frippery (and to a degree they are), but as children get older a degree of privacy becomes worthwhile. Also once you’ve got water and gas on board, hot water is but a small step 😉
Have fun!
Mike_DFree MemberPosted 8 years agoWe looked at the high roof ones, but they were thin on the ground when we were buying and considerably over budget. Masses of space, though, good choice 🙂 Just watch your payload, there’s a fair bit of extra steel up top but the MGW is the same as all the others…
Mike_DFree MemberPosted 9 years agoI’ll measure up to remind myself — in my head it’s down around 500mm, 5 bikes can be done but involves taking pedals off. There’s a bit of “free” depth due to the curve of the rear doors.
Mike_DFree MemberPosted 9 years agoThe little one in the middle practicing his race stare.
FOCUS 🙂
You got my lad in that one too — 403 on the right of the pic.
Been Bashing for several years and that one was the best yet. Really good bands this year, course as fun as ever, kids had a spiffing time 🙂
Mike_DFree MemberPosted 9 years agoHello 🙂
Some more update, I’m spoiling you now…
Before putting the lights in, my other half persuaded me that we should paint the interior. I wasn’t wholly convinced, because it’s not finished, but if not now, when? So much masking, then primer:
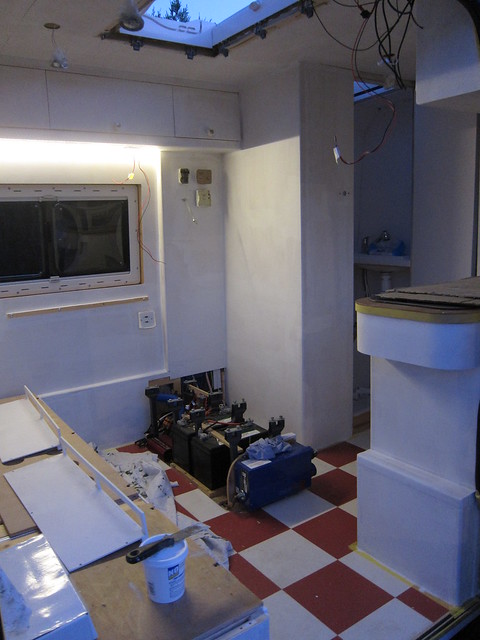
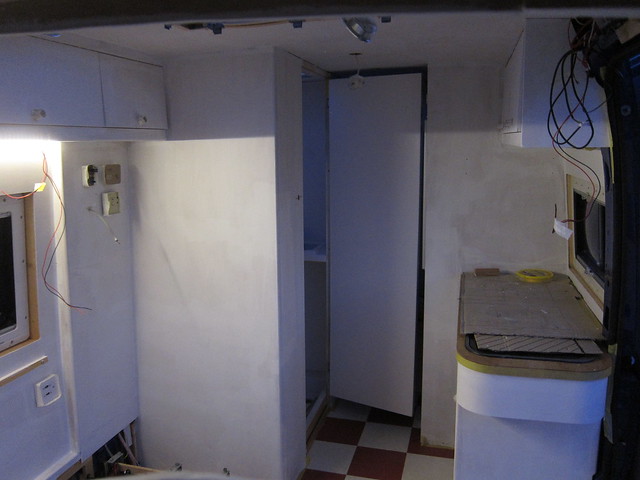
Look very carefully in that pic and you might just spot some unfinished wiring, hem-hem.
And then COLOUR:
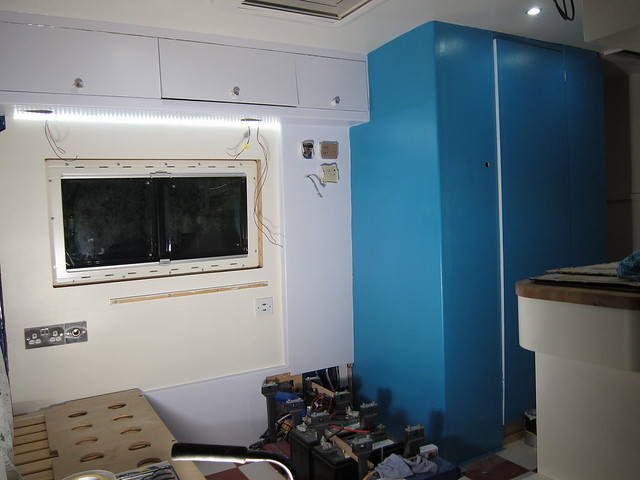
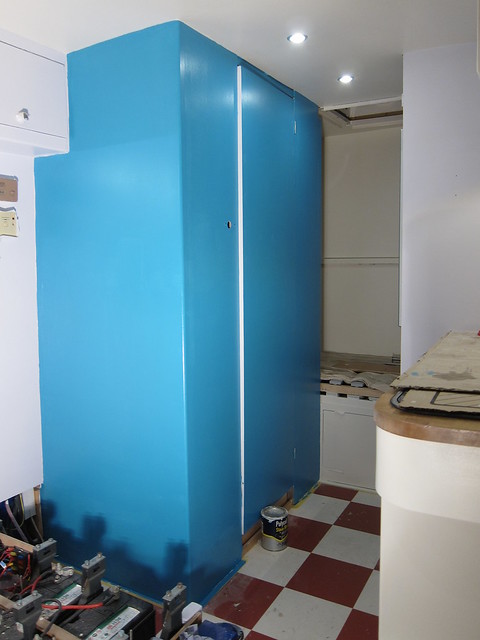
We’re not convinced by the cream panel, that’ll probably be redone in the bluey-grey that surrounds it. The kitchen and bunks are all in the cream. Another view:
Then I could put the spots in:
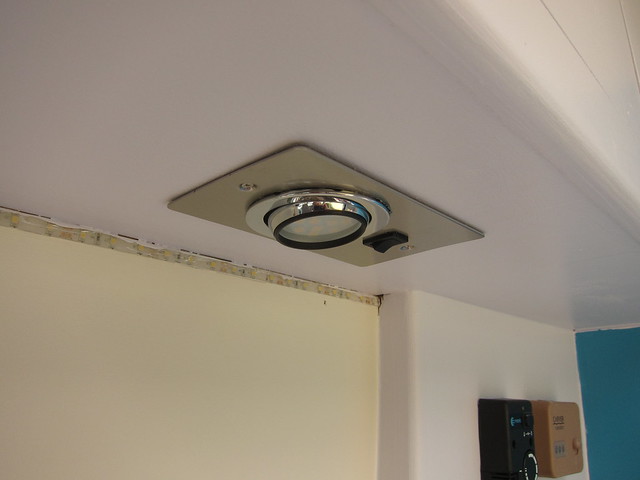
And for the full effect, seats and upholstery back in place. Still need to box in around the bottom of the seats:
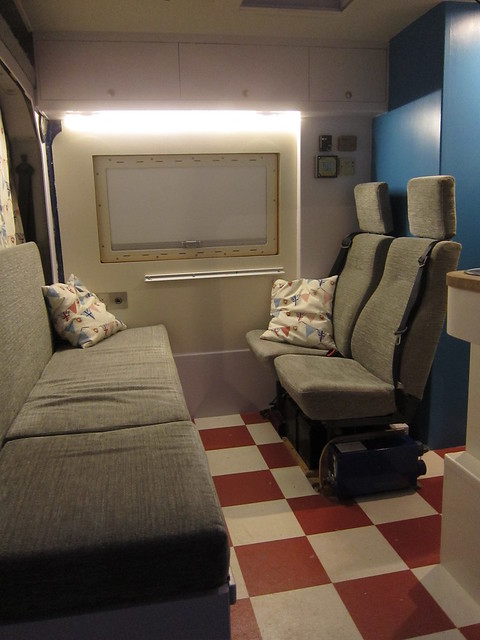
Yes, we have scatter cushions. Deal with it.
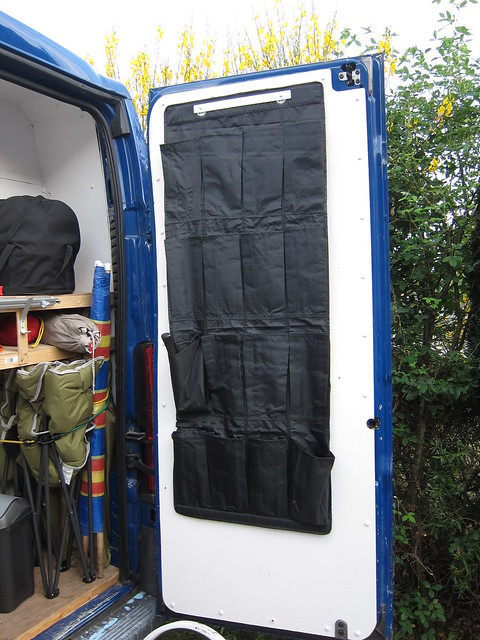
Made another little addition before we went on holiday — Ikea shoe holders on the inside of each back door. Works really well — obviously shoes go in there, but also mallet, clothes pegs, sunscreen bottle, tools, all sorts. £4 each, bargain.
And of course one of the wins of a painted plywood finish is that you can quite happily let a six year old decorate their own bunk 🙂
 Mike_DFree MemberPosted 9 years ago
Clearly there’s no one perfect solution for everyone 🙂 Our kids are 9 and 6 so there should be a few years yet.
I think depreciation will be not too horrendous. Obviously you’ll never get back what you spent on a DIY van and second-hand values aren’t a patch on pro conversions, but prices in the UK seem to hold up (and are higher to start with — you wouldn’t get much of a new panel van conversion for what 40000 euros currently is). Thing is, it’s always going to be a cost, it’s something of a luxury and we’re happy with that.
Have to say we’ve experienced, well, none of those negatives so far (including seven years with the previous van). Never been broken into, avoided unpleasant places, parked it for a week with 18in of snow on the roof and nothing broke, the solar panels keep the batteries topped up at home so we rarely plug it in. It’s a modern van, very easy to drive and very comfy — we find it way better for covering big distances than the car (our most recent trip was 2,500 miles). Never had trouble parking, most French towns have somewhere specific (and somewhere to dump your waste too). Admittedly we’ve not spent much time on the south coast of France because it’s nasty and busy (couple of nights near Hyeres because the kids wanted to swim in the Med, that was enough). Tolls well worth paying for empty roads with lots of places to stop. Does a bit better than half the mpg of the car but yes, it’s a fair bit worse. Current exchange rate sorted that out, though 😉 On our most recent trip we spent five nights on a pre-booked site, two in the Disney car park and the other nine in whatever we found — a mix of commercial sites, municipal sites and aires.
Anyway. Currently it’s working well for us 🙂
Mike_DFree MemberPosted 9 years agoNow you know how much it cost and how many hours you put in, would you do it again, Mike?
I have only a rough idea of how much it cost (until I add up the pile of receipts) and even less idea of how many hours so far 🙂 But yes, I would do it again, but not yet. This van’s built for our anticipated needs for the next few years in terms of small (growing) children and the sorts of things we like to do. Obviously those could change, but I hope it’ll be good for a good while. Eventually I’d like to build one for a couple who no longer take children on holiday with them 😉
The price of new/nearly new pro conversions is kind of moot, really, because we simply don’t have that kind of money, so one of those was never an option. Although having got this far I have a reasonable appreciation of why they cost as much as they do 🙂
Alex: I’ll dig out some potentially-useful stuff, although the Sketchup drawings aren’t exactly precision plans. Once we were satisfied that what we wanted to do would fit in a van, we got a van and most of the actual “design” work was done on the fly once we had a real interior space to look at/measure…
Mike_DFree MemberPosted 9 years agoStill going 🙂
First up, a boring maintenance job — the sliding door seal was badgered to the extent that it had holes in it and occasionally leaked, so that needed replacing. Two issues there: First, it was £95 (!); second, removing and refitting involves being able to pull the seal inwards half and inch all the way around the aperture, which my floor threshold forbade. So I had to dismantle a load of stuff, do the seal, then rebuild it. Made it better the second time, though 🙂
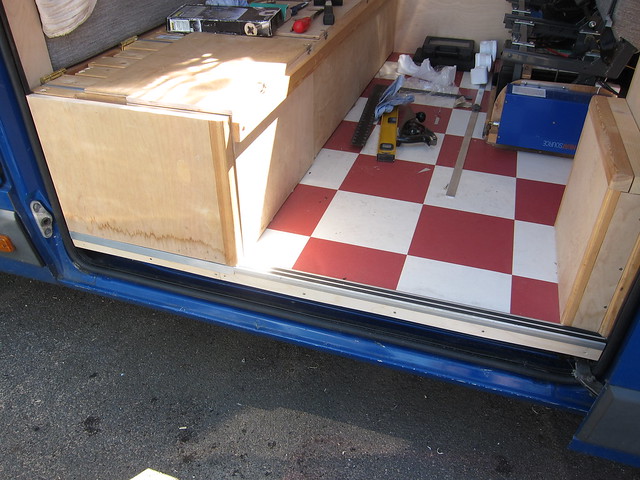
Next up, back into the washroom. Made up a frame to support my plastic worktop:

Glue worktop in place:

Drop the sink into the pre-prepared hole, having first bunged a load of Sikaflex around the edge:

Place something weighty on top until it sets:

Fit tap:

It’s a funky one that comes out on a hose so you can use it as a shower, although we won’t be doing that much, if ever. And certainly not until the shower tray is actually waterproof 🙂 Minor faff getting the pipes the right way around, then connect up the waste:

Actually, I clearly did the waste first, never mind 😉 I made another PVC bit to be a shelf across at wheelarch height and filled in that last bit of panelling (but forgot to take a picture at the time).
Then I made some reading lights to go in the bottom of the new overhead locker. Offered up the bits:
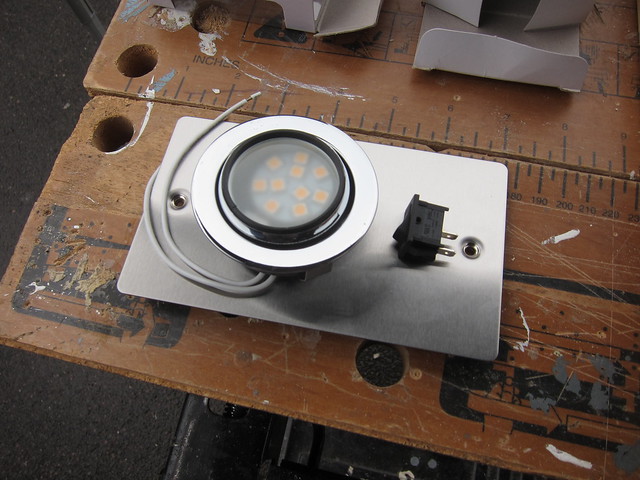
Marked up:
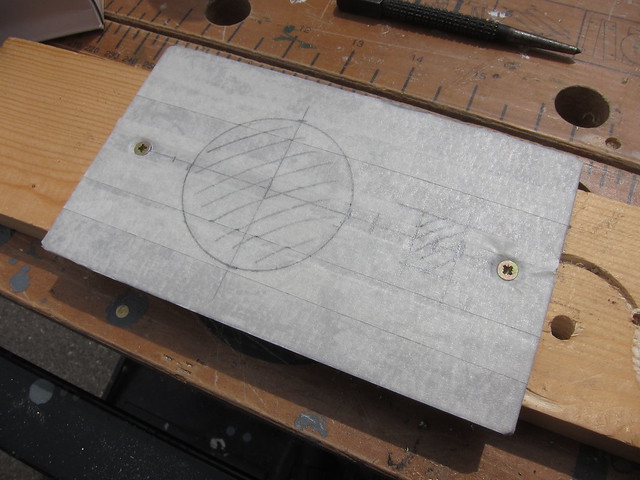
And cut it all out. Took ages, the stainless steel plates are as hard as I would have anticipated they’d be had I been thinking about it 🙂 Anyway, eventually (twice):
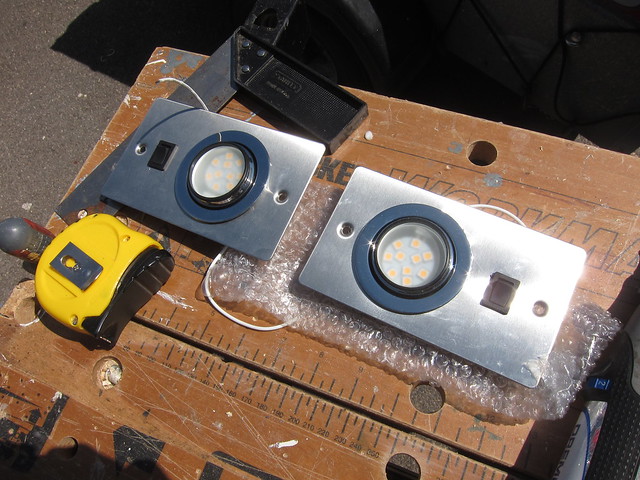
More soon!
Mike_DFree MemberPosted 9 years agoMINI UPDATE! Found a little bit of time the other day, so popped the locker doors on:

Looking something like a finished product there. The dangly wires are for some LED spots that will be recessed into the bottom panel of the locker.
Consumer unit now hidden away in the small bit of the locker:

Also picked up some dirt cheap (as in £5/pair) speakers from Maplin, which have ugly grilles but, well, cheap. Popped those in as so:

Bit of a comedy overlap with the locker on the right-hand one, but needs must. Handily, there’s factory wiring for rear speakers as far as the passenger-side door step, so connecting them up was easy. Couldn’t remember which wires were left and which right so guessed, and got it right first time. SKILLZ. Unfortunately Fiat hadn’t wired the front speakers up correctly, so the factory ones are back to front which meant the balance control had a very odd diagonal effect. Swapping the fronts means cutting and redoing factory wires, so my temporary bodge was to make the rears back to front as well… Also poked a load of wires down the back of the dash for the active sub that I found gathering dust on a shelf…
Mike_DFree MemberPosted 9 years agoOoh, tidy. Hadn’t seen those before. Using a swivelled front seat to get the length seems a slight cheat but should be OK for kids (might not even need it). Bear in mind that if you want a seat to align vertically with the front seats you’ll need to raise the floor at the back — you can see that in the pics. Obviously that has implications for securely mounting the rear seat.
Mike_DFree MemberPosted 9 years agoSummer: Drive to Mt Ventoux for a gentle pootle* on road bikes. Family will fly down a few days later, I’ll pick them up and then we’ll do some combination of Med/Gorges du Verdon/Millau/Paris/generally work our way back home in a leisurely fashion 🙂
The giant screw is a picture on the box of a Halfords screwdriver set 🙂
Mike_DFree MemberPosted 9 years agoThe obvious option would be a rock’n’roll seat/bed from Reimo or RIB or one of the other probably-good-but-not-necessarily-thoroughly-tested suppliers — take a look on the VW T4 forum, they’re all on there. The downside is that they mostly need space behind them to fold into, which limits your layout options somewhat. The other downside of your plan is that if the kids go to bed before you do (which they tend to) then having their beds up front takes out your “living space” in the evening. That’s why we went with the bunks at the back — kids go to bed, we can sit up around the table at the front. Had to go to the XLWB van to fit it all in, though. Probably worth thinking about an extra-high roof as well if you want a bed above a garage, the headroom could get a bit limited otherwise. Download Sketchup and have a play around 🙂
Looks awesome, keep an eye on our axle weights though!
I so am 🙂 It’s all built as light as I can manage, and I know what payload we need to end up with. All the heavy stuff is between the axles and I’ve tried to keep it balanced side to side as much as I can. Back-of-envelope calcs suggest it’ll be OK, but I’m going to get it on a weighbridge before adding the final bits and pieces in case any emergency remedial action needs taking. There’s an emergency fallback position in that the van’s a Ducato Maxi with bigger wheels and uprated suspension and brakes, and you can replate it to 4t GVW just by filling in some forms and paying some money. And both our driving licences are sufficiently ancient that we could still drive it. Downside is that all sorts of things — insurance, breakdown cover, ferries — get more awkward/expensive/both.
AAAAAaaaanyway, have an update:
I think probably the next thing was some washroom action. Another bit of board to add to fill in a gap:
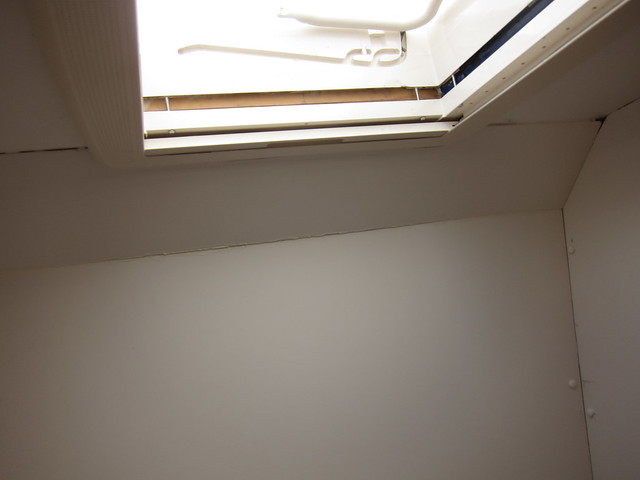
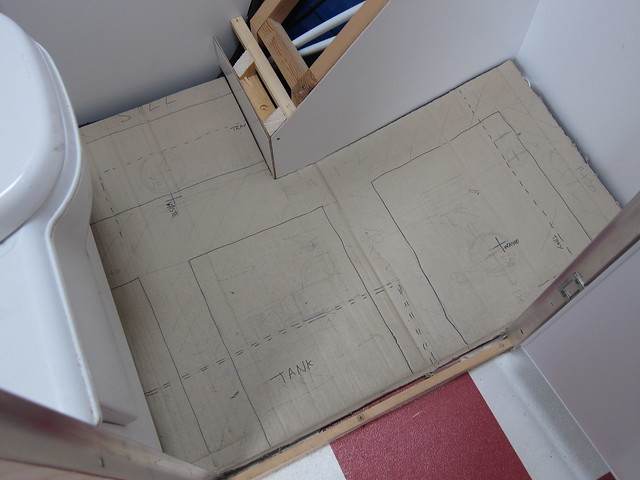
All the not-terribly-well-fitting edges will be siliconed. Moving down to floor level, there’s a wheelarch in the washroom, so the shower tray will need cutting down. And we need to let water out of it. So template, and marking up where all the stuff under the van that needs avoiding is, and mocking up the waste pipes:

Then out with the holesaw and make YET ANOTHER hole in the van. Careful measuring, pilot hole just to check I wasn’t about to go through a brake pipe or something, and then:
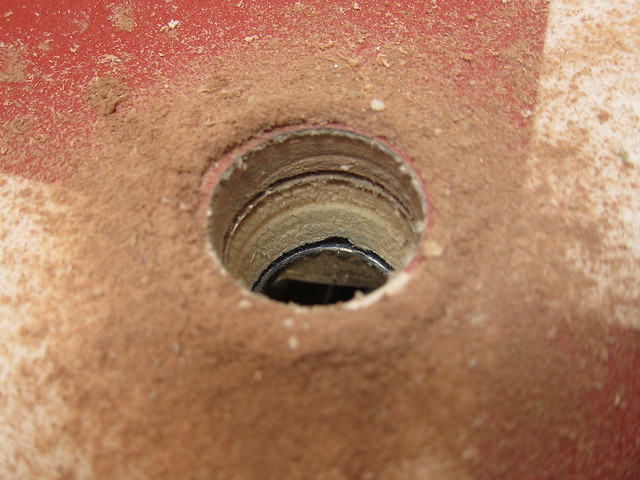
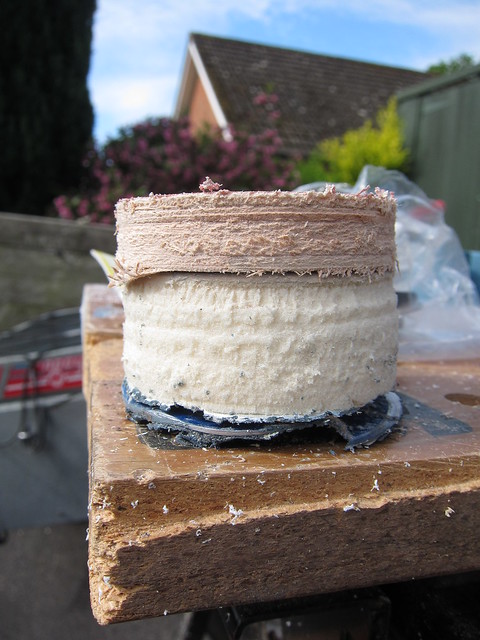
Straight through the vinyl, the plywood, the inch of Celotex and the steel floor. Made a nice core sample:
Had to add another connection to the waste tank, which meant dropping it off the van again which was a slight ballache:

Make hole in appropriate location:
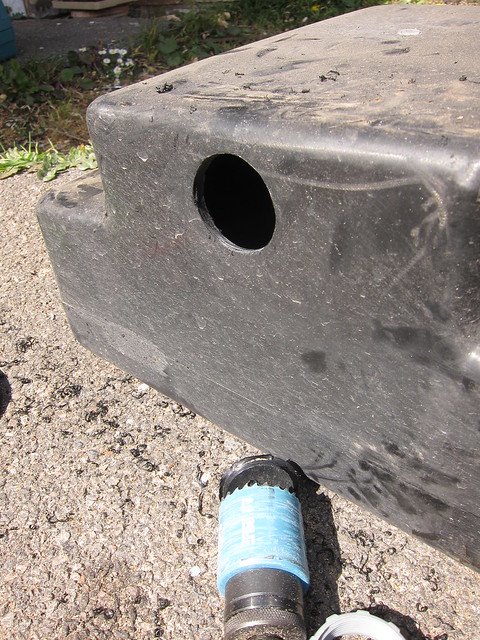
Added a standard tank fitting for 32mm waste pipe, but forgot to take a pic of it. Before cracking on with the shower tray, I had to line the wheelarch which has had just a timber frame around it for heaven knows how long:

I’ll use some PVC angle to finish off the corners. Offered up template:
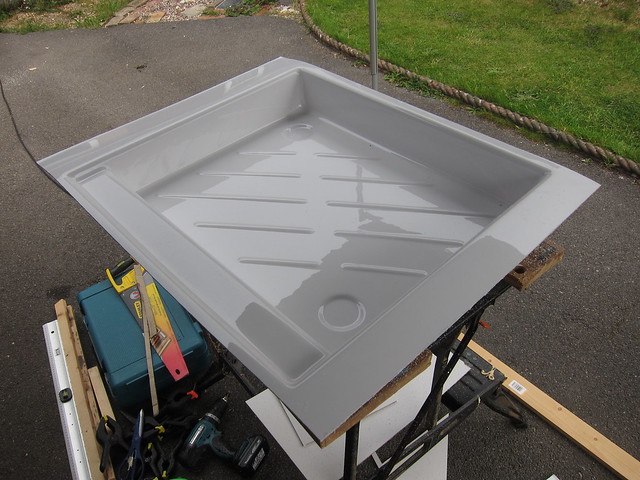
Here’s the shower tray as supplied — it’s plastic and weighs approximately not much. But is quite flimsy, of which more later:
Mark up:
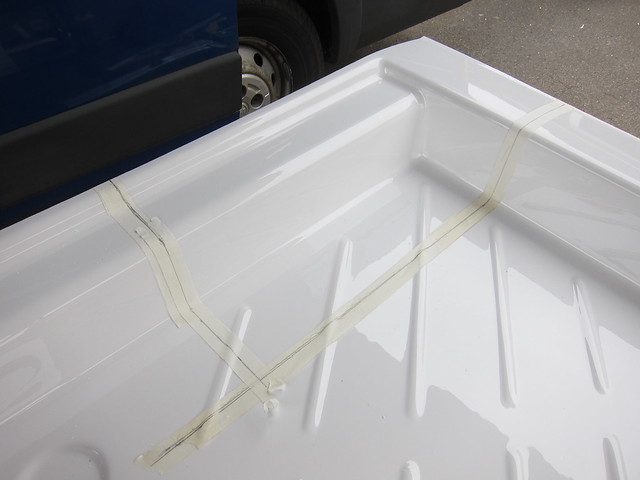
And cut:
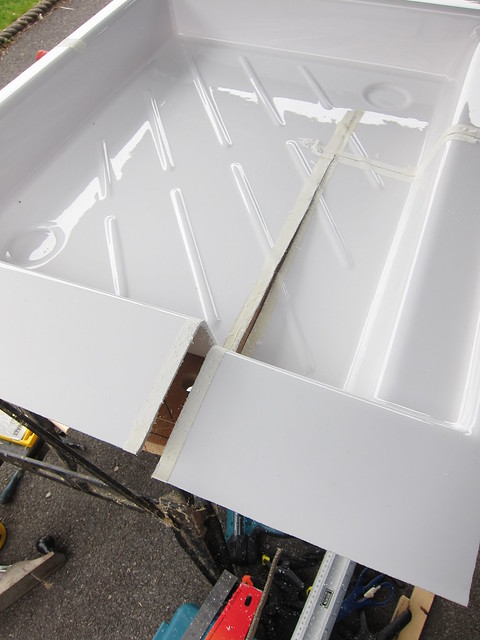
Just used a hacksaw blade in a handle, did a perfectly good job. BUT DOES IT FIT?
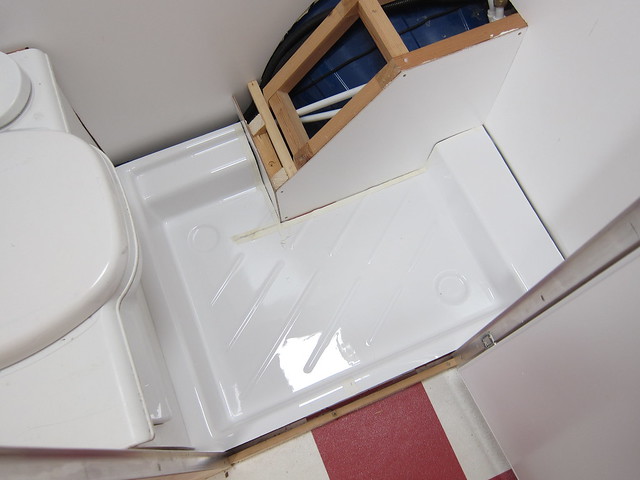
Phew. The high-up edges needed some support, so I made a bunch of these:
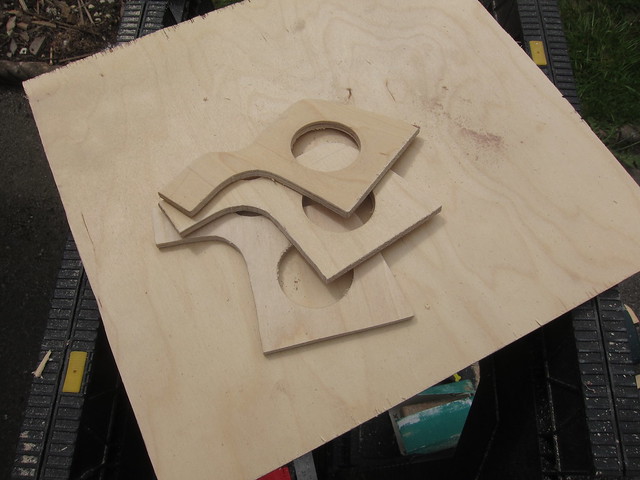
which I like to think look a bit like bits of Hurricane. Note the added lightness 😉 They go along here:
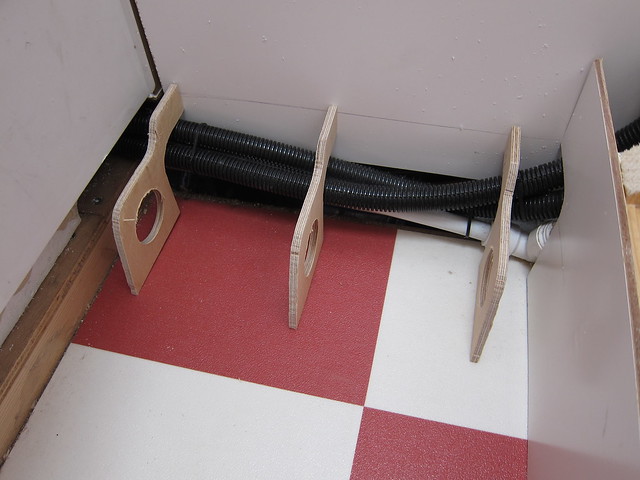
held up by battens screwed to the floor, thus supporting the edge of the tray thusly:
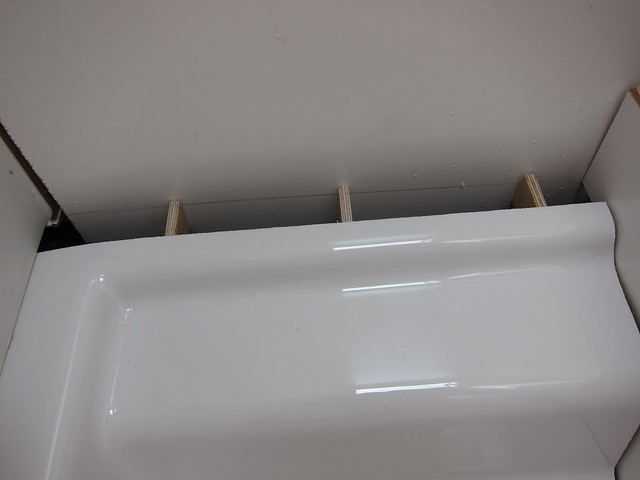
I filled in the gaps with some cut-to-shape bits of Celotex for good measure. Then an even biggerer hole:
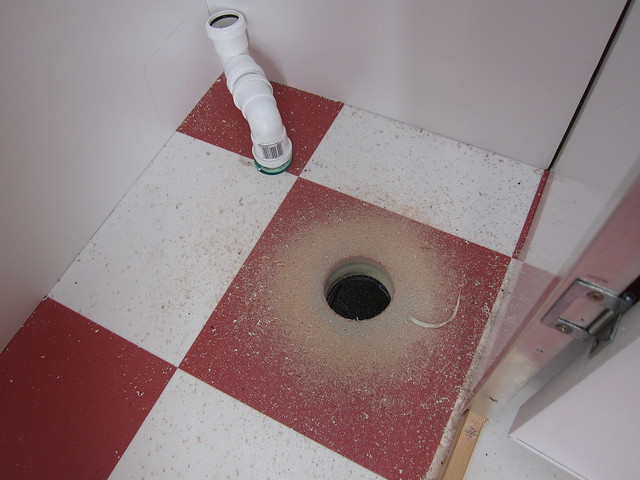
The first one was for the basin waste, this one is for the shower waste — it has to accommodate the actual waste fitting itself, hence the size. Then it was time to stick the tray down, using lots and lots of goop — I don’t want it flexing, and I do want it as well sealed as possible. Weighed down while the goop degoopifies:
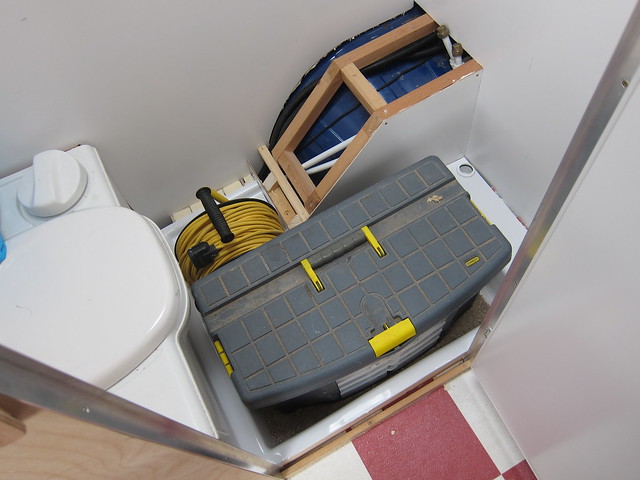
And well stuck:
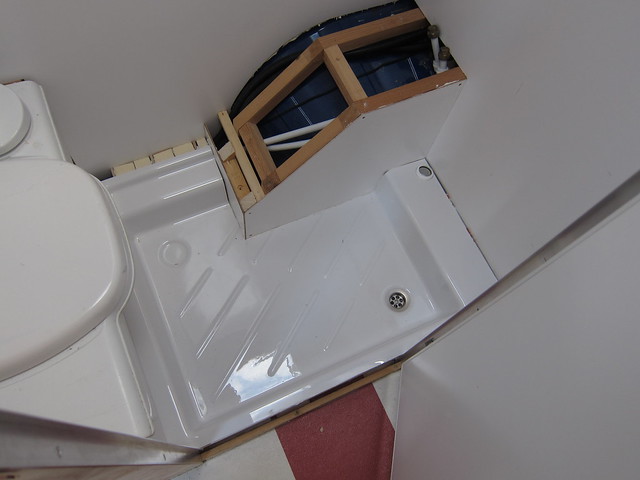
I’ll be using some PVC trim to seal up the edges and the bit where I cut the corner out of the tray. Hopefully with sufficient kilotonnage of silicone it won’t leak…
Next up (literally) was the overhead locker up front. First, start to cover up the last-remaining visible bits of Celotex. Had to move the consumer unit and added this bit:
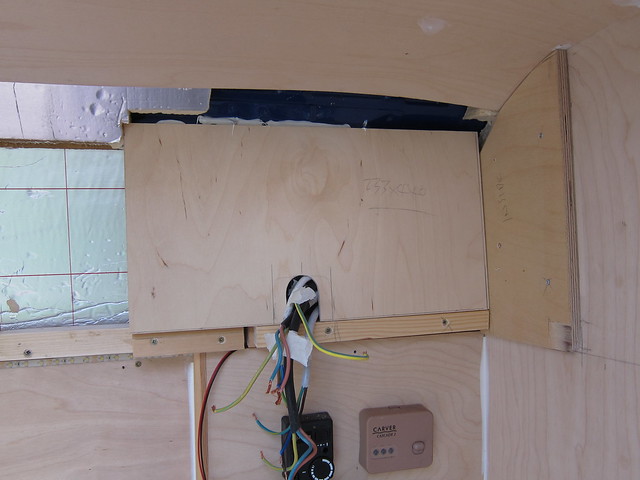
CU goes back on as so:
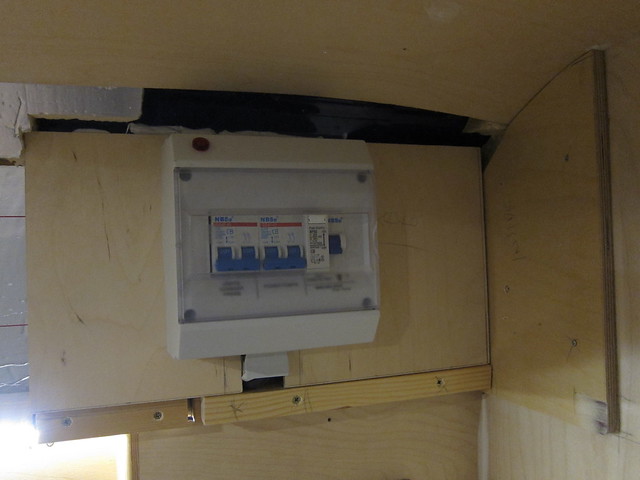
Then add a curvy back panel to the rest:

You can see the end panels and rear support batten already in place there. Couple of last gaps to fill in:
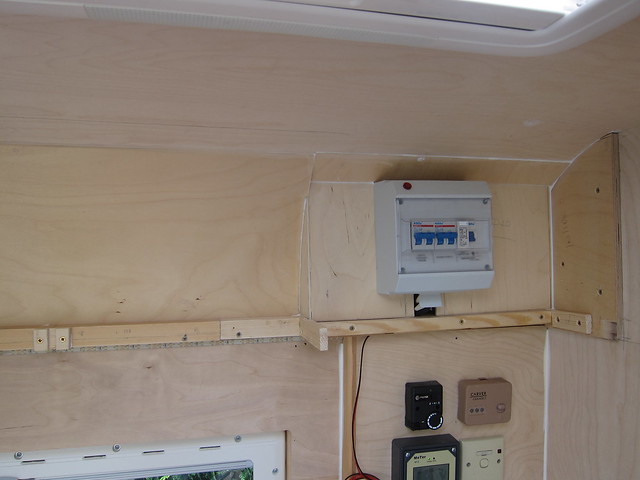
And then the frame for the front of the locker:
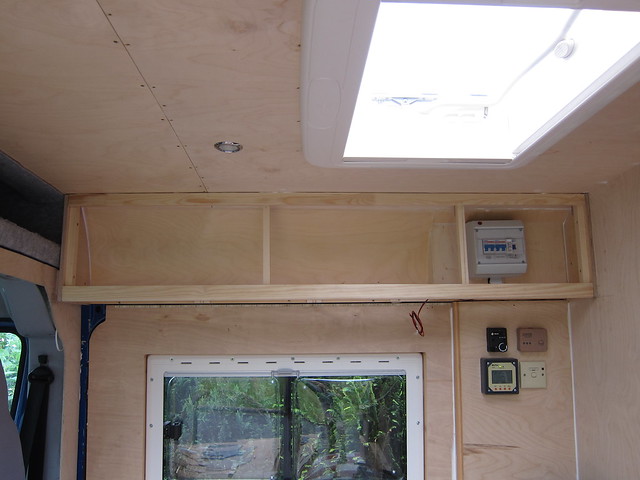
Slight cheat here — Dad made the frame offsite while I was faffing with other stuff. He made the doors too:
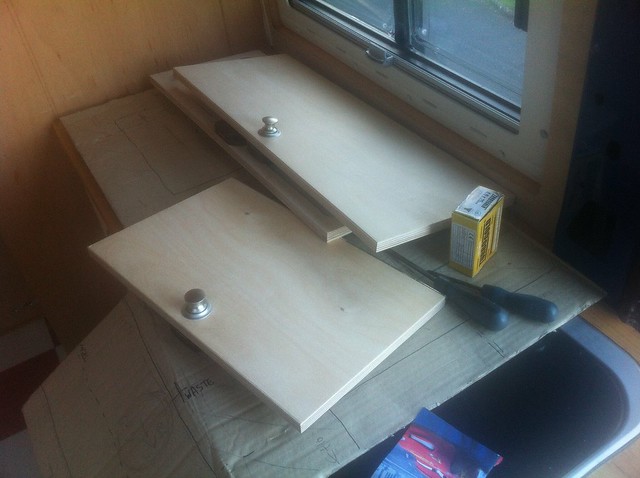
Tried-and-tested 12mm ply frame with 3mm skin on the front — looks solid, weighs little. Before they can go on, though, there needs to be a bottom in the locker. Added some stiffening struts between the frame and the support batten, made a shelf:

Glued in and with some heavy stuff on top to hold it while the glue sets:

And that’s about it so far…
Mike_DFree MemberPosted 9 years agoWhat Jonathan says, pretty much. Life’s too short and crowded for systematic chain cleaning, especially when dealing with multiple bikes 🙂
Mike_DFree MemberPosted 9 years agoi wouldnt fancy it staying in place if the hanger broke down a fast rocky descent
Typically you’re not in the big sprocket on fast rocky descents, which means the mech is a long way from the spokes and extremely unlikely to catch in them (unless the hanger’s already very bent, and if it was that bent the completely rubbish shifting would be something of a giveaway that something was up). It’s most likely to happen when going slowly and/or uphill, the wheel wouldn’t go anywhere. But again, something has to be wrong first (slightly bent/twisted hanger, maladjusted limit screw, bent mech cage) to the cage to catch the spokes.
Mike_DFree MemberPosted 9 years agoSlightly bent hanger from a topple you may not even have noticed, plus possibly slightly sloppy mech pivots, plus shifting into big sprocket, plus bad luck = mech in spokes. Gets dragged round, hanger snaps. Hanger did its job by snapping, frame essentially intact. Buy new mech and hanger, fit, ride, smile 🙂
Mike_DFree MemberPosted 9 years agoDamn, shamed into it…
Flung this together before going to the Alps:
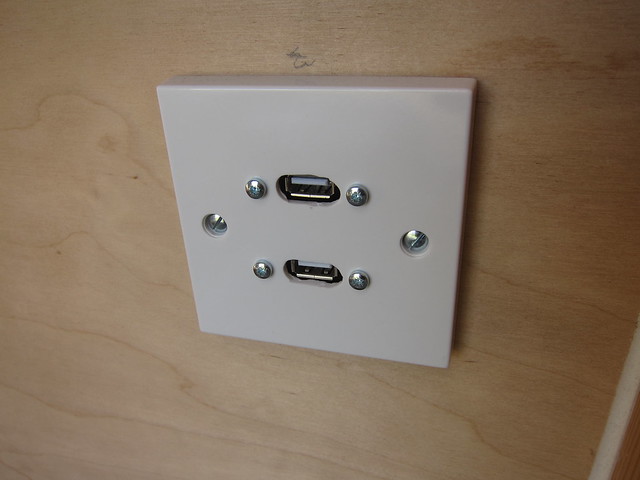
Got a pre-made voltage regulator/twin USB socket gizmo from ebay, hacked holes in a blanking plate, fastened the sockets in. Very rough and ready but it’s just a prototype — now I know it works I’ll make another with a stainless blanking plate, a bit like this cigar socket one:
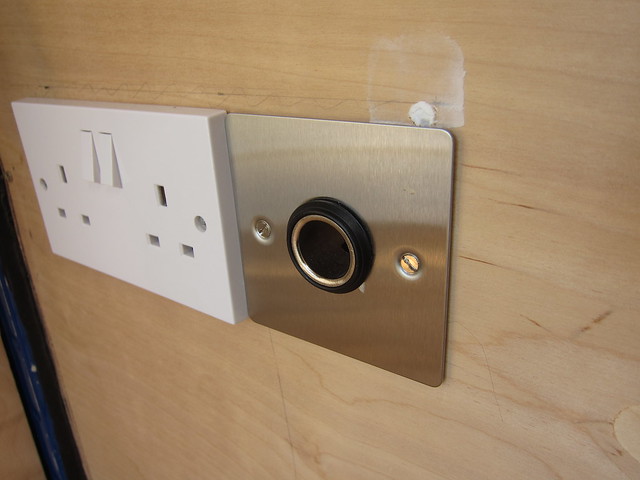
And the 240V socket will be changed too, of course 🙂
Then there’s this bit in the washroom that needed covering:
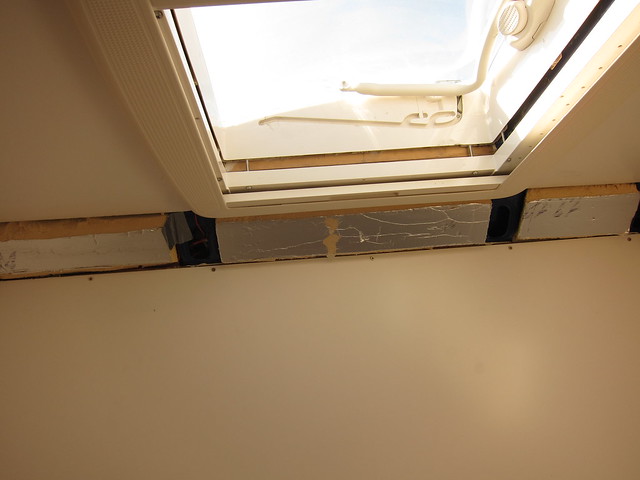
Made a template:

It needs to be a bit of a funny shape because the rooflight is right up against the edge of the roof inside, so the panel needs to go around the internal bezel.
Glued some bits of timber to the metalwork to support the sheet, which I failed to get any pics of before sticking the panel on:

A bit gappy round the edges, but all the joints will be masked up and siliconed over anyway, so no big deal.
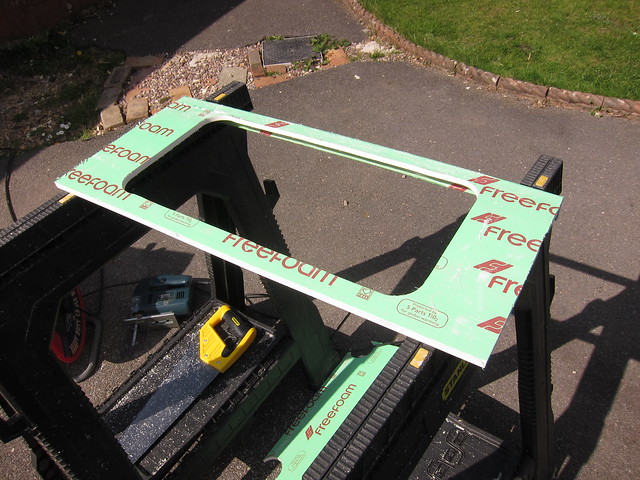
Also the washroom needs a sink. For, y’know, washing. I have a huge length of uPVC facsia with a lip along one edge. Cut to the width of the washroom and drill some holes:

Join the holes together:
And the sink drops in thusly:
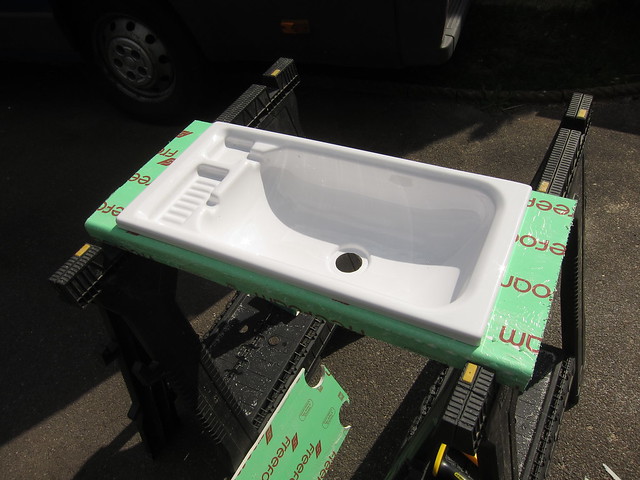
Obviously it’ll look a lot better when I peel the protective film off 🙂
Mike_DFree MemberPosted 9 years agodoes the quality of the paper make the words more interesting?
No, but it makes the pictures look better.
Mike_DFree MemberPosted 9 years agoThere’s probably a deliberate slope so any water drains onto the driveway.
Do you need to use the whole garage for whatever the business is? Do you still need to be able to park a car in it?

