Forum Replies Created

Viewing 40 posts - 121 through 160 (of 169 total)
  • 502 Club Raffle: Magura Brakes Worth £550
  • crogthomas
    Free Member

    Do you need a waterproof bag for those 4 things?

    crogthomas
    Free Member

    Been done many times. Tricky to set-up up with no real advantage.

    crogthomas
    Free Member

    Sorry to be negative, but DON’T use a stud extractor. They always snap off and then are impossible to drill out because they’re made from the hardest steel known to man.

    Persevere with drilling. Buy a new drill bit, any old ones will be blunt. Medium speed, lots of downward pressure and a little oil.

    crogthomas
    Free Member

    For this sort of thing (planing routes) I like to use the strava heatmap to get an idea of where is popular and ridable. Does that show anything useful to you?

    http://labs.strava.com/heatmap/#6/-6.41147/55.06660/gray/bike

    crogthomas
    Free Member

    This list my prove useful:
    http://www.framebuilding.com/custom_uk_bicycle_framebuilders.htm
    None in Oxfordshire though.

    Try:
    http://oxfordbikeworks.co.uk
    I don’t think they make their own frames, but they may know someone local who can do the work.

    crogthomas
    Free Member

    These are the days that must happen to you, by Dan Walsh.
    He has an ‘unusual’ style, so you might want to read it first. As far from Shackleton as you could get. Easy to read in short bursts as it was originally serialised in a magazine.

    Failing that, classic mountaineering literature such as Annapurna, or The Ascent of Rum Doodle (fiction) are always enthralling, but she may have read them already.

    crogthomas
    Free Member

    Crogthomas,
    I have one of those benders, it works ok, though I find the 12mm and up tubing a bit of a struggle.
    What did you do to stiffen it up?

    I made up a second ‘bridge/link’ to make it double sided. More difficult to use, but more effective.

    crogthomas
    Free Member

    Crogthomas, how do you bend the tubing?

    I use a cheap tubing bender for 8 and 10mm tubing. Halfway between a car brake pipe bender and a plumbing one. It works well enough with a bit of practice and some re-engineering of the bender to make it more rigid. It was very cheap though. I started off just using straight tubes, joining each corner, but that took ages. The bender makes things a lot neater and quicker. I use mild steel tubing because it’s not as brittle as stainless for an expedition rack. Any issues with stainless fracturing?
    I’m experimenting with various types of paint, truck bed liner is the favourite at the moment, but cosmetics are not really important to me.

    I make all my racks with tight joins that hold themselves together without solder, no need for the third hand, although some strategically placed weights or bits of wire sometimes help.

    PS: Kyrgyzstan is stunning. A hidden gem.

    crogthomas
    Free Member

    I’ve made a few for commuting and touring bikes. More function over form than your very nice star rack. I use mild steel tubing and silver solder it together using inserts to provide strength (internal lugs, if you like). The main aim for me is to make custom racks to clear brakes or provide extra mounting points for lights and mudguards, etc. I try and design them to be easy to build with as few joints as possible, mainly because I’m lazy but also because it makes them less likely to spring apart at inopportune moments.
    The best (and also the worst) picture I can find of one.

    Kyrgyzstan by crogthomas[/url], on Flickr

    Is your rack (the bicycle one pictured) stainless? How did you braze it? I *thought* stainless couldn’t be brazed, or not easily anyway?

    crogthomas
    Free Member

    A blob of superglue might secure the existing nut enough to be able to remove the bolt. At the very least that makes it a lot easier to drill out the rivnut.

    crogthomas
    Free Member

    I’ve found google maps and OpenStreetMap (on a laptop with a GPS receiver running some software called Quantum GIS) useful in the past for this sort of thing. But, as others have said, I’ve always mainly relied on a paper map (or 2). Much easier to use and more reliable.
    Some of the ‘roads’ I’ve encountered have been barely passable, so if it’s not marked as a road on a map it’s probably not worth trying.

    crogthomas
    Free Member

    Old cassettes can be butchered for their spacers.
    And Bottom bracket spacers are the same diameter.

    crogthomas
    Free Member

    It looks a lot nicer to move about folded up, but not tried one yet. Am tempted to order one as the feet no longer fold up on my workmate (plastic spring clips have snapped).

    Spares are available, or elastic bands.
    http://www.partshopdirect.co.uk/black-and-decker-latch-p373195-01/

    crogthomas
    Free Member

    so how do you knurl it with a centre punch?.dent the tube externally to create lumps internally?

    No, punch on the inside. The pock-mark will have a raised ridge around the edge like a crater.

    I’d try bearing-fit first though. Easier.

    crogthomas
    Free Member

    If I wanted to mount the bag on the front loop, I’d just use a longer bit of cable (brake cable) and loop it under the stem as it was designed to. But I echo the comments above about the distance in-front of the steerer that it is. I think I’d prefer the accessory mount idea. Or another stem and some old bars cut down to 10cm long.

    crogthomas
    Free Member

    Give these people a call:
    http://www.lakesideymca.co.uk/recruitment/

    If he signs up to be a Daycamp instructor he’ll get 2 months of experience over the holidays without having to give up on his college courses. He’ll then have a better idea of what he wants to do.
    I did this some years ago and it was the best job I’ve ever had. No qualifications are needed, mostly all you need is masses of enthusiasm, but anyone who’s sufficiently interested in the more technical side of climbing/sailing/outdoor stuff will be able to learn a lot.

    crogthomas
    Free Member

    What do you want to weld?

    crogthomas
    Free Member

    The easier method if you’ve already got a vernier caliper is the old bent spoke trick.
    As described here:
    http://forum.ctc.org.uk/viewtopic.php?t=18238

    crogthomas
    Free Member

    I can recommend Altura bags. I have the Arran bar bag and although it’s basic and not waterproof it’s reasonably priced and has been very robust, surviving a fair few long tours in remote places and even some proper mountain biking whilst loaded up with camera gear, etc. They have Rixen & Kaul fittings which seem very sturdy and are easy to use.

    crogthomas
    Free Member

    What he said.

    crogthomas
    Free Member

    What I would do in this situation is to make one 10mm thicker righthand dropout to replace the existing gear hanger. An exact copy secured in the same way, except thicker. The 135mm wheel would then sit 5mm offset to the left in the existing left hand dropout. The 5mm offset to the left would make no discernible difference to the bike (i’ve seen plenty of standard bikes worse than this), but you could re-dish the wheel if you were really bothered about it. Everything will then fit and work as normal, and loads will be fed into the frame as they were intended to be.

    crogthomas
    Free Member

    Pitch is the distance between the roller centres, which on all (modern) bicycle chains is 1/2 inch.
    1/8 or 3/32 refers to the width of the chain/sprockets. A 1/8″ chain is wider than a 3/32″ so will fit over a 3/32″ sprocket without any issue.

    crogthomas
    Free Member

    You could try JB weld, but I would imagine the risk of a subsequent leak filling the house with water whilst you’re at work would would be unattractive.

    Cast iron can be repaired with welding, but is very difficult. Brazing would likely be more successful. Either way it’s a specialists job and I guess you’ll have to remove it from the house. Try looking for someone who does repairs to cast iron engine blocks or exhaust manifolds.

    crogthomas
    Free Member

    Do you have access to gas welding equipment and brazing rods?

    crogthomas
    Free Member

    I’ve not been to Mumbai recently, but I’ve visited quite a few bike shops in the south of the country in the last few years. I’d be surprised if you found XTR parts for sale, but what is highly recommended is to watch a mechanic build up a kit-form single speed sit-up and beg bike (rod brakes, etc) from scratch. Seeing a gigantic pile of individual ball bearings, nuts, bolts and spoke nipples on the floor turned into a working bicycle is quite a sight. No instructions, not even a workbench, just experience.
    There always seems to be a few bits left over, but how else would a bike shop stay in business, eh?

    crogthomas
    Free Member

    Rollamajigs

    crogthomas
    Free Member

    It doesn’t matter which lamp casing you get, you just have to fit the correctly rated bulb.

    A quick internet search finds this:
    http://www.thebikelightshop.co.uk/Unio-nClassic-Front-Dynamo-Bike-Light-including-Cable.aspx
    Also plenty of old lamps on ebay.
    Then get bulbs from here:
    http://www.reflectalite.com/lightmodel.html

    crogthomas
    Free Member

    I find the San Marco Rolls Saddle ridiculously comfortable and a lot easier to maintain than a Brooks (as in, I don’t do anything to it).
    No one else use one?

    crogthomas
    Free Member

    It should be possible to just remove the brake shoes, I’ve done this with a Sturmey Archer hub successfully. It will then behave as a normal hub. But then you’ll have no rear brake…

    crogthomas
    Free Member

    Popping a zit.

    Radiator pants.

    crogthomas
    Free Member

    For a one-off trip is there anything wrong with a cardboard box from your local bike shop? That and some spacers to go between the dropouts. Probably free, and you can spend the money saved on something more fun.

    crogthomas
    Free Member

    Which travel adjuster is it that you have?

    crogthomas
    Free Member

    nixie – Member
    crogthomas, did you use a kit for doing the anodising? Been thinking of doing some myself.

    No, I did it myself using drain cleaner, battery acid, an old lab power supply and some clothes dye.

    It’s dangerous, smelly, inconsistant and takes ages.
    If you want to spend your entire evening dressed in overalls, rubber gloves and goggles, with your eyes watering and the hairs in your nostrils burning, all to produce one anodised trinket that you might have to strip back and do again, then it’s a great pastime. Otherwise I’d recomend getting someone else to do it for you. Far more sensible.

    You can buy kits though, like this one:
    http://www.frost.co.uk/automotive-electroplating/aluminium-anodising-kit.html

    crogthomas
    Free Member

    jameso – Member
    crogthomas, do you do the anodising yourself?

    I do, but it is an almighty pain in the posteria, very tricky to get right the current, voltage, duration, acid concentration, cleaning and electrical contact. I do it because it amuses me, not because it makes sense to do so.

    jameso – Member
    I like the dropout for belts.. would the snubber work better if it was moved forward to the are where the belt and cog mesh first?

    I was thinking the same. Where it is, if the belt climbs onto the peaks of the cog, its then too late for the snubber to do anything. If it was forward of the centreline it would prevent the belt ever climbing up in the first place. See my chain retainer above as an example. It doesnt have to touch the belt, just be there to guide it onto the cog if it bounces around.

    crogthomas
    Free Member

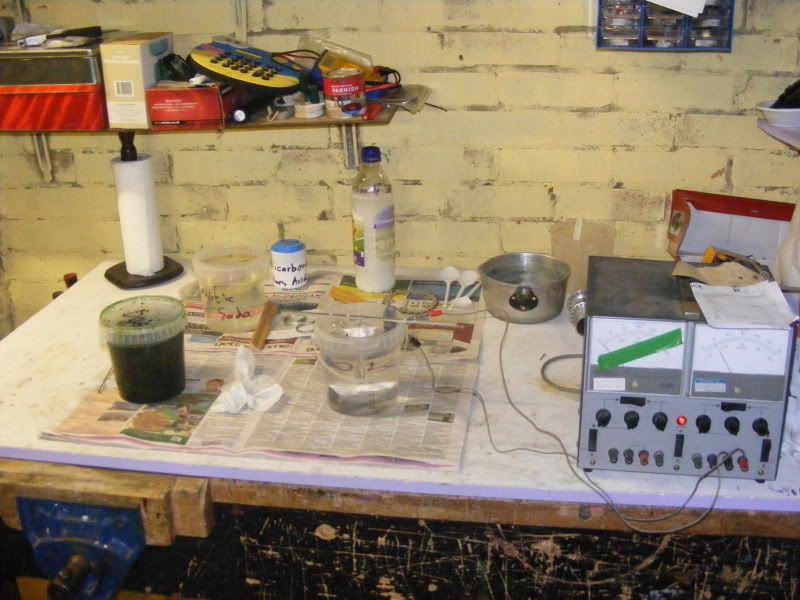
    Does manufactured count as modified? When the need arises, the occasional evening is spent in the ‘shed of dread’ making loud hammering noises and the occasional small puff of smoke, just like in the cartoons. Some creations that I have pictures of are:

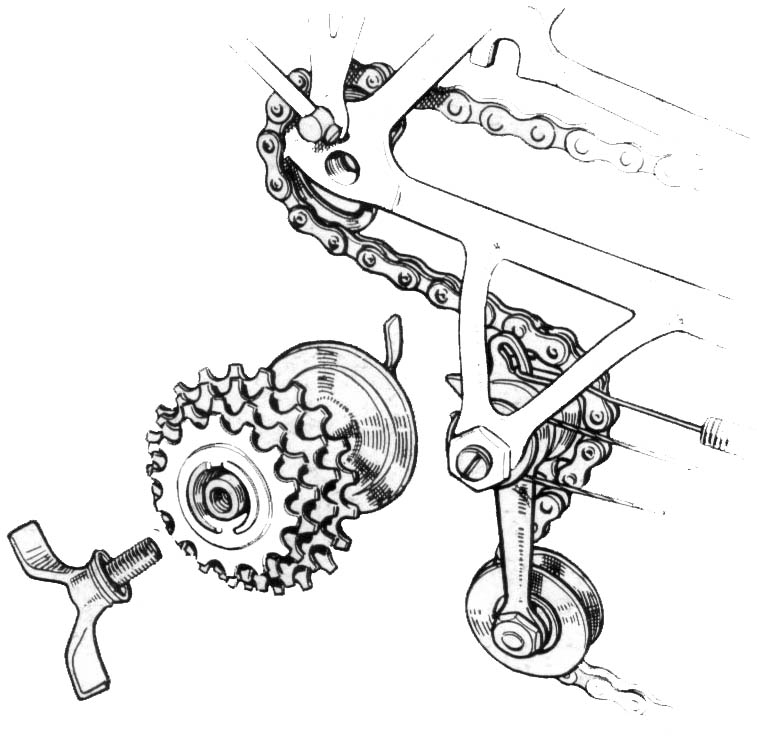
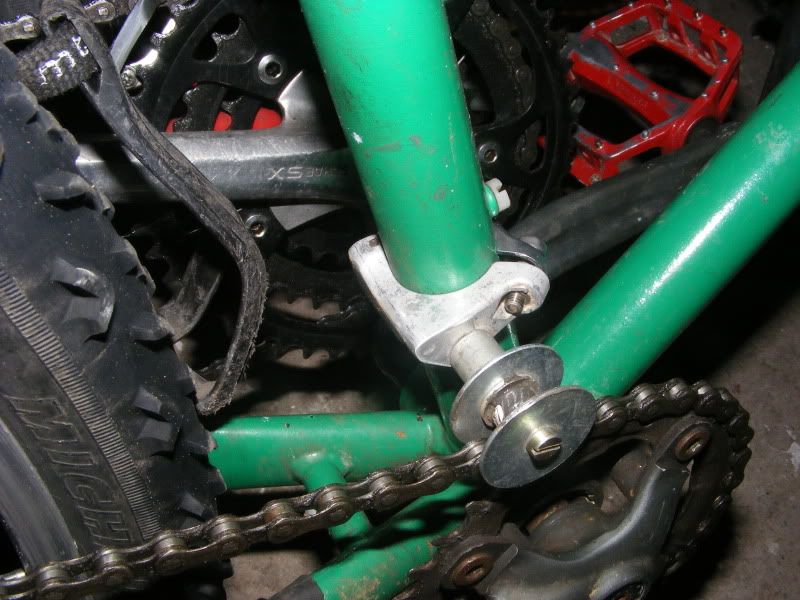
    A chain retainer made using on old derailleur, some spacers and washers:

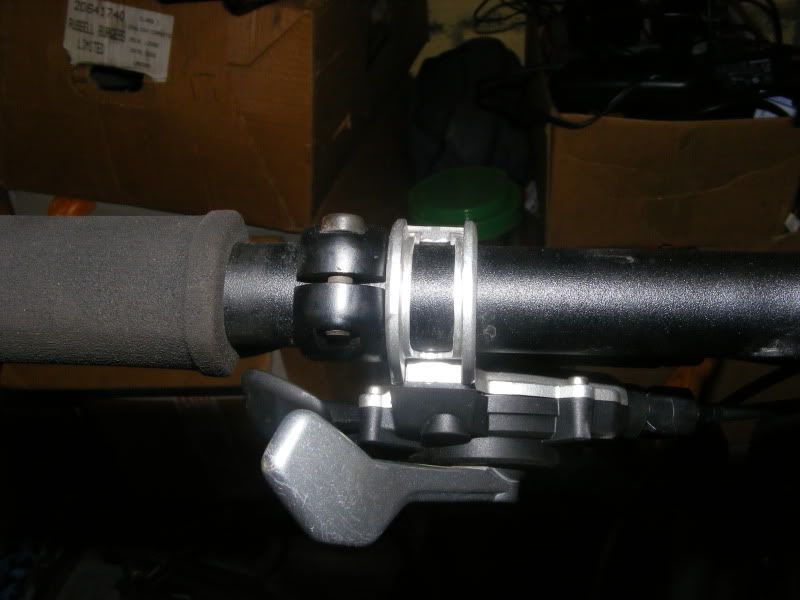
    Slotted X7 shifter levers, to remove the useless indicators and save some infinitesimally small amount of weight:

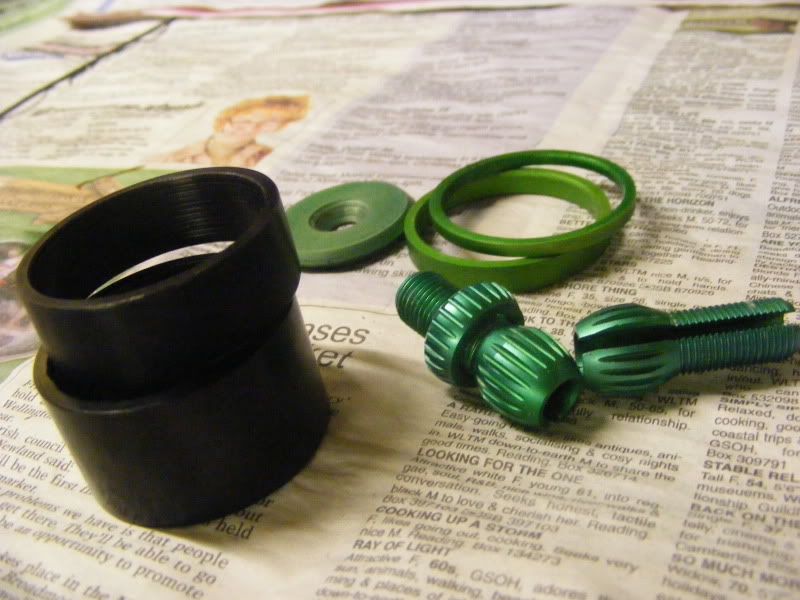
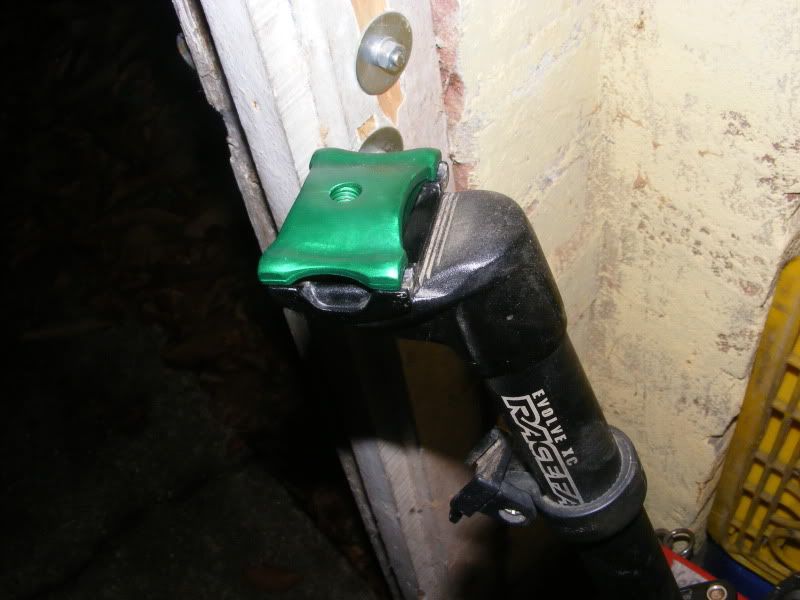
    Modified Raceface seatpost clamp. I’ve seen a few like this one where either the bolt is too long or the hole too shallow. This prevents it clamping the saddle properly. The solution is to drill the hole all the way through, then anodise it green of course. I like green:

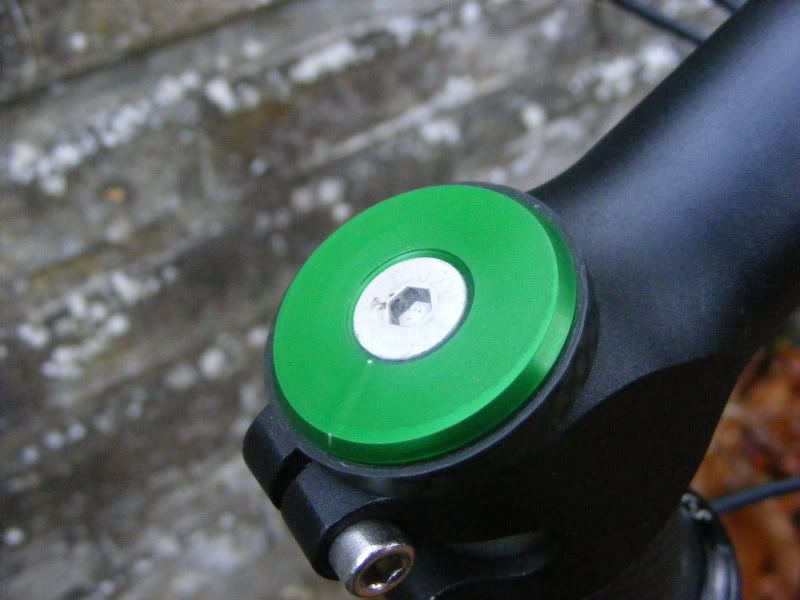
    Headset top cap designed to use a countersunk bolt, much lighter because there’s no dead metal around the top of the bolt. Used with an aluminium bolt it practically disappears due to it’s own lightweightiness:

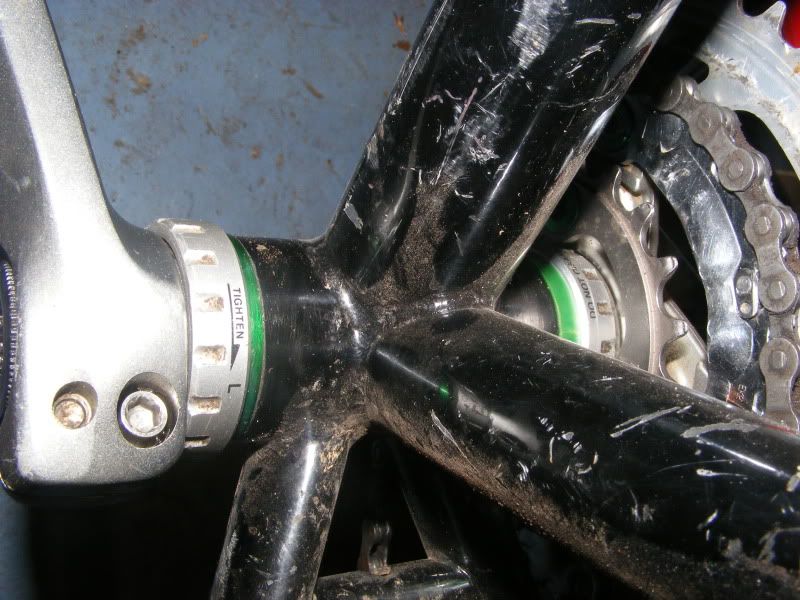
    HT2 bottom bracket spacers of special thicknesses, 5mm for where two 2.5mm ones are usually required, and 1.5 & 4mm for Shimano BB’s where the 6mm bearings have been replaced with 7mm width bearings:

    Singlespeed sprocket spacers. Not difficult to get hold of, but just because they are the same diameter as BB spacers and I had the metal already in the lathe:

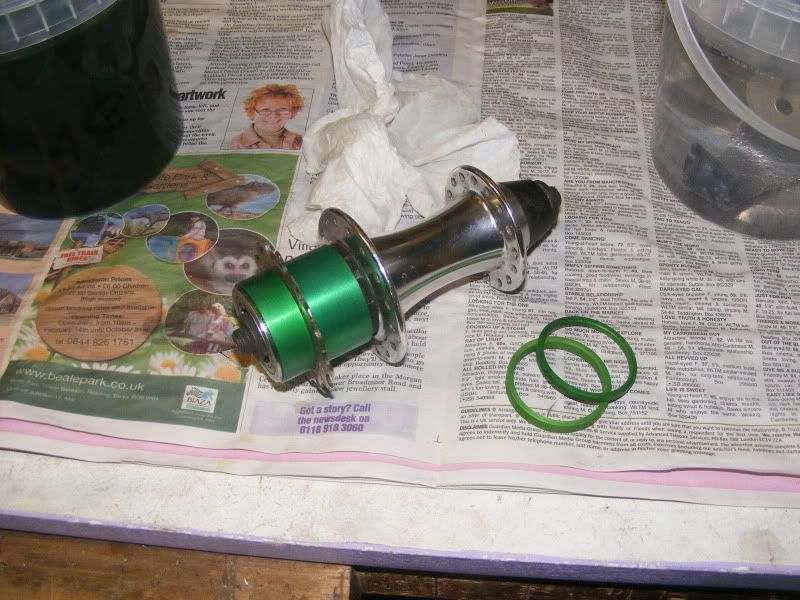
    More anodised spacers and things:

    crogthomas
    Free Member

    Just a thought, a gripshift rear shifter could easily be mounted on the left side of the bars upside down and still be fairly easy to use.

    crogthomas
    Free Member

    How about a modified old front deraileur? Like in my post here:
    http://www.singletrackworld.com/forum/topic/1×9-keeps-shedding-its-chain-advice-needed

    crogthomas
    Free Member

    All I did was to lose the flat circular seal that sat between the original bearing and the top hat

    But that won’t reduce the width of the BB will it? The top-hat has a shoulder on it that maintains the spacing away from the bearing regardless of whether the seal is fitted or not?

    considered turning up a pair of 1.5mm spacers to replace to the 2.5mm spacers to account for the extra width

    Did that, (well, made a 1.5mm and a 4mm spacer, losing 1mm each side) works fine so far. The seal fills the gap does it not, or am I remembering wrong?

Viewing 40 posts - 121 through 160 (of 169 total)