@Cougar you've got far more patience than me these days, I used to spend ages playing about with ROMS etc. I'm one of those annoying iPhone converts now, I use a phone that was released just over 4 years and last month it received the latest OS update. My Androids rarely made it much past 2 years before they were dropped.
To be honest, I didn't have a lot of choice in the matter. Once I'd gone down that road it was kinda one-way.
Not very recent but the throttle cable snapped on the mower, I pushed it round the garden then dumped it in the shed, thinking to order a new cable.
Then promptly forgot. Pulled the mower out again and realised of have to manu6 push the bloody thing around the garden. So looked in the shed- how can I fix this....
Hmm, bit of left over chain and a chic block ..
And it's still like that to this day 😆
Following the 3D scanning comments, you can do pretty good work with open source photogrammetry software- I think Colmap has a pretty good reputation for being on the easier side to use. Make sure the surface you want to work with is matt and get some ‘texture’ on there for the feature detection to work with should be able to get a reasonable surface representation to model around. Plenty of tutorials around, mostly for game model workflows but anyone with an engineering bent should be able to adapt it.
(Disclaimer- I have 3D scanning kit and photogrammetry software to play with at work. The open source stuff I’ve played with a little bit but not a lot).
Hmm, bit of left over chain and a chic block ..
Oh that's glorious.
How does the chain attach to the choc block?
Breadcrumb, that is exactly what I did! Great minds think alike and all that.
I threaded the cable though the choc block, around the chain and then back to the choc block.
So far this week l have replaced the pump and gearbox assembly of a power washer, repaired the shed wiring and today I will try to fix the leak from the shed roof.
Did a bit of fettling on our 14 year old Volvo V70 today, changed an outer CV joint boot, swopped out the crap Padgid brake pads and replaced back with genuine Volvo, drained and flushed the cooling system and sprayed 4 tins of Dinitrol wax underneath ready for another winter.
Oh that’s glorious.
Why, thank you ☺️
As Ambrose described! What's the chance of that bodge/fix being repeated!
Changed the motor in our Dyson Animal brush-bar, quite fiddly with some very hard to read Torx screws for which I ended up filing down a flat head screwdriver to fit so I could reach them.
Replacement motor came with wrong fittings, but luckily the body was identical, so had to swap over the fittings from the old one.
[url= https://live.staticflickr.com/65535/50255918562_116d965817.jp g" target="_blank">https://live.staticflickr.com/65535/50255918562_116d965817.jp g"/> [/img][/url][url= https://flic.kr/p/2jyWHGw ]Dyson repair[/url] by [url= https://www.flickr.com/photos/brf/ ]Ben Freeman[/url], on Flickr
[url= https://live.staticflickr.com/65535/50255918557_4dff1662d9.jp g" target="_blank">https://live.staticflickr.com/65535/50255918557_4dff1662d9.jp g"/> [/img][/url][url= https://flic.kr/p/2jyWHGr ]Dyson repair[/url] by [url= https://www.flickr.com/photos/brf/ ]Ben Freeman[/url], on Flickr
Not my actual one, but I did one of these yesterday and it was quite satisfying. Feels like a new van now...

Also been trying to repair another person a little bit, after they told me they were struggling with things. Think it's going OK. Can't post pics obvs.
Chuffed to see this thread still going.
Good work guys!
Finished during lockdown, done a fair bit of work with it now and she's running sweet.
A part of my kettle broke, just repaired it with a steel and epoxy. Would have used carbon fibre and a spoon but I have a lot to do today 🙂

Venetian blind. YouTube tip, the string that hasn’t broken (but that is also worn), melt the new cord to the end with a lighter and pull it through, the whole string threaded through slats and mech in about 2 mins). Satisfied.
This -

Not running and when I opened it up found this -


Replaced these parts -

And it now looks like this-


Always happy to join in a big hitter thread. Here's my attempt at fixing that stupid problem with Garmin Edge 1000s where the rubber switch dies and new ones are 40eur. It's ugly but it works and it was free
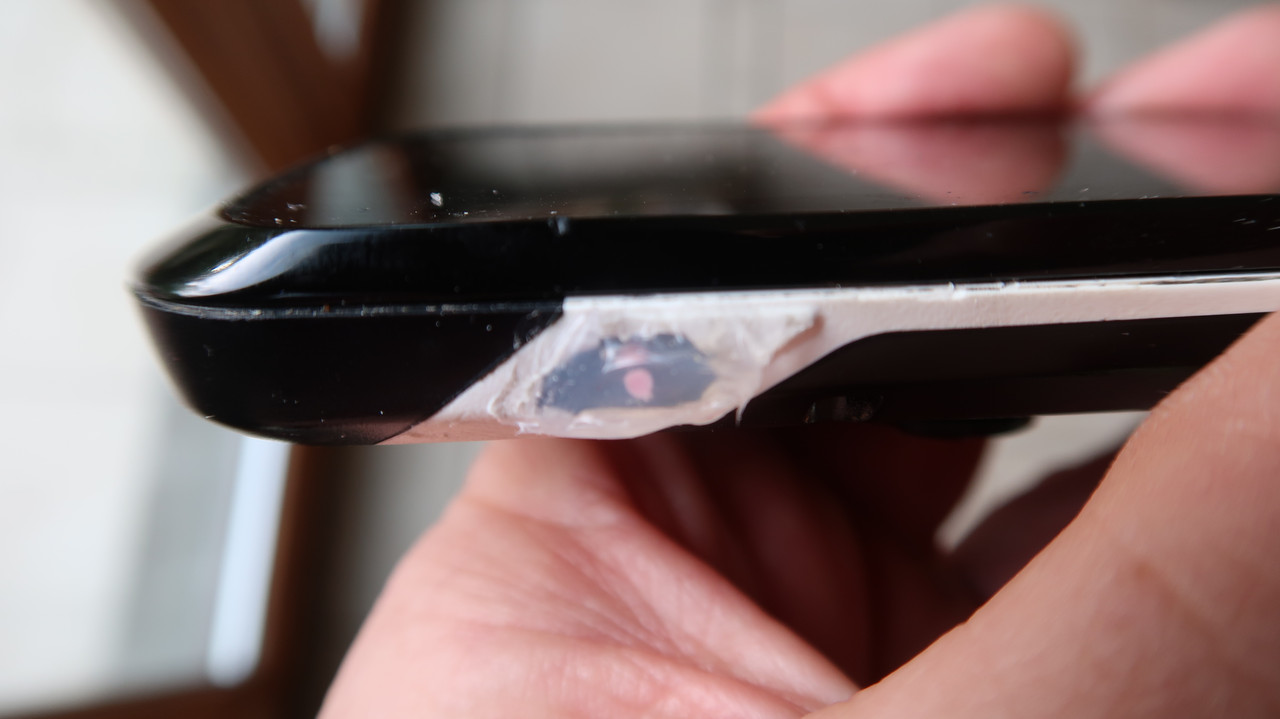
What I did was
open case
remove remnants of old rubber button
fill the hole with clear bathroom sealant
trip the sealant flush with the case
drill a small hole in line with where the microswitch is on the board (that's why I needed clear sealant)
insert a small piece of plastic in the hole and trim it at either side (I had a thin piece of pink plastic rod)
stick some more silicon sealant on the outside
The important bit is the piece of plastic as the silicon by itself isn't strong enough to push the switch. It works just fine now
