Up next in 10



Motion Ride E18 unboxing: https://singletrackworld.com/2019/04/unboxing-video-motion-ride-e18-linkage-fork
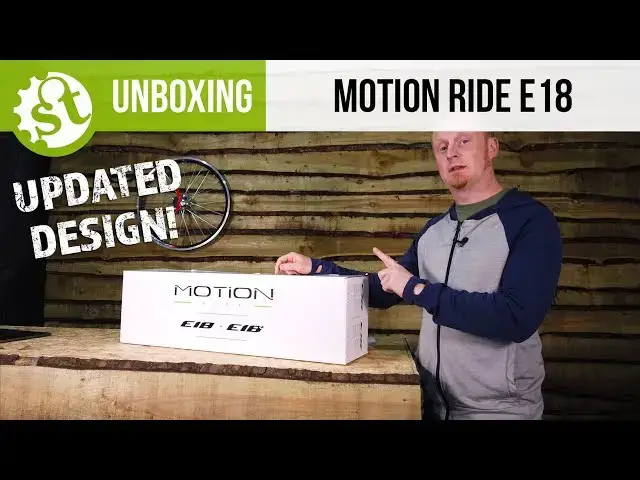
Last year we test rode a pre-production Motion Ride E18 linkage fork, this week we have a retail version to unbox and slap on the front of a bike.
In the summer of 2018, I had the chance to ride a pre-production Motion Ride E18 on our local trails around the office. You can read my first ride review here, and watch my interview with Matthieu Alfano, the designer of the E18 and founder of Motion Ride.
For those of you up to speed with that original Motion Ride linkage fork, here are a few notes about the final version of the fork and how it differs slightly from the one we saw last year.
Show More Show Less View Video Transcript
0:04
Hey everyone, Andy from Singletrack
0:06
Magazine here and today we're going to
0:07
do an unboxing of the Motion Ride E18
0:10
linkage anti-dive suspension fork. Now,
0:12
if you've been following us and the
0:14
Motion Ride project, you'll have seen
0:16
that we actually tested this fork last
0:18
year. It was a pre-production fork. Few
0:20
things have changed and we're going to
0:22
go through those changes in a second.
0:24
But first, let's take a look at the box
0:27
and in the box. So, as you can see,
0:28
we've got E18 and E18 plus written on
0:31
here. We have the E18 version of the
0:33
fork, which is a 27.5 inch model. The
0:36
E18 plus is for plus wheels or 29 inch
0:39
wheels.
0:40
Other than that, we've got a cool little
0:41
drawing of the fork and we've got some
0:44
information here about which travel fork
0:46
or which color fork you've got.
0:48
But, we only care about what's in the
0:50
box and in the box is ba-ba, the Motion
0:54
Ride E18 in earth green. Yeah. So, we'll
0:57
pop this out.
0:59
So, in the box, we've got the Motion
1:01
Ride E18. Pop this to the side.
1:05
We have got a little box in the shape of
1:08
a car.
1:09
And we've got something else. And that's
1:12
it. There's no instruction manual, there
1:13
are no tools.
1:15
That's it. Very, very simple and the
1:17
fork, although looks very, very
1:19
complicated, it is very simple, too.
1:21
We'll pop it down like that so you can
1:23
see a bit better.
1:24
So, as you can see, full black chassis,
1:27
we've got carbon legs here. We've got
1:30
aluminum CNC aluminum parts here for the
1:33
linkages.
1:34
We've got the earth green model. So,
1:36
you've got green here, here and here.
1:39
And these are bearing covers. Now,
1:41
that's important to remember. If you've
1:43
seen my previous look at these forks and
1:46
my interview with Matthew from Motion
1:47
Ride, you'll know that the original fork
1:49
had bushings, but they've changed to
1:51
bearings, which we'll get to in a
1:52
second.
1:53
So, yeah, we've got the 150 mil travel
1:56
version of the Motionride E18, 27.5-in
1:59
wheels, as I've already mentioned. And
2:01
this being a 150-mil travel fork has got
2:04
a offset of 44 mm. Interestingly, if you
2:08
look at the back of the steer tube here,
2:10
Motionride list this fork as 150, 160,
2:14
and 170 mil. So, you can get different
2:16
versions. But interestingly, each one of
2:18
those got slightly different offset.
2:20
This 140 Sorry, 150 has a 44-mil offset.
2:23
A 150 has a 45-mil offset, and a 160 has
2:27
a 46-mil offset.
2:29
So, again, a little bit different to
2:31
your traditional telescopic fork, but,
2:32
you know, what do you expect? It looks
2:34
like, you know, a grasshopper's leg.
2:36
Anyway, so, let's have a look at a few
2:37
of the features on here. First feature
2:39
is the wave. Now, this is a carbon fiber
2:42
composite blade.
2:44
This is actually a bit different to the
2:46
one that we tried in previous
2:49
pre-production versions. It's actually a
2:50
slightly thicker 7-mm wave beam.
2:54
And although it might look like it's
2:56
under compression now, it's not. This is
2:58
actually how Motionride mold these.
3:01
That's their natural state. So, when
3:03
this fork compresses, it's actually
3:05
pulling this beam flat.
3:08
So, yeah, although a lot of people look
3:09
at this and think that this is un- going
3:11
under compression and getting squished,
3:13
it's actually being pulled straight.
3:15
So,
3:16
the beam Sorry, this wave, sorry, is
3:18
basically your spring. There's no air
3:20
spring here. There's no coil spring.
3:22
This is the spring. And on the bottom of
3:24
it, we've got a sag adjustment.
3:27
So, to adjust your sag, we've got a
3:29
6-mil Allen bolt here.
3:32
And if you wind it anticlockwise, you
3:35
get less sag. And if you wind it
3:37
clockwise, you get more sag.
3:39
We've got a little
3:41
adjustment indicator here. So, maximum
3:43
sag, minimum sag, and maintenance mode.
3:47
You put it in maintenance mode, it
3:48
basically just takes all the tension off
3:51
the wave, and it means you can pop it
3:53
out just in case you ever need to
3:54
replace it. I do believe that if you're,
3:57
you know, a very very heavy rider, you
3:58
might need a thicker one. I'm I'm not
3:59
too sure about that. I'll have to try
4:00
and remember that. Um but yeah, if you
4:02
ever need to replace it, or if you need
4:03
to do any maintenance on it, you could
4:05
put it into maintenance mode and pop
4:06
this out. So, that's the wave. That's
4:08
your spring. And on the opposite side,
4:10
you've got the curve, which is your
4:12
damper.
4:13
Now, the curve is a really low-pressure
4:16
unit.
4:17
It's all oil in there.
4:19
It has very minimal seals. So, the idea
4:21
is there isn't much stiction at all, or
4:23
if any, for that matter. And it's very
4:25
very simple. Again, I keep using this
4:27
word simple. It looks complicated as a
4:29
whole, but the damper system itself is
4:31
actually really simple. And it has one
4:33
adjustment, and that's this. This collar
4:36
adjusts, and that's it. There's no
4:38
separate rebound. There's no separate
4:41
compression. It's just this one knob.
4:43
Now,
4:44
for the production version, things have
4:46
changed a little. We've got these little
4:48
lips here
4:49
to help you grip the the uh shaft when
4:51
you're uh whole wearing gloves.
4:54
Snigger.
4:55
The uh original one had a sort of a grip
4:57
tape uh feel to it, but these have got
4:59
like these these little uh ledges here.
5:01
And as you can see, you can
5:03
turn it.
5:05
There you go. It's quite firm. It's not
5:07
easy to turn. I mean, it's not
5:08
difficult. It's a quite a It's a quality
5:11
feel, but it's not something you're
5:12
going to knock by mistake. That's for
5:14
sure.
5:15
So, if I wind it all the way this way,
5:19
it goes into road mode. So, that's the
5:21
firmest setting. It shouldn't bob
5:23
around. It should feel quite firm. And
5:25
obviously, if you're riding to and from
5:27
the trail on the road, that's the
5:28
setting you want to in.
5:30
If you wind it back a little bit, you
5:32
can just put it into high,
5:34
medium, or low settings. Now, those
5:37
high, low, and medium settings are for
5:39
when you go to the bike park. And then
5:41
it all depends on what kind of terrain
5:42
you're hitting. So, for example, if
5:44
you're going to really flowy trails with
5:46
big jumps, you don't really necessarily
5:48
need the fork to absorb all those little
5:49
pattery bumps. So, you can use one of
5:51
these high, low, or medium settings. You
5:53
can have a play around with those.
5:55
Really, really simple. Then, when you're
5:57
on the trail, when you're hitting the
5:58
rocks, when you're hitting the natural
5:59
terrain, you can go further into the
6:01
trail mode. And in the trail mode, we've
6:04
got slow and fast, and that's your
6:06
rebound there.
6:08
So, basically, that's it. It's just one
6:11
easy damper movement.
6:13
And as you turn that, it's adjust your
6:15
rebound slightly, adjust your
6:17
compression slightly, but overall, that
6:19
they're set. You know, these settings
6:21
are designed by Motion Ride to give you
6:24
what they believe is the best for
6:25
different terrain.
6:27
Now, I can't speak for this fork, but
6:29
the pre-production fork worked very,
6:30
very well. I didn't get to try it in the
6:32
road or in the you know, the firmer
6:35
settings because we rode it in only
6:36
natural terrain. But now we've got a
6:38
long-term test fork, we can use it
6:39
everywhere, and we can give that a good,
6:41
good going over.
6:42
Another interesting feature here is
6:44
we've got this little rubber
6:46
uh indicator here, and that helps you
6:48
set the sag. So, although the sag is set
6:50
from the wave side, you can actually
6:51
measure it from the curve damper side.
6:55
And I already mentioned it's a
6:56
low-pressure system. Very little oil in
6:59
here. And the idea is um you know, even
7:02
if you go to different climates, it's
7:03
hotter or it's colder, different
7:05
altitudes, nothing should ever change.
7:08
So, basically, it's set and forget
7:10
unless you go somewhere else and you
7:11
need to reset it and forget.
7:13
Okay-dokey. Um other features of the
7:16
Motion Ride are the bearings. So, as I
7:18
already mentioned,
7:20
these green covers here,
7:22
behind those, inside the main frame,
7:25
we've got bearings. So, we've got a
7:26
bearing here.
7:27
We have a bearing here.
7:29
Here.
7:31
And we've got one here as well. Now,
7:33
originally, uh Motion Ride told us or
7:36
Matt from Motion Ride told us that
7:38
they'd be using a special uh material
7:41
developed from something that's used in
7:43
oil drilling oil drilling oil drilling
7:46
rigs that basically never wears out,
7:48
never needs lubrication, never needs
7:50
maintenance. You can pressure wash it,
7:52
you can do anything you want to and it
7:53
would be fine.
7:54
For some reason though, for production
7:56
forks they've gone to, you know, regular
7:58
bearings. Which is obviously going to
8:00
raise the question, is that going to
8:02
change service intervals? Can you still
8:04
pressure wash her? Do
8:06
Do they need lubricating? So, this is
8:08
something that we need to ask Motion
8:10
Ride. Um They're all at Sea Otter at the
8:12
moment so they're answering the emails.
8:14
Uh but we will let you all know what
8:16
they say about this. And also, are these
8:18
bearings serviceable at home or will you
8:21
need to send it off to a distributor to
8:23
get changed? We don't know. We need to
8:25
ask ask these questions.
8:27
Right, other interesting bits and bobs.
8:29
We've got a boost axle on here. This is
8:32
a 15 mil 110 axle. And I think I think
8:37
this was claimed to be the lightest axle
8:40
on the market when they first developed
8:42
it. Whether that's still the case, I'm
8:44
not too sure.
8:45
So, it's a uh
8:47
uses an Allen bolt there to undo. It's
8:48
not quick release.
8:50
We've got a standard
8:52
disc brake mount here.
8:55
And that's it. And at the top we have a
8:58
regular
8:59
tapered steer tube. That is the only bit
9:02
on this fork which you're you're going
9:03
to recognize from a regular fork, I
9:05
guess.
9:07
So, that's it. That's the Motion Ride
9:08
E18.
9:09
If you want to buy one of these, they
9:11
cost 1,690
9:13
euros. They are available in the UK from
9:16
Upgrade. I'm not entirely sure what the
9:18
UK pricing is, but we will pop that up
9:20
in the description below and on the
9:21
website. So, if you're interested in one
9:23
of these, keep an eye out for our
9:25
review. You can also go and check out my
9:27
first ride impressions on Singletrack
9:29
Magazine. You can also watch my
9:31
interview with Matthew from Motion Ride
9:33
as well. Uh yeah, but keep an eye out
9:34
for the the review that's coming very
9:36
soon. We're going to ride it in the
9:37
dirt, the mud, the sun. We're going to a
9:39
pressure wash it. We're going to throw
9:40
it in the canal. It's going to be great.
9:42
So, any questions, let us know in the
9:43
comments below. Don't forget to
9:44
subscribe. Don't forget to like, and see
9:46
you all soon. Bye-bye.
#Sports