
SRAM Force® 1 Rear Derailleur cable replacement and adjustment
Difficulty Rating: 2 out of 5
Words and photos by Julian Thrasher.
Some small tweaks to the rear derailleur and a new inner cable can keep your gears feeling like new.
The tools and spares you’ll need to replace the cable and adjust the SRAM Force 1 rear derailleur are:
- 3/4/5mm hex keys
- Torque wrench
- Cable cutters
- Small flat tipped screwdriver
- ‘Wet’ style chain lubricant
- Spare inner wire
- Cable end cap
Step 1
Begin by shifting the gears into the small chainring up front and the small chainring at the rear. This helps remove the stress from the chain and cables.

Step 2
Before you loosen the cable pinch bolt, it’s worth making a note of the route the cable takes around the derailleur. This is key to the derailleur’s performance. Getting it wrong when reinstalling the cable can lead to vague shifting and make the indexing difficult. Most manufacturer’s technical documents will have a routing diagram, but you may find taking a photo of it useful.
Step 3
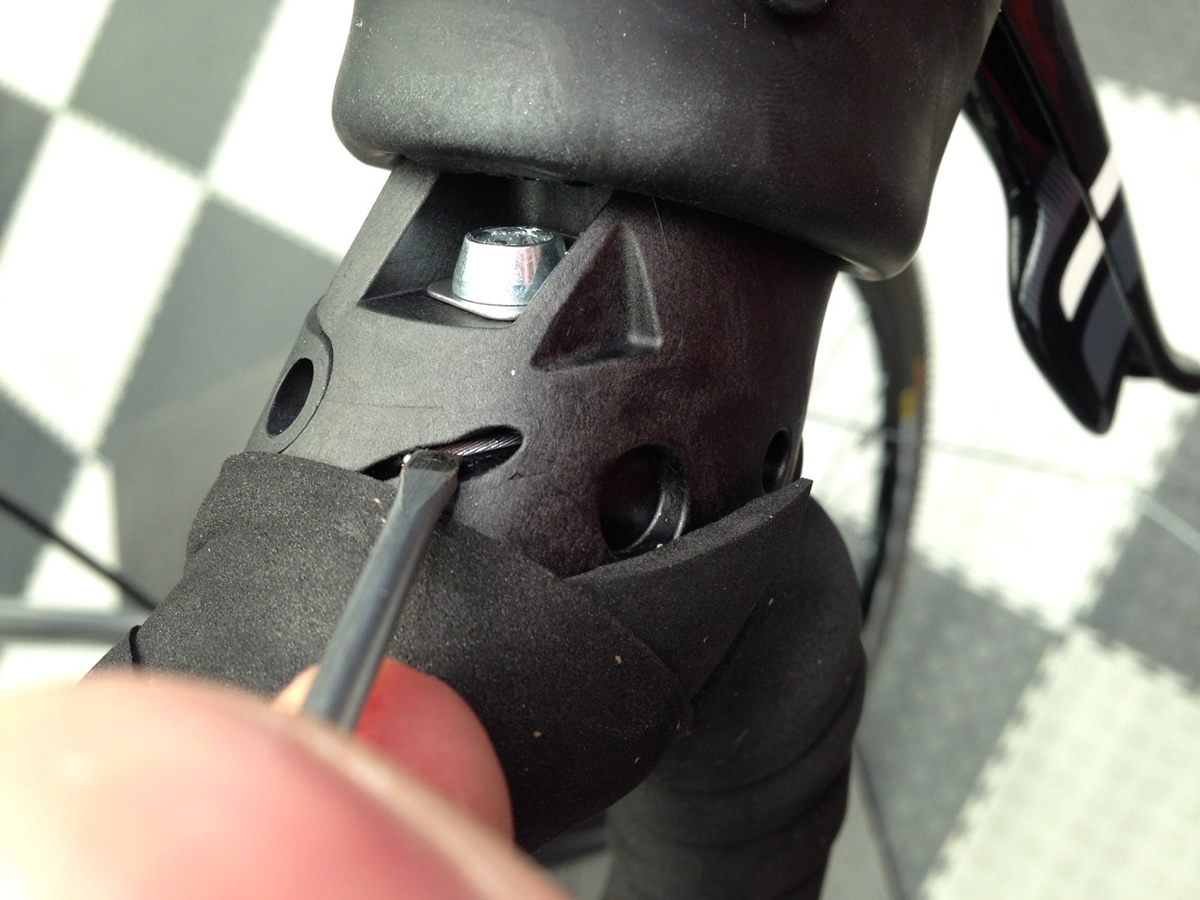
Pull the hood of the rear shifter back. If you look at the inside of the shifter you should be able to see the head of the cable as shown in the picture below. The shifter MUST be in the top gear (hardest) to remove the cable properly. Pull the gear inner wire out of the outer casing and shifter and dispose of.

Step 4
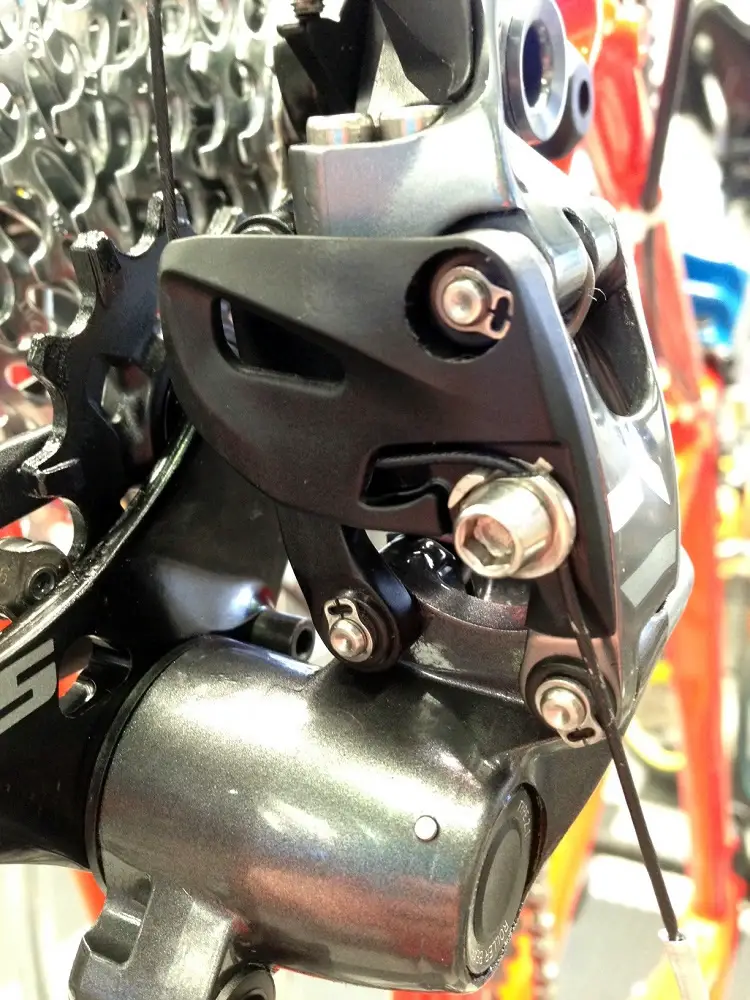
Before replacing the inner wire, screw both of the limit screws all the way into the derailleur. You may find you have to push on the derailleur to screw the high screw in. This will effectively ‘limit’ the gears available to you by preventing the movement of the derailleur linkage. If you have difficulty visualising what the limit screws do, try thinking of them as bookends on a bookshelf. The books themselves are the gears and the bookends prevent the books from falling off the shelf. Similarly, the limit screws stop the chain from falling into the spokes of the back wheel and jamming against the frame.
Sometimes the limit screws are marked with ‘H’ and ‘L’ which is useful. The Force 1 isn’t marked, so it’s a good idea to look through the derailleur linkage and physically push the cage by hand to see which screw the linkage gets closer too.
Step 5
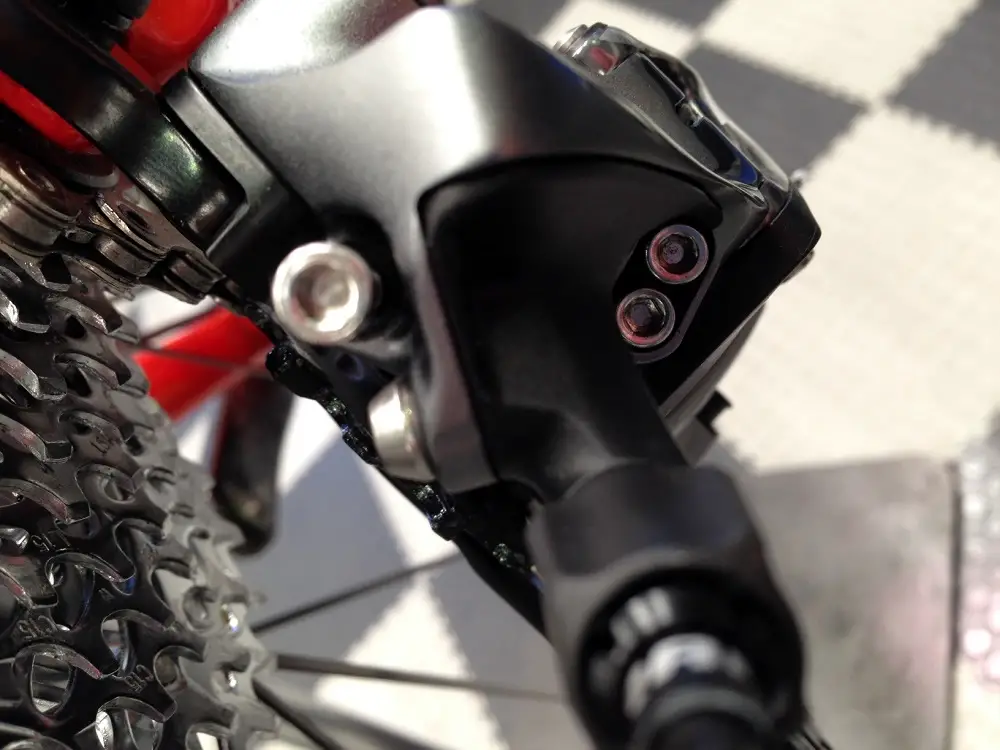
Undo the High limit screw counterclockwise until the jockey wheel sits directly under the smallest sprocket. Now loosen it a touch more so that the inside edge of the jockey wheel lines up with the outside edge of the cassette sprocket (which is approximately about a ¼ of a turn of the screw). This will help the derailleur shift smoothly without hesitating into the smallest sprocket.
Step 6
Undo the Low limit screw counterclockwise until the jockey wheel sits directly below the low (large) sprocket. You’ll need to push the derailleur over by hand to check you’ve got this right.
Step 7
Double check the shifter is in the high gear position and feed the cable through the shifter. It’s worth noting here that Shimano cables can be particularly troublesome to feed through SRAM shifters, so try either Jagwire or Clarks if you’re struggling. It also helps to put a very slight bend in the cable to help it around the shifter spool and having a small flat tipped screwdriver to push the inner wire into the outer casing at the top of the shifter will help a bunch too.
Step 8
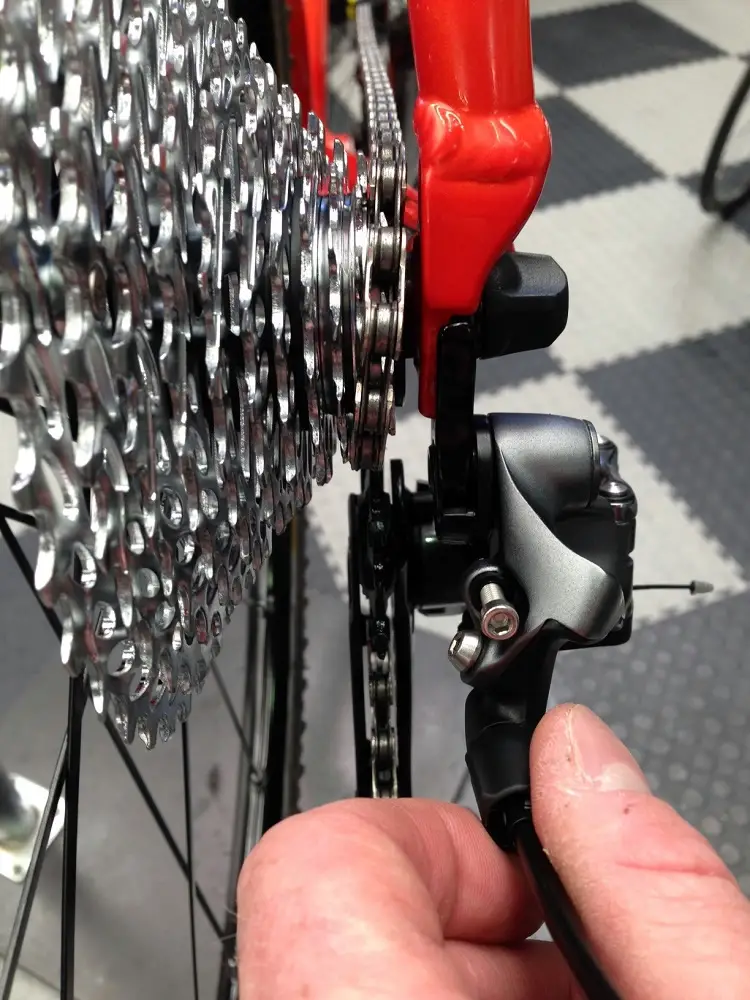
Drop a couple of spots of the wet chain lubricant onto the ends of the outer casing and feed the inner wire through the outer casing. Route the cable into the derailleur correctly as mentioned previously, making sure that the barrel adjuster at the rear of the derailleur is screwed fully in (clockwise). You may notice a small groove cut in the washer of the cable pinch bolt to help give you an indication as to how the cable should route through the pinch bolt.

Step 9
Without pushing on the derailleur, pull the cable taut and secure the pinch bolt to torque.
Step 10
Press one gear change on the shifter. If the derailleur shows no signs of movement then you will need to loosen the cable pinch bolt and pull more tension onto the cable. If the derailleur moves, but not enough to shift into the next sprocket, then undo the barrel adjuster counterclockwise until it hops into the next sprocket up. This is known as indexing the gears. Be careful not to use all of the threads of the barrel adjuster – if you need to unwind it a lot, it’s an indication you want to pull more cable through.

Step 11
Once the derailleur shifts nicely from the smallest sprocket to the next sprocket up, then it should shift nicely all the way up to the low sprocket. If it doesn’t, it could mean that the derailleur hanger is bent. BE VERY CAREFUL WHEN SHIFTING INTO THE LARGER SPROCKETS! If the hanger is bent, it is best straightened using a specific hanger alignment gauge. Your friendly local bike shop will be able to help you with this. If the shifter feels tight when going into the largest sprocket then you may just want to loosen (counterclockwise) the Low limit screw. Do this by a ¼ to a ½ turn max.
Step 12
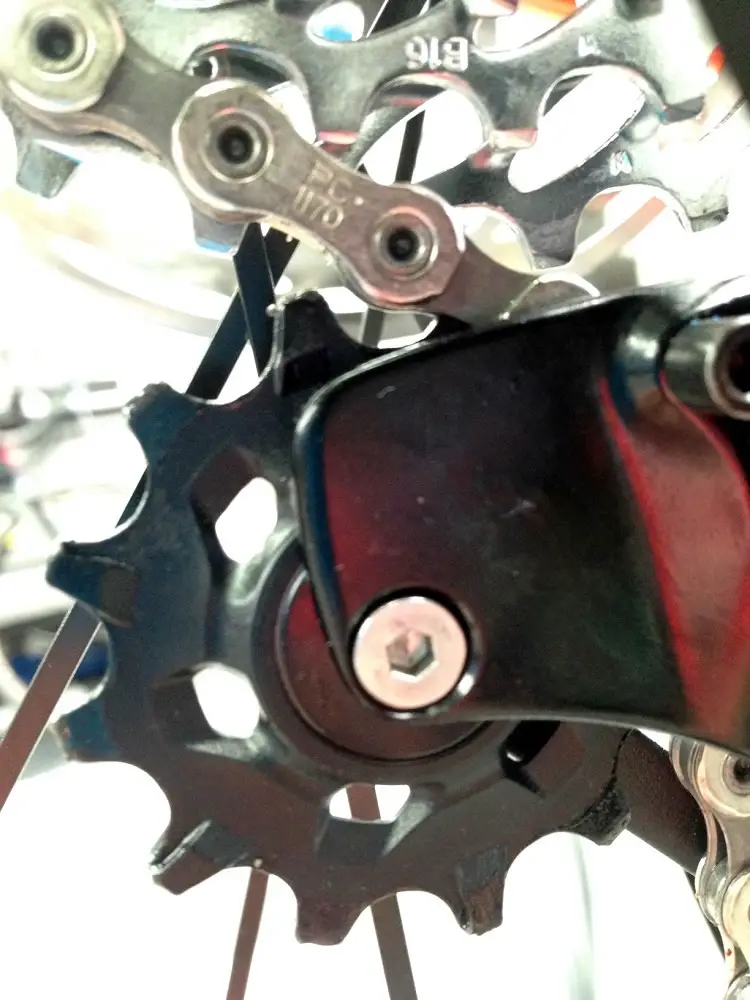
Once you’ve indexed the gears, then you can set the height of the body screw or ‘B’ screw as it’s known. For the Force 1 derailleur this is best done in gear 2, the second largest sprocket.
Screwing the B screw in will push the derailleur jockey wheel away from the sprockets, screwing it out will bring it closer. You are aiming to have a gap of around 6–8mm – looking at one outer plate of the chain between the sprocket and jockey wheel is a good way to reference this gap.
Stand back and marvel at your well-adjusted gears! You may find that the cable ‘stretches’ causing the indexing to go out, but a small tweak of the barrel adjuster will sort this out.
Happy spannering!