In the Pits: Hub – sealed cartridge – bearing replacement
Difficulty rating 4/5
In this months ‘how to’ we’ll take a look at one of the areas of the bike that tends to get forgotten, but is vital to keep your bikes wheels running smoothly.
Bearings of any sort get much more of a bashing on a ‘cross bike and the sloppy nature of the conditions they are ridden in with the constant washing they undergo make it far more likely that water will find its way past the delicate seals and start to corrode from the inside out. Typical signs that your hub bearings will need to be replaced include:
- Play felt in the wheel when pushed from side to side
- A gritty rumbling feel from the hubs
- A seizing that can only be broken by back pedalling the bike
Let’s take a look at what tools you’ll need.
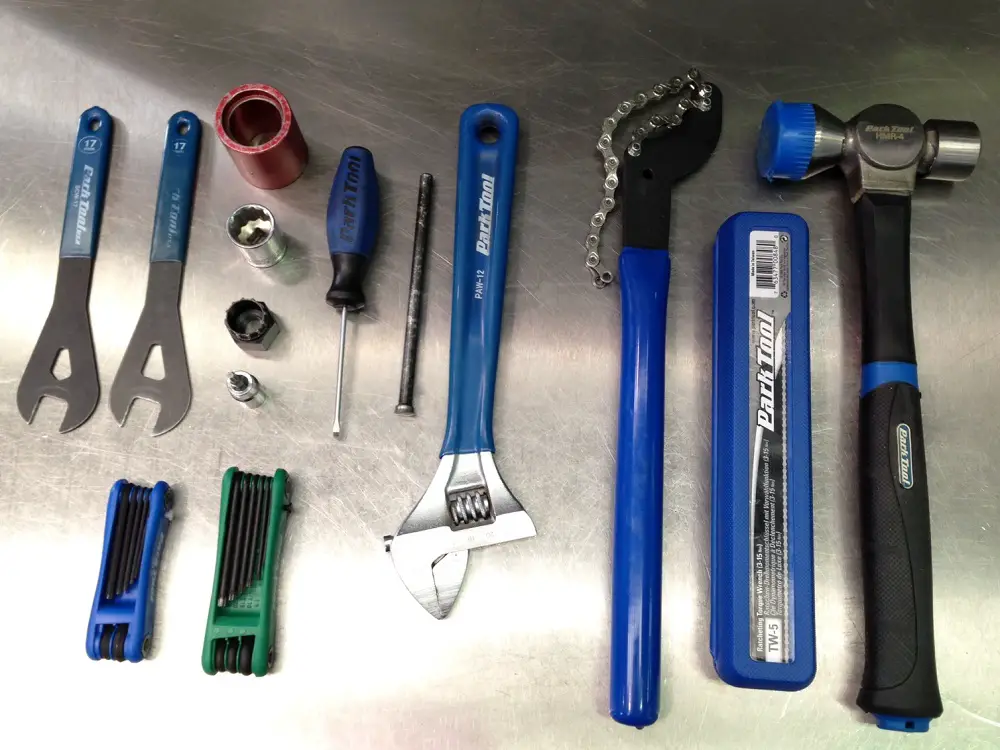

- Cassette removal tool
- T25 Torx key (if using discs)
- Small flat bladed screwdriver
- Adjustable spanner (or cassette lockring tool)
- Chain whip
- Soft blow mallet
- Drift
- Hub support
- Appropriately sized socket
- 17mm cone spanners
- Allen key multi tool
- Needle nose pliers
- Vernier callipers (not shown)
- Fast drying degreaser (such as disc brake cleaner)
- ‘Wet’ type chain oil
- Good quality grease (Park Polylube used here)
- Nitrile gloves
- Cloth
- Safety glasses
- Medium strength threadlock (not shown)
Nice to have but not essential:
- Bench mounted vice with soft jaws
- Bearing extractor tool
- Bearing press tool
- Freeze spray (Finish Line Chill Zone is a favourite) or penetrating oil
Allow yourself up to 45minutes to complete the job, if you stay on top of replacing the bearings then they will be easier to remove than if you have left them in for a couple of seasons!
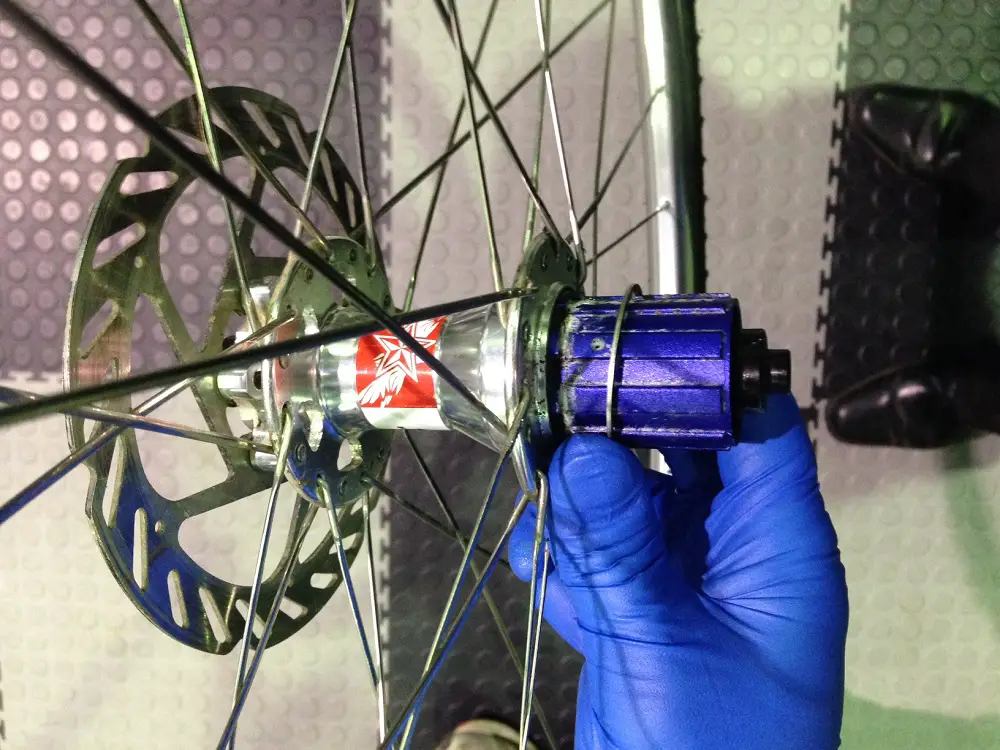
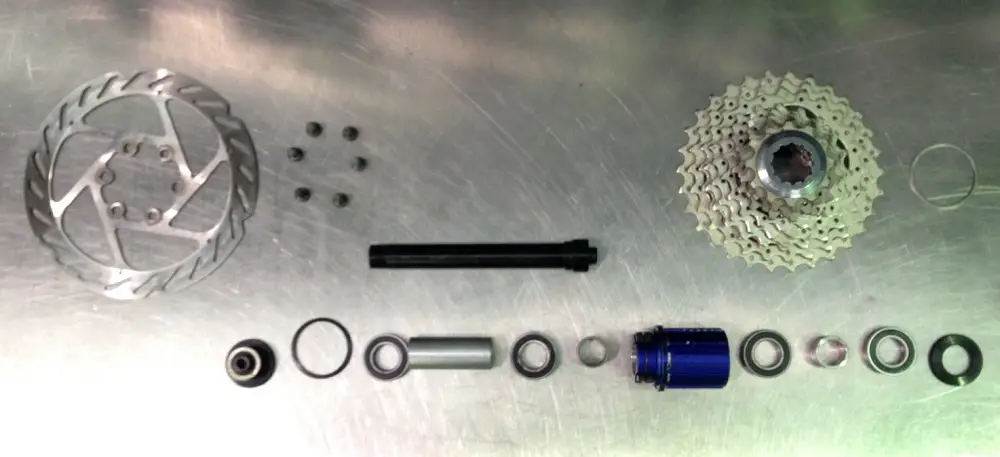
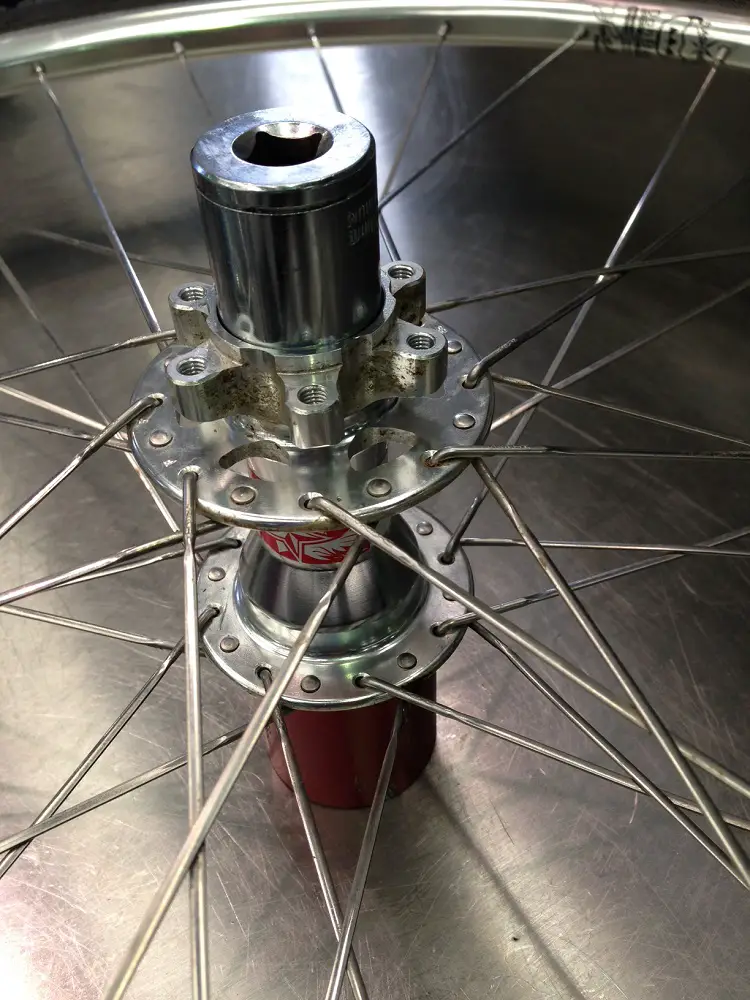
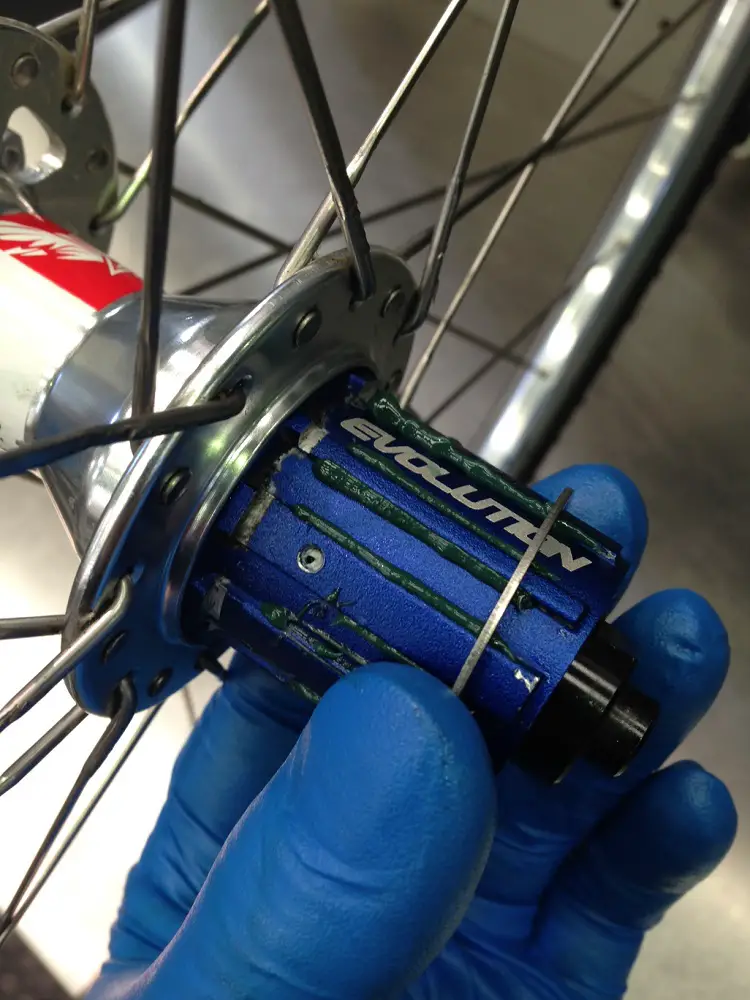
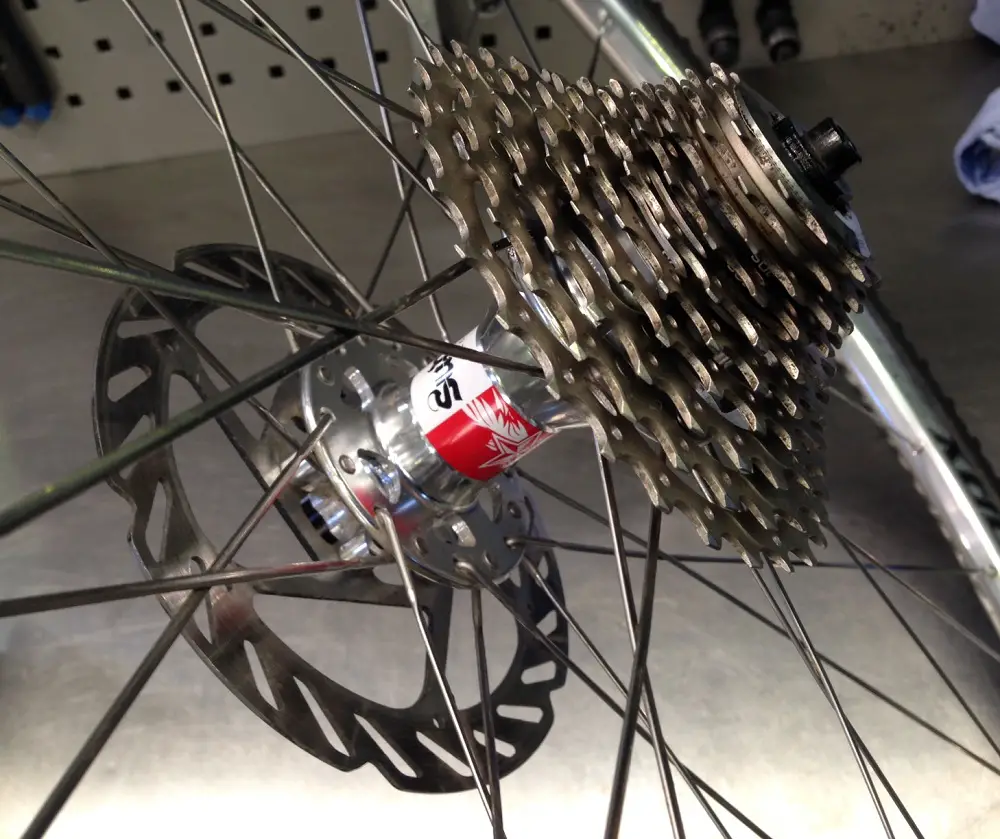
Start by removing the cassette and disc rotor (if you have disc brakes fitted).

You may find a small spacer washer on the back of the cassette (Mavic freehub bodies run a slightly thicker spacer to allow you to convert from 10 to 11 speed) make sure you remove this and place it safely to one side.
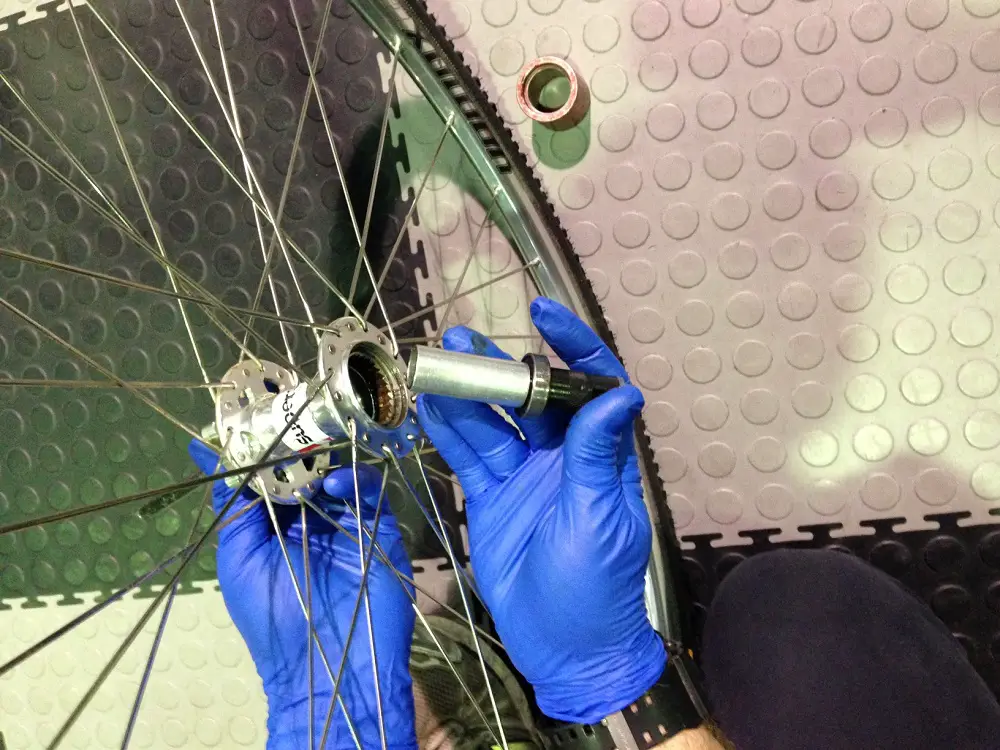
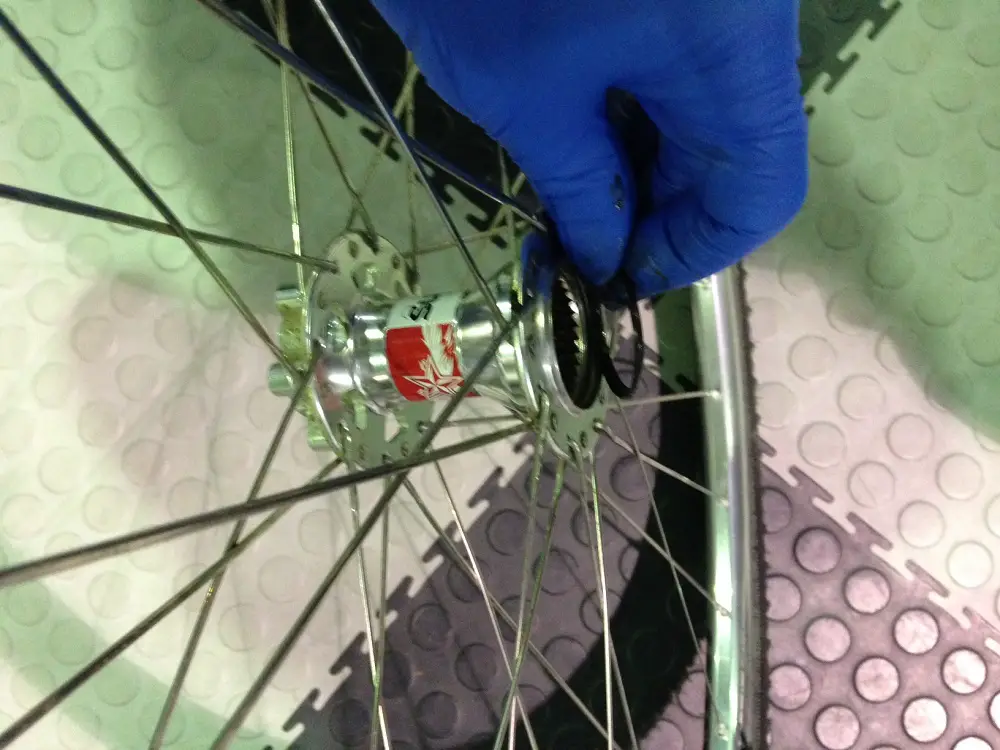
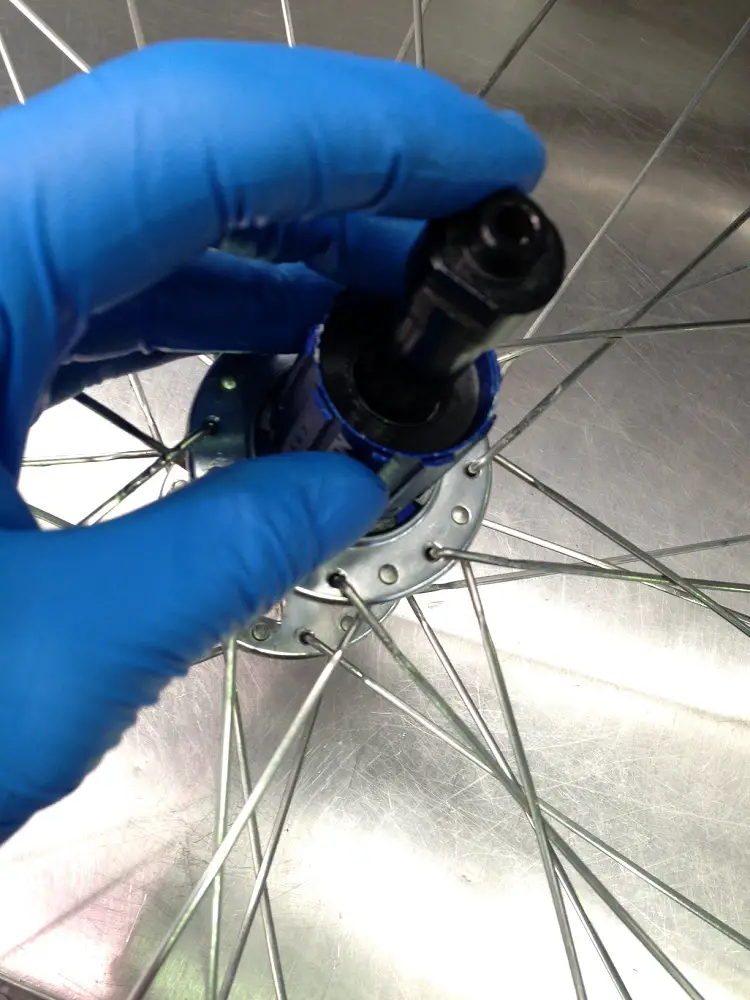
Remove the hub bearing end cap. On the hub shown this required two 17mm cone spanners, but could be a combination of 5mm hex key and 17mm cone spanner, or two 5mm hex keys. In some instances the end caps are push fit and can be removed by hand or if they are stiff some needle nose pliers (just remember to protect the soft aluminium by wrapping some cloth around the jaws of the pliers first).

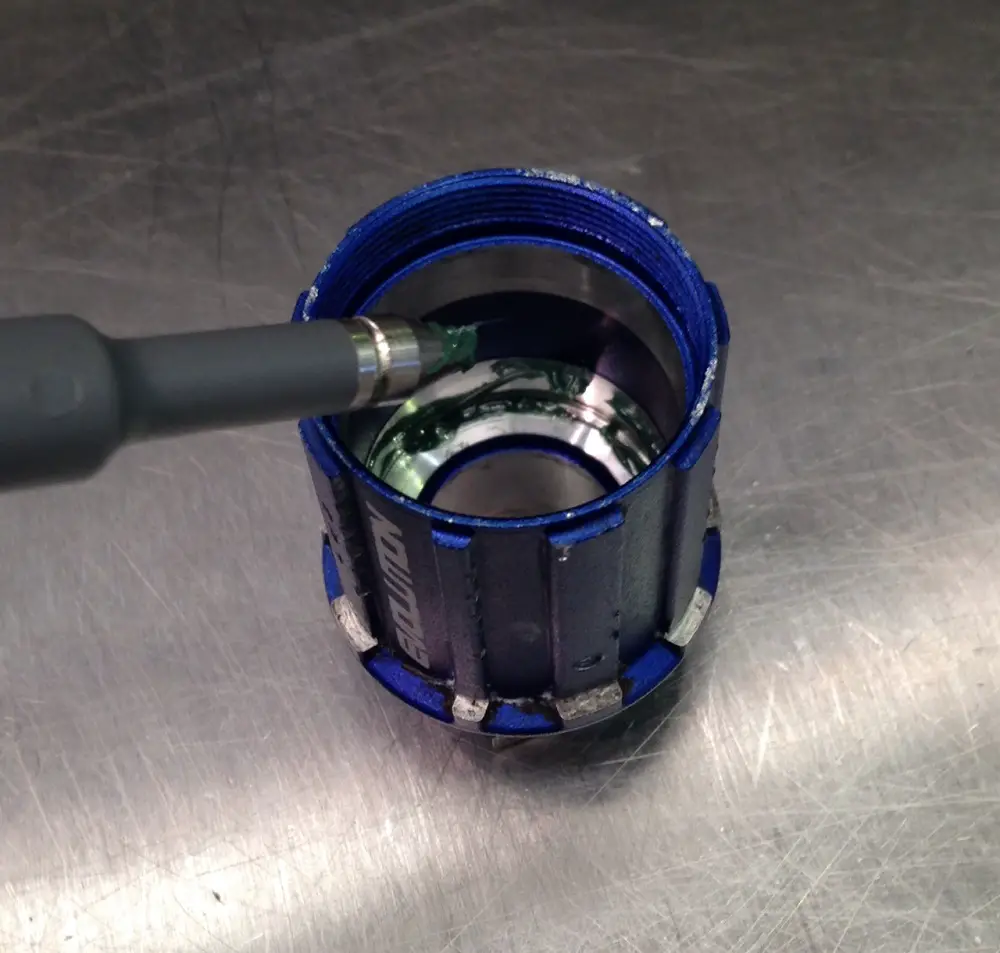
With the end cap remove press on the end of the axle to extract it from the hub. In this instance axle pressed out to the drive side, but on some hubs it may need to be pressed to the non-drive side. Always refer to the manufacturer’s instructions if in doubt. Take care once the axle is removed as there will be nothing retaining the freehub body and the tiny sprung pawls have a habit of pinging across the floor and down / under the nearest gap or heaviest object, you have been warned!
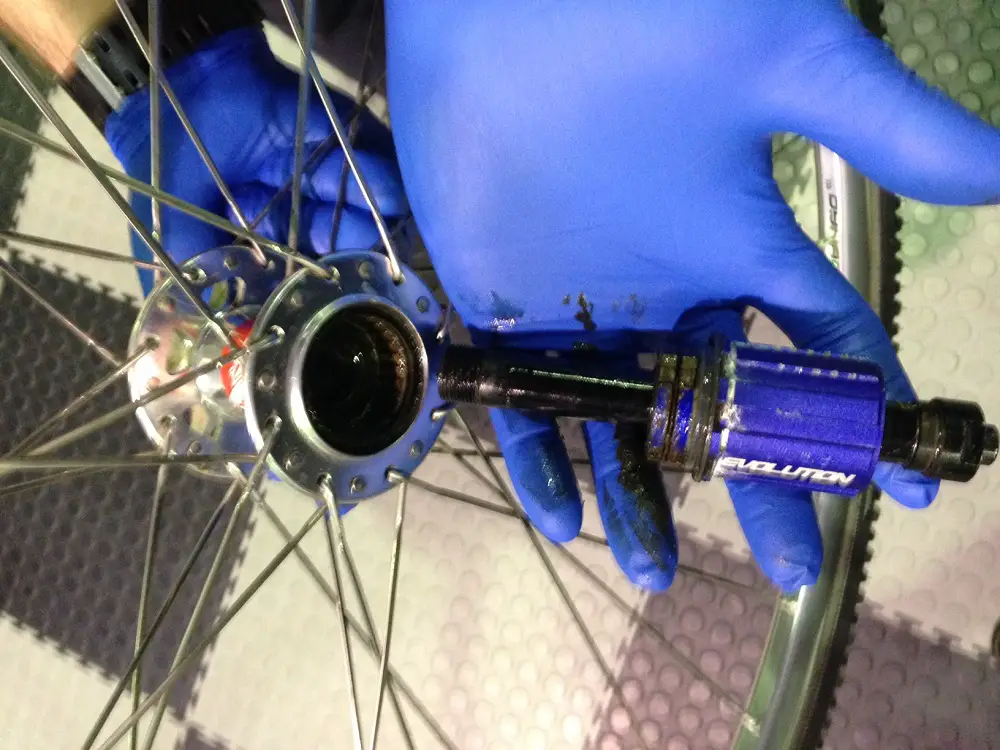
There may be an additional seal on the drive side. In our hub service this came off after the freehub was removed, but sometimes it can sit above the pawls and come off with the freehub body. Be careful to note the orientation of the seal and set to one side.
Place the hub on a support and use the drift to remove the bearings from the hub shell. Shown below are two methods of supporting the hub, either with a dedicated hub support or using a bench mounted vice with soft jaws fitted.


Remove the hub shell bearings and any support collars from the hub. Note that ours requires the use of a bearing extractor to remove the first bearing from the hub as the support collar was butted closely to the bearings making it difficult to get a purchase with the drift. If this is the first time the bearings are being removed from the hub and the bearings have been in the bike for a couple of seasons then it may be best to leave the bearings soaking in penetrating oil for a few hours first. If you do not have time / are impatient then a product such as Finish Line’s ‘Chill Zone’ is useful. It freezes the bearing, causing it to contract thus breaking any corrosive bond and the gaps caused by the contraction are filled with penetrating oil contained in the spray which further aids removal.

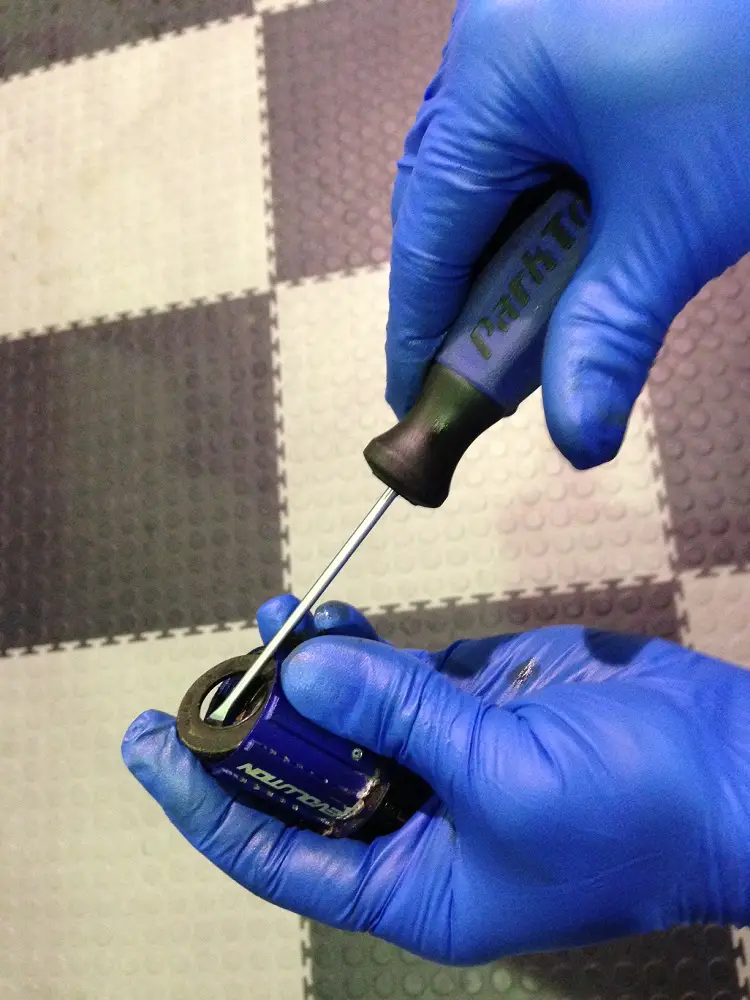
Remove any seal washers from the freehub body and remove the bearings from the freehub body. This is harder to do than removing the bearings from the hub shell and different hubs have different ways of securing the bearings, on some freehub bodies you may find that there is a circlip between the two bearings and some hubs such as some Mavics the bearings are in a stub on the hub shell itself. What they all share in common is a short support collar between the two bearings which makes the bearings difficult to remove which is why we used a bearing extractor on this job. Freehub bodies can be purchased seperately with the bearings already installed and this is sometimes a better bet if you do not own a dedicated bearing extractor.Take note of any differences in colour of the seals on the bearings and ensure that the new bearings are pressed in with the same colour facing outwards if there is a difference in colour. Remove the bearings and support collar and set to one side. Note that there may be an additional support collar in the reverse (hub side) of the freehub body. Take care not to confuse the two!

Clean and degrease the freehub body and hub shell using the fast drying degreaser.

Ensure a decent layout when dismantling the hub, this makes the rebuild stage easier!
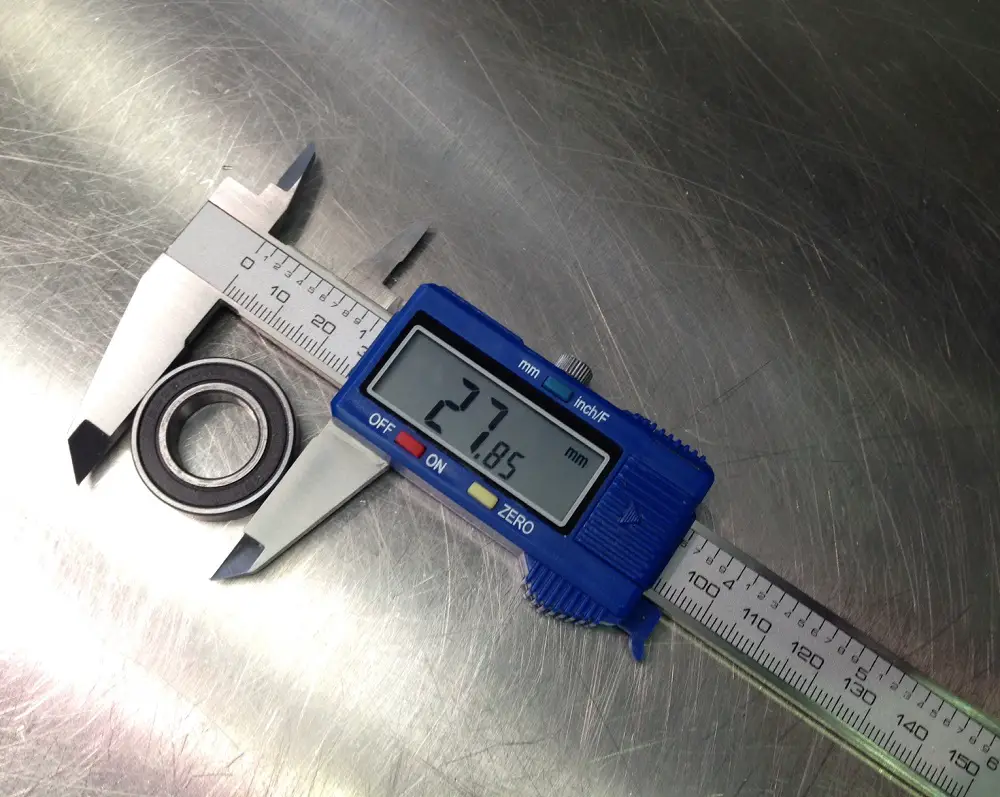
With the bearings removed and cleaned look at the seal of the bearings, there should be a bearing code on them. Ours were numbered as 6903RS bearings. There are many good bearing trader websites and sealed cartridge bearings can be easily purchased from them, but there can be a bewildering choice. Always go for the best you can afford, but you don’t have to buy the really expensive bearings for a ‘cross bike if you are replacing them regularly instead pick a bearing that is about mid-range in terms of price. To confirm you have the correct bearing it may be worth taking some measurements from the bearing. Key measurements are the Outside Diameter (OD) Inside Diameter (ID) and the thickness of the bearing. Use a Vernier Calliper if you have one to take the measurements from the bearing.
Now is a good time to give the hub shell a good clean as you can get to all the bits you can’t when the cassette and disc rotor are fitted.
Make sure you grease the freehub body (if you removed them) and hub shell before re-installing the bearings. This will ensure that the next time you remove the bearings you are less likely to find them seized into place.
If you purchased a new freehub body you can skip the next step. If not then you will need to press the new bearings into the freehub body. We used a dedicated bearing press for this which made the job a lot easier, but if you do not have one of these you can use a soft blow mallet and a socket to re-seat the bearings as shown in the next step. If you are using a bearing press then be careful to press the bearing in until you feel it seat and NO MORE. Pressing against the bearing like you’re life depended on it will not make it grip the bearing any better and usually results in a bearing that feels gritty to spin. Make sure that you install the short support collar between the two bearings. This may need to be centralised when the second bearing is pressed into place.
Press the bearings into the hub shell. Here we show you using a socket to re-seat the bearings instead of the dedicated bearing press. Make sure that you choose a socket that fits precisely onto the outer edge (metal) part of the bearing. Pressing on the inner edge or worse, the seal will destroy the bearing. Support the hub shell on the hub support and use a soft blow mallet to re-seat the bearings ensuring that any support collars are positioned between the two bearings.
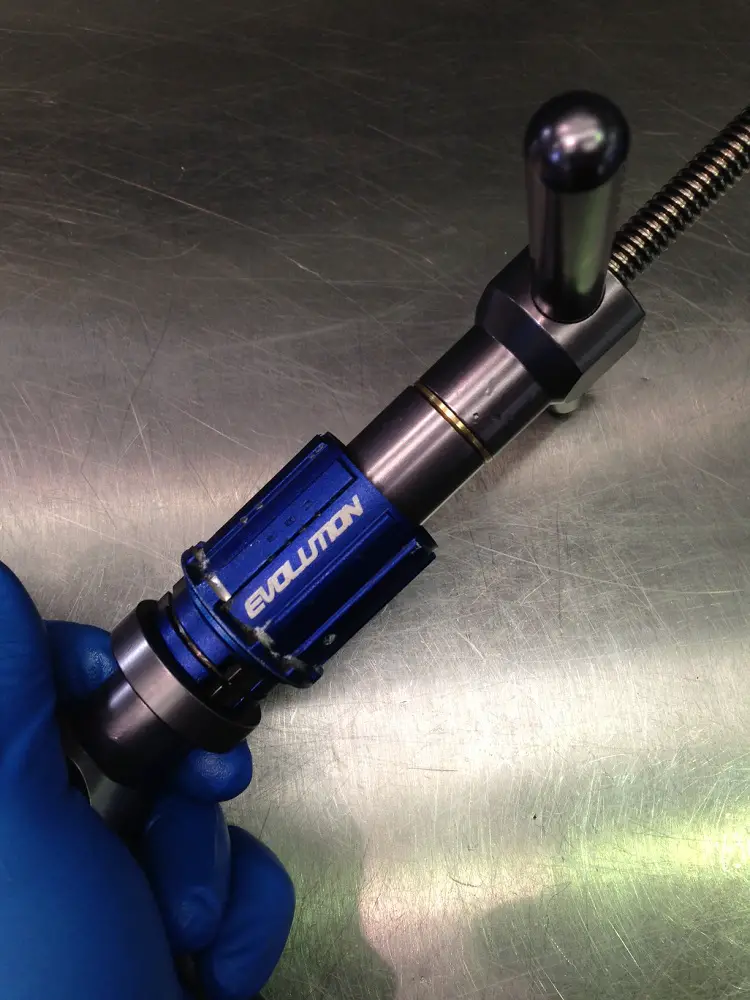
Replace the freehub body seal washer and oil the ratchets in the hub shell. Apply a small drop to the pawls on the freehub body. It is worth checking whether the manufacturers have designed the pawls to work with grease or oil as greasing pawls that have been designed to run with oil will result in the pawls sticking down and unable to drive the freehub body. Replace the freehub body support collar and re-install the freehub body. You may find that pinching the pawls down and twisting the hub whilst pressing down on the freehub body helps seat it in place.


Replace the seal washer on the front of the freehub body if required and apply a light coating of grease to the hub axle before sliding the axle into the hub. You may need to reseat the central support collars once more to allow the axle to slide through nicely. Replace the hub end cap.

Secure the hub end cap in place and remember to replace the cassette spacer if there was one fitted. Grease the splines on the freehub body, this will help to prevent the cassette from biting into place making it easier to remove next time.
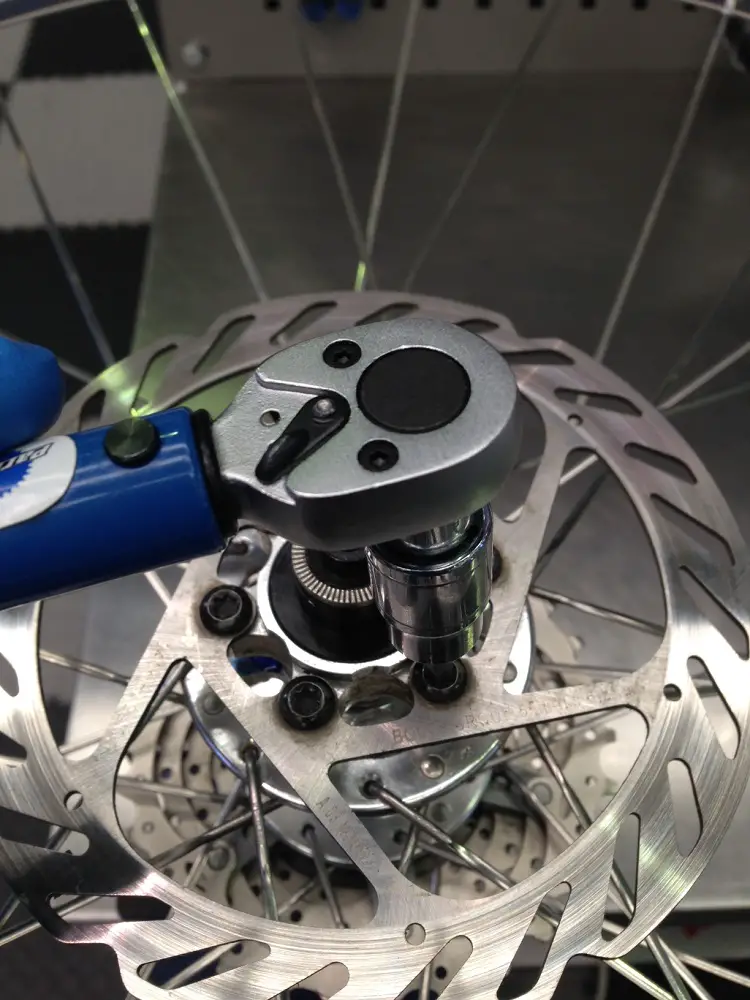
Re-install the cassette and disc rotor (if required) ensure that you torque the rotor bolts to the specified torque rating which can often be found printed on the disc rotor.
All that remains now is to wipe off any greasy fingerprints from the rim with a touch of fast drying degreaser (disc brake spray is best) apply a light coating of grease to the quick release skewer and replace making sure the spacer springs are the correct way round (small end towards the hub) before refitting the wheel to the bike. If you run disc brakes then you may find you have to reposition the brake calliper slightly because of the increased tolerance of pad to rotor and the new bearings may not be seated in EXACTLY the same place as the old ones.
So there you have it, now it’s up to you to go and make it muddy!
Julian Thrasher.