Viewing 40 posts - 681 through 720 (of 749 total)
  • Rate my Brickie….
  • mogrim
    Full Member

    I’m worried (and I admit: curious)… this “wee shower” thing you’re talking about, interesting, but is it something you really want to be sharing on the internet?

    footflaps
    Full Member

    I’m worried (and I admit: curious)… this “wee shower” thing you’re talking about, interesting, but is it something you really want to be sharing on the internet?

    He’s looking for someone to provide the ‘shower’, so where better to advertise than STW…..

    bruneep
    Full Member

    I’m pretty handy

    It shows

    rusty-trowel
    Free Member

    8 feet rusty? That’s a bit of an over-order no. Or did you have secret plans for it , “yes of course I need all this darling”

    Yeah, only needed 2 and a little bit so plenty of the 3rd length left over.

    footflaps
    Full Member

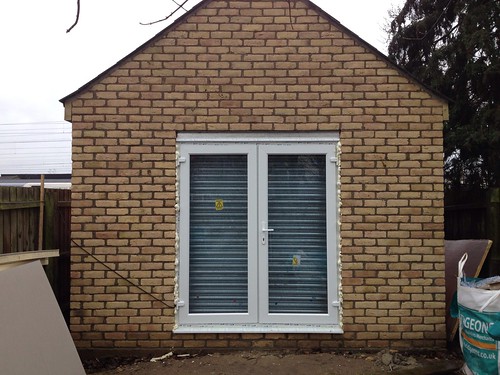
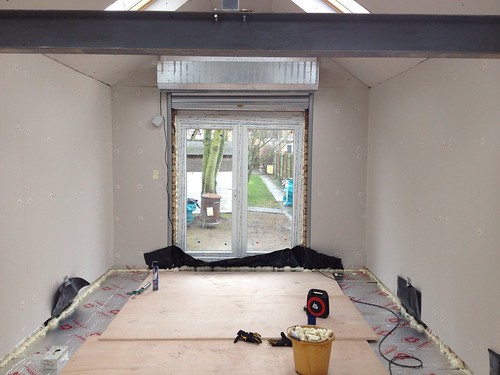
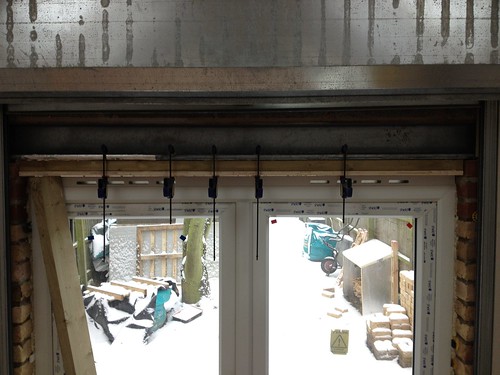
    Final photo before xmas, with patio door partially fitted. Need to fit wood plinth above doors to close 3/4 brick gap and provide something solid to screw the top of the frame to. Currently some Celotex is filling the gap to keep the rain out.


    Patio doors in place, but not quite fitted. by brf, on Flickr

    wrightyson
    Free Member

    Good old expanding foam. Merry Christmas flaps, all the best for 2013’s develoents!

    pjm84
    Free Member

    I was trying to work out what was above the doors … and then spotted Celetox in your posting.

    What height are those doors? Course wise I count 26 bricks which is Hobbit like. (No 29ers then)

    You doing anything with the verge?

    2unfit2ride
    Free Member

    Course wise I count 26 bricks which is Hobbit like.

    I count 25 to the top of the frame, 25×3″ =75″ =6’3″, how big are Hobbits nowadays?

    footflaps
    Full Member

    Imperial bricks, so doors are 82″ high. http://www.wickes.co.uk/invt/155253?w=155253

    wrightyson
    Free Member

    x 83, they’re imperials! 😉

    wrightyson
    Free Member

    57 seconds too late! Ah well santas finally been so I can hit the hut!

    althepal
    Full Member

    Patio is on the list for spring but need to sort out the neighbours drainage first- washed away the last attempt at sand and cement between the slabs- weeded it a few months ago but as its not exactly been BBQ weather couldn’t be bothered doing it again..
    Take on board comments about regs- was just thinking it would be a good wee addition to the house.
    Shower room/wc there if we use it as a guest room or for use after muddy rides on the bike.

    andylaightscat
    Free Member

    why not get some doors made??

    pjm84
    Free Member

    Good old Imperials. Bet your Brickie loved you.

    26 for the opening, 25 for the doors. So with metric bricks (they’re not) the opening would have been circa 1950mm / doors 1875mm

    Just finished a office refurb where the doors are 3m tall externally.

    footflaps
    Full Member

    Good old Imperials. Bet your Brickie loved you.

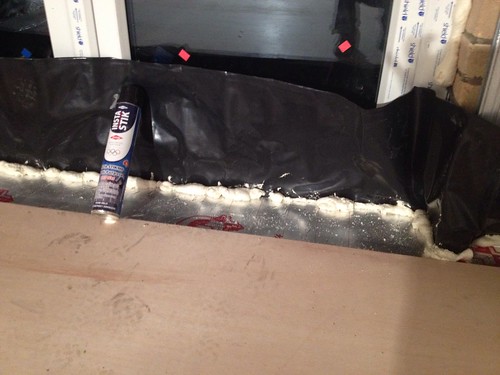
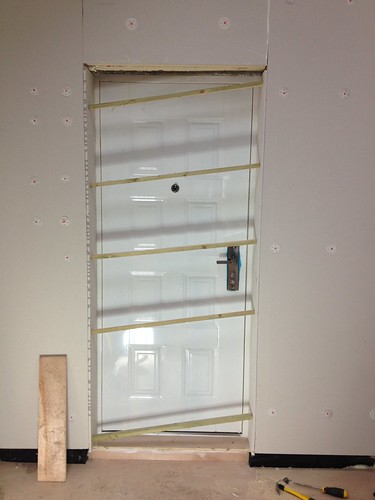
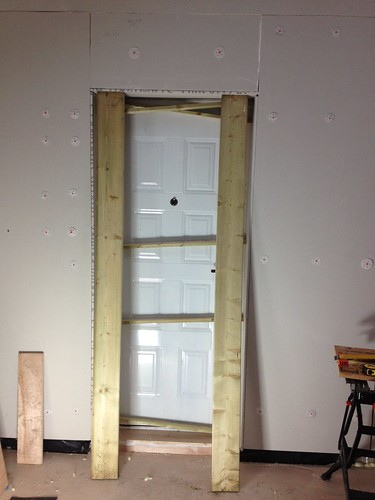
    They’re a right pain fittings doors / shutters to as you get such a variety of widths, there are no straight edges / flat surfaces, so you need loads of packers to manage all the offsets, then a can of foam to fill in all the remaining gaps!

    However, they do look nice and match the house.

    footflaps
    Full Member

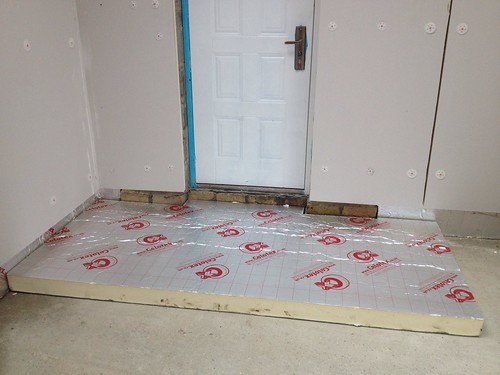
    No where near as exciting as DrP’s Xmas edition, but in between inlaw visits etc, managed half a day to sort out the floor insulation.

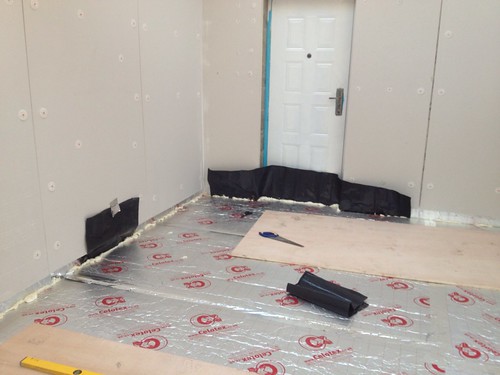
    There’s a tiny amount of damp creeping in one side as there is a load of slab overspill concrete outside which is holding the water against the wall. You can just see the damp in the photo below:


    Celotex G4100 on the floor by brf, on Flickr

    Given that’s all the damp I’m getting, even in this wet period, I’ve decided not to lay another DPC and just use the Celotex foil covering as a Vapour barrier, using expanding foam to get a good seal against the stuff on the walls.


    Celotex acting as Vapour barrier by brf, on Flickr

    For the pillars and the doorways, where there isn’t Celotex on the walls, I’ve used pieces of DPC which will get bonded to the DPC in the brickwork, to keep any damp away from the floor.


    DPM covering the doorway by brf, on Flickr

    Whole thing looks like:


    Floor insulation complete by brf, on Flickr

    Next job is to cut the 18mm Hardwood Ply to sit on top, trim the DPC sections and then add skirting around the edges to hide the foam overspill.

    footflaps
    Full Member

    Back from skiing, so a bit more progress, cut to fit and laid the 18mm Ply on top of the Celotex:


    18mm Ply Floor by brf, on Flickr

    Next job is skirting and making work benches….

    trail_rat
    Free Member

    Looks alot smaller inside than outside and floor pan would have you believe, much narrower.

    JEngledow
    Free Member

    I’m glad your back, I was starting to get withdrawal symptoms -I think you might have to provide some counselling for when you finish completely!!

    MrGrim
    Full Member

    Is there going to be some sort of opening ceremony with an invitation to all STW members? 😉

    Will be glad to see the end man-cave result

    footflaps
    Full Member

    The plot is 4m wide, but each wall is 9cm block + 15cm Celotex + 12.5mm Plaster Board, so the internal width is 3.3m ish.

    trail_rat
    Free Member

    Smaller than my garage then thats why it looks narrow…..i wish my garage was another metre wider……ill be trying for it when i knock it down and rebuild it 2 story for my master bedroom and en suite 🙂 ( in 10 years time…..ie in my dreams)

    JoeG
    Free Member

    Is there going to be some sort of opening ceremony with an invitation to all STW members?

    I’ll bet that it will be his wedding. After (over)building the shed, there is no way that he can have enough funds to hold it anywhere else! 😀

    It does sort of look like a chapel with the vaulted ceiling. Maybe some stained glass for the skylights…

    user-removed
    Free Member

    Bagsy taking the photos. Can’t believe I’m a wedding photographer and have yet to shoot an STW wedding!

    No-one’s allowed to ask the groom if he’s bricking it.

    footflaps
    Full Member

    The OH did suggest holding the reception in the workshop!

    footflaps
    Full Member

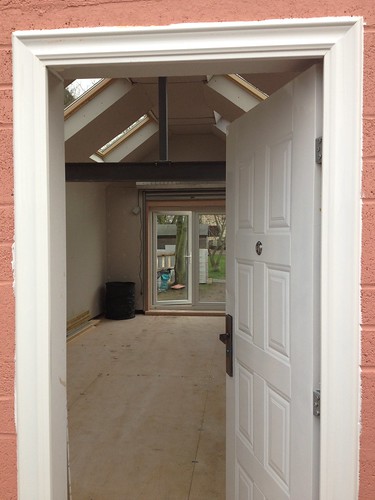
    It’s been a while, but spent a couple of hours sorting out the back door. Tidied up DPC, added a ply-wood step and fitted plaster board round the returns (just bonded to concrete with glue).


    Untitled by brf, on Flickr


    Untitled by brf, on Flickr

    Alan the Brickie will be back soon to skim the lot….

    toby1
    Full Member

    If there is a grand opening, I’m in. I only live Ian village a few miles out of town 🙂

    2unfit2ride
    Free Member

    Keep it up Footflaps, I don’t think anyone has lost interest in this thread…

    pjm84
    Free Member

    Okay you got me…

    Skim and insulation fixings. What’s the plan?

    footflaps
    Full Member

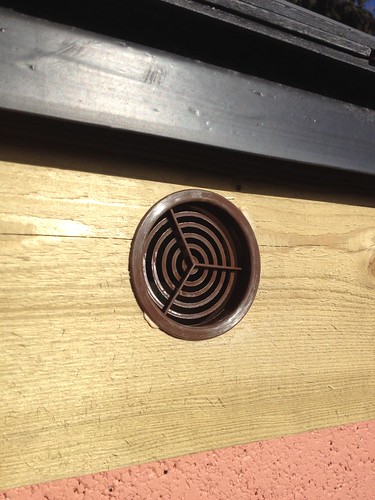
    Not a lot of progress recently, it all slows down once you get onto lots of fiddly jobs, plus I knackered my hand this weekend using a core drill for the soffit vents, caught on a rafter and nearly broke my wrist:


    Soffit fascia vent by brf, on Flickr


    Ouch. Drill caught using holesaw and whipped out my hand at 300rpm! by brf, on Flickr

    Last weekend I fitted the wooden beam under the lintel so I had something to screw the door frame into:


    Wooden beam needed to fit between door and lintel by brf, on Flickr

    Made a 65mm width beam from a joist and some 18mm ply:


    Making up correct width beam by brf, on Flickr

    I did try and bolt it in place, but my drills couldn’t so much as mark the RSJ, so I glued it in the end:


    Beam glued to RSJ by brf, on Flickr

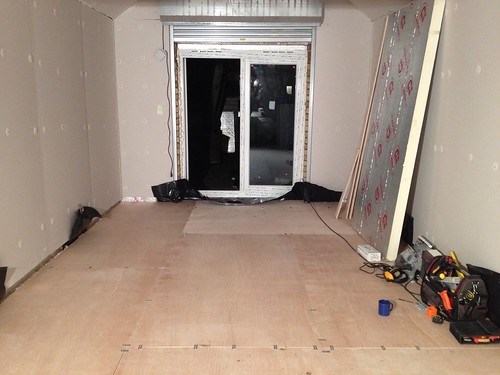
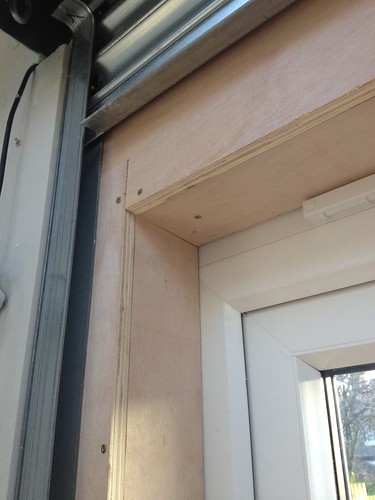
    Other than that, I’ve been faffing with cutting Ply to make a sort of door alcove thing tied into the RSD and around the Patio doors. Turns out 18mm ply exactly fits into the rear slot on the RSD, so I get a clean fit. There are two slots, one for the RSD to close in and one behind.


    Ply box around door by brf, on Flickr

    2unfit2ride
    Free Member

    Great stuff footflaps. keep it coming.

    wwaswas
    Full Member

    Do the core drills not have a clutch fitted to stop that? Looks painful 🙁

    matt_outandabout
    Full Member

    Do the core drills not have a clutch fitted strong enough operator to stop that? Looks painful 😥

    FTFY
    😉

    footflaps
    Full Member

    I wasn’t using a core drill, just core drill bits with a standard DIY drill. Like most things you learn from your mistakes!

    A decent drill with a clutch will be my next purchase….

    footflaps
    Full Member

    Alan the Brickie is back today to start skimming the whole thing, so here are some photos before he starts:


    Pre-skimming by brf, on Flickr


    Back door by brf, on Flickr

    footflaps
    Full Member

    Also, just invested in this, to reduce the chances of any more knackered hands / wrists:

    wwaswas
    Full Member

    Power tools are good 🙂

    Sandwich
    Full Member

    New tools too. This thread is so full of win it may burst!

    footflaps
    Full Member

    It’s the project that keeps on giving, once it’s skimmed I can start fit out – electrics, sinks, plumbing, workbenches, shelves, etc.

    I doubt it will ever actually be finished 😉

    piemonster
    Full Member

    Power tools, hmmmmm lovely power tools

Viewing 40 posts - 681 through 720 (of 749 total)

The topic ‘Rate my Brickie….’ is closed to new replies.