- This topic has 19 replies, 13 voices, and was last updated 3 years ago by masterdabber.
-
Making some wooden signs
-
scotroutesFull MemberPosted 3 years ago
I’ve reached an agreement with one of the local estates about putting up a couple of “warning” signs on a particularly nasty bit of (what used to be a) track. I’m thinking that something with engraved/embossed lettering will last longer than something that is just painted. My thoughts are to get a couple of bits of wood, then “carve” lettering into them with a router bit.
I don’t have a router. I don’t have a router table.
I do have some router bits, an electric drill and a vertical stand for the drill.
Do you reckon it would be safe enough to hold the wood in one hand, lower the drill, and then manipulate the wood under the drill to cut each letter?
(I’ll likely then paint it green, with white lettering).
kayak23Full MemberPosted 3 years agoGet a cheap router like this Katsu.
https://www.amazon.co.uk/dp/B00LVVJ99U
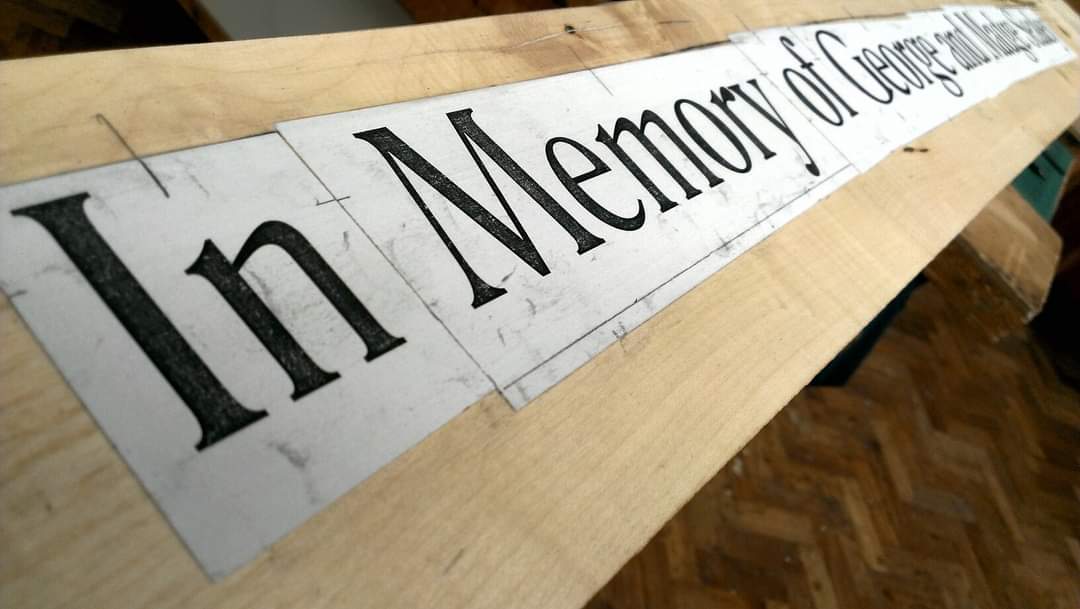
I used to make lettering by printing off the lettering, sticking it to the wood, routing near to the lines, crisping them up with a chisel, then cutting away more material around, so you end up with letters that are proud.
dovebikerFull MemberPosted 3 years agoA drill doesn’t really spin fast to enable the router cutter to make a clean cut, but a bull-nose cutter routing the letters into the wood filled with paint would look best.
deadlydarcyFree MemberPosted 3 years agoYeah, the drill idea, while seemingly ok, isn’t great. As dovebiker says, the speed is way less than a router. A cheap palm router with an accessory pack will do it, as per kayak’s suggestion. I’d probably stencil the letters in, draw a square/rectangle around them, and router out the non-lettered bit to leave the letters proud, tidying up the edges with a chisel. You can always clamp a straight edge to guide the router around the edges of your surrounding shape, leaving only the corners to tidy up. This is possibly now getting a bit more complicated than you imagined.
kimbersFull MemberPosted 3 years agoI got a used once plunge router off eBay for 30 quid
It’s the most fun I’ve had with a power tool!
Will be posting up in the things I’ve made thread when it’s all done, but so much fun, even if I made a bodge of my first attempt- I think a palm router like above might be easier to work with.
sockpuppetFull MemberPosted 3 years agoCheap palm router, as above. Rout out the letters & fill with thick paint. Sand flat if needed to clean up.
I’ve made some great (simple) signs this way. Easy to read & good longevity. ‘Warning’ or ‘Caution’ well within the scope! Full sentences would need a small bit/large board and lots of work!!
DavesportFull MemberPosted 3 years agoThe track heading south from Achlean at the river crossing per chance? Almost rode off the end of the now non existent steps a while back.
polyFree MemberPosted 3 years ago(I’ll likely then paint it green, with white lettering)
Sorry to be all HSE – but convention for warning signs is for them to be yellow and black (usually with a triangle). On the roads they are red and triangular. Green with white lettering is the convention for “safe” condition signs (first aid, emergency exit, emergency stop, life jacket etc). They are rectangular. To make it obvious that your sign is conveying hazard information I would suggest sticking to the convention – and using yellow and black (ideally with a warning ! in a triangle).
goldfish24Full MemberPosted 3 years agoLookup Katsu routers on eBay. Cheap but well regarded for occasional use. It’s basically a makita copy.
EyepicFree MemberPosted 3 years agoKayak
I have to say I am super impressed and want to give it a go despite the fact that I have zero woodworking experience.
Do I need a plunge attachment?
Did you fully stick the letters on the wood?kayak23Full MemberPosted 3 years agoKayak
I have to say I am super impressed and want to give it a go despite the fact that I have zero woodworking experience.
Do I need a plunge attachment?
Did you fully stick the letters on the wood?You don’t need a plunge router as such but you do need to be very mindful of hand position while doing it. It’s easier with a plunge router but a Palm router is great for the smaller work.
You can get a very nice effect by just cutting a couple of mm or so deep.
With a Palm router you basically hold it two handed, tilt it over, start it up and carefully bring it back so the cutter plunges, then you’re away. I tend to keep a vacuum going, tilt the router out of the cut, remove it and vac the chippings away now and again. You need to see the lines well.
I used pva to stick the printed letters on. You want them stuck on well as the paper has a tendency to fluff up and peel off otherwise.
You want to do the area around the letters first. If you cut away too much ‘relief’, bigger than the router base, then you lose support for the important bits.
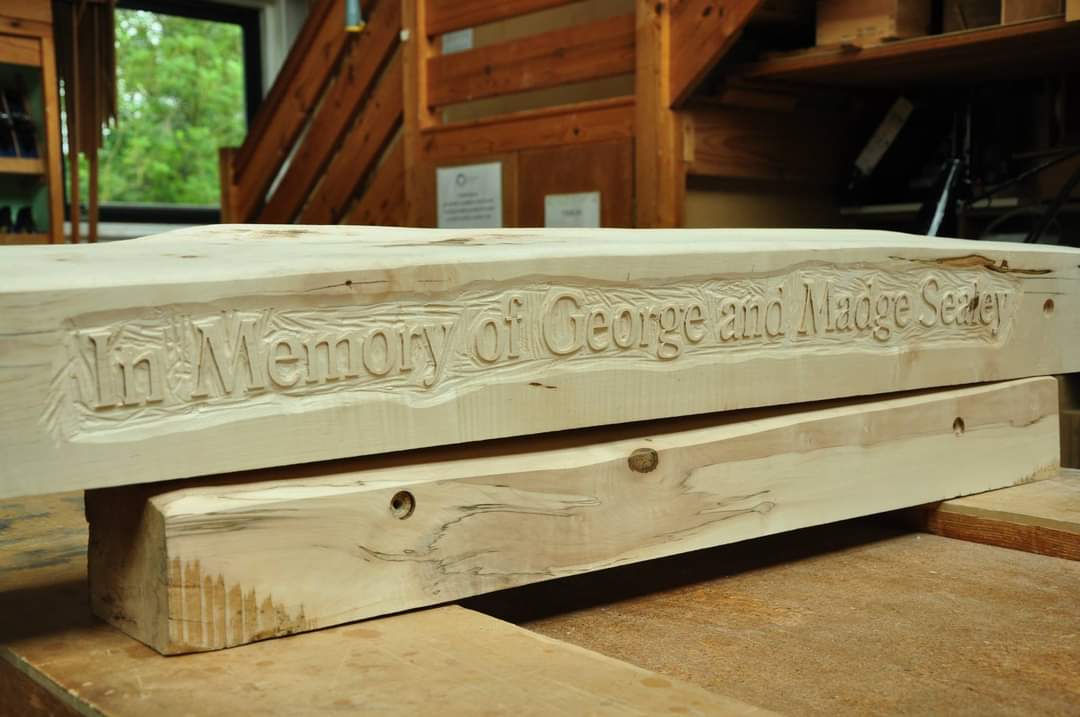
Go nice and close to the letters, two handed, eye protection essential as you’re quite close. Afterwards, crisp up the edges with a chisel. Curved gouge if you’ve got one for the curves, otherwise can get away with a small chisel.
All the gouges in mine you can see was purely to make it look a bit more hand carved. It was of course dead flat.
😊👍
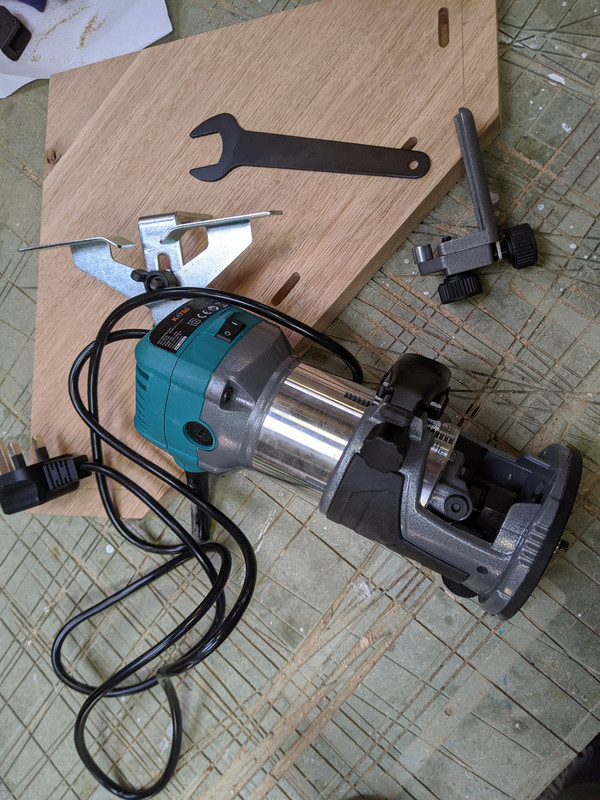
kayak23Full MemberPosted 3 years agoJust to say I ordered a Katsu Palm router and got it today.
Seems really well built actually. Very impressed. It was £33 off Aim tools on eBay.
Doesn’t seem much difference in quality to my Makita but we’ll see how we go. 😊🤙
Good for sign making.
 dyna-tiFull MemberPosted 3 years ago
I did find with my Makita trimmer, the base initially didn’t appear to lined up with the cutter, being circular as you know it should cut evenly however its turned in use, and being a trimmer,thats kind of what you tend to do. I found the circular base overhung slightly at different points, and even the slight play int he mounting holes didnt ensure all of it was flush.
I would check the ebay model for the same fault. I used the sander to smooth excess,refitting till it was flush.
It was just a tiny bit overhanging, but….Carved lettering would look more rural and natural, with that earthy feel. Doesn’t have to be Grinling Gibbons level, I’m sure you carved your initials into the school desk using little more than the blade from your pencil sharpener.
This looks like it would be ideal, and way cheaper than a dangerous powertool.
masterdabberFree MemberPosted 3 years agoHow about burning it in… Pyrography…. the pens seem cheap.

The topic ‘Making some wooden signs’ is closed to new replies.