- This topic has 392 replies, 23 voices, and was last updated 3 years ago by AlexSimon.
-
Family-friendly bike-carrying camper build
-
Mike_DFree MemberPosted 8 years ago
Damn, shamed into it…
Flung this together before going to the Alps:

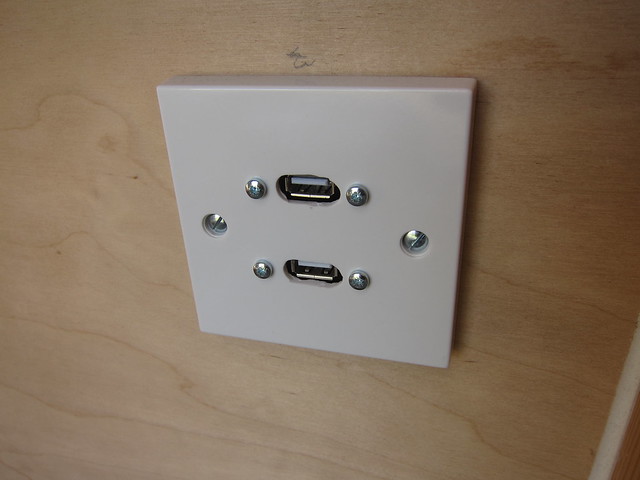
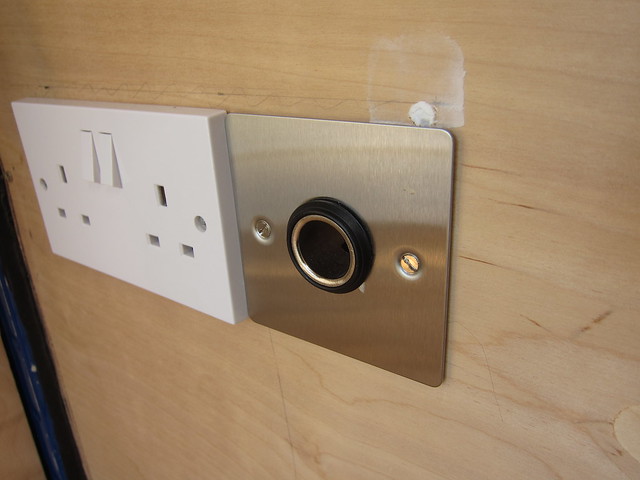
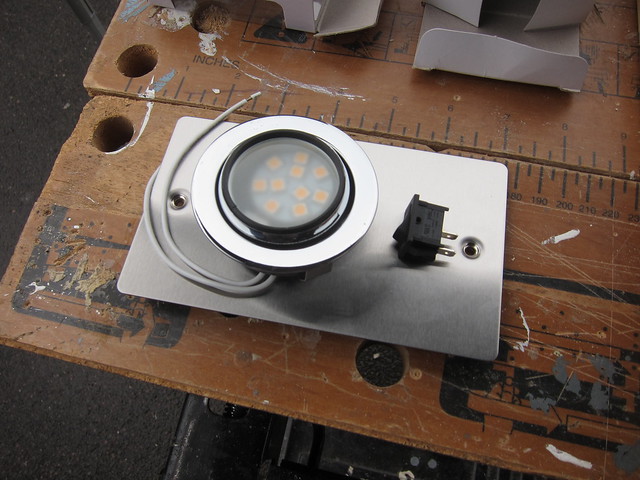
Got a pre-made voltage regulator/twin USB socket gizmo from ebay, hacked holes in a blanking plate, fastened the sockets in. Very rough and ready but it’s just a prototype — now I know it works I’ll make another with a stainless blanking plate, a bit like this cigar socket one:
And the 240V socket will be changed too, of course 🙂
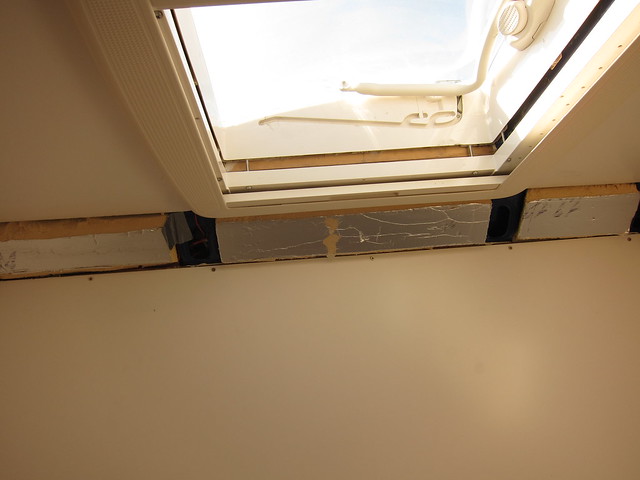
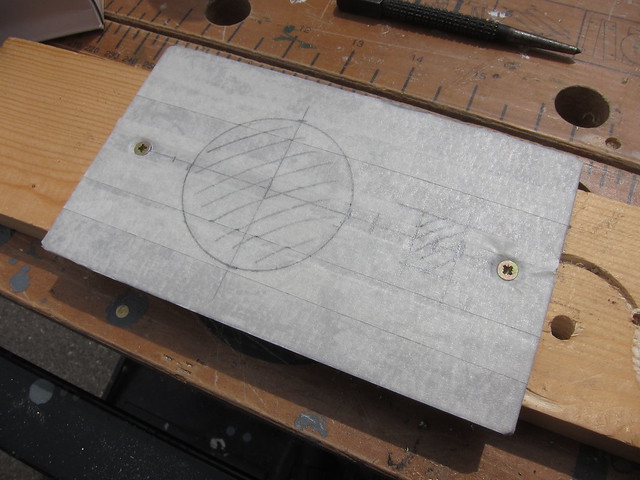
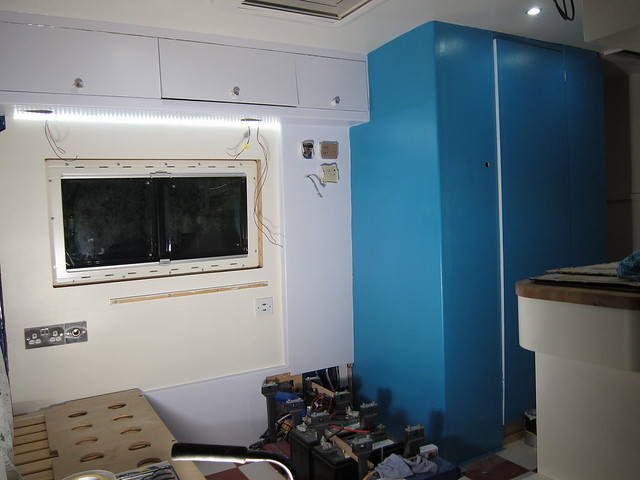
Then there’s this bit in the washroom that needed covering:
Made a template:
It needs to be a bit of a funny shape because the rooflight is right up against the edge of the roof inside, so the panel needs to go around the internal bezel.
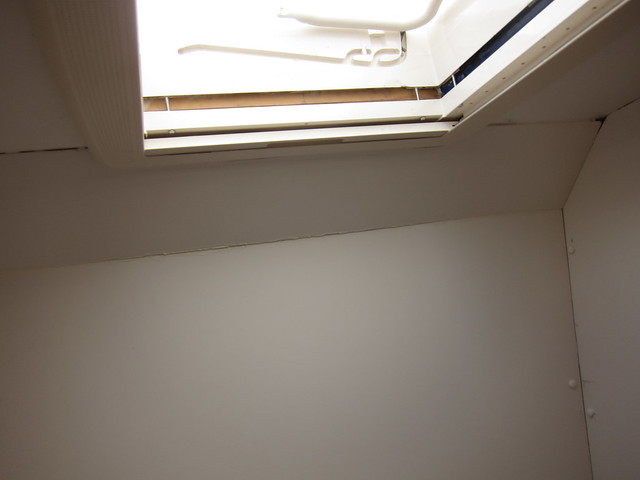
Glued some bits of timber to the metalwork to support the sheet, which I failed to get any pics of before sticking the panel on:
A bit gappy round the edges, but all the joints will be masked up and siliconed over anyway, so no big deal.
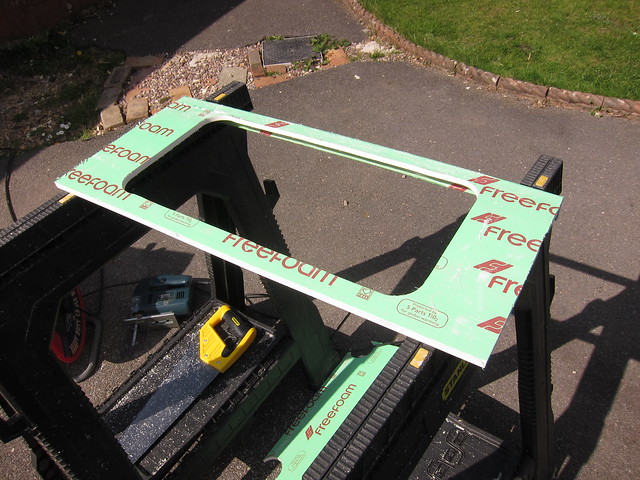
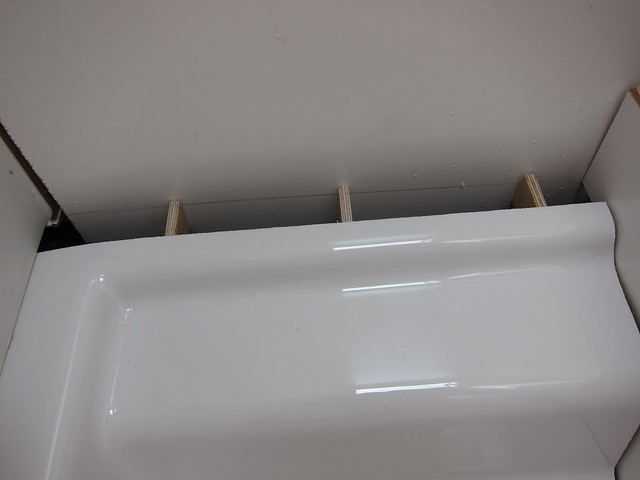
Also the washroom needs a sink. For, y’know, washing. I have a huge length of uPVC facsia with a lip along one edge. Cut to the width of the washroom and drill some holes:
Join the holes together:
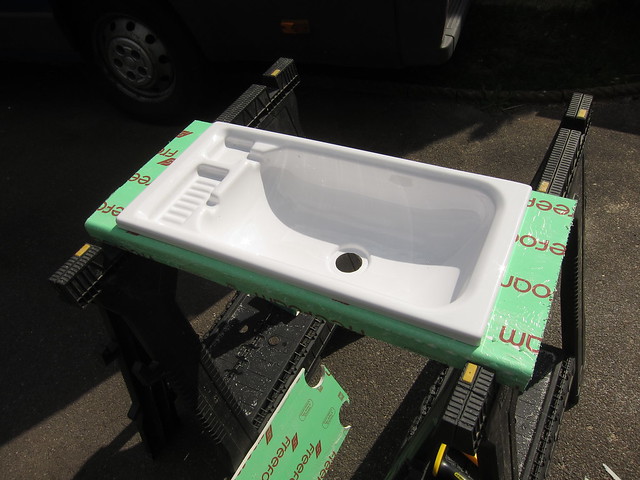
And the sink drops in thusly:
Obviously it’ll look a lot better when I peel the protective film off 🙂
AlexSimonFull MemberPosted 8 years agoJust caught up again!
Ace stuff. Great that it’s all usable now while you finish off the details.surroundedbyhillsFree MemberPosted 8 years agoChapeau to you and sorry for the impending hijack.
I am looking to get a similar conversion – probably not quite to the “Hands-on” extent you have!My base vehicle will be a Master/Movano/Ducato/Relay LWB/med high roof.
However I am struggling to find a layout plan that provides the following:Fixed double bed at the rear
Garage under fixed bed for 4 bikes
Additional 2 travelling seats with 3 point harness which will work as additional double bed.the first two are easy enough but the additional seats cum double bed for my two kids are a problem.
Anyone know of a supplier or got a layout plan I could copy?Cheers
Mike_DFree MemberPosted 8 years agoThe obvious option would be a rock’n’roll seat/bed from Reimo or RIB or one of the other probably-good-but-not-necessarily-thoroughly-tested suppliers — take a look on the VW T4 forum, they’re all on there. The downside is that they mostly need space behind them to fold into, which limits your layout options somewhat. The other downside of your plan is that if the kids go to bed before you do (which they tend to) then having their beds up front takes out your “living space” in the evening. That’s why we went with the bunks at the back — kids go to bed, we can sit up around the table at the front. Had to go to the XLWB van to fit it all in, though. Probably worth thinking about an extra-high roof as well if you want a bed above a garage, the headroom could get a bit limited otherwise. Download Sketchup and have a play around 🙂
Looks awesome, keep an eye on our axle weights though!
I so am 🙂 It’s all built as light as I can manage, and I know what payload we need to end up with. All the heavy stuff is between the axles and I’ve tried to keep it balanced side to side as much as I can. Back-of-envelope calcs suggest it’ll be OK, but I’m going to get it on a weighbridge before adding the final bits and pieces in case any emergency remedial action needs taking. There’s an emergency fallback position in that the van’s a Ducato Maxi with bigger wheels and uprated suspension and brakes, and you can replate it to 4t GVW just by filling in some forms and paying some money. And both our driving licences are sufficiently ancient that we could still drive it. Downside is that all sorts of things — insurance, breakdown cover, ferries — get more awkward/expensive/both.
AAAAAaaaanyway, have an update:
I think probably the next thing was some washroom action. Another bit of board to add to fill in a gap:
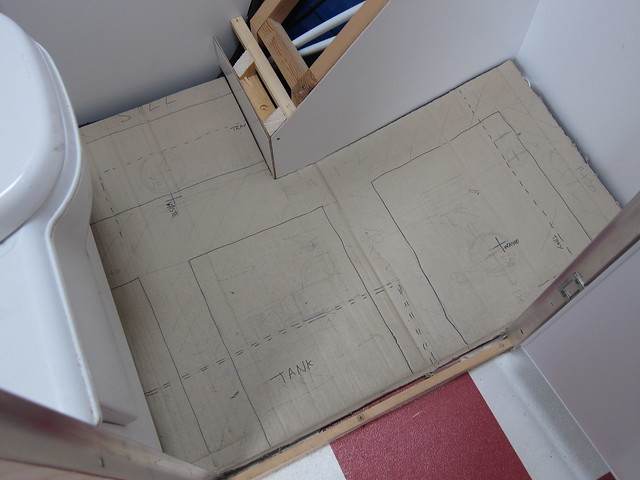
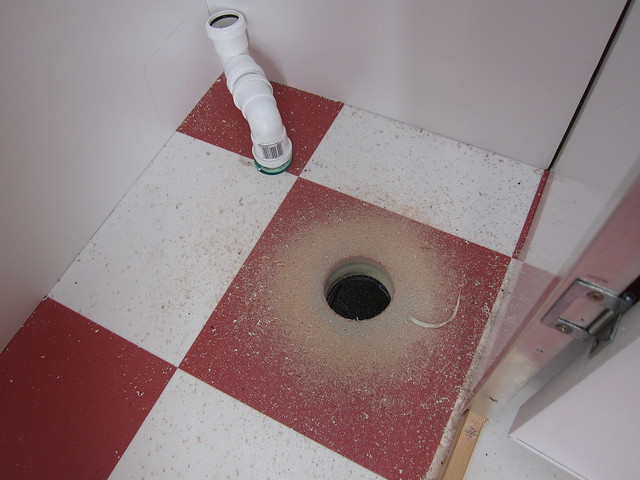
All the not-terribly-well-fitting edges will be siliconed. Moving down to floor level, there’s a wheelarch in the washroom, so the shower tray will need cutting down. And we need to let water out of it. So template, and marking up where all the stuff under the van that needs avoiding is, and mocking up the waste pipes:
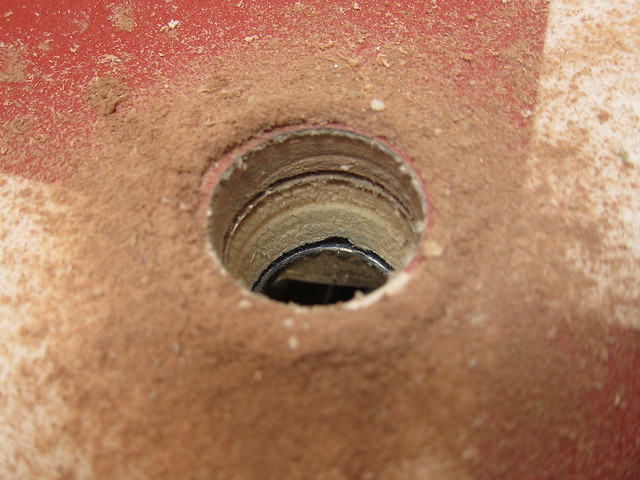
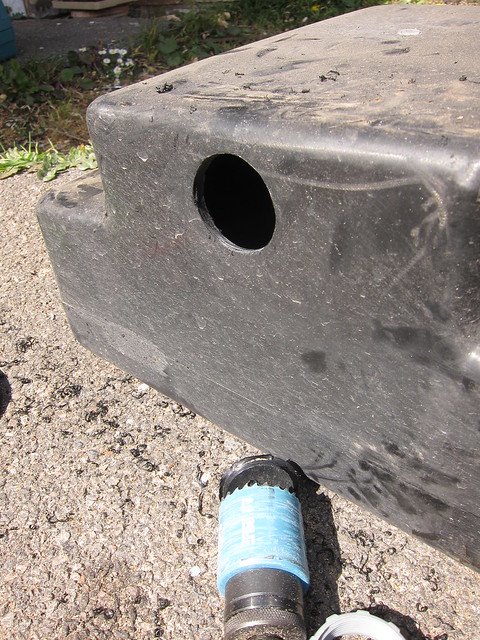
Then out with the holesaw and make YET ANOTHER hole in the van. Careful measuring, pilot hole just to check I wasn’t about to go through a brake pipe or something, and then:
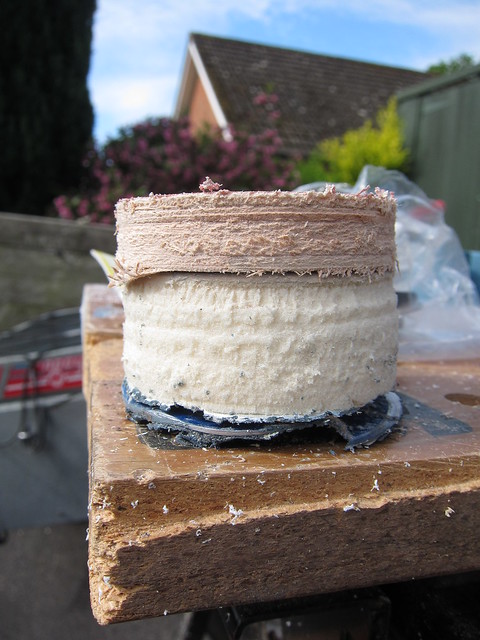
Straight through the vinyl, the plywood, the inch of Celotex and the steel floor. Made a nice core sample:
Had to add another connection to the waste tank, which meant dropping it off the van again which was a slight ballache:
Make hole in appropriate location:
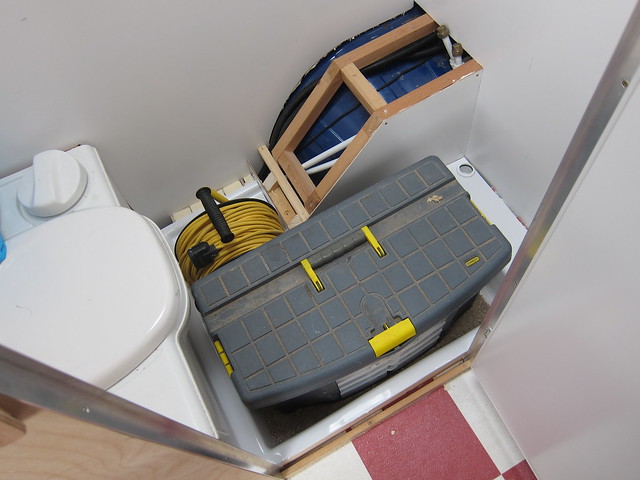
Added a standard tank fitting for 32mm waste pipe, but forgot to take a pic of it. Before cracking on with the shower tray, I had to line the wheelarch which has had just a timber frame around it for heaven knows how long:
I’ll use some PVC angle to finish off the corners. Offered up template:
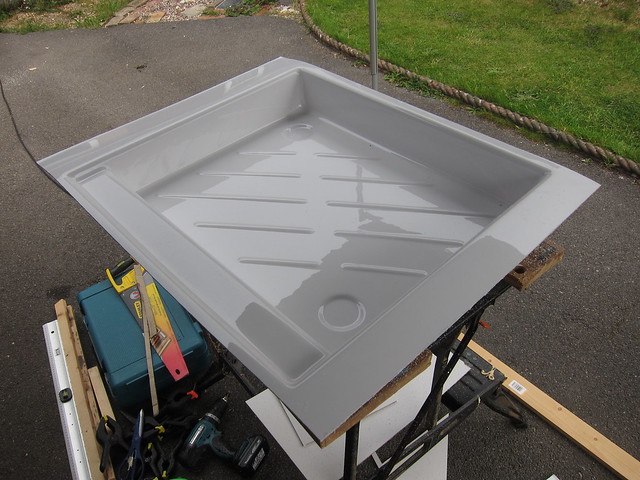
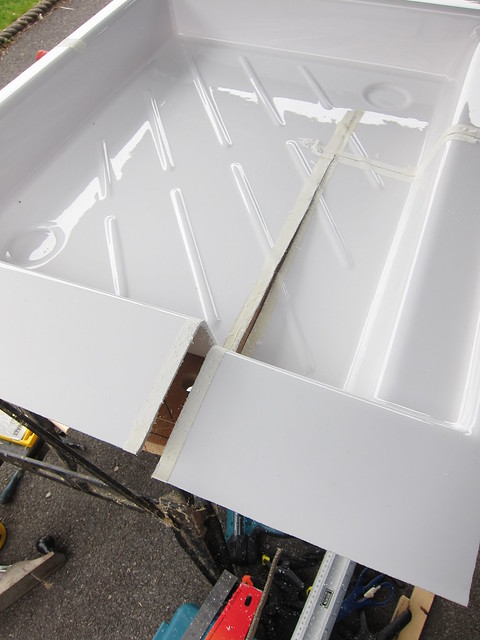
Here’s the shower tray as supplied — it’s plastic and weighs approximately not much. But is quite flimsy, of which more later:
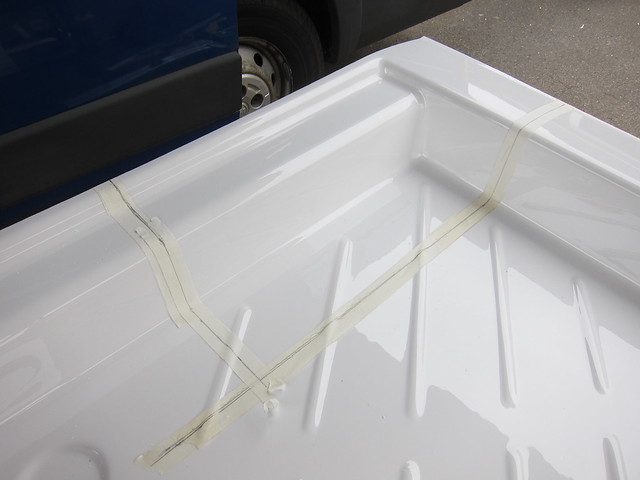
Mark up:
And cut:
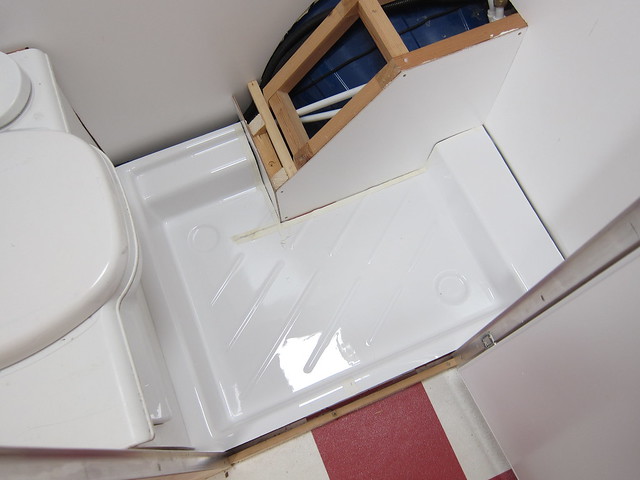
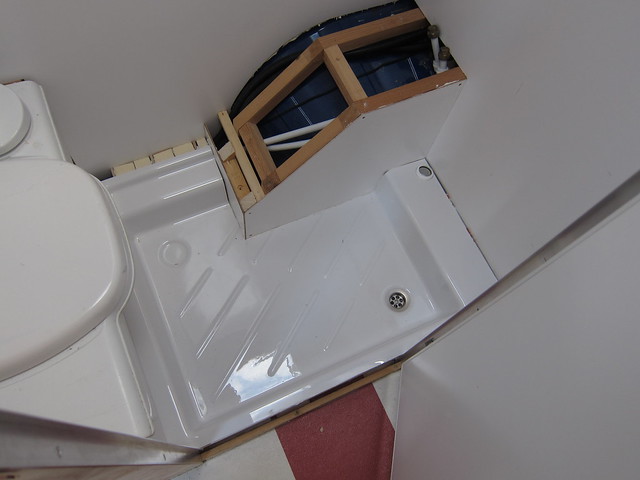
Just used a hacksaw blade in a handle, did a perfectly good job. BUT DOES IT FIT?
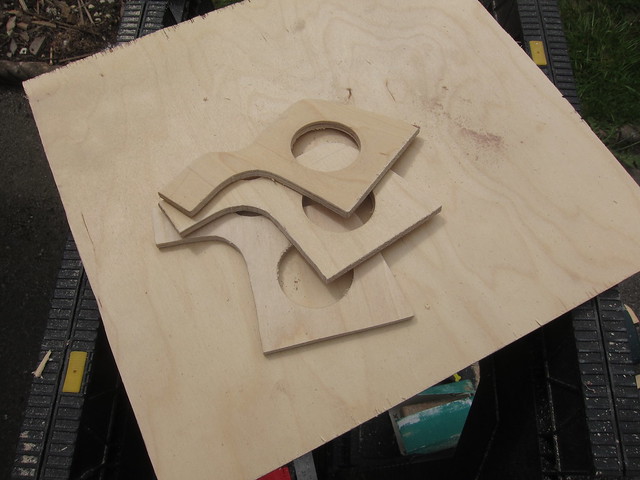
Phew. The high-up edges needed some support, so I made a bunch of these:
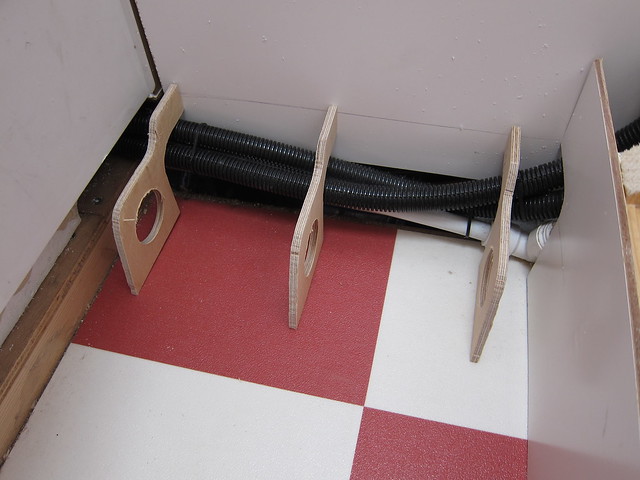
which I like to think look a bit like bits of Hurricane. Note the added lightness 😉 They go along here:
held up by battens screwed to the floor, thus supporting the edge of the tray thusly:
I filled in the gaps with some cut-to-shape bits of Celotex for good measure. Then an even biggerer hole:
The first one was for the basin waste, this one is for the shower waste — it has to accommodate the actual waste fitting itself, hence the size. Then it was time to stick the tray down, using lots and lots of goop — I don’t want it flexing, and I do want it as well sealed as possible. Weighed down while the goop degoopifies:
And well stuck:
I’ll be using some PVC trim to seal up the edges and the bit where I cut the corner out of the tray. Hopefully with sufficient kilotonnage of silicone it won’t leak…
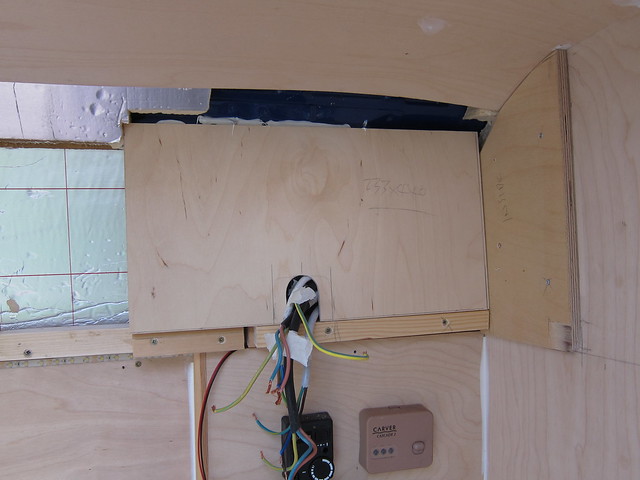
Next up (literally) was the overhead locker up front. First, start to cover up the last-remaining visible bits of Celotex. Had to move the consumer unit and added this bit:
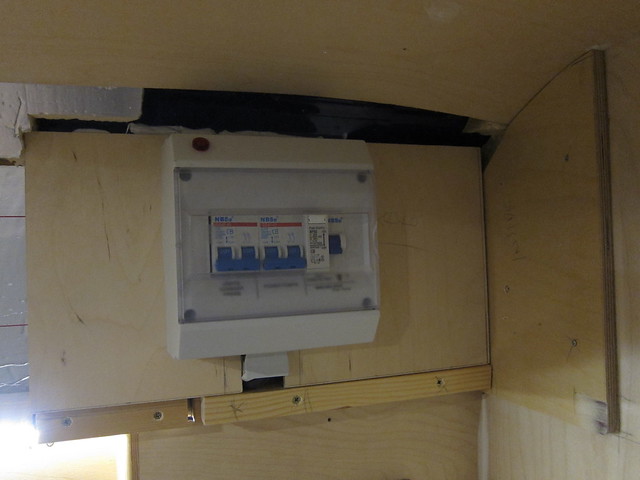
CU goes back on as so:
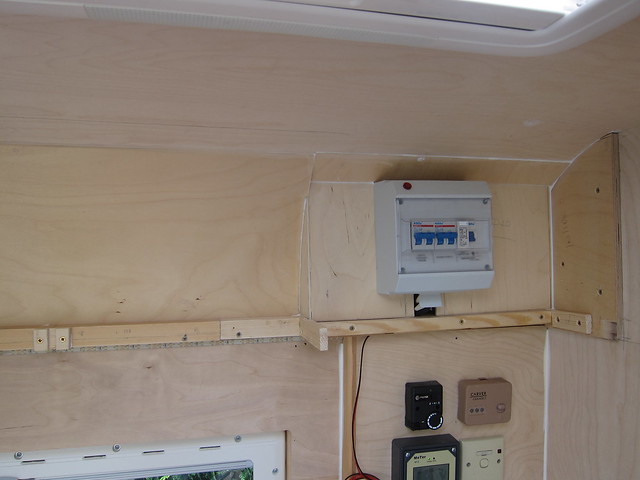
Then add a curvy back panel to the rest:
You can see the end panels and rear support batten already in place there. Couple of last gaps to fill in:
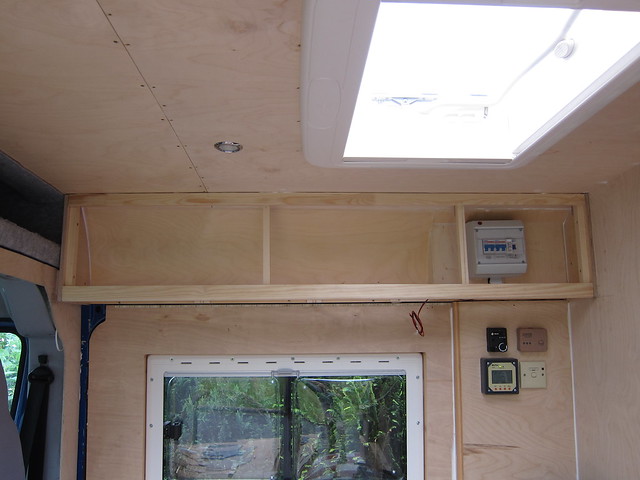
And then the frame for the front of the locker:
Slight cheat here — Dad made the frame offsite while I was faffing with other stuff. He made the doors too:
Tried-and-tested 12mm ply frame with 3mm skin on the front — looks solid, weighs little. Before they can go on, though, there needs to be a bottom in the locker. Added some stiffening struts between the frame and the support batten, made a shelf:
Glued in and with some heavy stuff on top to hold it while the glue sets:
And that’s about it so far…
Mike_DFree MemberPosted 8 years agoSummer: Drive to Mt Ventoux for a gentle pootle* on road bikes. Family will fly down a few days later, I’ll pick them up and then we’ll do some combination of Med/Gorges du Verdon/Millau/Paris/generally work our way back home in a leisurely fashion 🙂
The giant screw is a picture on the box of a Halfords screwdriver set 🙂
surroundedbyhillsFree MemberPosted 8 years agoCheers Mike lovin the updates..
I found this
which I don’t think need space behind, but i am not planning on a shower unit like yours. Found alternative seats here
Mike_DFree MemberPosted 8 years agoOoh, tidy. Hadn’t seen those before. Using a swivelled front seat to get the length seems a slight cheat but should be OK for kids (might not even need it). Bear in mind that if you want a seat to align vertically with the front seats you’ll need to raise the floor at the back — you can see that in the pics. Obviously that has implications for securely mounting the rear seat.
spooky_b329Full MemberPosted 8 years agoSurrounded by hills, my layout might be adaptable for you.
Fixed transverse bed at rear (6′ in my Iveco and the Ducato is wider) Kitchen down the offside.
Double belted seats on the nearside by sliding door. Small toilet room directly behind them.
I have a single front passenger seat but you can now get double seat swivels. Swivel the front and you could probably knock up a bed that spans the two sets of facing double seats…even if its just a folded frame that resides on the fixed double/in the garage during the dayI can only get two or three bikes under my rear bed but its fairly low, if I raised it up the bikes would go in upright with the front wheels off.
Its the layout closest to you on here https://3dwarehouse.sketchup.com/model.html?id=e312c8336b9caadeeae1e97096c79089
Mike_DFree MemberPosted 8 years agoMINI UPDATE! Found a little bit of time the other day, so popped the locker doors on:
Looking something like a finished product there. The dangly wires are for some LED spots that will be recessed into the bottom panel of the locker.
Consumer unit now hidden away in the small bit of the locker:
Also picked up some dirt cheap (as in £5/pair) speakers from Maplin, which have ugly grilles but, well, cheap. Popped those in as so:
Bit of a comedy overlap with the locker on the right-hand one, but needs must. Handily, there’s factory wiring for rear speakers as far as the passenger-side door step, so connecting them up was easy. Couldn’t remember which wires were left and which right so guessed, and got it right first time. SKILLZ. Unfortunately Fiat hadn’t wired the front speakers up correctly, so the factory ones are back to front which meant the balance control had a very odd diagonal effect. Swapping the fronts means cutting and redoing factory wires, so my temporary bodge was to make the rears back to front as well… Also poked a load of wires down the back of the dash for the active sub that I found gathering dust on a shelf…
Mike_DFree MemberPosted 8 years agoStill going 🙂
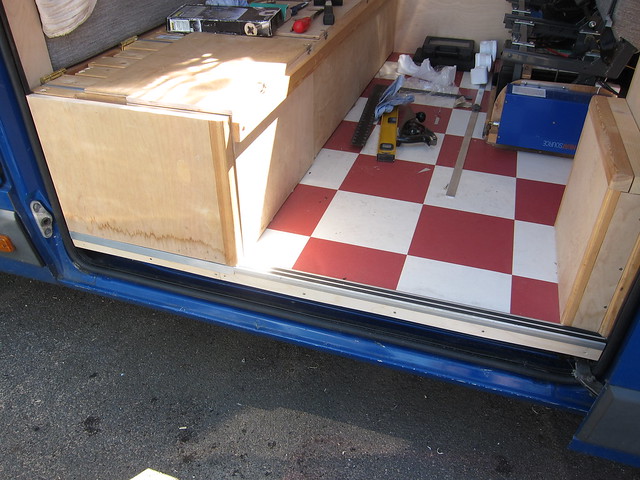
First up, a boring maintenance job — the sliding door seal was badgered to the extent that it had holes in it and occasionally leaked, so that needed replacing. Two issues there: First, it was £95 (!); second, removing and refitting involves being able to pull the seal inwards half and inch all the way around the aperture, which my floor threshold forbade. So I had to dismantle a load of stuff, do the seal, then rebuild it. Made it better the second time, though 🙂
Next up, back into the washroom. Made up a frame to support my plastic worktop:
Glue worktop in place:
Drop the sink into the pre-prepared hole, having first bunged a load of Sikaflex around the edge:
Place something weighty on top until it sets:
Fit tap:
It’s a funky one that comes out on a hose so you can use it as a shower, although we won’t be doing that much, if ever. And certainly not until the shower tray is actually waterproof 🙂 Minor faff getting the pipes the right way around, then connect up the waste:
Actually, I clearly did the waste first, never mind 😉 I made another PVC bit to be a shelf across at wheelarch height and filled in that last bit of panelling (but forgot to take a picture at the time).
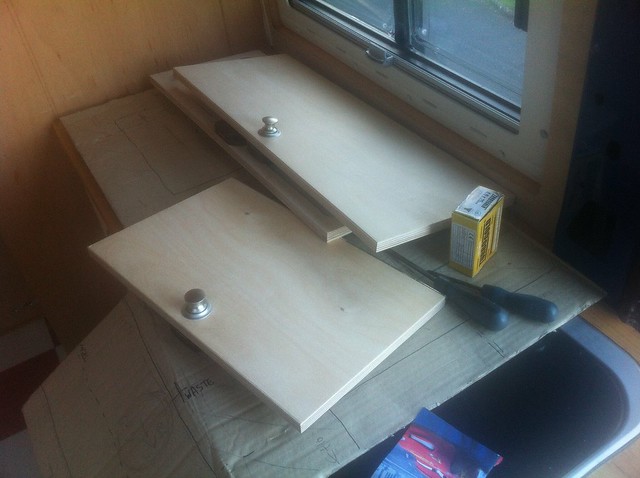
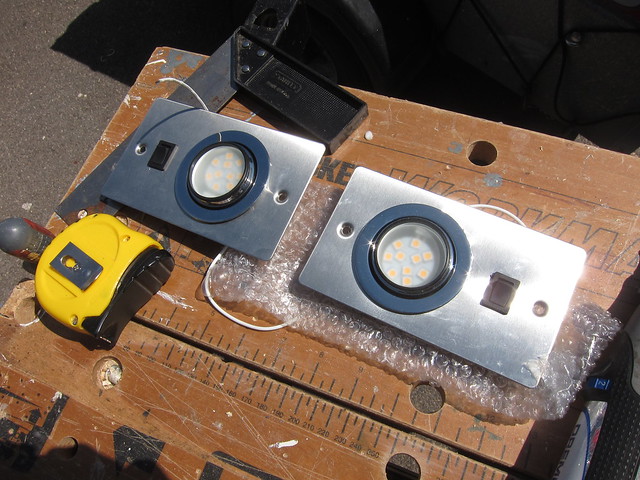
Then I made some reading lights to go in the bottom of the new overhead locker. Offered up the bits:
Marked up:
And cut it all out. Took ages, the stainless steel plates are as hard as I would have anticipated they’d be had I been thinking about it 🙂 Anyway, eventually (twice):
More soon!
jamj1974Full MemberPosted 8 years agoHave to echo all the comments about how amazing a job you are doing Mike_D!
EdukatorFree MemberPosted 8 years agoWe had a T2 hippy mobile way back when and a Ducato with a bed but nothing quite like this. I could never pluck up the courage to fully equip the Ducato because it was a van which would be sold/scrapped one day (the builder who bought it is making better use of it than I ever did). I recently priced up a camper and found it was about 10e a day over 12 years, easily affordable but a lot for something that we’d sleep in less than our mountain tent. So to all those who are tempted by a camper project I have an alternative:
Put a rucksac on your back and start walking then catch a bus home when you’ve had enough. I predict you’ll do it one day Mike.
AlexSimonFull MemberPosted 8 years agoGreat stuff Mike. I’ve been looking at this thread a lot over the last couple of days – getting my head around it all.
Would it be cheeky if I asked you for your sketchup file?
I’m having difficulty in getting dimensions of garage, minibus seats, etcemail in profile!
Cheers
AlexmonkeyfudgerFree MemberPosted 8 years agoInsane skillz! I’ll know to avoid this thread from now on due to extreme feelings of inadequacy/jealousy.
EdukatorFree MemberPosted 8 years agoEspecially when you compare with the commercial offerings, Monkey fudger. I had a look around some vans in June including the Font Vendome Master Van LWB. I found myself thinking “Mike’s is better thought out than that”. The new Master was 40 000e and there’s a new trafic-based Font Vendome Autocamp in a local dealers for 39 500e. Three-year-old ones go for 30 – 34 000e. Now you know how much it cost and how many hours you put in, would you do it again, Mike? There’s the satisfaction of a job well done that you can’t put a price on but is it worth the effort compared with walking into a showroom and driving out a van?
TravisFull MemberPosted 8 years agojust found this.
Seriously jealous of you, and your families skills.Keep posting, there is hope for us mortals yet!
Mike_DFree MemberPosted 8 years agoNow you know how much it cost and how many hours you put in, would you do it again, Mike?
I have only a rough idea of how much it cost (until I add up the pile of receipts) and even less idea of how many hours so far 🙂 But yes, I would do it again, but not yet. This van’s built for our anticipated needs for the next few years in terms of small (growing) children and the sorts of things we like to do. Obviously those could change, but I hope it’ll be good for a good while. Eventually I’d like to build one for a couple who no longer take children on holiday with them 😉
The price of new/nearly new pro conversions is kind of moot, really, because we simply don’t have that kind of money, so one of those was never an option. Although having got this far I have a reasonable appreciation of why they cost as much as they do 🙂
Alex: I’ll dig out some potentially-useful stuff, although the Sketchup drawings aren’t exactly precision plans. Once we were satisfied that what we wanted to do would fit in a van, we got a van and most of the actual “design” work was done on the fly once we had a real interior space to look at/measure…
spooky_b329Full MemberPosted 8 years agoI paid £5k for a four year old van, reckon I spent £6k on it (I pretty much went through the whole box of receipts so that includes all the silly bits that add up, like expanding foam, extra wood, cable etc)
I’ve used it for six years (and its just had its 3rd refit, add £500 to the spend as its got a nice glossy kitchen now) and I reckon it would still go for £7-8k when I eventually find a decent replacement.
I am intending to do it all again, I’m just being picky so won’t sell it until I find the right van 🙂
EdukatorFree MemberPosted 8 years agoWe enjoyed camper van and cycle-touring holidays until junior was about 14 when he started to take up too much space both literally and figuratively. Barbara promised herself a “Wendy house on wheels” when we could go away as a couple but now that’s happened we can’t decide what to do.
Camper van +es:
A home-from-home wherever you go with all the creature comforts.
Some really nice locations become your garden.
Cheap, adventurous holidays (if you ignore the depreciation on the van).-ves:
You can’t leave it anywhere except in your garden or on a camp site without it being broken into. Five times for the T2, we lost count with the Ducato (a certain mobile population also viewed our Ducato as a source of spare parts as video footage proved – and tried to run me over when I caught them in the act).Camper van ghettos, yes you can avoid them but the number of van owners who holiday in dusty, dirty camper car parks/camp sites between the railway and main road is astonishing. 40 000e or more to holiday in conditions worse than the aforementioned mobile population.
There’s so much to go wrong: drive up to a ski resort where it’s -20c without draining everything and everything will leak after. Even after draining the water pump broke. It needs cleaning, batteries charging, a regular run around the block, an MOT/pollution test, tyres, hoses/seals, wiper blades; everything that ages as well as everything that wears out.
It’s still a van with van discomfort, van height so it won’t go onto most French car parks (which are 1m90), costs at least 50% more in fuel and tolls (which isn’t going to be an issue if you have the cash to buy it tin the first place). Means you can’t get anywhere near the sea front in many French coastal towns as they are banned.
So, our last trip we camped, and stayed in hotels, gîtes and an appartement (no car, it was a walking holiday). Nothing was booked and we never spent more than half an hour to find somewhere to stay. A month of accomodation cost roughly double the price of a camper on a campsite, the difference being less than three months depreciation on a 40 000e van.
A German TV programme did a holiday comparison between a couple of weeks in a camper van, a hotel and a rented appartement. The camper wasn’t the cheapest but provided the most comedy value – family bitten by mosquitoes, unable to sleep in the hot van, issues with the cassette toilet, couldn’t park, couldn’t turn around, the usual anti-social campsite behaviour.
Mike_DFree MemberPosted 8 years agoClearly there’s no one perfect solution for everyone 🙂 Our kids are 9 and 6 so there should be a few years yet.
I think depreciation will be not too horrendous. Obviously you’ll never get back what you spent on a DIY van and second-hand values aren’t a patch on pro conversions, but prices in the UK seem to hold up (and are higher to start with — you wouldn’t get much of a new panel van conversion for what 40000 euros currently is). Thing is, it’s always going to be a cost, it’s something of a luxury and we’re happy with that.
Have to say we’ve experienced, well, none of those negatives so far (including seven years with the previous van). Never been broken into, avoided unpleasant places, parked it for a week with 18in of snow on the roof and nothing broke, the solar panels keep the batteries topped up at home so we rarely plug it in. It’s a modern van, very easy to drive and very comfy — we find it way better for covering big distances than the car (our most recent trip was 2,500 miles). Never had trouble parking, most French towns have somewhere specific (and somewhere to dump your waste too). Admittedly we’ve not spent much time on the south coast of France because it’s nasty and busy (couple of nights near Hyeres because the kids wanted to swim in the Med, that was enough). Tolls well worth paying for empty roads with lots of places to stop. Does a bit better than half the mpg of the car but yes, it’s a fair bit worse. Current exchange rate sorted that out, though 😉 On our most recent trip we spent five nights on a pre-booked site, two in the Disney car park and the other nine in whatever we found — a mix of commercial sites, municipal sites and aires.
Anyway. Currently it’s working well for us 🙂
EdukatorFree MemberPosted 8 years agoSo the question now is, “do we go out and buy Barbara her Wendy house on wheels?” There’s an new Autocamp sitting on the forecourt of a local dealer. Or do we wait and see if Renault do a Generation version of the new Trafic (think T5 multivan)? Hmmm, decisions, decisions… .
mrlugzFree MemberPosted 8 years agoReading the thread it seemed familiar. Got to the ‘built not bought’ sticker and then I twigged.
SBMCC 🙂
Mike_DFree MemberPosted 8 years agoHello 🙂
Some more update, I’m spoiling you now…
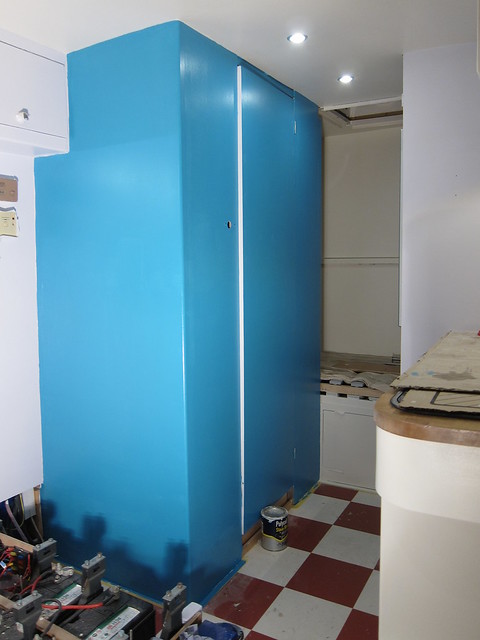
Before putting the lights in, my other half persuaded me that we should paint the interior. I wasn’t wholly convinced, because it’s not finished, but if not now, when? So much masking, then primer:
Look very carefully in that pic and you might just spot some unfinished wiring, hem-hem.
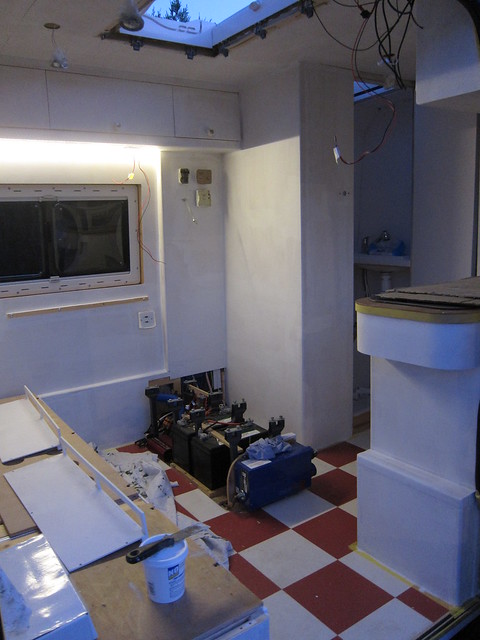
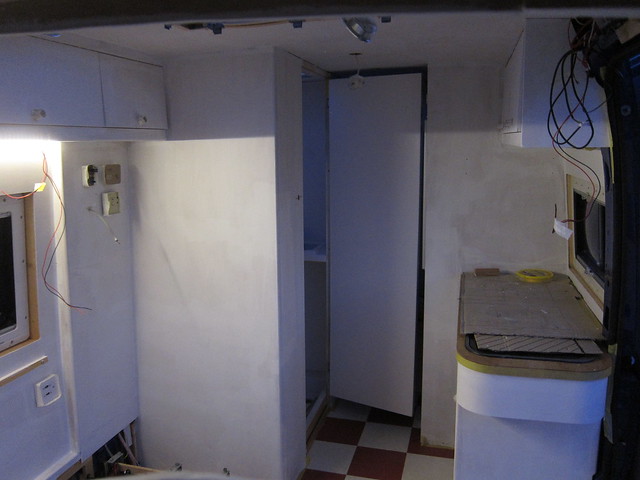
And then COLOUR:
We’re not convinced by the cream panel, that’ll probably be redone in the bluey-grey that surrounds it. The kitchen and bunks are all in the cream. Another view:
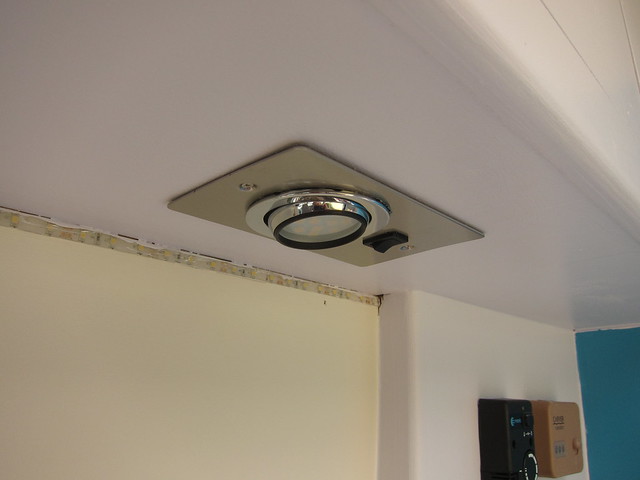
Then I could put the spots in:
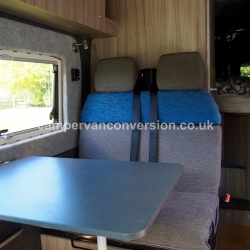
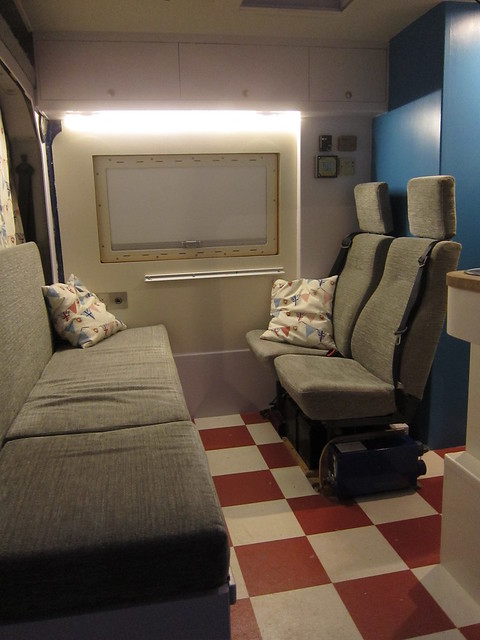
And for the full effect, seats and upholstery back in place. Still need to box in around the bottom of the seats:
Yes, we have scatter cushions. Deal with it.
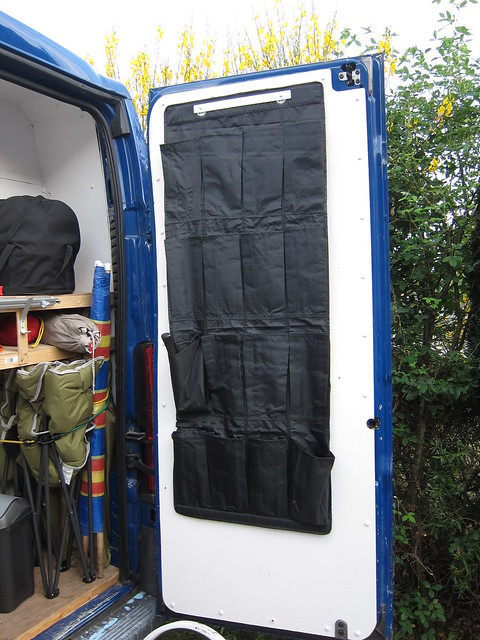
Made another little addition before we went on holiday — Ikea shoe holders on the inside of each back door. Works really well — obviously shoes go in there, but also mallet, clothes pegs, sunscreen bottle, tools, all sorts. £4 each, bargain.
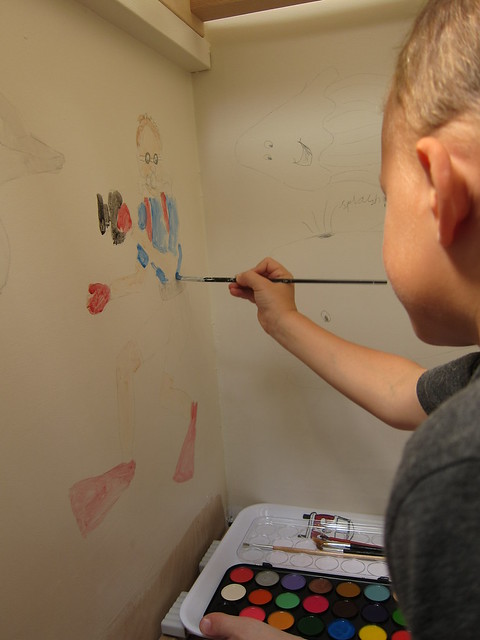
And of course one of the wins of a painted plywood finish is that you can quite happily let a six year old decorate their own bunk 🙂
codybrennanFree MemberPosted 8 years agoLooking great Mike, loving the Ikea shoe-things, might well get some of those.
Hopefully have some shots of my Trafic this weekend to show, but its not as special as this 🙁
AlexSimonFull MemberPosted 8 years agoNice to see some shots showing more of the interior. Looking great!
EdukatorFree MemberPosted 8 years agoA remarkable likeness that painting. Though the arms are perhaps a bit too thick. 😉 Or is that what a camper build does to your arms?
We had one of those shoe storage things. It was one of the many things that banged and clunked and was replaced with yet another Curver box.
AlexSimonFull MemberPosted 8 years agoHi Mike
What depth garage did you end up using?
I need to be able to store 5 adult bikes and am currently thinking 700mm would be doable.Mike_DFree MemberPosted 8 years agoI’ll measure up to remind myself — in my head it’s down around 500mm, 5 bikes can be done but involves taking pedals off. There’s a bit of “free” depth due to the curve of the rear doors.


The topic ‘Family-friendly bike-carrying camper build’ is closed to new replies.