- This topic has 392 replies, 23 voices, and was last updated 3 years ago by AlexSimon.
-
Family-friendly bike-carrying camper build
-
brFree MemberPosted 9 years ago
We had one of those vans bought already converted into a horsebox.
Quick too and when empty you could easily do 80mph and overtake folk on A-roads 🙂 Plus even loaded (and with a sleeper/hi-bay above the cab) would manage +30mpg happily.
hooliFull MemberPosted 9 years agoGreat thread, looks like another thing on my list of things I want but have no time/money/need for!
wingnutsFull MemberPosted 9 years agoJust moving to the front page so we don’t have to trawl back to far.
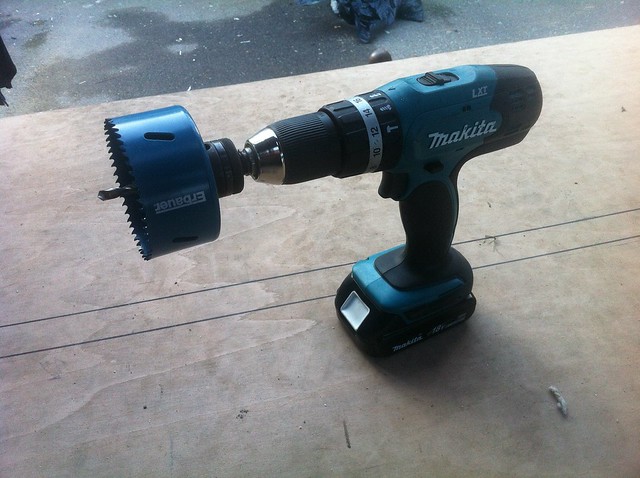
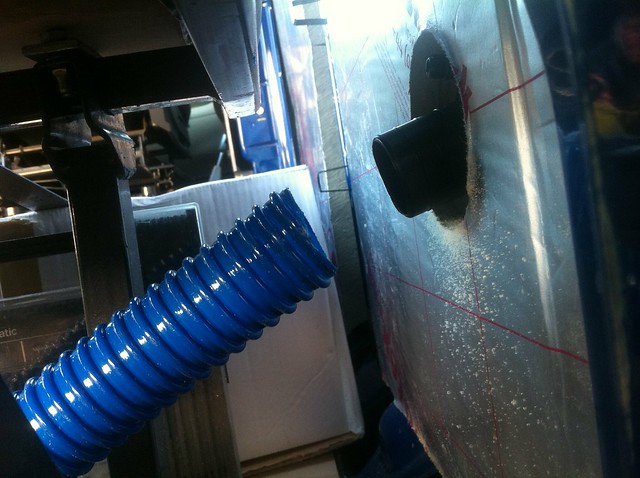
Mike_DFree MemberPosted 9 years agoHi all! Have some plumbing. Well, of sorts. A few updates back a fresh water tank found its way under the van. Not a lot of use unless you can get water in it, so a filler had to go in. Unleash the hole saw:

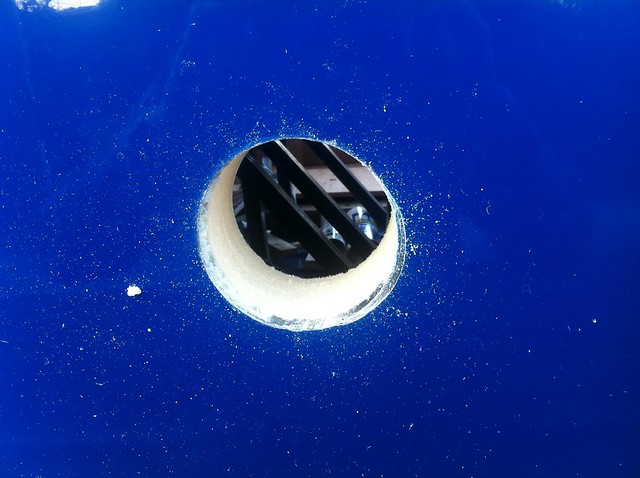
Make a hole:
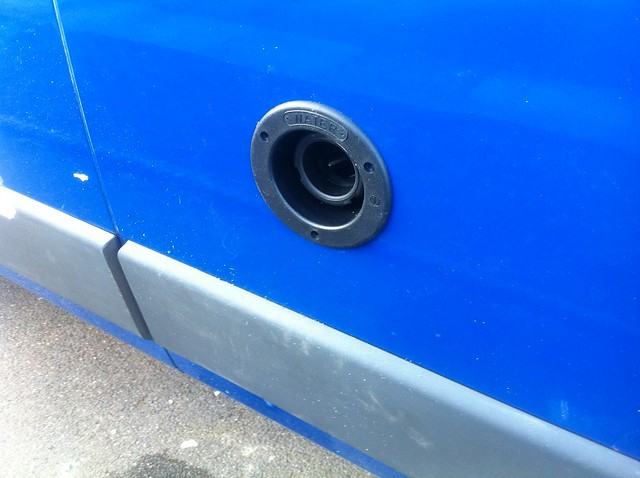
(That bit had already been insulated, but it doesn’t matter — just drill straight through). Filler cap goes in the hole like so:
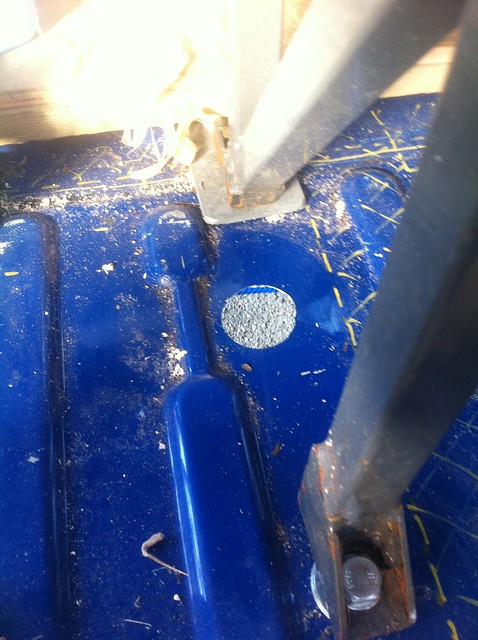
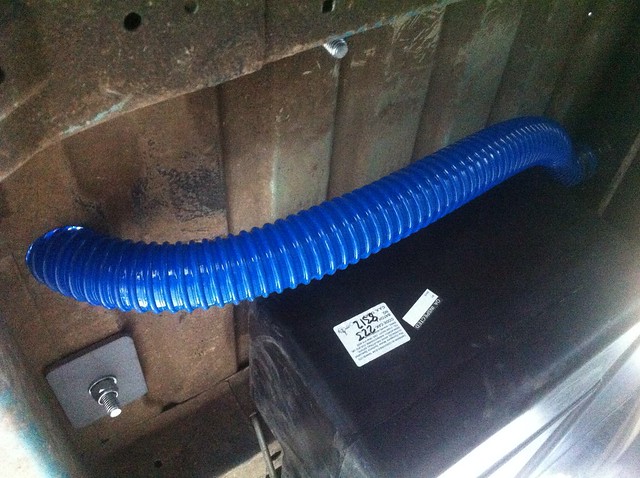
That gets the water inside the van, but we don’t (we really, really don’t) want it there, so another (slightly smaller) hole underneath:
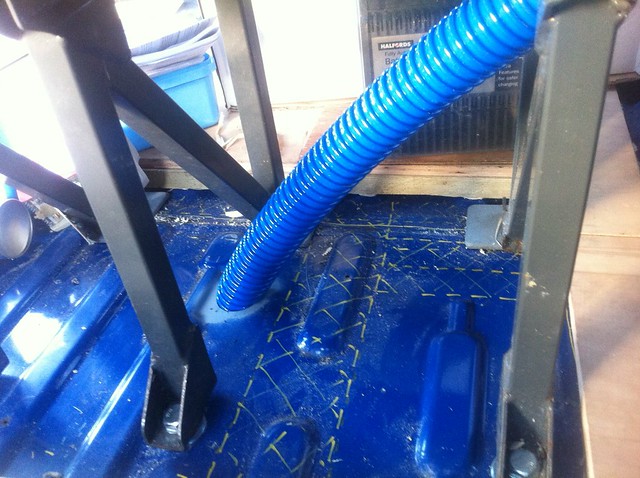
It’s under the rear seats in a position that’s a compromise between the pipe not having to dip under any chassis rails and not forcing any too-extreme bends in it. Pipe runs under the van and in like this:
Up through the floor:
And connects to the back of the filler:
Ah. B*gger. Well, you get the idea — had to get a slightly longer bit of hose to finish it properly 🙂
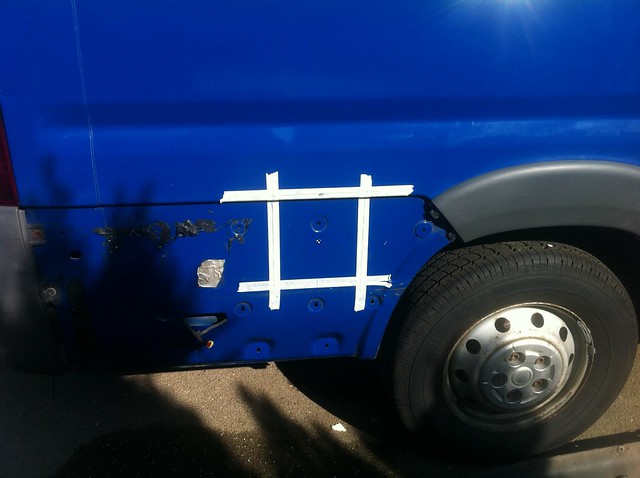
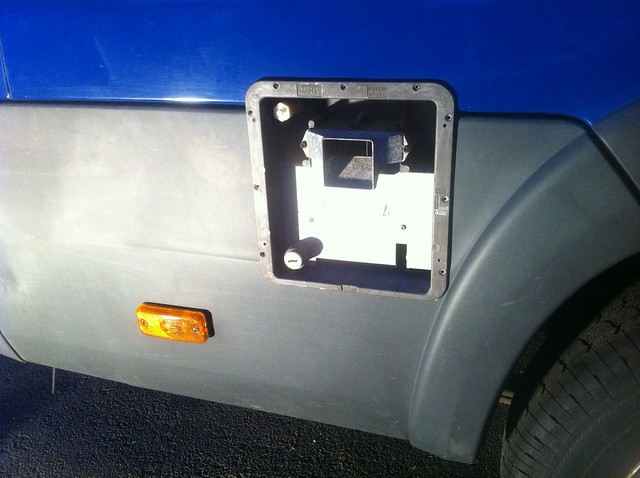
Mike_DFree MemberPosted 9 years agoAround this time the water heater went in. Bit of a luxury this, but we had one in our previous van and kind of got used to it, so we’re having one in this too. It’s a Carver Cascade 2, runs off gas or 240V electric (where available) and will go here:
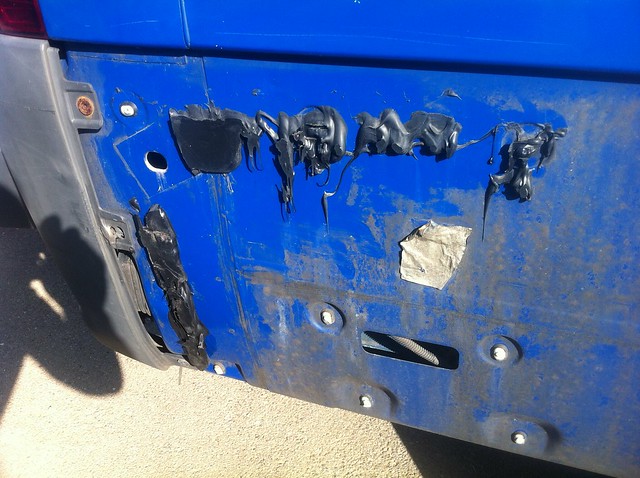
Needs to be raised up a bit to clear the top of the sill, because it goes in from the outside. Had to pull off one of the plastic trim panels from the outside, which it turned out had been stuck on with goop rather than using the proper clips:
Nice. Cleaned everything up and marked out:
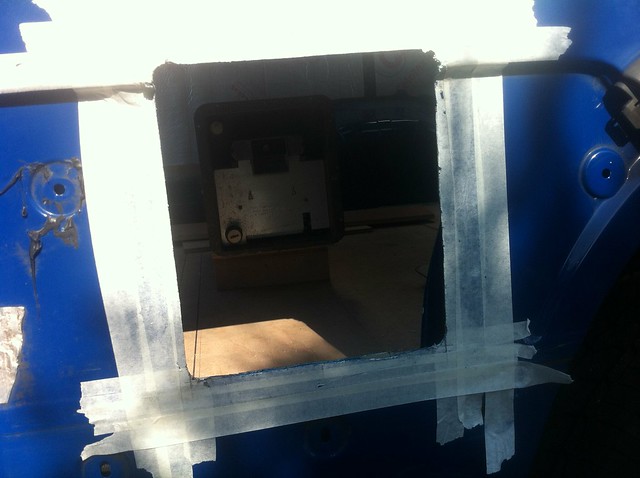
More holesaw/jigsaw action, although this one needed finishing by hand with a hacksaw blade on account of my last jigsaw blade snapping just after the shops had shut:
Strip the tape off and tidy the edges:
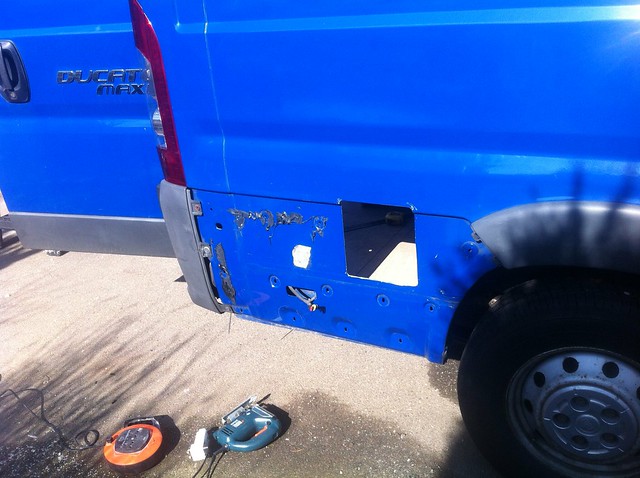
The eagle-eyed will have noticed that this hole’s behind where the plastic panel goes, so a hole had to be made in that too. Because the heater has a flange on the outside that the mounting screws go through, I had to pack out the back of the panel so it didn’t get all squashed and misshapen as the screws were done up. Rummaged out some bits of PVC and stuck them on:
Put the panel back on, slide the heater in and it looks like this:
I’d like to claim that the extremely close fit between the bottom corner of the heater flange and the wheelarch bulge was deliberate, but really it was firmly in the “happy coincidence/thank **** for that” camp.
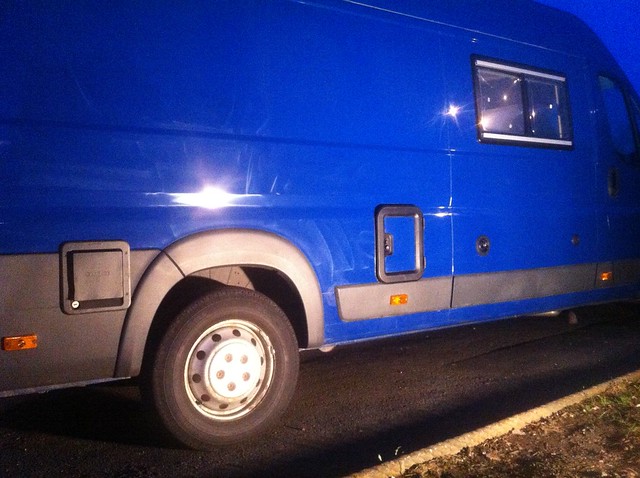
Pop the cover back on and that side of the van now looks like this:
Like the toilet hatch, the flue cover was originally grubby off-white, it had the same paint treatment. The other filler to the right of the water one near the front is for the LPG tank.
JEngledowFree MemberPosted 9 years agoI’m loving this tread, it’s up there with rate my brickie and the McMoonter builds 😀
flangeFree MemberPosted 9 years agoI’m now looking on webuyanycar to sell my bmw so I can buy a van. I blame you. You’re awesome x
gearfreakFree MemberPosted 9 years agoOh dear, what have you started. The missus is gonna kill me. (Starts scouring Ebay for suitable van)
wingnutsFull MemberPosted 9 years agoMy Missus has moved enough to consider renting a motor home for a week. What I’m worried about is that she won’t like it and say NO i’ve been good enough to try it and it’s still NO.
Mike_DFree MemberPosted 9 years ago🙂
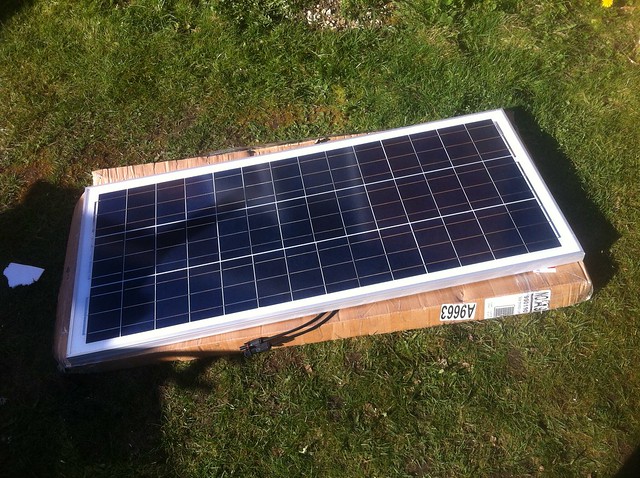
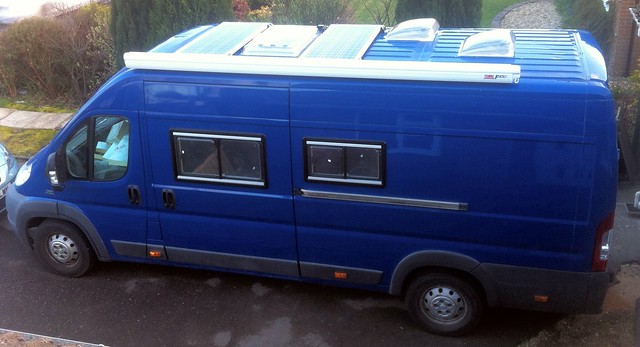
Next up, some electrickery. Got a couple of 100W solar panels from ebay:
Thought I’d best checked that they worked — looks promising:
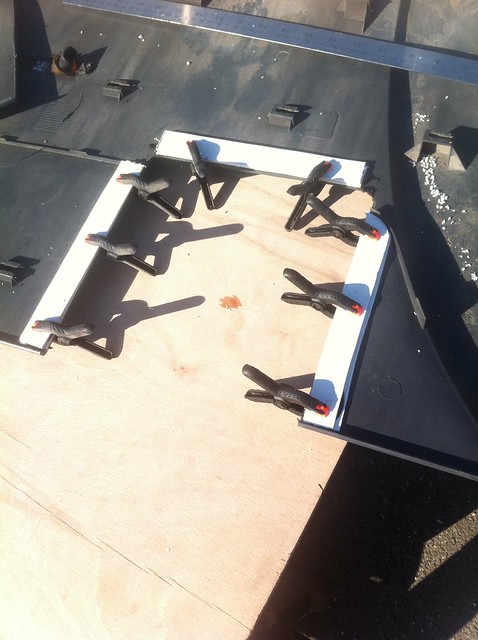
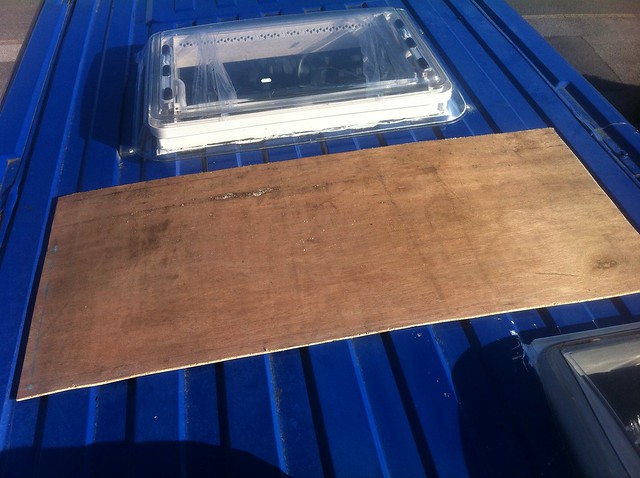
I didn’t want to be hoofing panels on and off the roof while sorting the brackets out, so I made a mockup out of a bit of scrap ply:
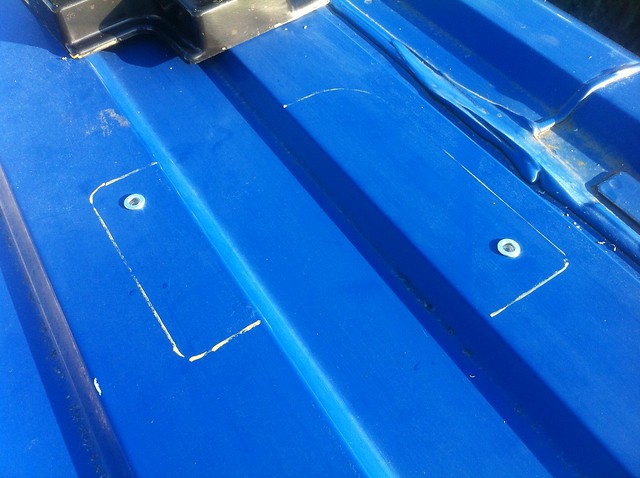
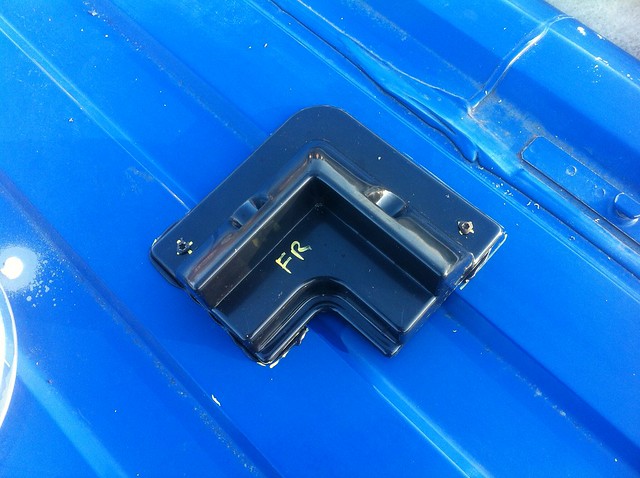
Used that to position and mark up the plastic corner brackets. I ummed and ahhed about how best to fix them on — I reckon just Sikaflex would have done the job just fine, but I bottled it (having read about someone’s that came off) and used some rivnuts as well:
Bracket in place:
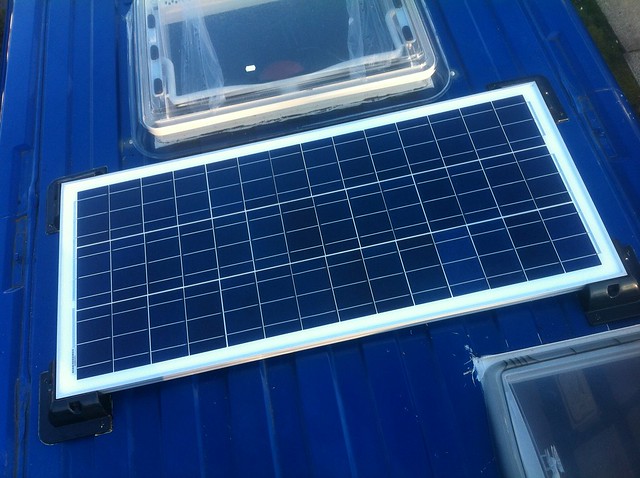
That’s “FR” for “Front Right”, not “Freeride”, of course. Repeat for the other corners and the panel drops in as so:
Drilled the aluminium frame and brackets, put stainless self-tappers through to hold the panel to the brackets, job bejobbened:
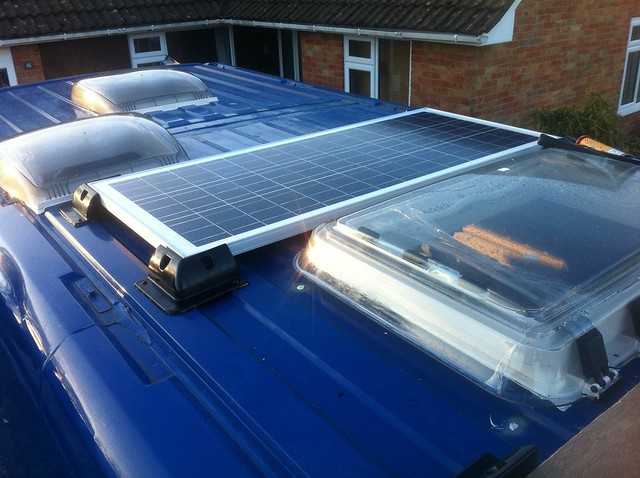
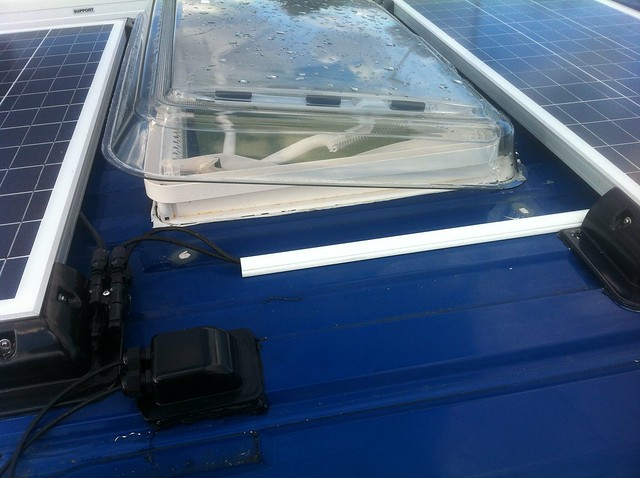
Then did it all again for the other panel, which goes right at the front. It’s pretty snug against the big rooflight to avoid the front brackets ending up on the sloped part of the roof, but the rooflight will still open fully. Just:
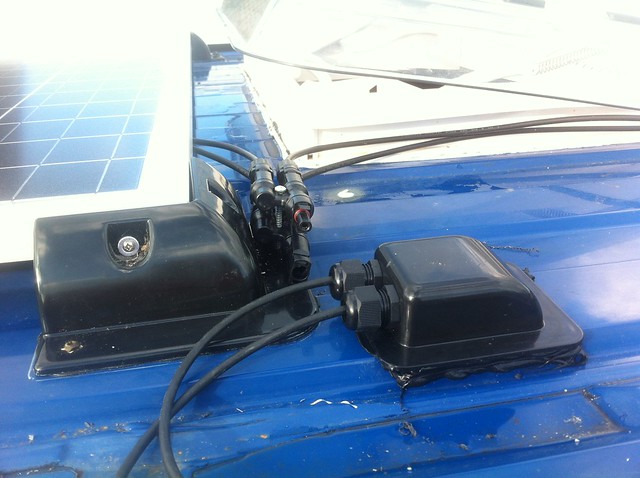
The cables come in via a waterproof box stuck to the roof:
Panels connected together with Y-connectors — they have handy mounting holes, so I attached them to one of the brackets with a long screw and a quick-and-dirty spacer made from a bit of alu tube:
Tidied the cables up with a bit of self-adhesive trunking:
Just stops them flapping about, not sure how powerful the adhesive is but it’s done a few hundred miles and hasn’t come off yet.
The increasingly-crowded roof now looks like this:
Note also the Fiamma roll-out awning which was a reasonable ebay bargain — someone else converting a van had bought two of them with a view to putting one down each side, then thought better of it. So it was effectively brand new, never fitted, still in the box, just a bit dusty and £140 less than a new one.
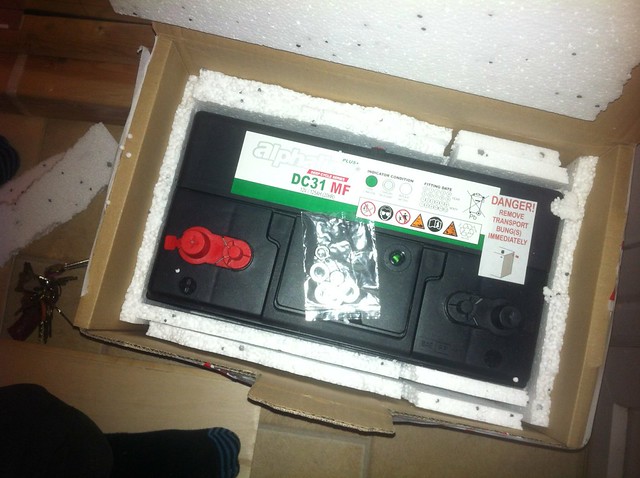
The charge from the panels will eventually find its way into two of these:
which I felt a bit sorry for the delivery man about, they’re about 25kg each.
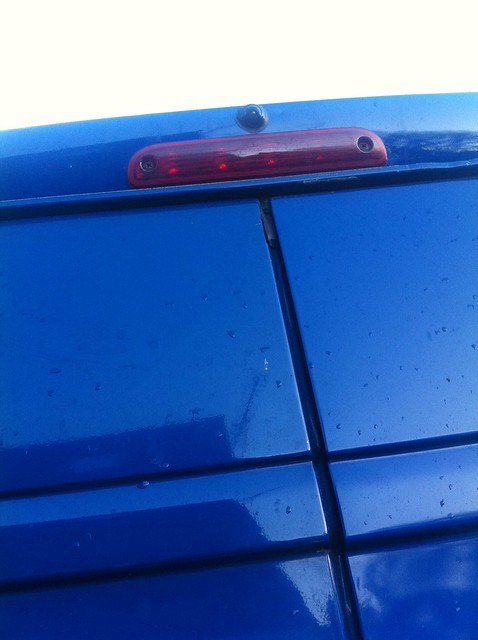
In other news, more ebay purchases included a teeny reversing camera that fitted neatly above the high-level brake light:
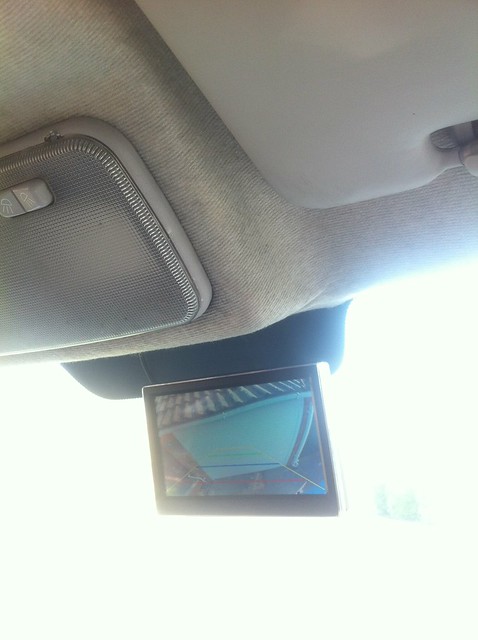
and a 5in screen that goes where the mirror would be:
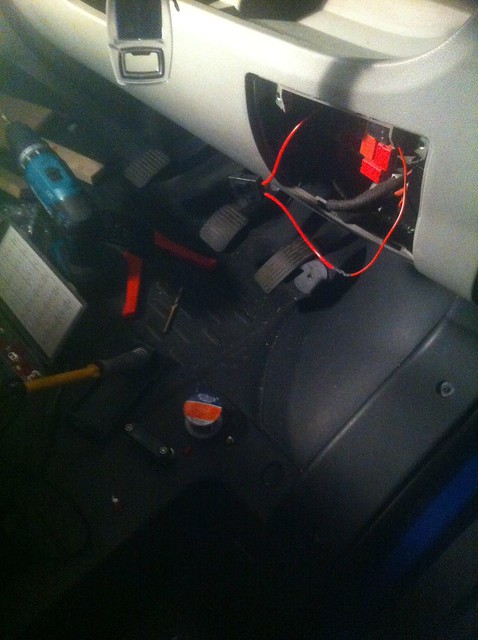
Needs adjusting to be actually straight. It’s a very wide angle (claimed 170degrees), that blue bit at bottom right is the top corner of the van roof. Somewhat inevitably it distorts a fair bit at the edges, my guttering isn’t quite that wonky 😉 Decided that we might as well have it on all the time when driving, so screen and camera are both hooked into a handy spare ignition live I found in an empty slot in the fusebox:
The neat way of doing this would be to pull the fusebox out, connect a new wire to the back of it and put a fuse in the vacant slot. But taking the fusebox out looked a bit non-trivial, so I cheated — stuck a spade connector into the fuse side and added an in-line fuse holder.
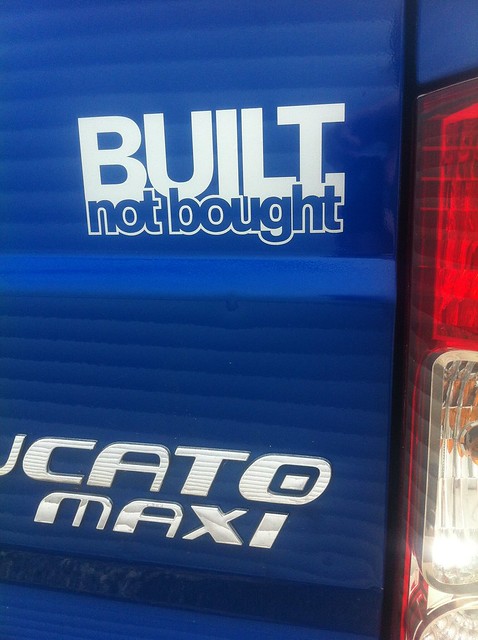
Also I got a sticker:
Which I bought, for added irony 😉
Bigface0_0Free MemberPosted 9 years agoNO!!!! just read the whole thread and thats it, its like breaking bad, I need more… Cmon I need to see how it ends….
wingnutsFull MemberPosted 9 years agoI think there is another sticker possibility – Envied by Singletrack!
sandwicheaterFull MemberPosted 9 years agoJust wow. In the words of Ron Burgundy;
[video]http://youtu.be/CmwBPlD7jlk[/video]
BillOddieFull MemberPosted 9 years agoThis is fantastic!
My brother converted an old AA van to a Camper using Amdro kit, which I thought was relatively impressive, but he has clearly an amateur.
I took the lazy way out and bought a preconverted Toyota HiAce.
peterfileFree MemberPosted 9 years agoThis thread is great! I haven’t felt this excited since Breaking Bad 🙂
shifterFree MemberPosted 9 years agoEither I’m going mad or the reversing camera has been in two instalments. Top thread, keep’em coming 🙂
househusbandFull MemberPosted 9 years agoMike_D – I am in awe!!!
Just added this thread to my favourites; I now feel crestfallen and empty inside having arrived at the end of this episode.
mtbmattFree MemberPosted 9 years agoAwesome build. Bring back memories of doing mine… good and bad! 🙂
OP – What sealant did you use on your roof lights? I made the mistake of using sikaflex here and it failed after a few months and started leaking. You need to use something that doesn’t dry out, as it will crack.
Mike_DFree MemberPosted 9 years agoThey’re bedded on two layers of mastic tape. It took a couple of goes to get all the roof corrugations satisfactorily filled, and the odd shape of the Midi Heki at the front around the hinges caused some issues. All good now, though. /crosses fingers
HounsFull MemberPosted 9 years agoStop teasing us! It’s obviously finished, get the rest of the pix up!
Mike_DFree MemberPosted 9 years agoIt’s _so_ not finished 🙂 It’s got to the point where it’s a Motorcaravan in the eyes of DVLA and the insurance company, and we’ve had eight nights away in it so far, but there’s plenty to do yet 🙂 Perhaps unsurprisingly, getting to “useable” status has slowed progress a bit…
mtbmattFree MemberPosted 9 years agoThey’re bedded on two layers of mastic tape. It took a couple of goes to get all the roof corrugations satisfactorily filled, and the odd shape of the Midi Heki at the front around the hinges caused some issues. All good now, though. /crosses fingers
Fingers crossed! It was a heki-midi I used, with mastic to fill in corrugations and sikaflex as the sealant.
I had lots of problems and ended up having to re-do it all using a non-setting mastic from a tube, rather than the tape stuff.Also, I know exactly what you mean by slowing up. I got mine ready to use almost 2 years ago and have only just started to do more bits and pieces 🙂
I had no idea just how much time and effort was going to be involved in it.mark90Free MemberPosted 9 years agoI had my van for 7 years and it wasn’t finished when I sold. Had lots of great holidays in it though 🙂
Enjoying the updates.
Mike_DFree MemberPosted 9 years agoI brought the corrugations up to level with thick strips of uPVC from a building plastics place, stuck in with Sika (not exposed to UV just there so should be OK). Tape on top.
Mike_DFree MemberPosted 9 years agoMOAR.
Insert own “got wood” joke here:
Various sizes of planed all round timber for framing, 6mm birch ply for bulkhead sides, 4mm birch ply for wall lining and furniture skins, 3mm ply for ceilings.
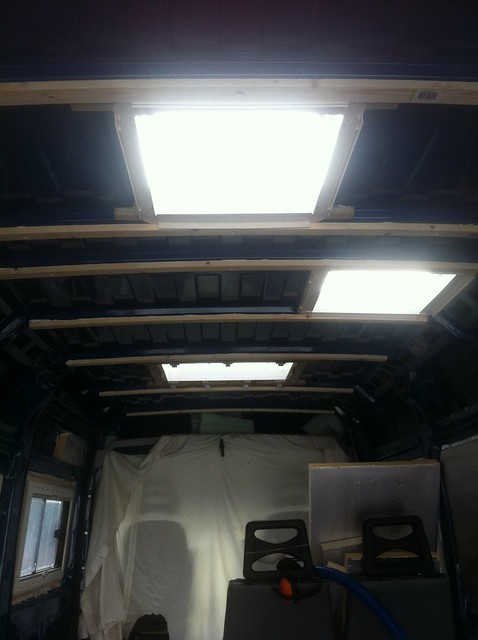
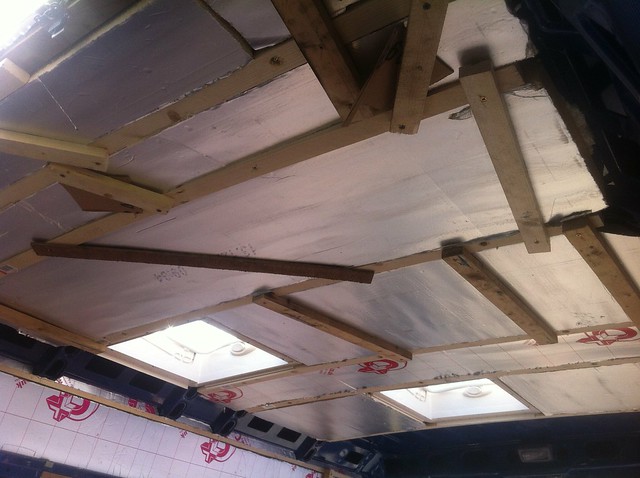
Some of this was for battening the roof to support the ceilings:
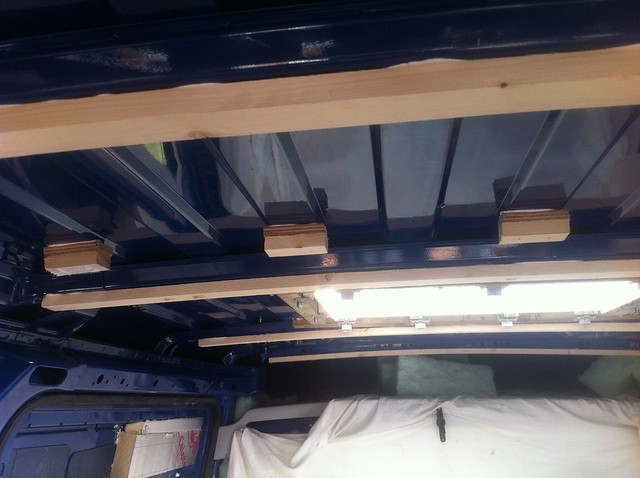
There’ll be more Celotex in between the battens — went for 40mm in the end because there was _just_ enough height for it (I’m 6ft) and we want it as well-insulated as we can reasonably manage. Most of the battens are Sika/rivnutted to the steel ribs in the roof, but in a couple of places we need intermediate ones so we can use the full width of a sheet of ply. And also to help support various bits of wall/full height cupboard that’ll be going in later:
The intermediates need packing so they end up at the right height. Many points for Sikaflex here — I can hang off one of those little blocks (until my grip gives out).
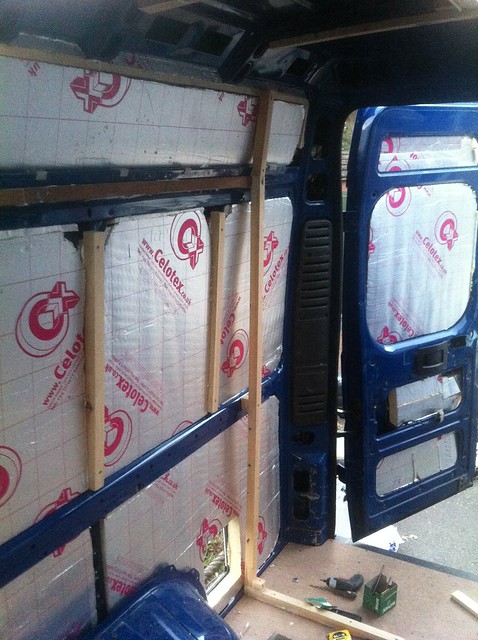
Meanwhile, more insulation was happening:
After much pondering we’re not doing anything with the steel ribs — people who’ve insulated inside report that it doesn’t make much difference, given that most of the heat is conducted through the metal rather than radiating through the air gap.
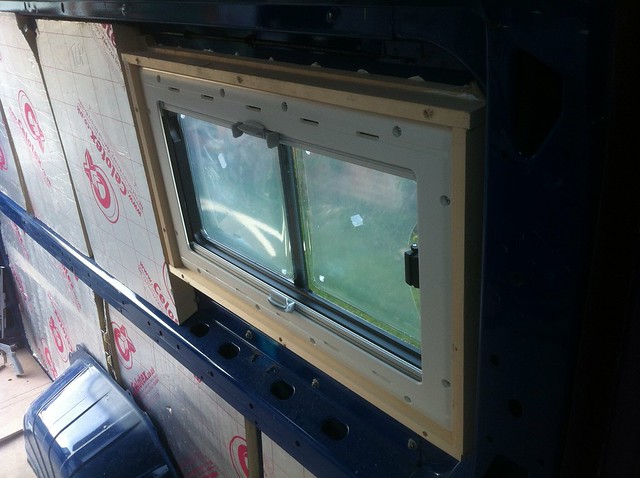
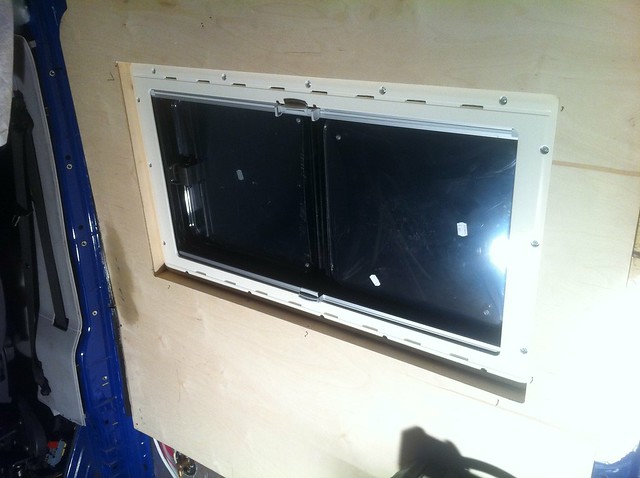
The windows work best with a wall thickness of about 25mm, so that’s what we did. But there’s 50mm of insulation in the walls, so I had to make reveals for the windows to bring them out to where the walls will be:
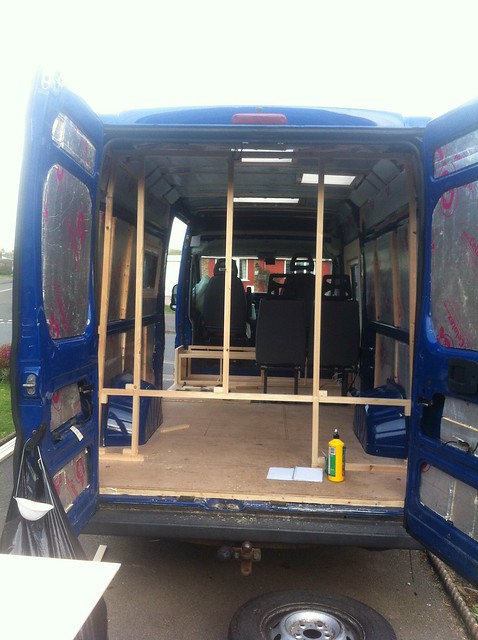
Then some more wood, making a start on the framing for the rear bulkhead that separates the accommodation from the bike space:
The space looks very shallow, because, well, it is 😉 But it’s deep enough for two bikes side by side, crossways, front wheel out, with big flat pedals on, so that’ll do.
Obviously when tackling a project like this, it’s essential to maintain a tidy, well-ordered working environment:
Hm. Possibly not that essential after all.
Got a bit of interior lining in, bit of a fiddle to get the hole for the window in the right place — to play safe I made it a few mm too small, it’ll get planed/sanded back to end up flush with the reveal frame. Eventually.
Insulated the roof:
All those random bits of wood are temporarily screwed to the ceiling battens to support the insulation while the goop goes off.
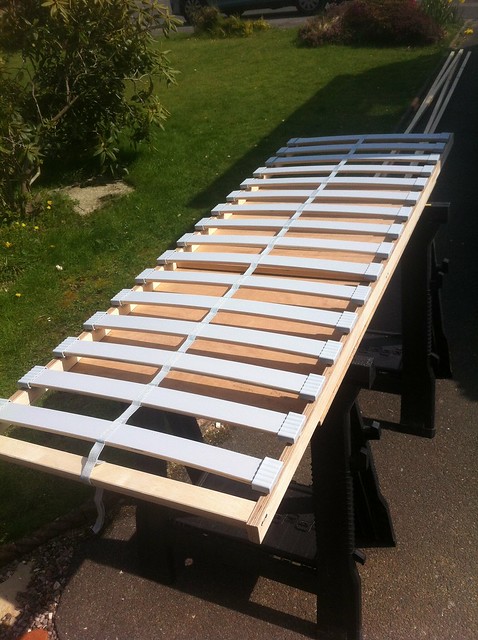
In the interests of saving time and effort, the rear bunks are made using Ikea bed bases. They’re too long and too wide, but that’s easily remedied:
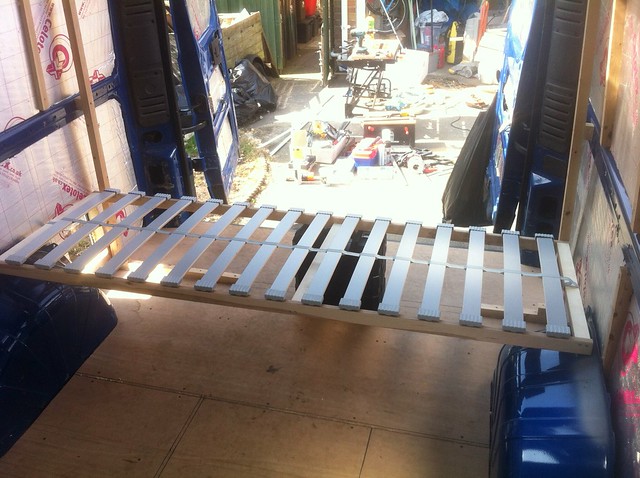
Lower one mocked up in position:
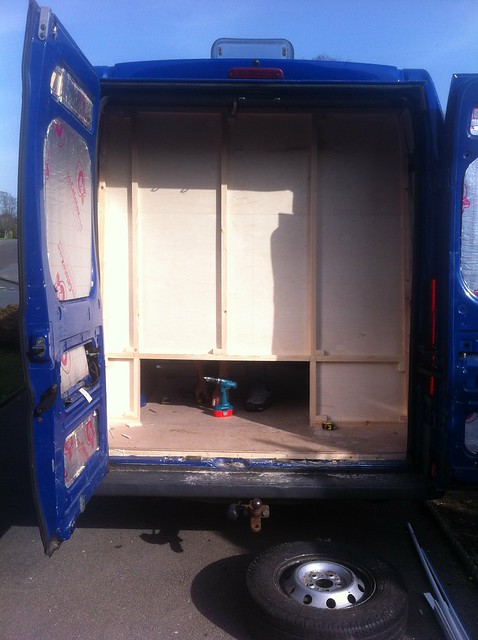
Bulk of the bulkhead framing done:
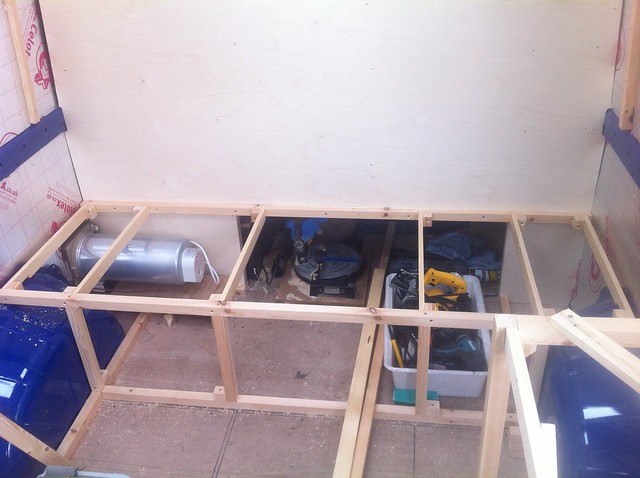
The gap at the bottom is for access to the space under the lower bunk — there’s room for a couple of inflatable canoes there (not a random example, those are things we’d like to carry 😉 )
Lined on the accommodation side:
Looks like this from the other side:
A bunch more framing to hold the lower bunk up:
With the base in place:
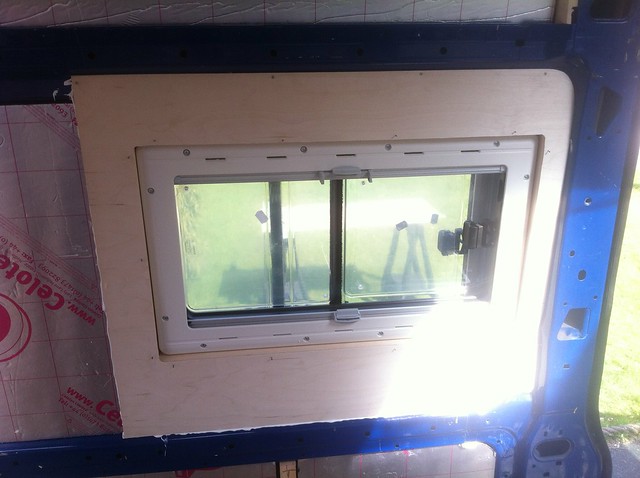
And to round off this exciting instalment, another lined window:
This one’s over the kitchen, so the lining doesn’t need to go any further down. There’ll be a full-height cupboard to the left, so the lining doesn’t need to go any further that way, and an overhead locker, er, overhead.
Super-observant readers may have spotted a sneak preview of the next stage in one of the pictures above 😉
althepalFull MemberPosted 9 years agoLoving your work sir! Its like an stw “how-to” guide..
when you say you work at at desk.. is it producing Haynes manuals?SteelsrealFull MemberPosted 9 years agoits monday, sunny, my legs hurt from HOTS and i demand an update to this thread…


The topic ‘Family-friendly bike-carrying camper build’ is closed to new replies.