- This topic has 1,254 replies, 94 voices, and was last updated 12 years ago by stevemorg2.
-
DIy 700 lumen batteries inside light
-
XyleneFree MemberPosted 13 years ago
I think I just fried mine.
Wires came off and in a moment of foolishness I didnt’ double check what went where. A brief flash then nothing…bugger
DoctorRadFree MemberPosted 13 years agoPicked up a couple of Hammond boxes from Maplin yesterday… OMG, so tiny! Everything looks bigger in the photos.
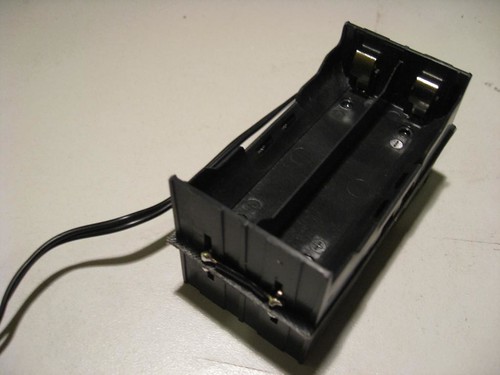
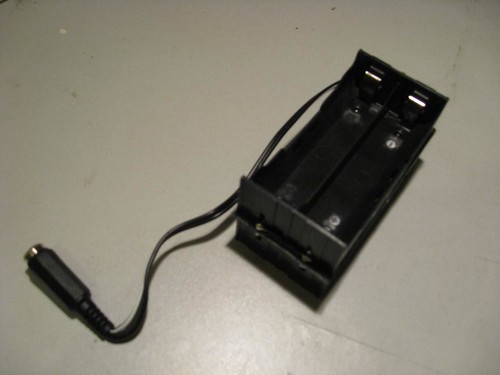
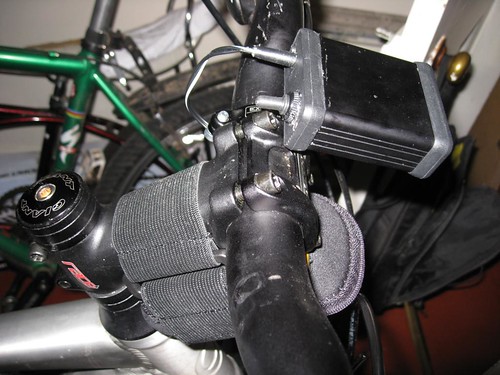
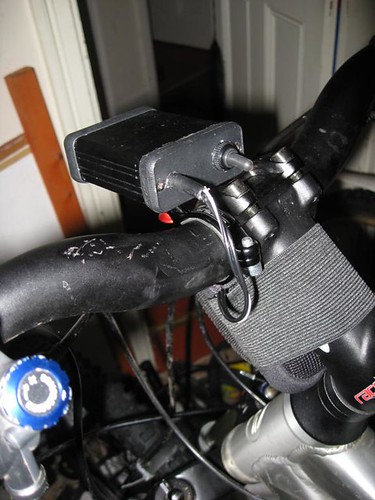
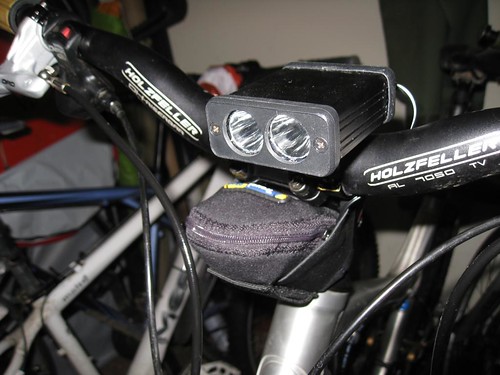
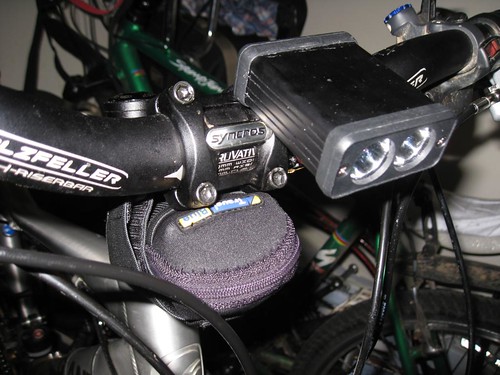
bigjimFull MemberPosted 13 years agoBatteries arrived from DX finally. Found a good little case in Mountain Warehouse that fits my DIY 4×18650 holder perfectly, so job done for now, though I do have an itch to make a v2 with a more spready optic on one LED if I can find info on them somewhere. I whittled part of troutie’s mount down to fit into a broken Exposure mount I have lying around, just off to test it in the snow, seems solid. Total cost of light must be about £50-£60 I guess, nae bad!

IMG_7869_1024x768
IMG_7867_1024x768
IMG_7882_1024x768
IMG_7881_576x768
IMG_7884_1024x768
IMG_7883_1024x768Jammy111Free MemberPosted 13 years agoTroutie did you get my email re. missing package?
I’ve bought a few of the extension cables from DX (http://www.dealextreme.com/details.dx/sku.32751) so if anyone would like one fire me an email. I’m guessing they will take a while to arrive though…
J
troutFree MemberPosted 13 years agoYes I did Jammy also replied see my post further up
theres millions of parcels languishing in warehouses due to the weather and xmas rush just have to be patientNice job BJ
bigjimFull MemberPosted 13 years agoCouldn’t have done it without you and BCt troutie – thanks!
Jammy – my last order from DX took 6 weeks or so, might be longer now the royal snail are up the creek.
DoctorRadFree MemberPosted 13 years ago@bigjim – would frosting the glass over the front of one reflector make the beam a bit more floody? Could be an easy win…
bigjimFull MemberPosted 13 years ago@bigjim – would frosting the glass over the front of one reflector make the beam a bit more floody? Could be an easy win…
I really dont know, a more spready lens or reflector would perhaps be more efficient.
joec1Free MemberPosted 13 years agotrout – Are the kits (from you) still £20 each? i need two kits and one box (i already have the other box) so i make it £48? can you confirm and i will have payment across to you today.
troutFree MemberPosted 13 years agoHi Joec1
Yep that is correct.
Not likly to get for before xmas though with the mailjoec1Free MemberPosted 13 years agocheers trout, will send across now
yea i had guessed that. doesnt matter too much, as long as its here soon(ish) haha. will add my username to the payment details.
puntopeteFree MemberPosted 13 years agojust striped down a ‘dead’ laptop battery i was given at work and all cells were between 3.92 and 3.94 volts. i haven’t ordered a charger yet, so can’t test any further
XyleneFree MemberPosted 13 years agoSo after connecting up the battery the wrong way and everything looking dead. What is post likely to have died on me?
My leds, or driver?
bigjimFull MemberPosted 13 years agoI think the driver doesn’t have polarity protection if I remember correctly. Not sure if the badness would have made it as far as the leds and if they would be damaged too.
BlackCatTechFree MemberPosted 13 years agoThe driver will have gone – they are not tolerant of reverse connection of power I’m afraid. Next batch I’m going to have to add this as I’ve found a way to do it with minimal losses. Only problem is I’ve got a few hundred of these to get through first…
It is unlikely to have reached the LEDs but not impossible. The LED+ is near enough the power + (only a low value resistor between them). The LED- should only go live when the driver IC starts switching which it won’t have done with power the wrong way but it depends what internal damage it has done to the IC. Or if you happen to have a LED short to the case.
As I’ve suggested before, and easy and safe way to test power LEDs is a PP3, preferably a really cheap one, direct across the LED. They can’t source enough current to do any damage but I wouldn’t do it for long, just enough to test it still works.
pikerFree MemberPosted 13 years agoThanks trout,package arrived today.
Time to re-read the thread and get cracking.XyleneFree MemberPosted 13 years agoah well.
I will figure out how I’m going to dig open the case and get to the driver I smothered in silicon.
pikerFree MemberPosted 13 years agoLast question before i get started,what is the best glue to use to stick the driver to the ali heatsink/heatsink to hammond box.
pikerFree MemberPosted 13 years agoThanks bobblehat, on the bottom of the new driver i have there are 5 small holes that show metal,will they short out on the ali heatsink or is it not a problem.
lipsealFree MemberPosted 13 years agopiker I used some car touch up paint on the exposed connections on the back before I glued the driver on to the aluminium. HTH
Happy Xmas & happy new year to all you fellow builders!
 bobblehatFree MemberPosted 13 years ago
I used the AAA directly on the board … it’s non-conductive and non-capacitive. The AAA layer, even if very thin, will insulate the board from the small piece of aluminium. I think the exposed metal is actually minutely recessed as the solder mask covers all but those exposed bits.
Did you get a case with solid plastic ends or metal ends with plastic bezel? I think you’ll be OK with using AAA to stick the little ali plate to either.
BlackCatTechFree MemberPosted 13 years agoIf you got the new-type power connector as well (I think you did) then there is less of a problem with electrical shorts through a metal backplate as the body is now plastic. The original power connectors I supplied had a metal body so of course the backplate (and in theory the whole case) was live. There may still be a problem if there are any shorts on the LED connections to the case but as bobble says AAA is insulative so you shouldn’t need to worry.
Best check on the size of the mounting plate, as the connections are now on both sides of the board make sure you don’t short between them.
pikerFree MemberPosted 13 years agoThanks for the advice,i have trimmed the plate a bit so the end connections dont short.Was just bothered about the holes underneath.
pikerFree MemberPosted 13 years agoCan normal 2 part epoxy adhesive be used for the driver,AAA is expensive considering i only need a tiny bit and i have epoxy to hand.
stayhighFull MemberPosted 13 years agoBigjim: is THIS the case your using for your batteries, did the velcro strap come with it?
BlackCatTechFree MemberPosted 13 years agoEpoxy not ideal as it starts to soften when you get over about 50-60C. Also heat transfer to the block will be minimal. That said, the new driver runs cooler anyway so not such an issue but it is always good to reduce the temperature as far as possible.
If you are using AAA to mount your LEDs then do the driver at the same time. If you’ve already done the LEDs or are using thermal paste and screws then you would probably get away with epoxy or a contact adhesive.
bobblehatFree MemberPosted 13 years agoBite the bullet piker …… get the AAA …. you’ll probably need some for your next build as well! ……….
……….. Oh! Yes! There will be a next build 😈
troutFree MemberPosted 13 years agoI have used silicon for the driver with no adverse effects in a few lights and still working fine .
jazidFree MemberPosted 13 years agoThank god its back … I thought my build instructions had vanished!
spacehopperFull MemberPosted 13 years agomanaged to finally finish off my MK2 triple hammond yesterday.. 😆
2 cool white XPG using regina reflectors, and a single warm white (i think its warm anyway..) XPG through an oval optic to give a bit of spread and less of a cold beam in the foreground..
first ride with it tomorrow.. cant wait! 8)
thanks to trout and Blackcattech for the parts / inspiration!
MK3 and 4 are already being planned with some triple XPG boards… 😯
bigjimFull MemberPosted 13 years agoWhat optic did you use spacehopper? Very keen to get one of my 2 leds through a more floody optic than the regina reflector – get a bit more light around the foreground.
spacehopperFull MemberPosted 13 years agothe Oval version of one of these.. i got it from Farnell though but cant find it on there now…..!
i think there is a newer/better version out though which is on the farnell site..
bigjimFull MemberPosted 13 years agoCool thanks. I take it you used a larger box to get the three and that bigger optic in? I’d be interested in seeing some pics of that, and beamshots!
Is there a minimum order at Farnells?
spacehopperFull MemberPosted 13 years agopics of the light… this is Mark 2..!
not the prettiest of things.. reminds me of Number 5 from Short circuit..
It was going to have a piece of plastic or something in front of the clear perspex front to make the front look neater but found they interfered with the beam when next to the reflectors..
shifted the heatsink upwards in the case too to the top as when the LEDS where at the bottom the bottom of the case it cut off part of the beam and stopped the light shining downwards to where the front wheel is..
oh.. and if you do use one of the oval / laura type optics they are about 2mm shorter than a regina reflector… so i cut a square of aluminium to put behind the LED and space it to the same level at the front. So as not to block the periphery of the oval beam being blocked by the Regina’s either side..
will take some beamshots tomorrow night and post them on here if i remember! 8)
and yes there is a minimum order of £20 at Farnell..
its pretty near to where My other half lives in Leeds though so i might pop in over the weekend as ive seen big billboards advertising a trade counter and see if i can pick up some of the new Laura Optics and see if they are any better..
spacehopperFull MemberPosted 13 years agotest ride last night.. 🙂
Beamshots.. all @ 970Ma
Camera Fuji F31FD 3 second exposure 2.8 aperture Iso 100
2 Reginas + Oval Optic…
2 Reginas
Just the Oval Optic..
20 Watt Philips Masterline Halogen @ 14 Volts for comparison
looks a bit more floody in the pictures than in real life..
Hopefully Mark 3 with a 20mm triple XPG and floody optic in the centre in place of the Oval will improve this a bit.. 🙂


The topic ‘DIy 700 lumen batteries inside light’ is closed to new replies.