- This topic has 2,324 replies, 145 voices, and was last updated 2 weeks ago by Harry_the_Spider.
-
Christmas Airfix!
-
ChrisLFull MemberPosted 3 years ago
I think I painted my Tamiya M1A2 with an xtracrylix paint through my airbrush. I think I thinned it with Vallejo airbrush flow improver.
nickcFull MemberPosted 3 years agobut it is temperamental I just use it to brush paint small parts these days.
Yes it is…I think I’ll be doing the same.
timbog160Full MemberPosted 3 years agoI find xtracrylix ok but agree it’s temperamental – I use a 2ml syringe so I can very precisely control the viscosity. Your airbrush will be fine provided you have the proper tools to strip and clean it – one of those kits with the v small bottle brush type affairs is ideal. I also use Liquid Reamer for really stubborn paints – it will melt just about anything – just don’t breathe it in!!
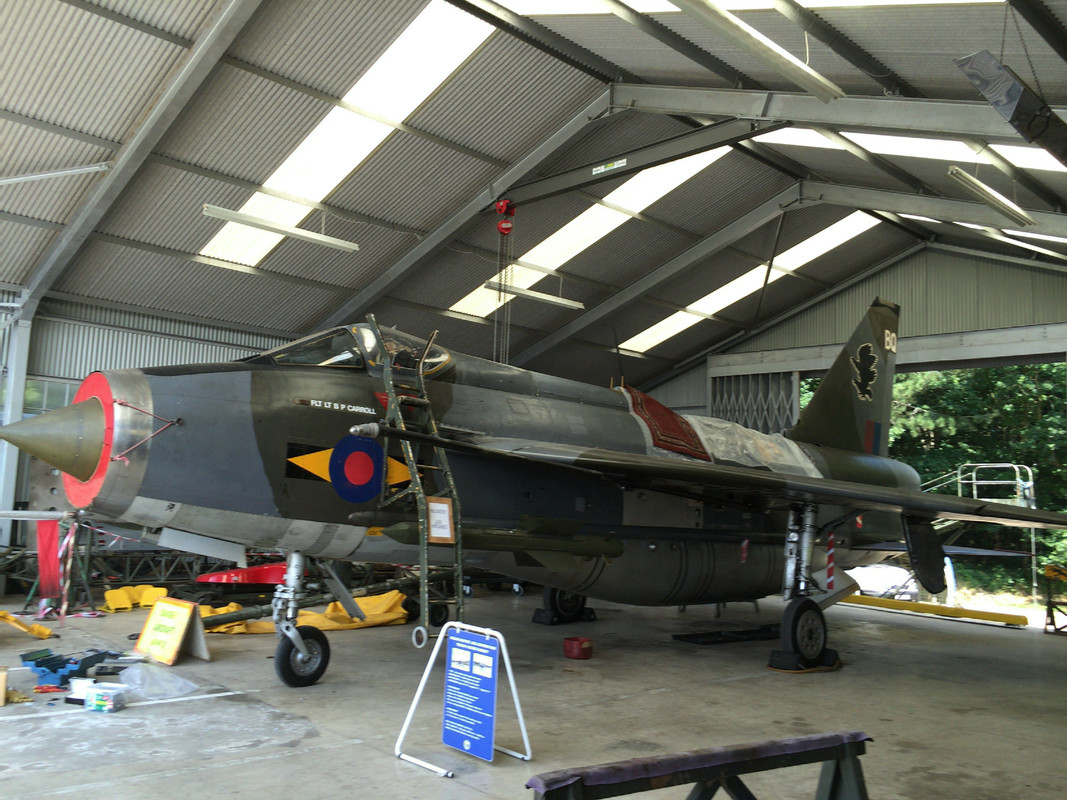
JonEdwardsFree MemberPosted 3 years agoSo here’s the next one off my bench…
Airfix 1/72 EE Lightning F6, provided by my nephew for my birthday some 7 months ago (thank you – excellent taste!). Built OOB, bar a nicer ejection seat and a brass pitot probe (which looks a lot more pleased with itself in the photos than it does in real life!). I read a few WIP on Britmodeller, which meant that I avoided most of the “Gotchas” (although I STILL didn’t take enough plastic out to make the top of the fuselage nose join up especially nicely), and created a couple of my own – namely leaving the engines out (bar the compressor face/bulkhead) until final assembly, then discovering they didn’t fit quite as well as I thought. It all came out in the wash though…

I discovered the ejection seat firing handle on my bench the other day, so that’s just been reinstalled
…and with one of its near ancestors for scale. Its a big old bugger…!
Harry_the_SpiderFull MemberPosted 3 years agoI like that a lot. Got a couple of Lightnings in the stash that I need to do something about.
johndrummerFree MemberPosted 3 years agoSomewhere in Eastern Europe…
Typhoon-VDV K-4386 Russian MRAP vehicle – 1/35 by MengSoldiers by Zvezda.
Street by MiniArt.Paints by AK Interactive, Tamiya & Revell. Pigments by Vallejo
More here: https://imgur.com/gallery/WN4tUof
johndrummerFree MemberPosted 3 years agoThanks Harry, glad you like it
I tried not to do any chipping on the truck as it’s still a very new model, but no harm making it a bit mucky, eh?
uponthedownsFree MemberPosted 3 years agoI think you’ve overdone the panel wash on the Lightning Jon to the point where it looks like a cartoon of a Lightning. Also you’ve applied the decals over the top of the panel wash.
Harry_the_SpiderFull MemberPosted 3 years agobut no harm making it a bit mucky, eh?
How do you do that?
I’ve become mildly obsessed with the retro-futuristic Stridsvagn 103 “S Tank” and fancy a crack at the Trumpeter 1/35 kit.
CoyoteFree MemberPosted 3 years agoWhat scale is the Lightning?
Great work on the Russian vehicle JD.
mogrimFull MemberPosted 3 years agoI’ve become mildly obsessed with the retro-futuristic Stridsvagn 103 “S Tank”
There’s a Tank Chat on that one, worth a watch for inspiration:
johndrummerFree MemberPosted 3 years agoTo make it mucky, I first gave it a liberal coating of Humbrol Sand Wash, wherever you’d expect a 4×4 that’s been off-roading to get mucky.
Then apply some Vallejo pigment fixer and sprinkle on the appropriate colour Vallejo pigments (other brands are available) and let it dry. If you’ve done too much you can clean it up with a wet brush or cotton bud.If you want it really mucky, spray a very thin coat of Tamiya or Revell Dark Earth, starting at the bottom & working up. Don’t forget to mask the windscreen where the wipers would do their thing
If you want to display the interior, don’t forget to mucky up the floor where soldiers’ muddy boots would get to
This is a really good reference book:
https://www.modelhobbies.co.uk/ammo-by-mig—how-to-paint-modern-russian-tanks-solution-book–mig-6518-274771-p.aspPJM1974Free MemberPosted 3 years agoI think you’ve overdone the panel wash on the Lightning Jon to the point where it looks like a cartoon of a Lightning
I respectfully disagree, I think that Jon did an amazing job on that Lightning.
Harry_the_SpiderFull MemberPosted 3 years agoThat Lightning looks OK to me.
https://www.airliners.net/photo/UK-Air-Force/English-Electric-Lightning-F6/905663/L
JonEdwardsFree MemberPosted 3 years agoWhat scale is the Lightning?
1/72
I think you’ve overdone the panel wash on the Lightning Jon to the point where it looks like a cartoon of a Lightning. Also you’ve applied the decals over the top of the panel wash.
A little harsh, but arguably fair. I think its down to a combination of things.
Firstly – decals very much underneath the panel wash and in the plastic, its pretty obvious on the sharkmouths However the XS903 decals really didn’t want to soften into the panel lines despite copious Microsol.
I think I went a bit OTT with the “clarity” slider in Lightroom – it makes the plane “pop” from the background, but does emphasise the dark sharp edges.
Then there’s the combination of hefty Airfix panel trenches and Flory washes. I did consider not doing any weathering, but pics of the real XS903 look pretty grubby around the belly and backend – and as soon as you end up putting a wash on, you’re kinda stuck with whatever ends up in the crevices – unless someone can suggest a method for reducing the effect there without washing it off elsewhere? It’s definitely an issue on that PR Spit, which really does look toylike. The relatively pale colouring also makes it contrast more.
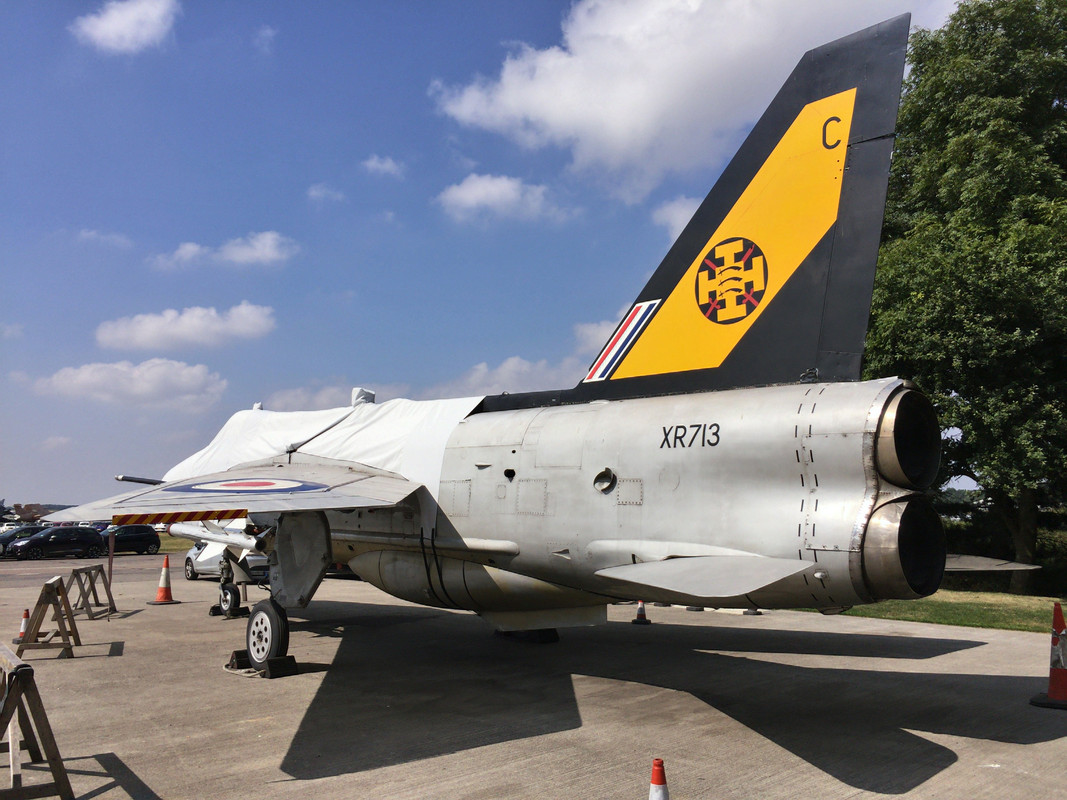
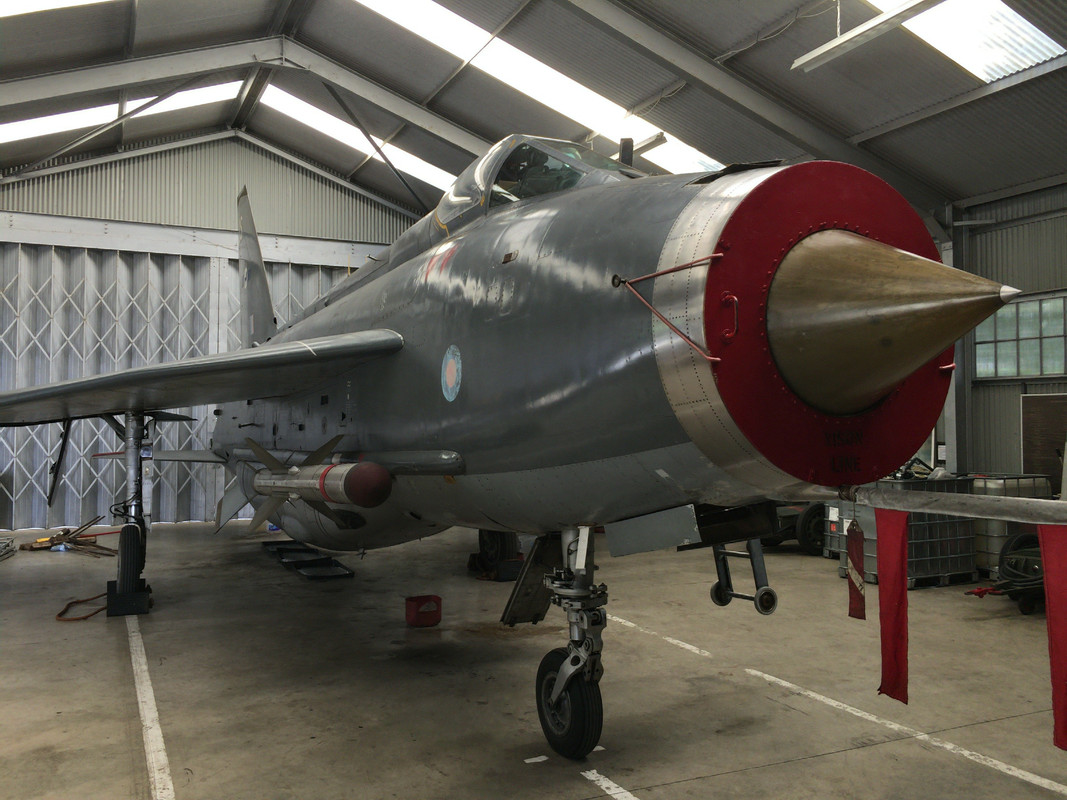
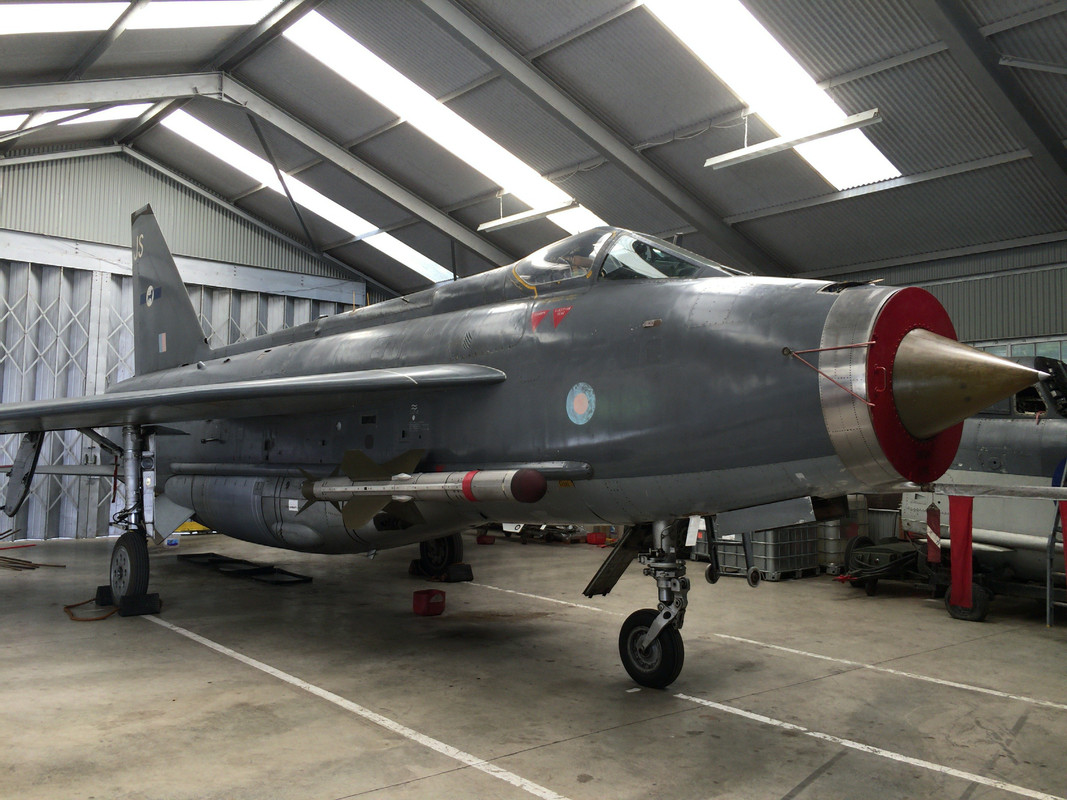
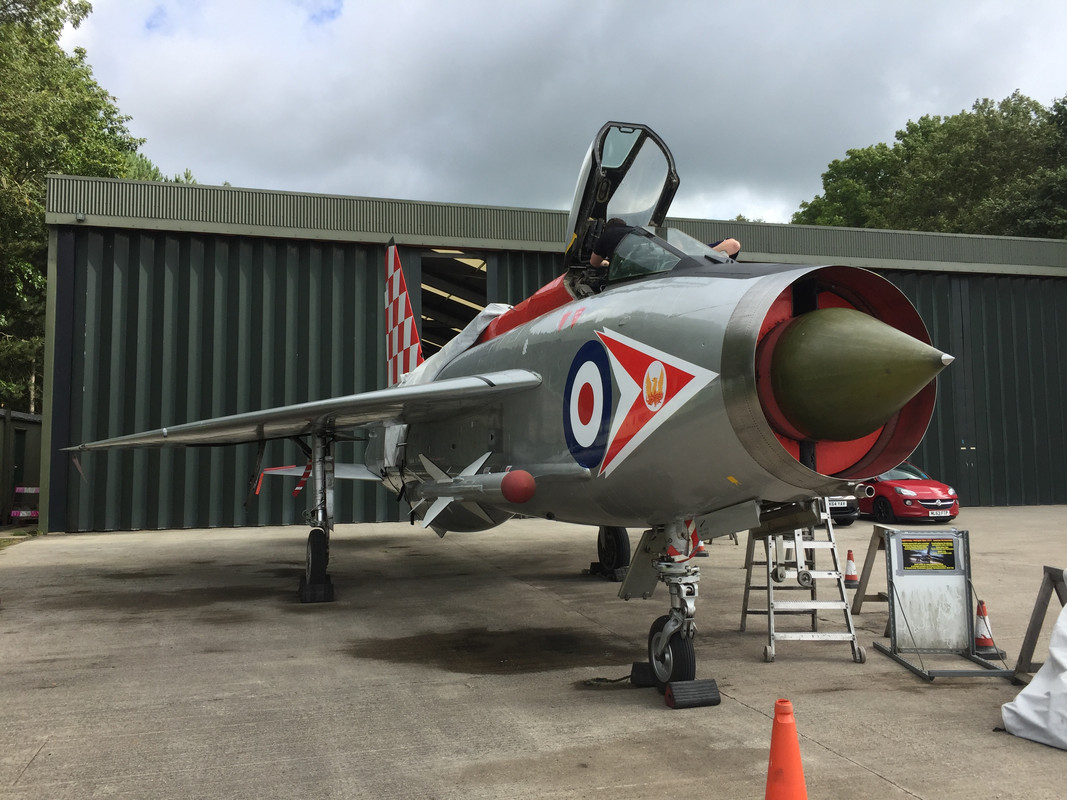
CountZeroFull MemberPosted 3 years agoAnyone building a Lightning kit, I’ve got some close-up photos from Bruntingthorpe to help with some details.
timbog160Full MemberPosted 3 years agoThere are some amazing arguments about pre and post shading on models. It’s just a matter of personal taste, but can be easy to overdo it. One of my other hobbies is messing about with ex military vehicles (ie real ones) and I never pre shade on those 😀
spursn17Free MemberPosted 3 years agoI think you’ve overdone the panel wash on the Lightning Jon to the point where it looks like a cartoon of a Lightning. Also you’ve applied the decals over the top of the panel wash.
The paint on the Lightning is a cracking job, I couldn’t get anywhere near as good as that on a 1/72 kit, the comment quoted above is a fair comment though.
This is the sort of comment/criticism I look for when I post pics of my models as making kits is usually done in isolation, I’ll show them to my family and the response is ‘oh yeah, very nice’ but they don’t really have any idea of what they’re looking at. Getting the honest opinion of my modelling peers is very important to me, so feel free to have a dig at mine if it’s warranted as it’s a path to getting better!PS; my F105 is very close to going in the bin, I’m really not happy with it.
Harry_the_SpiderFull MemberPosted 3 years ago@john_drummer Thinking of going for an Iawata Neo after your recommendations. Will it just be more reliable that the £20 eBay jobbies it will it allow me to do other stuff too? I particularly struggle with paining thin lines but down know it this is poor kit or poor technique.
johndrummerFree MemberPosted 3 years agoI’m still as clumsy with a decent airbrush as I was with a cheap one. But in theory with a gravity fed dual action airbrush & the compressor dialled down, you’re supposed to be able to paint really thin lines, like you might see on say a 1/35 Panther or Tiger/King Tiger.
I make do with masking putty & Maskol, Tamiya masking tape for straight lines, like on the Typhoon VDV above.Mine is I think the Neo CN model. I think the standard needle & nozzle is 0.5mm, I’ve also bought a 0.3mm needle & nozzle that I have yet to try.
I’m just starting an Eduard 1/48 FW190A-3 so I’ll be trying out the thinner nozzle & needle on the fuselage mottled camouflageI’m sure it’ll be more reliable than a £20 single action jobbie like wot I started with
Harry_the_SpiderFull MemberPosted 3 years agoJust bought the Neo CN (and some airbrush cleaner).
Will use my eBay special for applying clear coat and the new one for paint.
£86 lighter, but I’m not spending money on diesel!
johndrummerFree MemberPosted 3 years agoYes, airbrush cleaner is essential. After each use and again before use if you haven’t used it for a while.
Disassemble the airbrush for ease of cleaning.
Harry_the_SpiderFull MemberPosted 3 years agoI flushed the old one with alcohol then water, or with Alclad airbrush cleaner if I’d used to for clear.
Closer inspection is showing that the needle tip is off centre causing the spray to be at an angle.
PJM1974Free MemberPosted 3 years agoThree things:
1) I would be extremely happy to have built anything approaching half as good as Jon’s Lightning. I did have a go at XS903 with the sharkmouth in 1/48 and my effort was rubbish in comparison.
2) On a related subject, I am very amenable to plenty of walk around pictures of Lightnings.
3) I also have an Iwata Neo. I found that the lack of a trigger limited on the handle of the brush made getting a consistent spray difficult, so I swapped with a handle from a £25 Amazon special that matched the Iwata handle thread so I can now effectively choke the throttle.
nickcFull MemberPosted 3 years agoThing is, we’re making plastic toys to amuse ourselves. I said something similar to uponthedowns earlier on in this thread and had to go away and have a word with myself. Even if it’s meant in the spirit of constructive criticism; it can still come across a bluntly when it’s written down.
Each to their own, if you’re happy with the end result, it’s all good…
Harry_the_SpiderFull MemberPosted 3 years agoWOW! The Iwata is so much nicer to use than the cheapo ones. Can’t say I’ll be a better modeller for it, but I’m happy with the money spent.
Also, I managed to spray some white paint which I’ve never had much luck with before. Probably coincidental, but this means that my Shakleton and Sea Vixen can be attempted with a little more confidence now.
nostrilsFree MemberPosted 3 years ago@Harry_the_Spider, I haven’t followed this thread for a while, did you ever finish your Victor(s)?
Harry_the_SpiderFull MemberPosted 3 years agoDamn. You’ve shamed me in to doing something about it!
nostrilsFree MemberPosted 3 years agoSorry, wasn’t my intention 😁 I enjoyed following the build. Hasn’t there been a new tool version released in the mean time?
Harry_the_SpiderFull MemberPosted 3 years agoProbably several!
Mine is the ancient £15 one. Can’t afford £50 on a kit.
johndrummerFree MemberPosted 3 years agoHere’s another finished article.
9K37M1 BUK in 1:35 by Meng, built OOB.
NATO code SA-11 if I remember correctly.Sadly there’s a lot of fragile plastic around the interesting end of the launcher so I had to fix it in ‘stowed for travel’ position.
Paints by Ammo by Mig, pigments by Vallejo.
Individual track links were a challenge. Working suspension less so.More here: https://imgur.com/gallery/Qe9sKAD
johndrummerFree MemberPosted 3 years agoThanks Harry.
I have a couple more approaching completion, including the A-7D that had a near-disaster with my then choice of masking material.
Just got a couple of avionics bay covers, an AIM-9 Sidewinder and the canopy to fitjohndrummerFree MemberPosted 3 years agoRemember the plasticine disaster?
Not my finest work but I think I’m done with this now. Hasegawa 1/48 A-7D Corsair II.
mostly OOB but some details in the cockpit from Aires, Eduard.
no ordnance in the kit other than the 2 AIM-9 Sidewinders you see here; the rest of the load from US Ordnance Set 1 by AMK.
paints by AK Interactive.
Decals by Furball Aero-Design, this is A-7D 71-0354 based at Korat RTAFB in June 1973More here: https://imgur.com/gallery/jfwV8On
Don’t look too closely at the Mk82 bombseddiebabyFree MemberPosted 3 years agoWhat a beautiful quality kit to start with. Must be a new moulding.


You must be logged in to reply to this topic.