- This topic has 40 replies, 10 voices, and was last updated 1 year ago by WorldClassAccident.
-
Are you bored enough to watch me design/build a book case?
-
WorldClassAccidentFree MemberPosted 1 year ago
Following on from the success of the coffee table I have been instructed to build a bookcase. I will attempt to keep this thread up to date with progress.
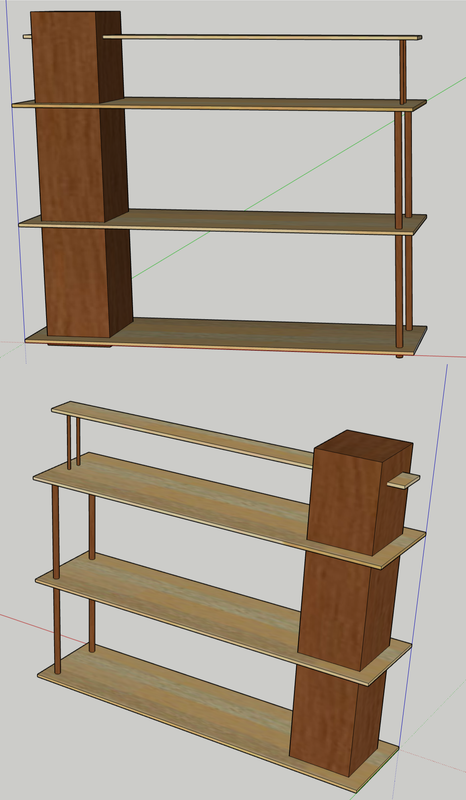
So far I have come up with a basic design. When I say design, I mean more of a concept as I am not sure of the dimensions yet, or indeed how many shelves it will have but hopefully it will all work itself out over the coming week.
 WorldClassAccidentFree MemberPosted 1 year ago
Just found out that I might be making a pair of book cases
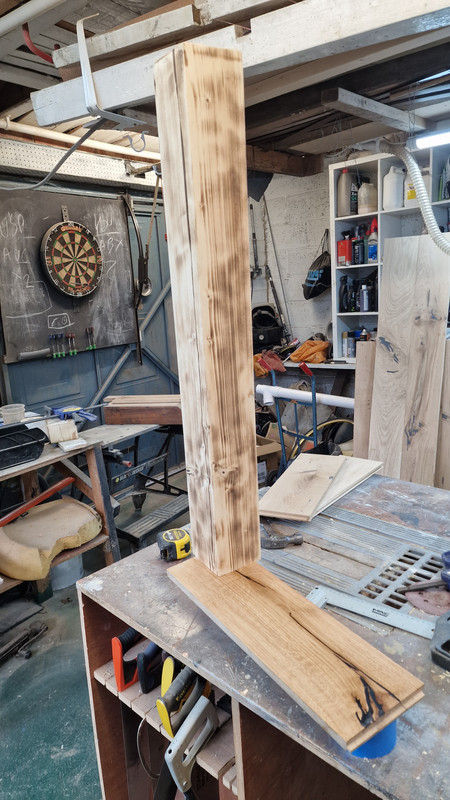
The raw materials are a big lump of timber that has been kicking around the garage for ages. It was part of a bar/music desk for a while. I hoped it was an interesting wood but taking the tope surface off shows it to be pine (I think)
There are a couple of deep saw cuts which I might ‘lose’ behind the shelves which helps me decide what height to have those.
pk13Full MemberPosted 1 year agoI challenge you to do a triangle instead of the box. Think Toblerone standing on edge good look
WorldClassAccidentFree MemberPosted 1 year agoA quick review of materials and a bit of measurement has led to a slightly revised design. I have routed a slot around the upright for the first shelf to slot into. Just need to cut a little rectangle into the two t&g planks to go around the remaining centre of the post and hopefully I will get a nice neat join when they are pushed together again.
The ‘box’ is actually a solid lump of pine. I am going to burnt the surface after sanding it down to create the ancient Japanese effect of ‘burnt wood finish’
WorldClassAccidentFree MemberPosted 1 year agoI am sorry to hear that. Perhaps you might like to browse my back catalogue of boredom?
pk13Full MemberPosted 1 year agoI made a bar top out of ceder and scorched it lots of clear floor epoxy and it looked very good.
Give the wood a wire brush to pull the grain out a bitWorldClassAccidentFree MemberPosted 1 year agopk13 – I did the burning thing when I needed a really quick art display and only had time to grab some pine CLS timber on the way to the exhibition. Strange looks from some other artists as I was running a blow torch over it in the carpark outside the venue. I think the thought it might be performance art but the slight smell of smoke as I screwed it all together to form a double a-frame added to the atmosphere and the burning disguised the cheap woods origins.
kayak23Full MemberPosted 1 year agoI have routed a slot around the upright for the first shelf to slot into. Just need to cut a little rectangle into the two t&g planks to go around the remaining centre of the post and hopefully I will get a nice neat join when they are pushed together again.
Might be more complicated than it needs to be?
I’d have thought you could chop the upright into the correct lengths to sit between each shelf and dowel and glue them in, stacking the whole thing as you go.
Providing you have the means to cut such a chunk cleanly, accurately and safely that is.WorldClassAccidentFree MemberPosted 1 year agoIt is more complex than it needs to be but should still work. I wanted to try it.
The T&G floorboards were the cheapest way to get some long pieces of oak. I thought I would used the fact I will be joining two bits together to make the cut out for the post.
The upright stays in one piece for strength.
The shelves stay in one piece and are held in place by the slot in the upright.
A couple of wooden rods near the tips give the remaining support.Maybe not the easiest way but not too challenging and saves having a wobbly upright where I cut it slightly crooked. I finally got round to checking my chop saw for accuracy for 90, 60 and 45 degrees. None are close enough to use for joints so everything that needs to be properly square, needs to be hand cut.
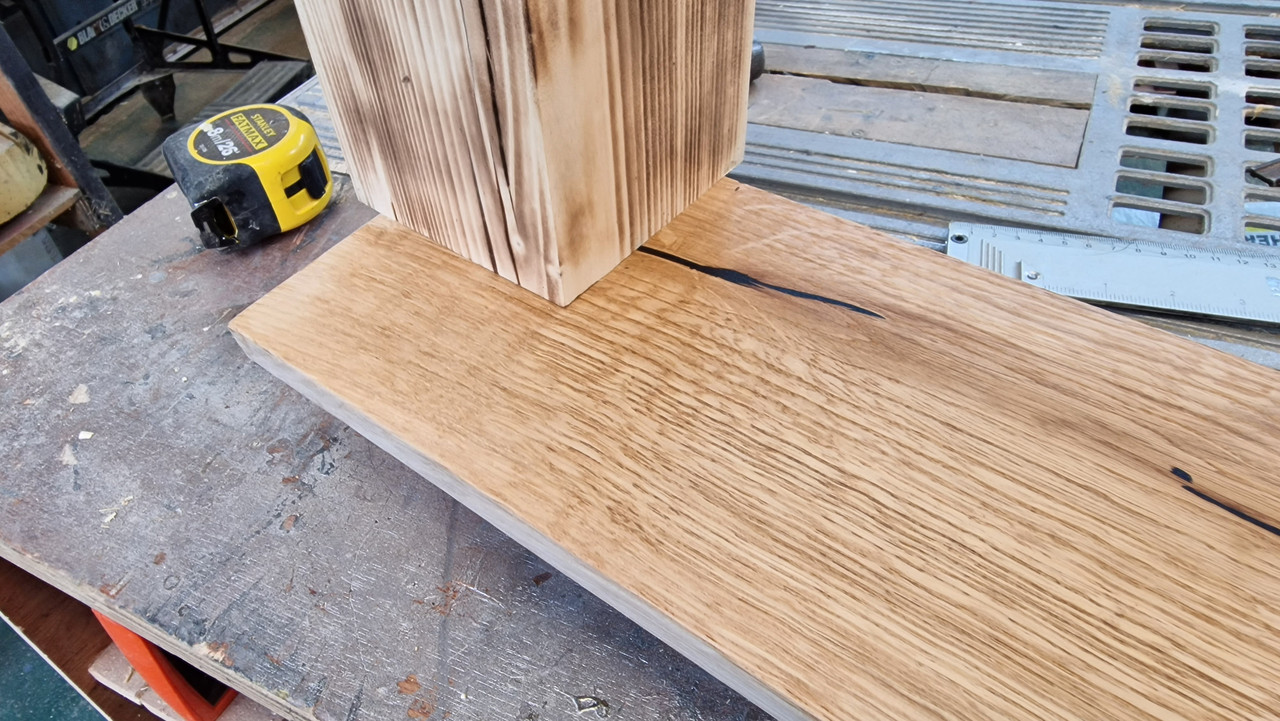
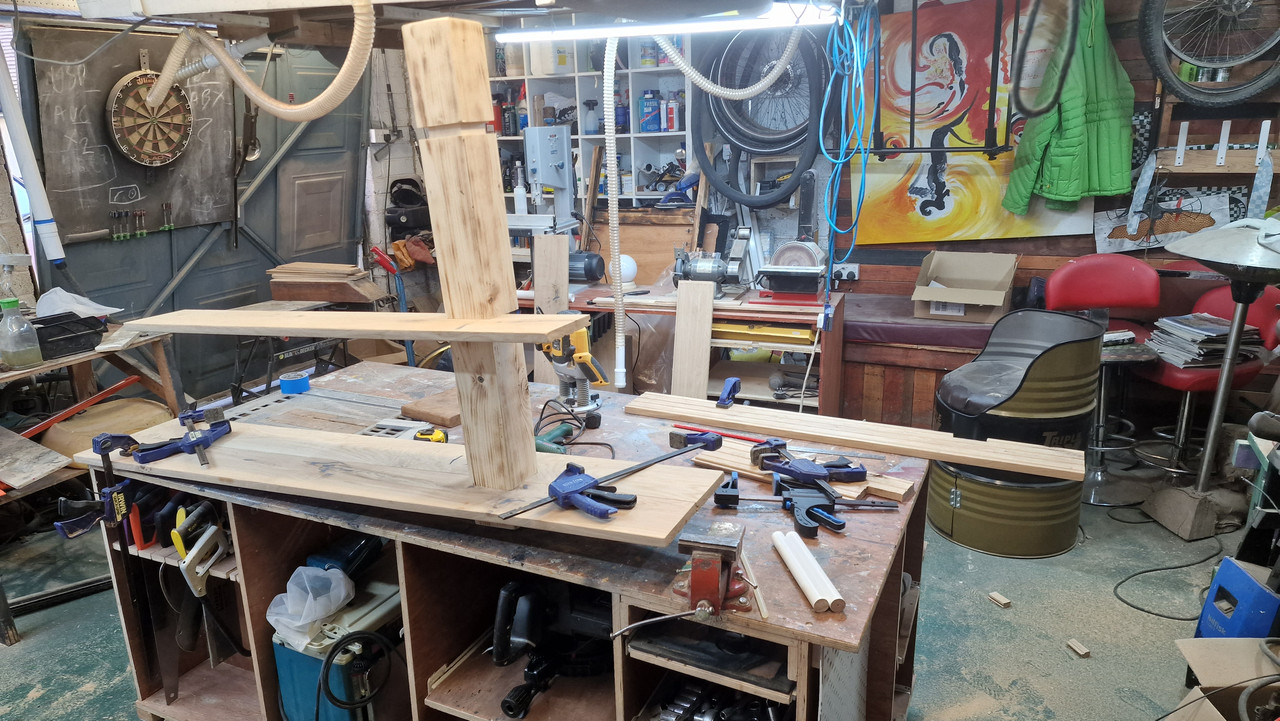
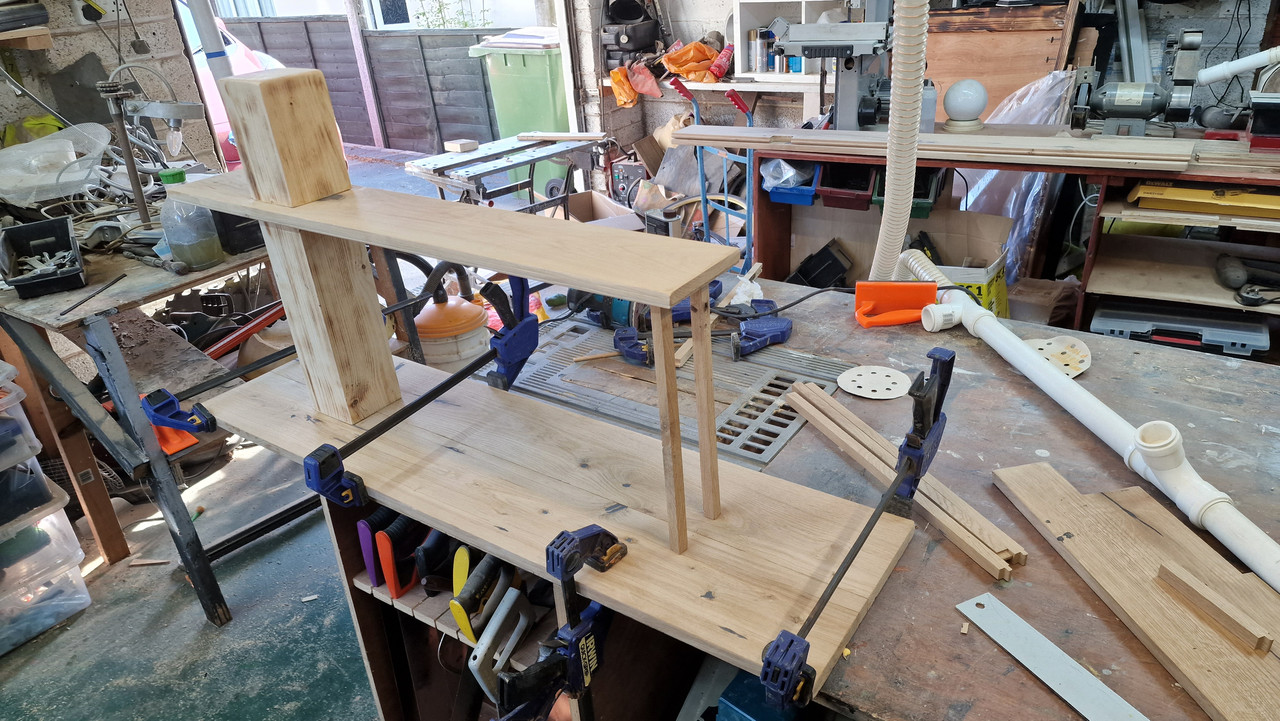
WorldClassAccidentFree MemberPosted 1 year agoA quick dry fit of a spare bit of shelf to seen if my over-complex joint system will work.
The main post will be sanded to give a more even burn effect and this will be minimised as I discovered this morning that we don’t like the burnt look that we suggested yesterday.
The shelf will be longer and joined to another one coming in from the other side to join seamlessly to for a single uninterrupted plank with the post passing through it.
There will be two more shelves added.
Yes, I will tidy the garage.
walowizFull MemberPosted 1 year agoNice design, looking forward to seeing it progress.
How are you going to fit the smaller top shelf?
scratchFree MemberPosted 1 year agoI’d be tempted to leave the shelves full length, then cut the recess out from the rear of the shelf to fit around the upright, I’d then offer it up from the front on and fix. then I’d dowel and glue the small rear section of the shelf on. Depends if the unit has a dedicated front / back.
Joining the shelves across the front as you describe may leave more of a witness line? Just trying to think of alternative ways to make it look as tidy as possible
WorldClassAccidentFree MemberPosted 1 year agoThe ‘shelves’ are floor boards as that was the easiest way to get straight, flat lengths of oak with enough strength to take books. They are T&G which I want to keep to ensure the strength of the join along their length (also it is easy).
scratchFree MemberPosted 1 year agoAh! My fault, thought you were joining left and right, joining along the T&G makes more sense!
WorldClassAccidentFree MemberPosted 1 year agoNot as much progress as I would have liked as I decided to repair / rebuild part of my dust collection system to cope with the wood shavings I have been creating and blocking the old system with, see https://singletrackworld.com/forum/topic/what-was-the-last-thing-you-repaired/page/5/#post-12374271, and then my sister turned up for a couple of hours.
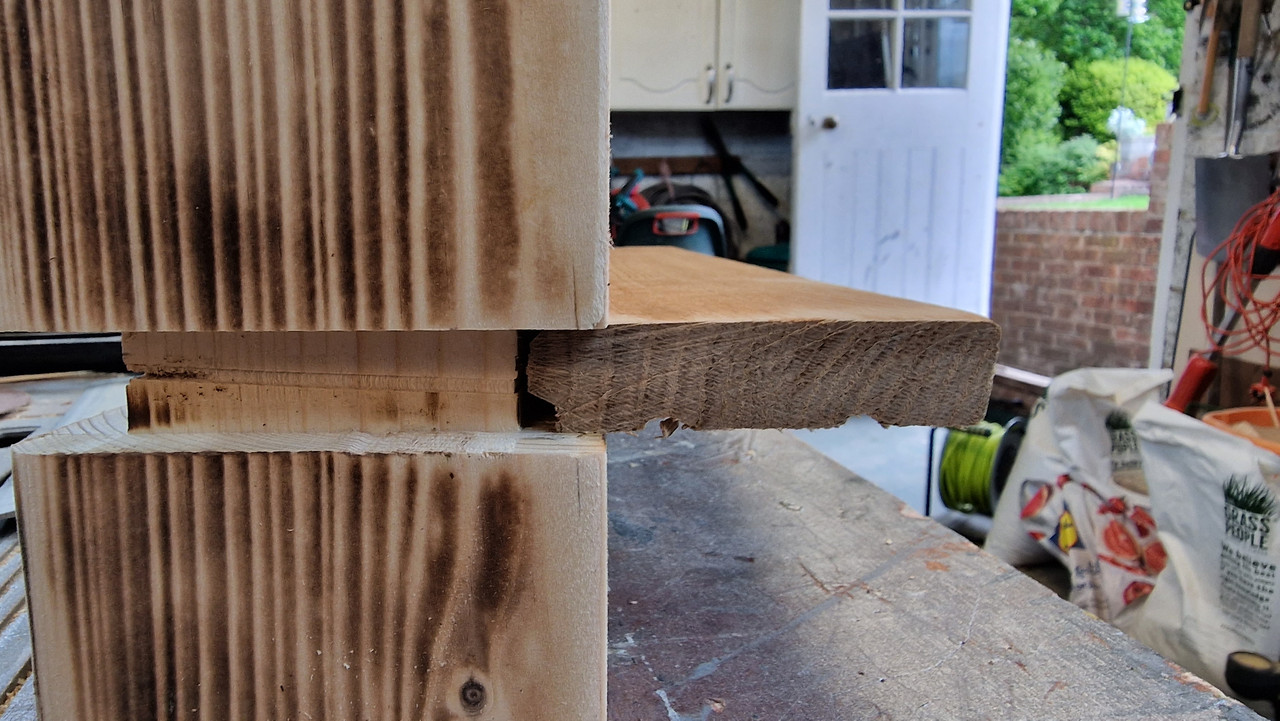
What I have achieved though is pleasing.
The main post is now and acceptable colour and appearance.
The bottom shelf is dry fitted and good.
The second shelf is dry fitted and good. Photo shows before I fitted one half so you can see exactly how it is done.
The third shelf has the rebate cut into the main post ready.
Plans for tomorrow:
Dry fit third and final shelf.
Cut and fit round support rods under the shelves*.
Sand everything.
Sand everything.
Sand everything.
Sand everything.
Clean and glue.
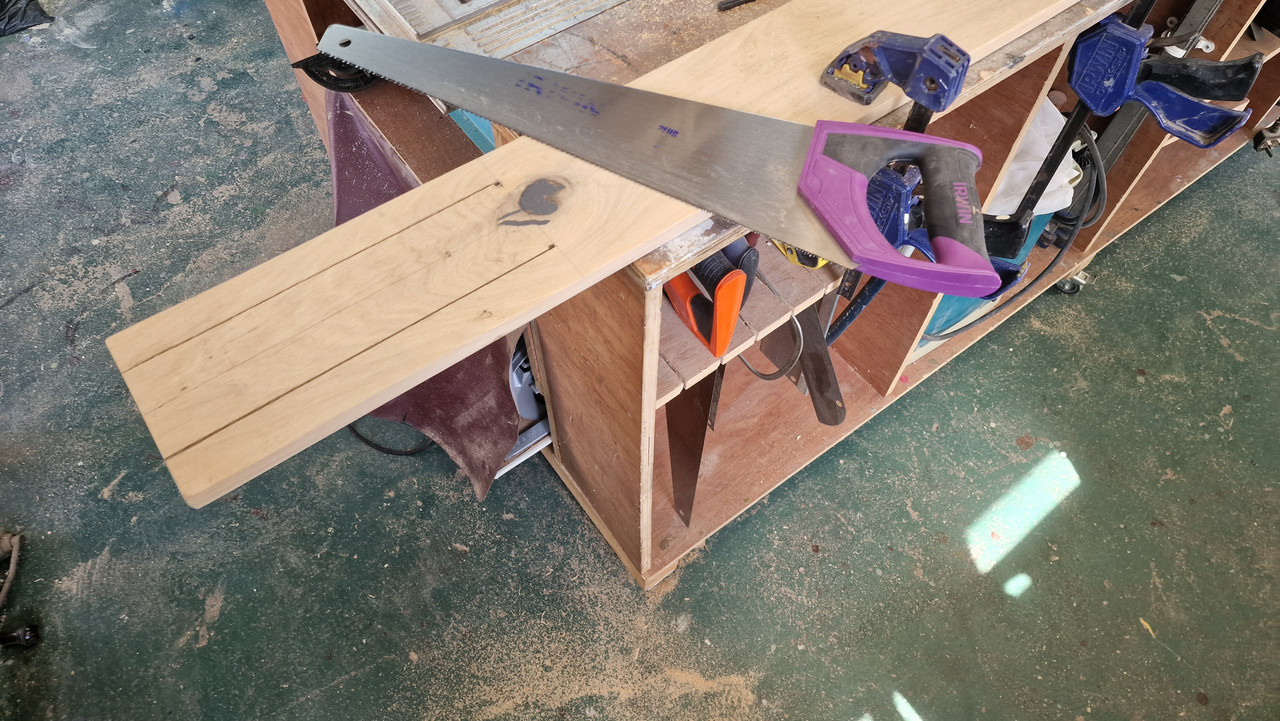
Use the repaired dust collector to properly clean the garage as 3 days without it working properly has left dust and shavings everywhere.WorldClassAccidentFree MemberPosted 1 year agoI needed to cut a long thin rip cut on the final shelf. The perfect job for one of those extra fine Japanese pull saws. Unfortunately, as you can see from my saw rack, I don’t own one. Will the cheap B&Q saw do the job?
Well that is the third shelf dry fitted. I like the design of the shelves now you can actually see what it will look like.
You know I mentioned needing a thin saw and only having a thick one? I guess I am going to have to cut a different piece to fit here rather than using the bit I cut out. I am glad I chose a plank without too much grain effect.
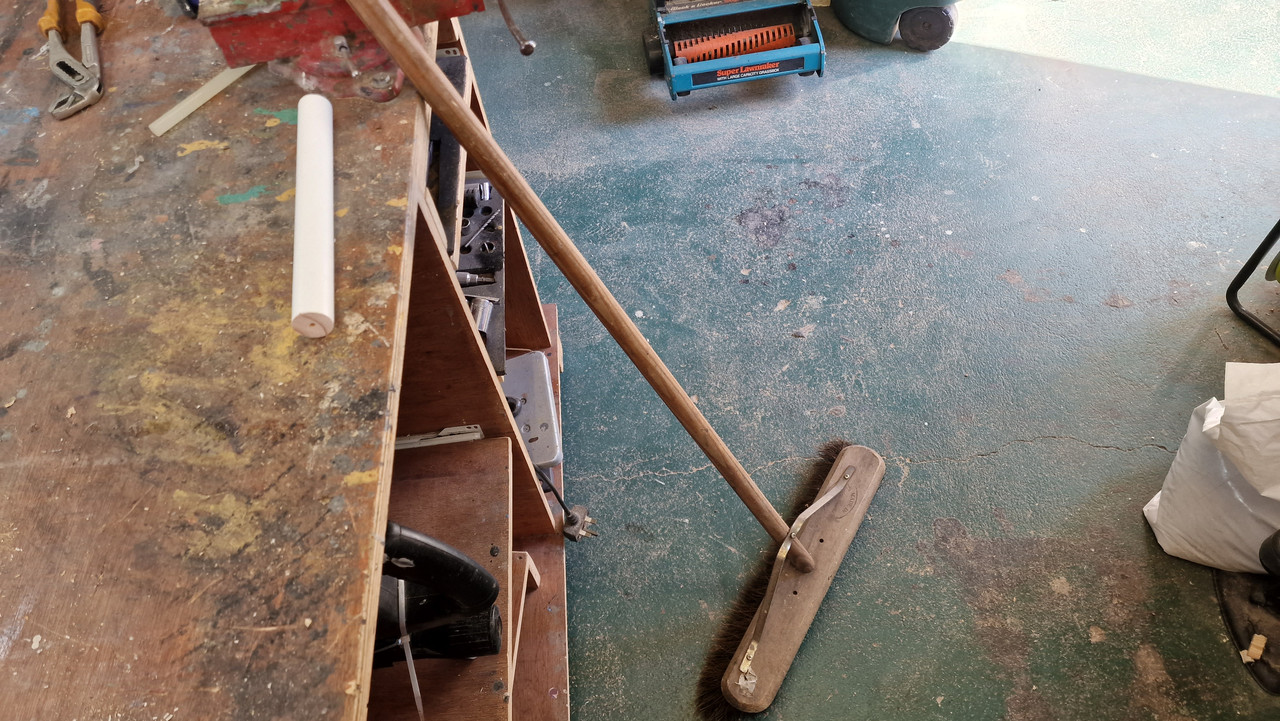
As well as the third shelf insert I need to get the wooden support rods. I don’t think the end of a curtain pole or a cut down broom handle will really do it. I think I will have a quick Google on how to make a big dowel maker that can make 35cm+ lengths of oak rod.
Than the sanding begins. Any ideas other than Osmo Oil for the finish on the shelves?
kayak23Full MemberPosted 1 year agoShelves are looking really cool.
To make your dowels, you could try this sort of method with a drill and chisel.
It’s what I do when I need to make longer lengths.It’s a bit of trial and error but you can get nice round profiles in any wood.
Than the sanding begins. Any ideas other than Osmo Oil for the finish on the shelves?
They’re not ‘high traffic’ surfaces so anything really. Danish maybe?
If you like experimenting, what about trying fuming?
You can darken Oak by fuming it in an enclosure with household ammonia.
Quite interesting.
Or maybe Lime waxing?
Maybe a bit passe these days but interesting to try.welshfarmerFull MemberPosted 1 year agoWhy did you not cut the cutout on the top shelf from the back side of the top plank? The refitted piece would have been much harder to see. Otherwise a very nice job. I like the design
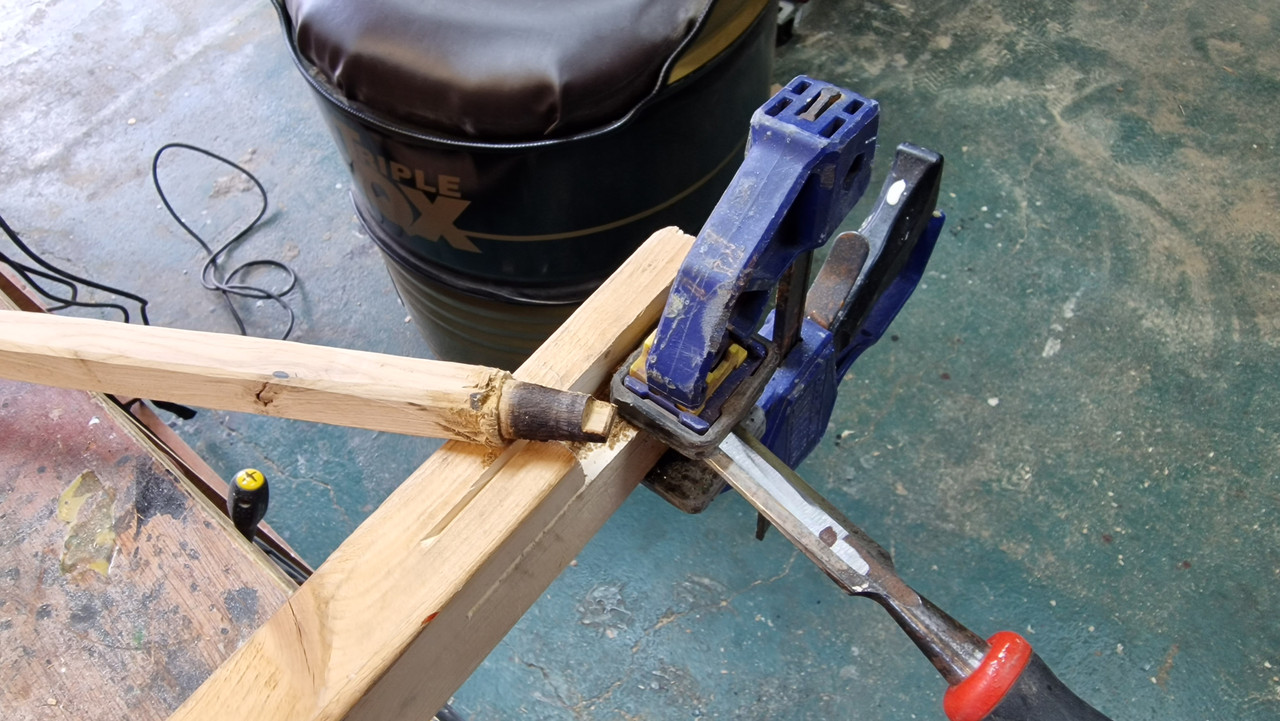
WorldClassAccidentFree MemberPosted 1 year agoSo I started off trying something like Kayak suggested
I guess I need more trial and less error, or perhaps a sharper chisel
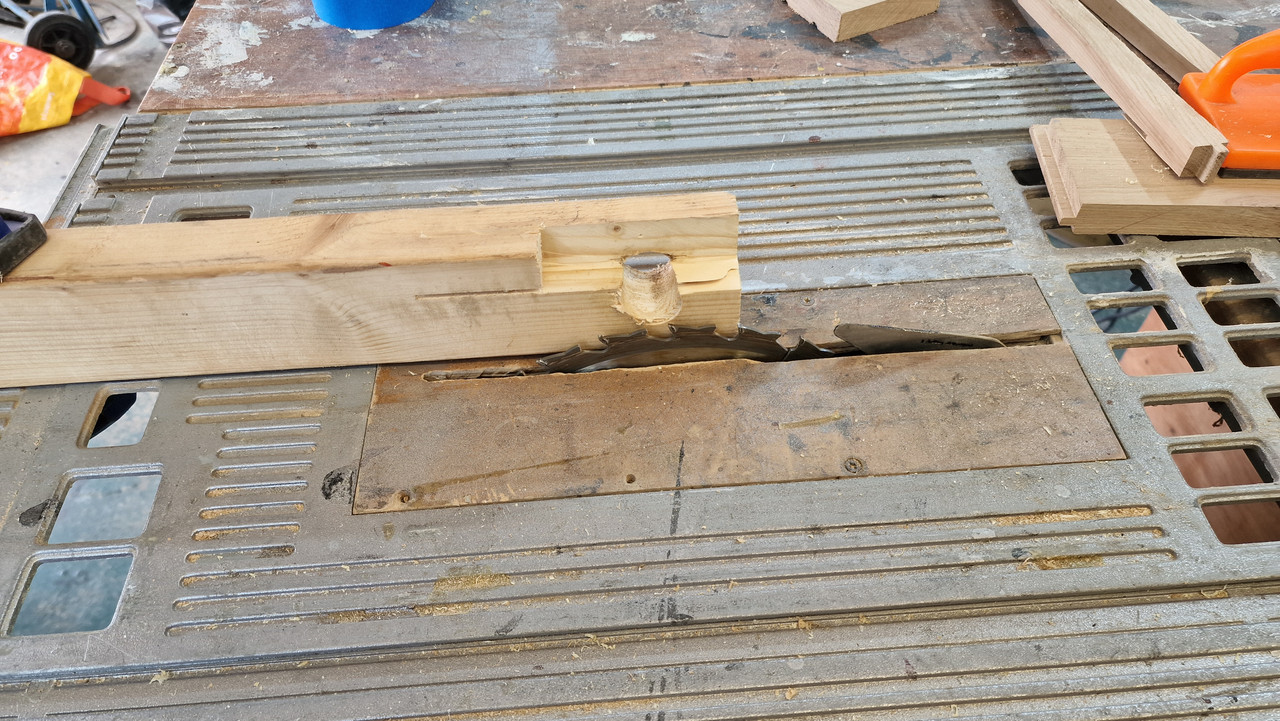
A different video showed how to do it using a round guide and a table saw
That didn’t go exactly to plan either
At this point I decided to stop trying to use my carpentry skills and fall back on my Consultancy skills.
“If you can’t solve the problem, change to problem to one that you can solve”
I decided that round pillars would look terrible on such an angular design and that square rods were definitely the better option. 2 minutes later I had the rods I needed and could start the glue up.
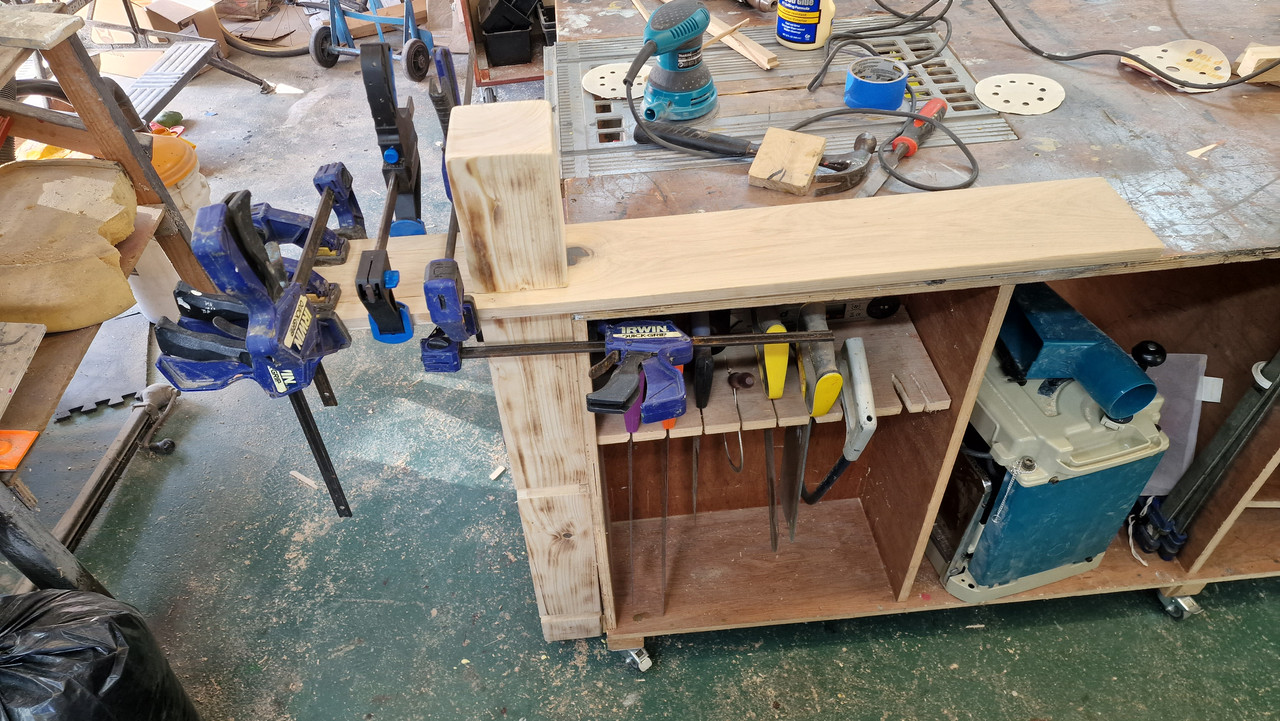
Top shelf is the most awkward so attempted first. It is glued and clamped so I am having a coffee and pork pie while I wait for the glue to go off a bit.
I think I will probably go for Danish Oil for this as it is quick and easy plus looks alright on oak. Just spotted the time so need to pop out and get some before the shops shut.
dyna-tiFull MemberPosted 1 year agoYou can use an engineering die to make dowels.
8:30 on shows the technique.
pk13Full MemberPosted 1 year agoTap and die set like that will do it or even just a castle bolt and a hammer for a bodge
WorldClassAccidentFree MemberPosted 1 year agoI was running short on ‘test pieces’ which is why I used the Consultancy Solution methodology.
Seems to work okay.
Family stuff and fixing the dust extractor yesterday has eaten into the time I had so still haven’t glued up the third (bottom) shelf but in the words of the not quite immortal Meatloaf – Two out of three ain’t bad.
walowizFull MemberPosted 1 year agoNice job it’s coming along nicely, some good inventive work there 👍
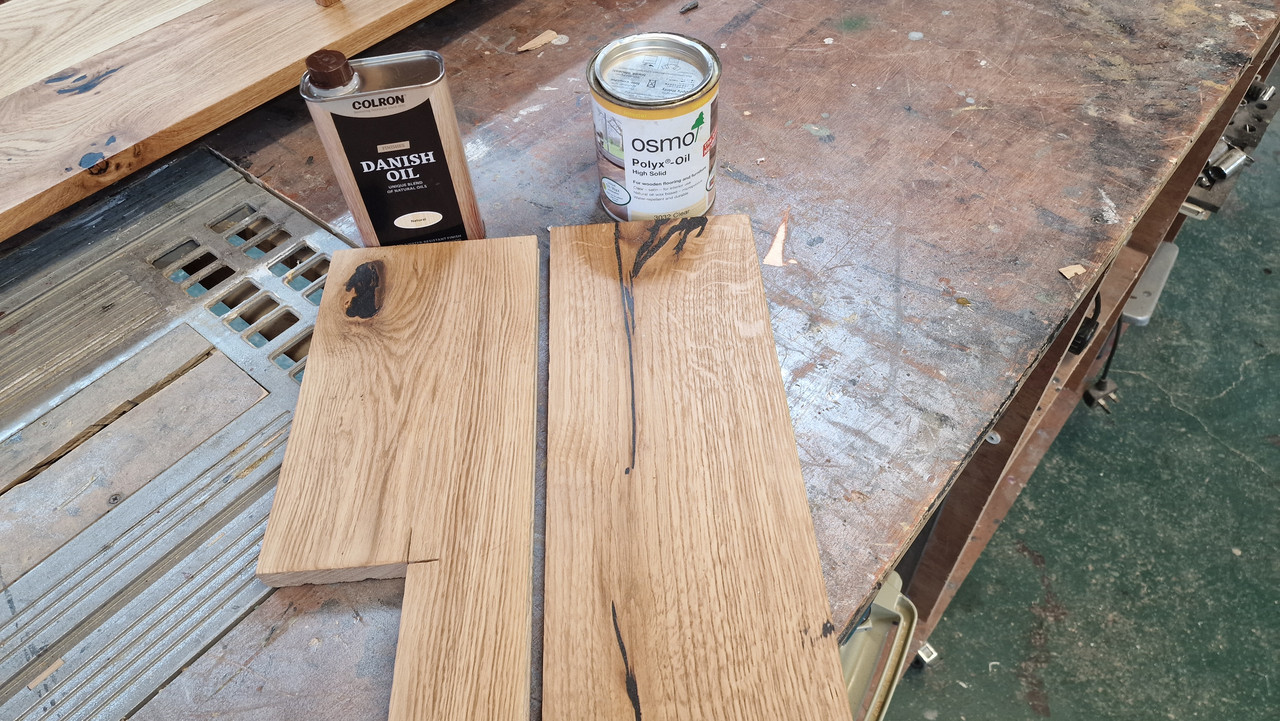
WorldClassAccidentFree MemberPosted 1 year agoWell it is all together at last and has had it’s first coat of finish. Tomorrow I will sand it down with a fine grit and then coat it all again, probably one more coat the following day and in the house for the weekend.
I wasn’t sure whether to use Osmo Oil or Danish Oil. I knew it didn’t need the hard wearing floor grade protection of Osmo but what would the different finish actually look like. Well, here are the two sample off cuts I tested, can you tell which one I eventually used?
dyna-tiFull MemberPosted 1 year agoI reckoned if you did the main support in a pigmented shellac- Bright red, it would look rather nice.
I know that’s a bit far out on the limb for some, but a bit of colour is always nice.
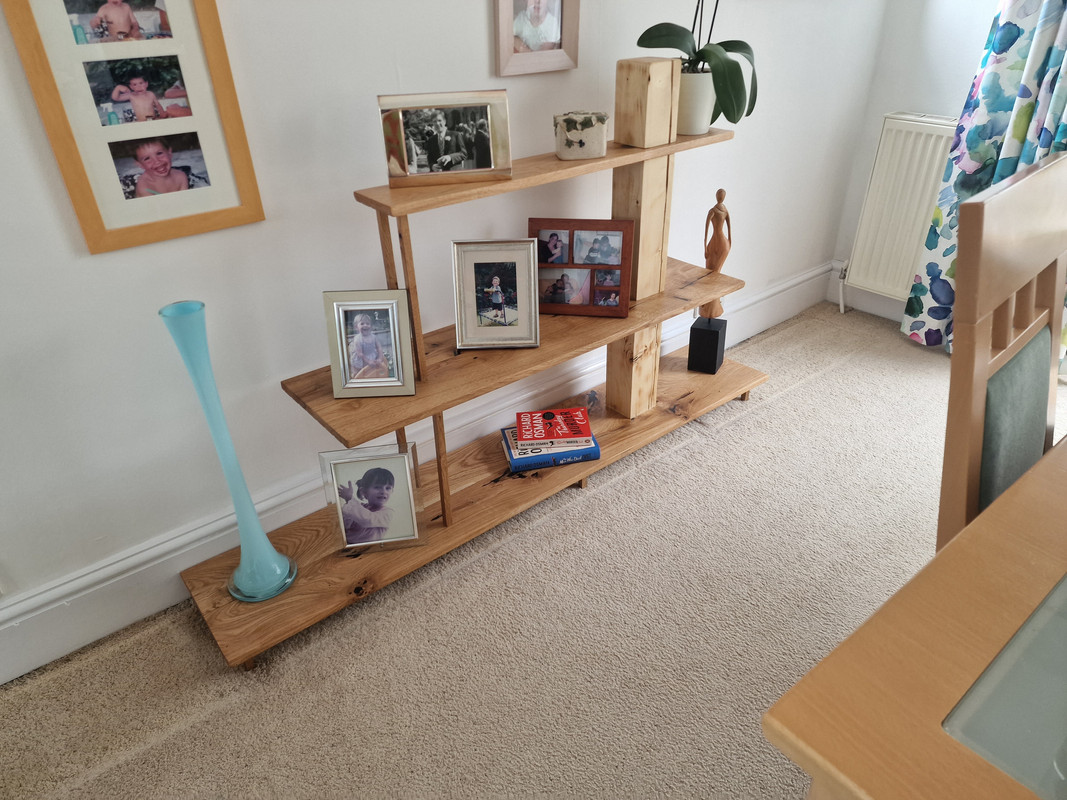
WorldClassAccidentFree MemberPosted 1 year agoI had similar thoughts in various colours and finishes but apparently I prefer plain light wood at the moment which is why most of the burn effect was sanded off.
I think it looks a bit nautical. I might stick a model sail boat on the top shelf 🙂
WorldClassAccidentFree MemberPosted 1 year agoApparently, once this is finished, I want to make a similar and complementary shelf to hold the mini-stereo and speakers.
I am glad I bought all the oak flooring the timber merchant stocked. Apparently it is really difficult to get real wood flooring made from single pieces of wood now as everything is just plywood with a thin skin of hardwood.
WorldClassAccidentFree MemberPosted 1 year agoInteresting the twists and turns of interior decor, aren’t they?
Apparently the bookcase I just built isn’t a bookcase after all because there are no shelf backs and it is a set of display shelves, or some such description.
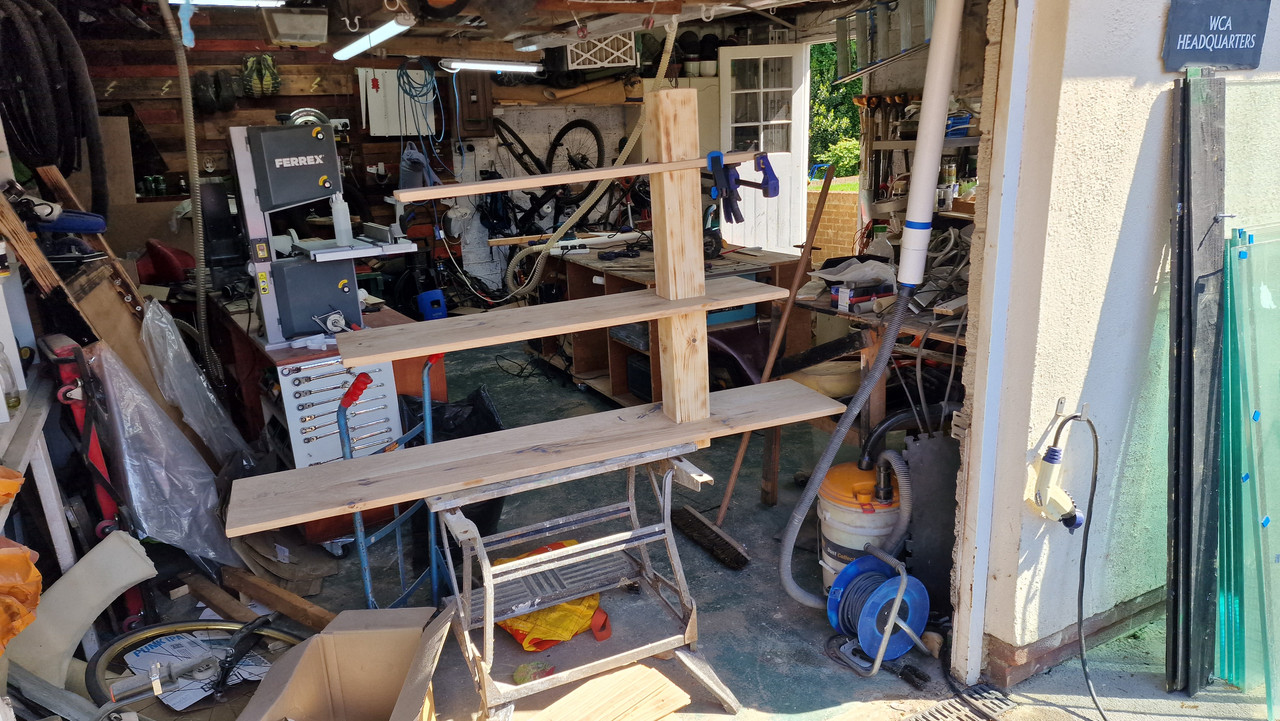
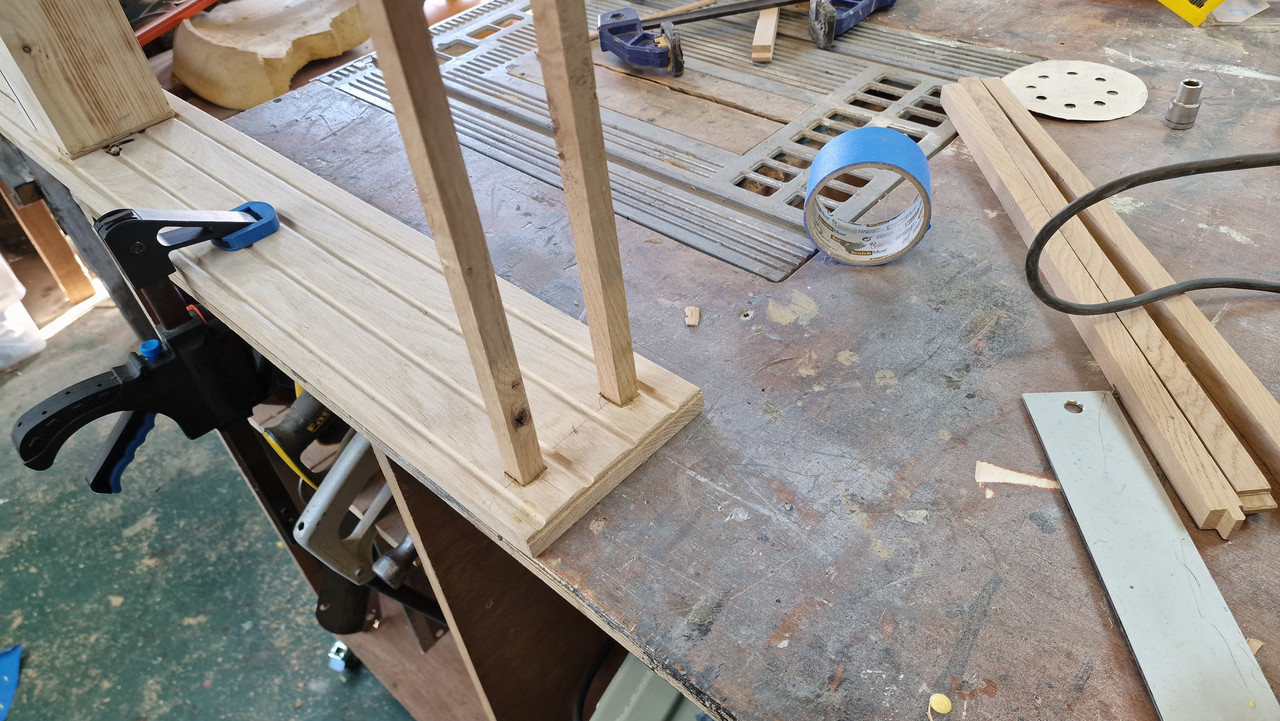
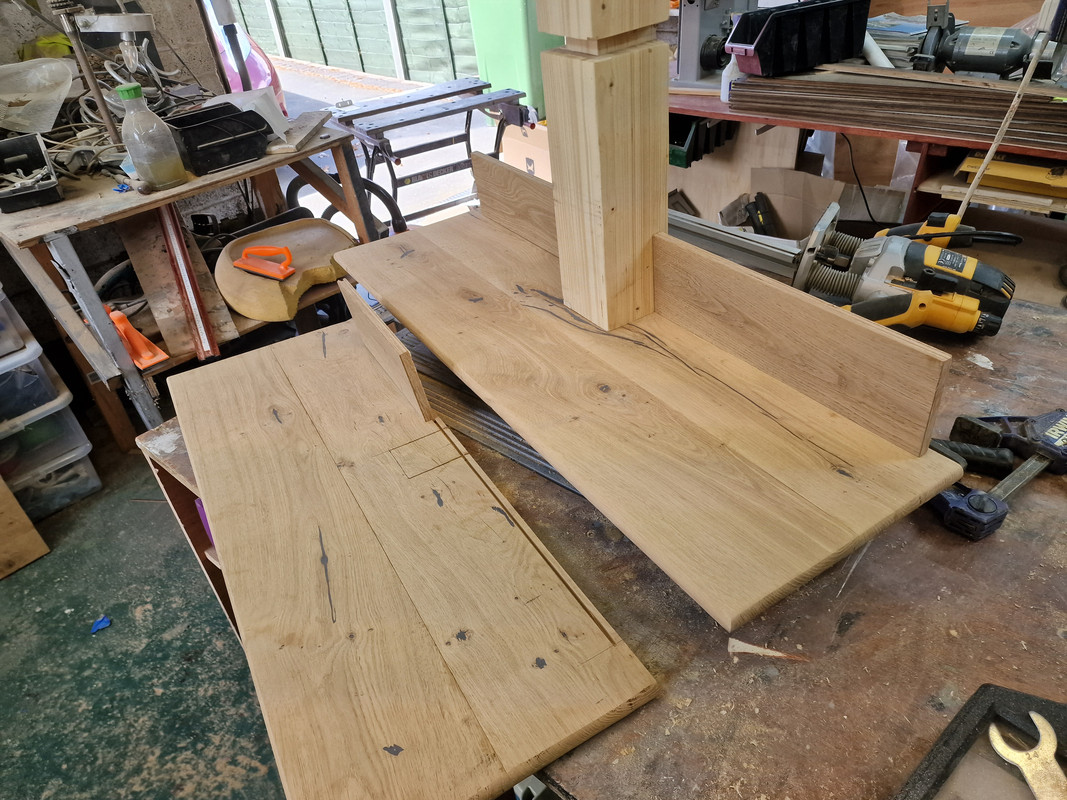
This leaves us with the problem of where to put books and the mini stereo. I am designing a second set of shelves which are definitely going to be bookshelves as I will add shelf backs to these ones. I have mocked up the design in the garage with what I have left of the oak planking and some other bits I have going spare. Really not sure how this one will turn out yet.
Current thinking based on the photo above is, from the bottom:
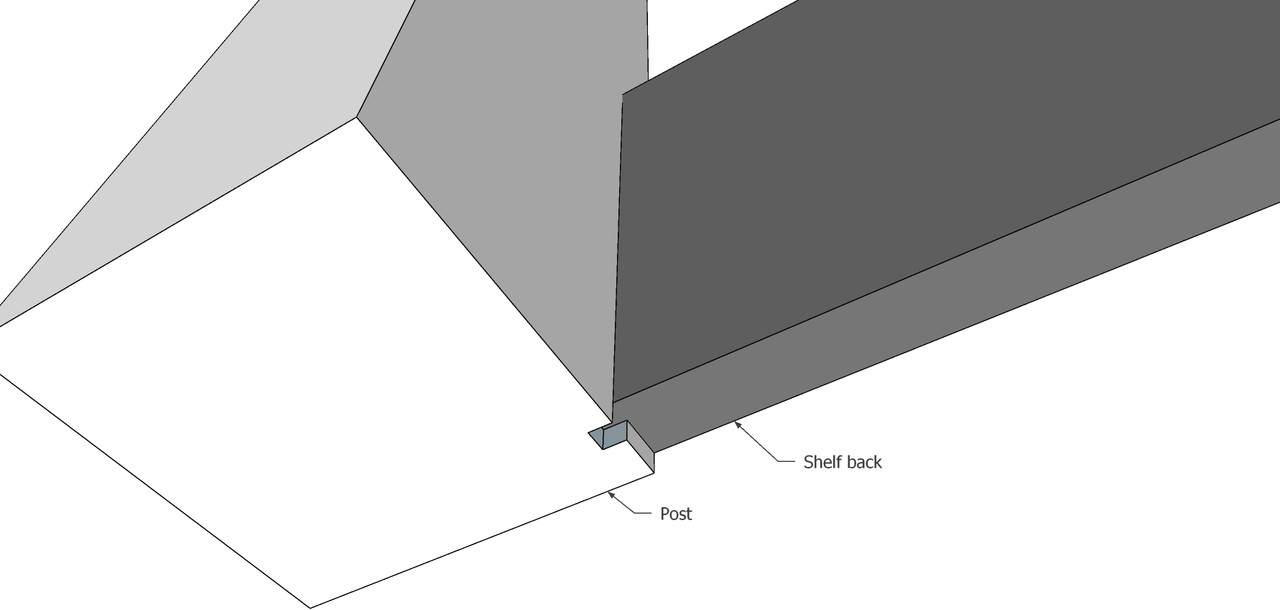
1) All shelves will have the piece or wood across the back so that the shelves are book shelves and not just shelves you can put books on (someone please explain?) and will slot into routed groves in the main pillar.
2) The bottom shelf will be two planks deep, the same as the ‘display shelves’, and the full 1m width.
3) The first shelf on the right will just be one plank deep so will be set towards the back of the unit but not flush with the back of the post like the big shelves.
4) The first shelf on the left will be two planks deep and the left most edge will possible be in vertical alignment with the bottom shelf (depends on how long the planks actually are).
5) The very long shelf shown will be cut in half and used as a two plank deep shelf, slightly narrower than the bottom shelf.
6) The top right shelf will be similar to the short, single width shelf on the left.
7) There will be vertical pillars, like on the display shelves supporting the various shelves from below.Make sense?
Comments and feedback always welcomekayak23Full MemberPosted 1 year agoPretty much makes sense I reckon. Sounds like a plan.
You could do a bare-faced tenon into a groove on the post for the shelf backs perhaps.
Your display shelves look great all loaded up. Nice work. 👌
WorldClassAccidentFree MemberPosted 1 year agoThanks for the bare faced idea. I will be doing that. Just heading down the garage to start up the router while the glue dries on the two plank shelves.
I mean, just going to spend some time considering the options for this particularly challenging issue at work requiring me to be offline for an hour…
WorldClassAccidentFree MemberPosted 1 year agoA useful morning in the garage. The first shelf is dry fitted and the second is almost there and artfully placed so you can see how the whole lot fixes together
Just paused to buy a new coping saw as the one I bought in Woolworths about 44 years ago had broken. It came with a lifetime warranty I think but as Woolworths has gone I decided to bite the bullet and blow £10 on a new one.
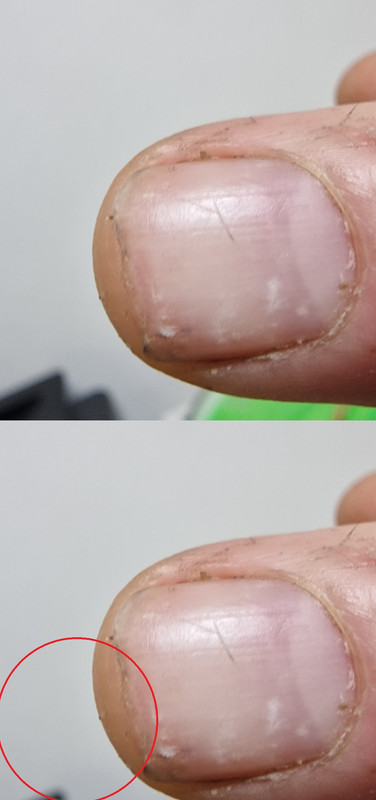
WorldClassAccidentFree MemberPosted 1 year agoJust as a comedy highlight, I managed to stick my finger under the router and despite taking the end of the nail off, it only actually cut through half the nail thickness so no blood and gore for a change.
dyna-tiFull MemberPosted 1 year agoIs it one of those 1/4″ trimmers ? they seem prone to inviting finger contact. Well done on not routing out a section of finger. That would make for a very painful hospital visit.
WorldClassAccidentFree MemberPosted 1 year agoYou can just see the yellow DeWalt router in the photo. It was shimmed down to the smaller bit size to cut the ‘trench’ for the shelf backs to slide into.


You must be logged in to reply to this topic.