- This topic has 4,413 replies, 728 voices, and was last updated 7 minutes ago by Daffy.
-
What is the last thing you made? (pics pls)
-
welshfarmerFull MemberPosted 6 years ago
Got our local agricultural show on the weekend so thought I would throw something together for the “article made of metal” class. Have always wanted to do something with the ever growing pile of scrap and useless offcuts I seem not able to throw away so ….. a pair of old land rover brake disks, a few old mower blades, some useless short bits of box and some past-their-best bike bits got stuck together over the course of a couple of hours in the workshop on a rainy day in Wales. And I know the patio is a mess 🙂
 ebygommFree MemberPosted 6 years ago
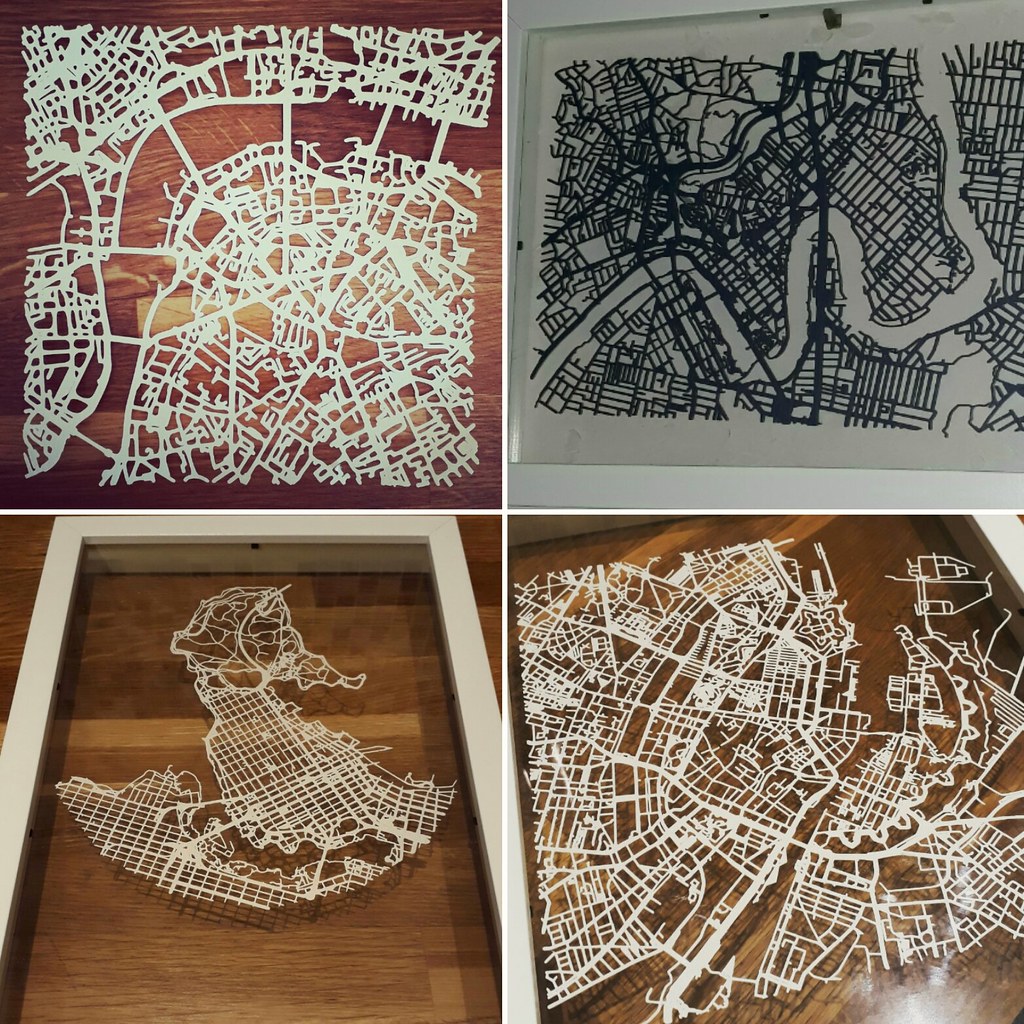
Papercut maps from open street map data
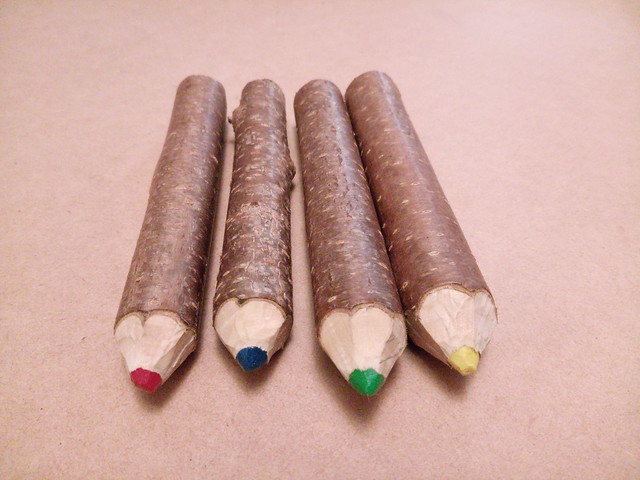
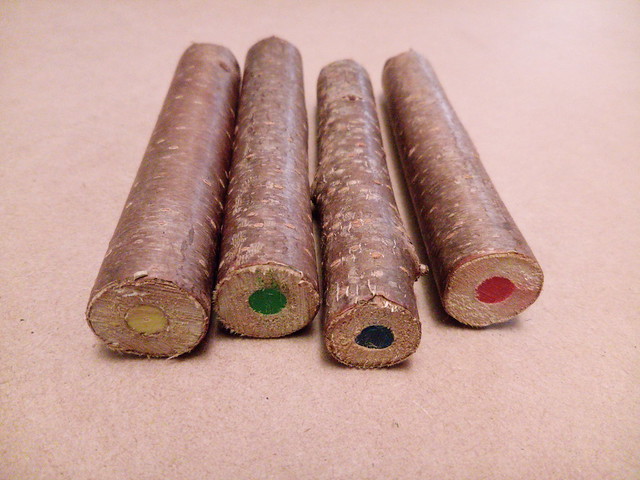
[url=https://flic.kr/p/X7c9aS]2017-08-02_08-55-02[/url]WillHFull MemberPosted 6 years agoQuick project with my five-year-old at the weekend…
[url=https://flic.kr/p/WKZfsU]IMG_20170803_070842[/url] by W Hyde, on Flickr[/img][url=https://flic.kr/p/W8zEoB]IMG_20170803_070856[/url] by W Hyde, on FlickrHe did most of the work himself – used his pruning saw to cut a branch (from a prunus/flowering cherry), then used the mitre saw to tidy the ends and chop into 150mm lengths. We measured the diameter of the crayons we were using and picked the right size drill bit, which was 8mm. He drilled the holes in each end (shallow hole in the flat end, and about a 60mm hole in what was going to be the pointy end – note to anyone making these, at this point you will want to mark which hole is which, as they look the same once filled with wax…).
Tried two methods for filling. First was a bit of glue in the hole then sliding the crayons in. This was a bit hit and miss, as the crayons were about 8.1mm so were very tight in some holes. Other holes were a bit larger due the variability in the boy’s drilling skills 🙂 and the crayons were a bit loose as the glue wasn’t keen on sticking to green wood.
The next method we tried was using a small stainless saucepan with a pouring lip, pop the crayons in and apply a heat gun. Then pour the molten wax into the holes. This is by far the easiest method, and results in the ‘lead’ being totally secure and well-fixed into the hole. You don’t have to worry about matching the hole diameter to the crayons, or glue not setting against green wood etc.
After that I used a knife to sharpen them (this is where you need to know in advance which end has the deep hole).
He took them to ‘show and tell’ at school, and said he’d chopped them from the pencil tree we have in our garden 😀
AlexSimonFull MemberPosted 6 years agoebygomm – Member
Papercut maps from open street map dataReally nice! Laser-cut of hand cut?
AlexSimonFull MemberPosted 6 years agoWillH – Member
Quick project with my five-year-old at the weekend…Look great!
ebygommFree MemberPosted 6 years agoReally nice! Laser-cut or hand cut?
Neither, cut with a silhouette portrait, sort of like a printer with a knife/blade
StedlocksFree MemberPosted 6 years agoTesting imgur for the first time!
Made a storytelling chair for my wife’s pre-school……not finished yet.
porter_jamieFull MemberPosted 6 years agothis weighed 88kg when i put it on
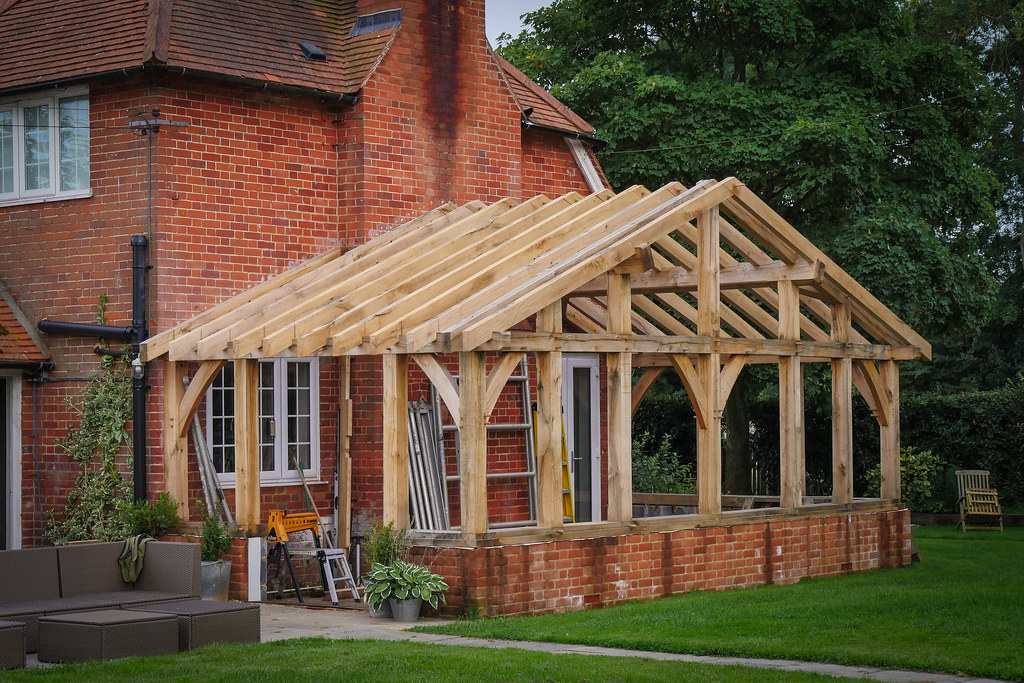
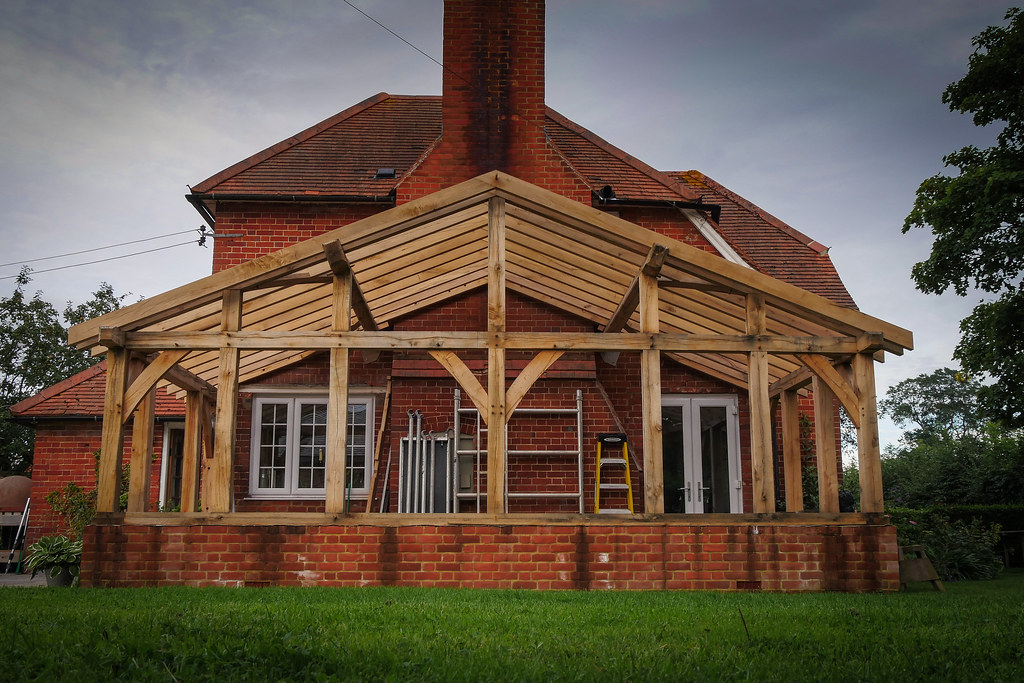
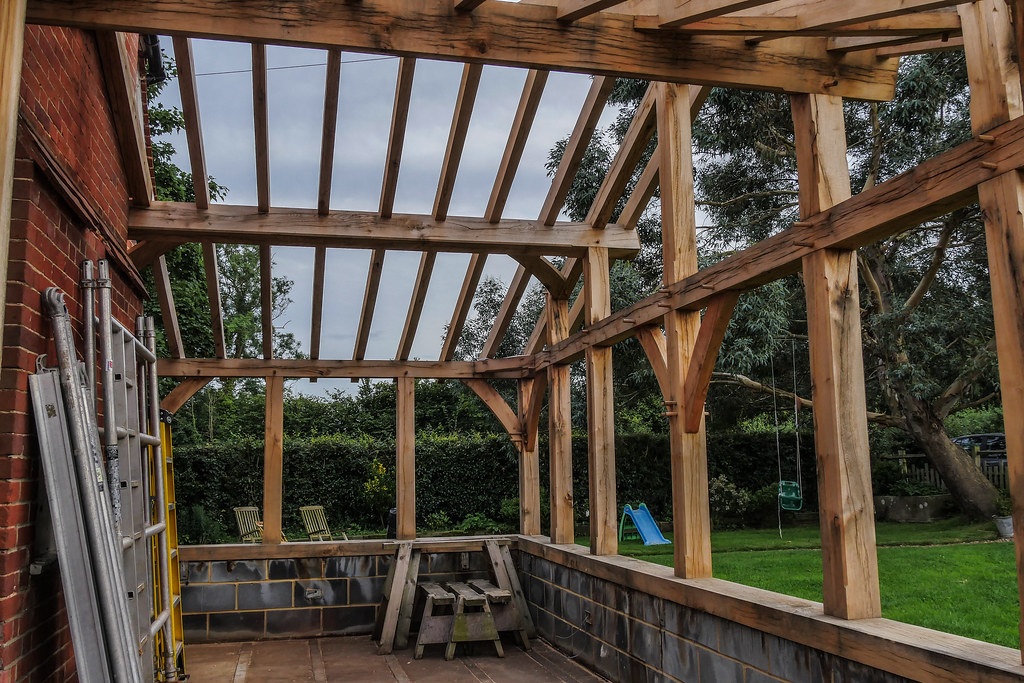
and 1.88kg when i took it off!!siwhiteFree MemberPosted 6 years agoI finished the main structure of our oak framed garden room yesterday. It’s really just a posh conservatory, about 3.5m x 7m. We will have a little snug reading corner with a woodburner and a large dining room type area.
[url=https://flic.kr/p/WwH9Wh]Garden Room[/url] by Scgwhite, on Flickr[/img][url=https://flic.kr/p/XJoqwA]Garden Room[/url] by Scgwhite, on Flickr[url=https://flic.kr/p/XJorV7]Garden Room[/url] by Scgwhite, on FlickrThis has been a really fun project, but really hard and heavy work in places – the purlins alone are about 140kgs each, and each rafter (50kgs) had to be lifted into place and lowered (by hand) three times for cuts and holes to be marked. There is about 3000kgs of oak in total, and it has taken about four months of evenings and weekends. I designed it using Sketchup and everything was manufactured at home, including all the oak pegs and curved braces. Going full chat, I was generating a wheelbarrow-full of sawdust and shavings a day.
The frame will be shot blasted next week to remove all the water staining, and then the roof and glazing will make it watertight. Lots still to do, but I’m getting there!
eddFull MemberPosted 6 years agothis weighed 88kg when i put it on
and 1.88kg when i took it off!!Pictures of the finished job please.
AlexSimonFull MemberPosted 6 years agoPictures of the finished job please.
He can’t see it due to the swarf pile!
I finished the main structure of our oak framed garden room yesterday.
Absolutely brilliant. Sounds like back-breaking work, but if it’s anything like my shed, every time you use it will be a moment of pure satisfaction.
Stevet1Free MemberPosted 6 years agoThis has been a really fun project, but really hard and heavy work in places – the purlins alone are about 140kgs each, and each rafter (50kgs) had to be lifted into place and lowered (by hand) three times for cuts and holes to be marked. There is about 3000kgs of oak in total, and it has taken about four months of evenings and weekends. I designed it using Sketchup and everything was manufactured at home, including all the oak pegs and curved braces. Going full chat, I was generating a wheelbarrow-full of sawdust and shavings a day.
I haven’t the faintest idea how anyone manages to do something like that. I was pleased when I built a shed door.
TheDTsFree MemberPosted 6 years agoJamie, That’s never going to fit, the top right hole is the wrong size! 🙄
Mesmerizing watching that take shape, to someone who doesn’t do it all day.kayak23Full MemberPosted 6 years agoSiwhite that is beautiful! Pics as it progresses please.
Having been involved in some green oak whittling lately I have a lot of respect for anyone lifting them buggers!
integerspinFree MemberPosted 6 years agoI haven’t the faintest idea how anyone manages to do something like that. I was pleased when I built a shed door.
I have no idea how you did that. I put a wanted ad on freecycle when I needed a new a shed door.
jonm81Full MemberPosted 6 years agoPart of remodelling the garden involved making a climbing frame/swing/wendy house thing for our daughter.
Just to note, the swing cross bar is level; it’s the garden and fence that are not level.
MowgliFree MemberPosted 6 years agoMade some roof bar thingies to help my Dad get his canoe onto the car roof singlehandedly. Couple of inserts into the end of the roofbars which have bearings as rollers, and the blue bars have bearings at the other end to roll along the bars. Bits of cord hold it in position for loading. Not used in anger yet. Think his door mirror might be at risk…
pictonroadFull MemberPosted 6 years agoBloody hell siwhite! What a thing of beauty, I’m gobsmacked that someone can do this during their down time.
Chapeau indeed!
jonm81Full MemberPosted 6 years agoThe wife and child are away for a couple of days so I finally got a chance try painting again after a few years break.
Calvin and Hobbes using watercolour and indian ink. It’s not as good as most of the painters on here but I like it.
thisisnotaspoonFree MemberPosted 6 years agoCAD’ed and 3D printed a mount for my Magicshine-818, it now points backwards (on a 74deg seatpost) rather than at the ground. Printed in Ninjaflex so it simply grips the seatpost
Still isn’t quite right, mk3* will hopefully have a smoother finish if I tweek the E-axis on the printer slightly.
[url=https://flic.kr/p/XNmGH9]2017-08-25_01-24-31[/url] by thisisnotaspoon, on Flickr*mk1 didn’t fit the light properly.
thisisnotaspoonFree MemberPosted 6 years agoi turned 350kg of billet into 12kg of billet…
Is there a point at which you say “You’d be better off with something other than a CNC mill?”
AlexSimonFull MemberPosted 6 years agoGetting to grips with 3D printing and Fusion 360.
Printed some signs to go in the local pub where some of the local clubs I’m involved with frequent.
TheDTsFree MemberPosted 6 years agoOut of interest AlexSimon, what do the signs cost to make? How long do they take?
SpeederFull MemberPosted 6 years agoporter_jamie – Member
i turned 350kg of billet into 12kg of billet…
What is that and what stops it being a noodle?
AlexSimonFull MemberPosted 6 years agoTheDTs – Member
Out of interest AlexSimon, what do the signs cost to make? How long do they take? In terms of filament it’s about 50p. Print time is 9 hours on my printer. Design time was about 2 hours in the 3D realm after I’d already designed the logos.
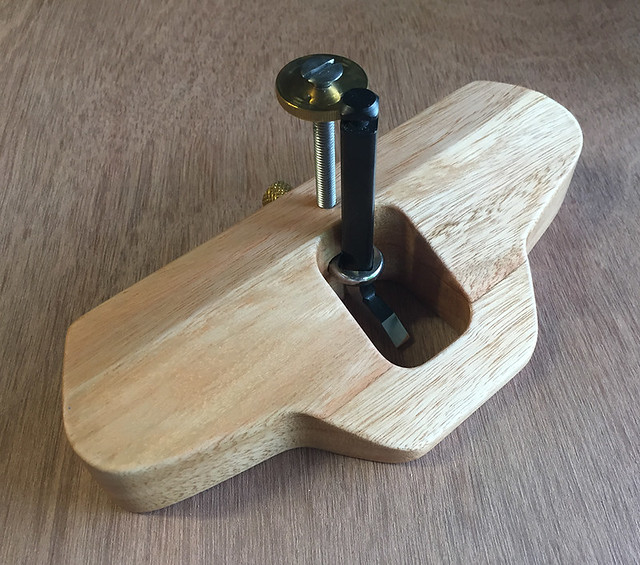
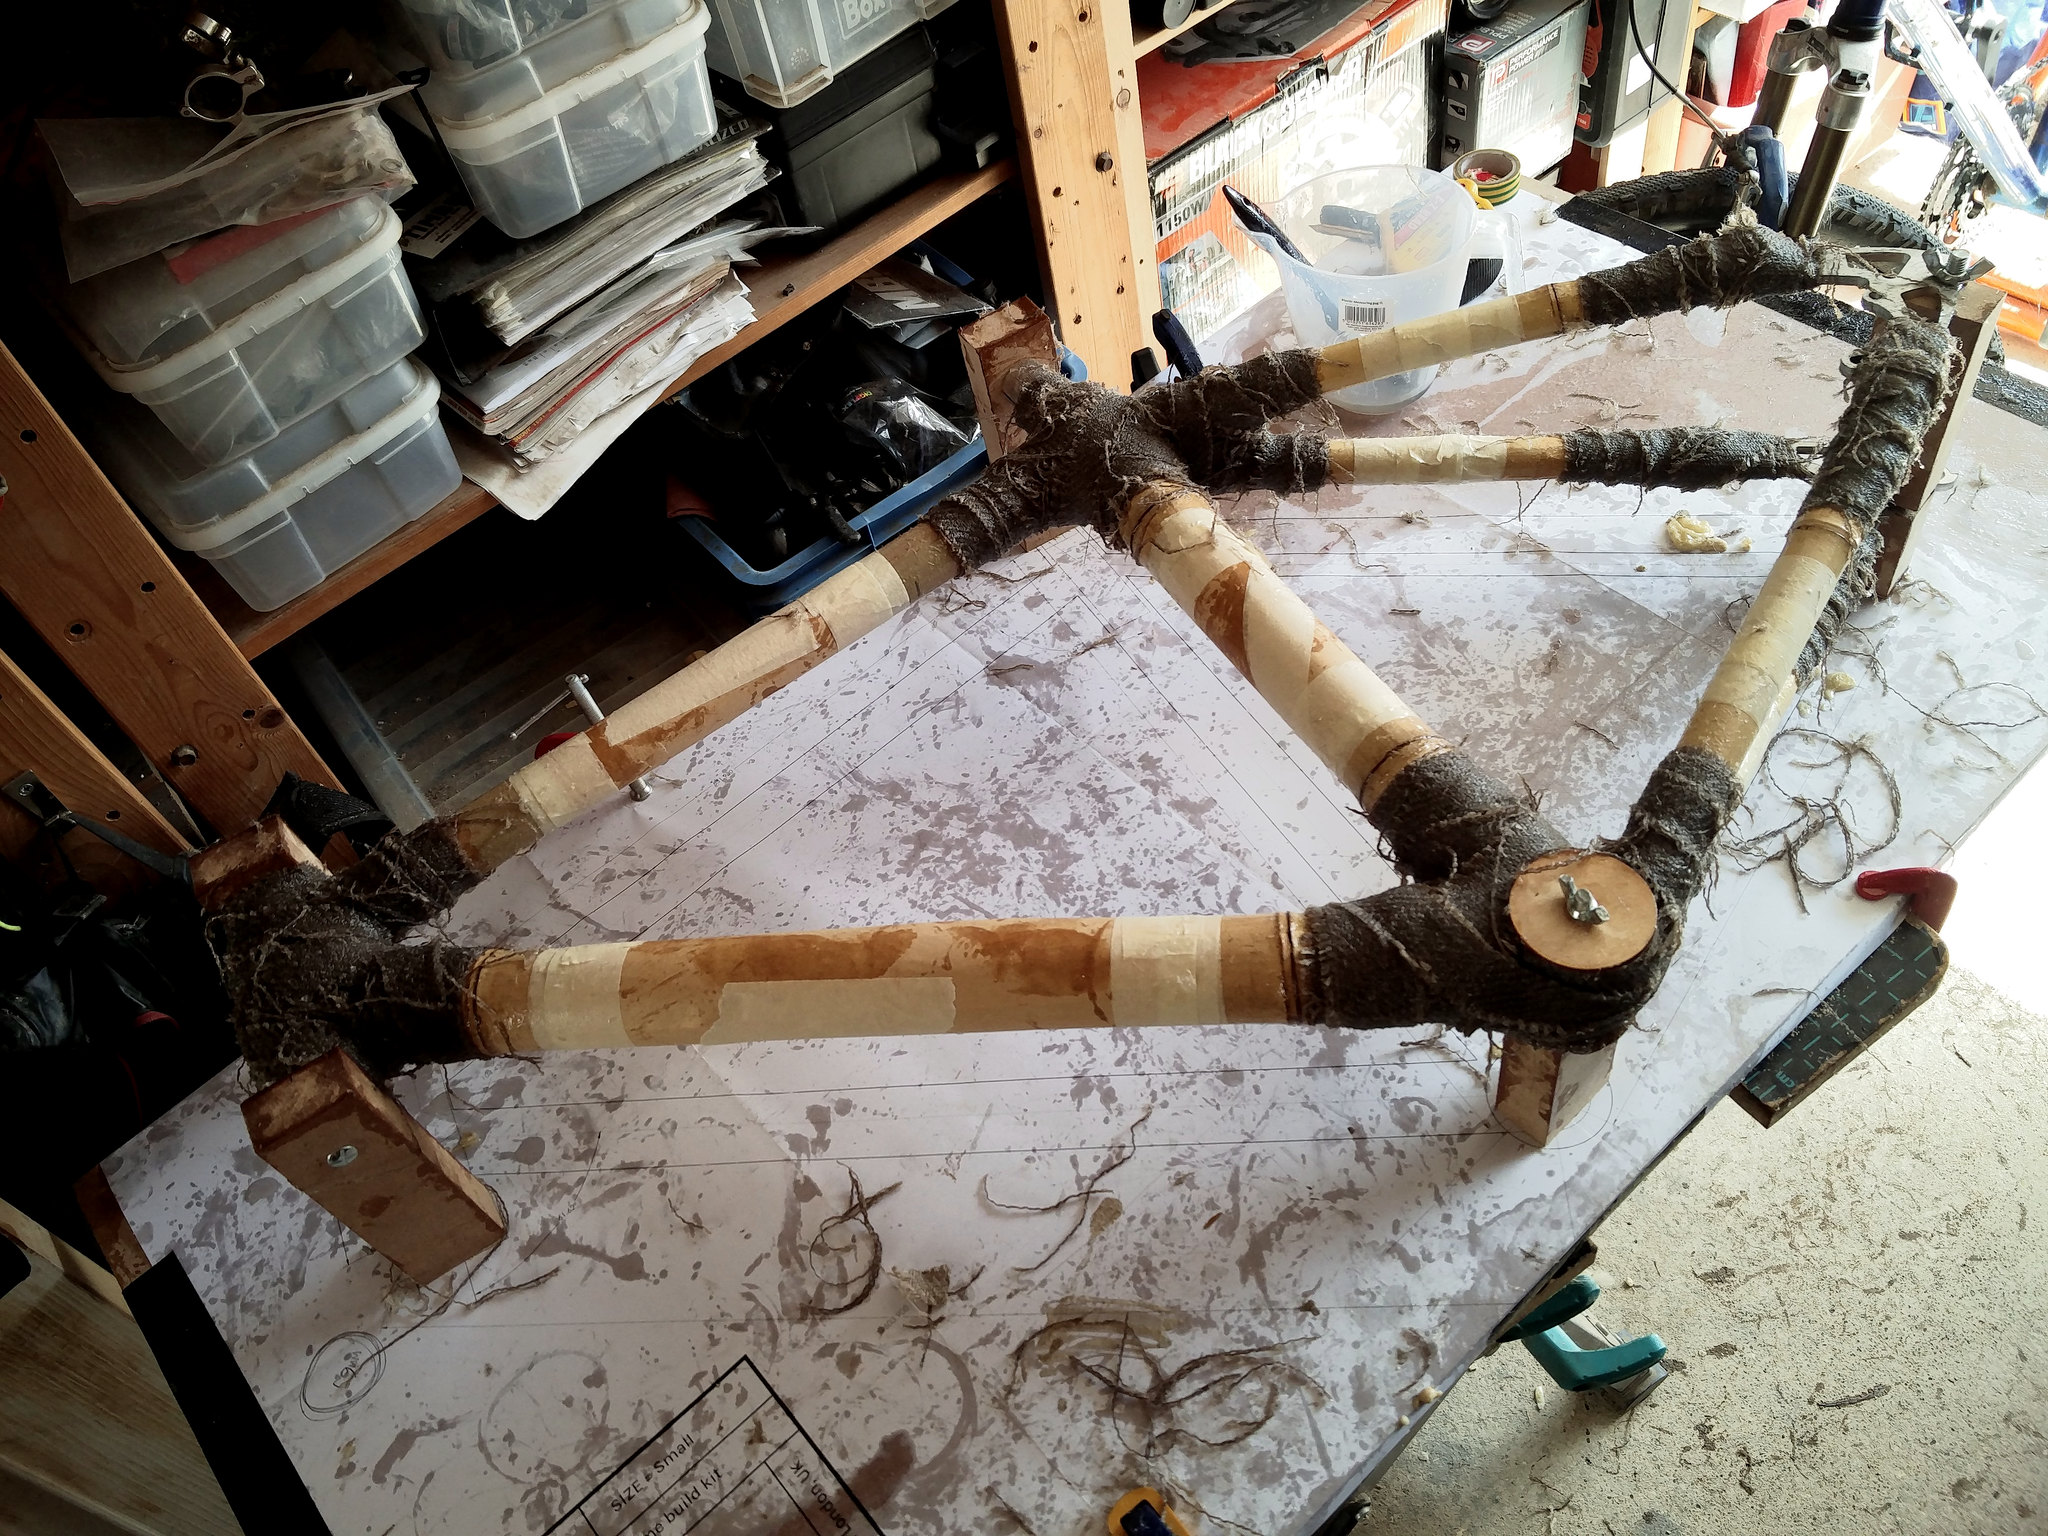
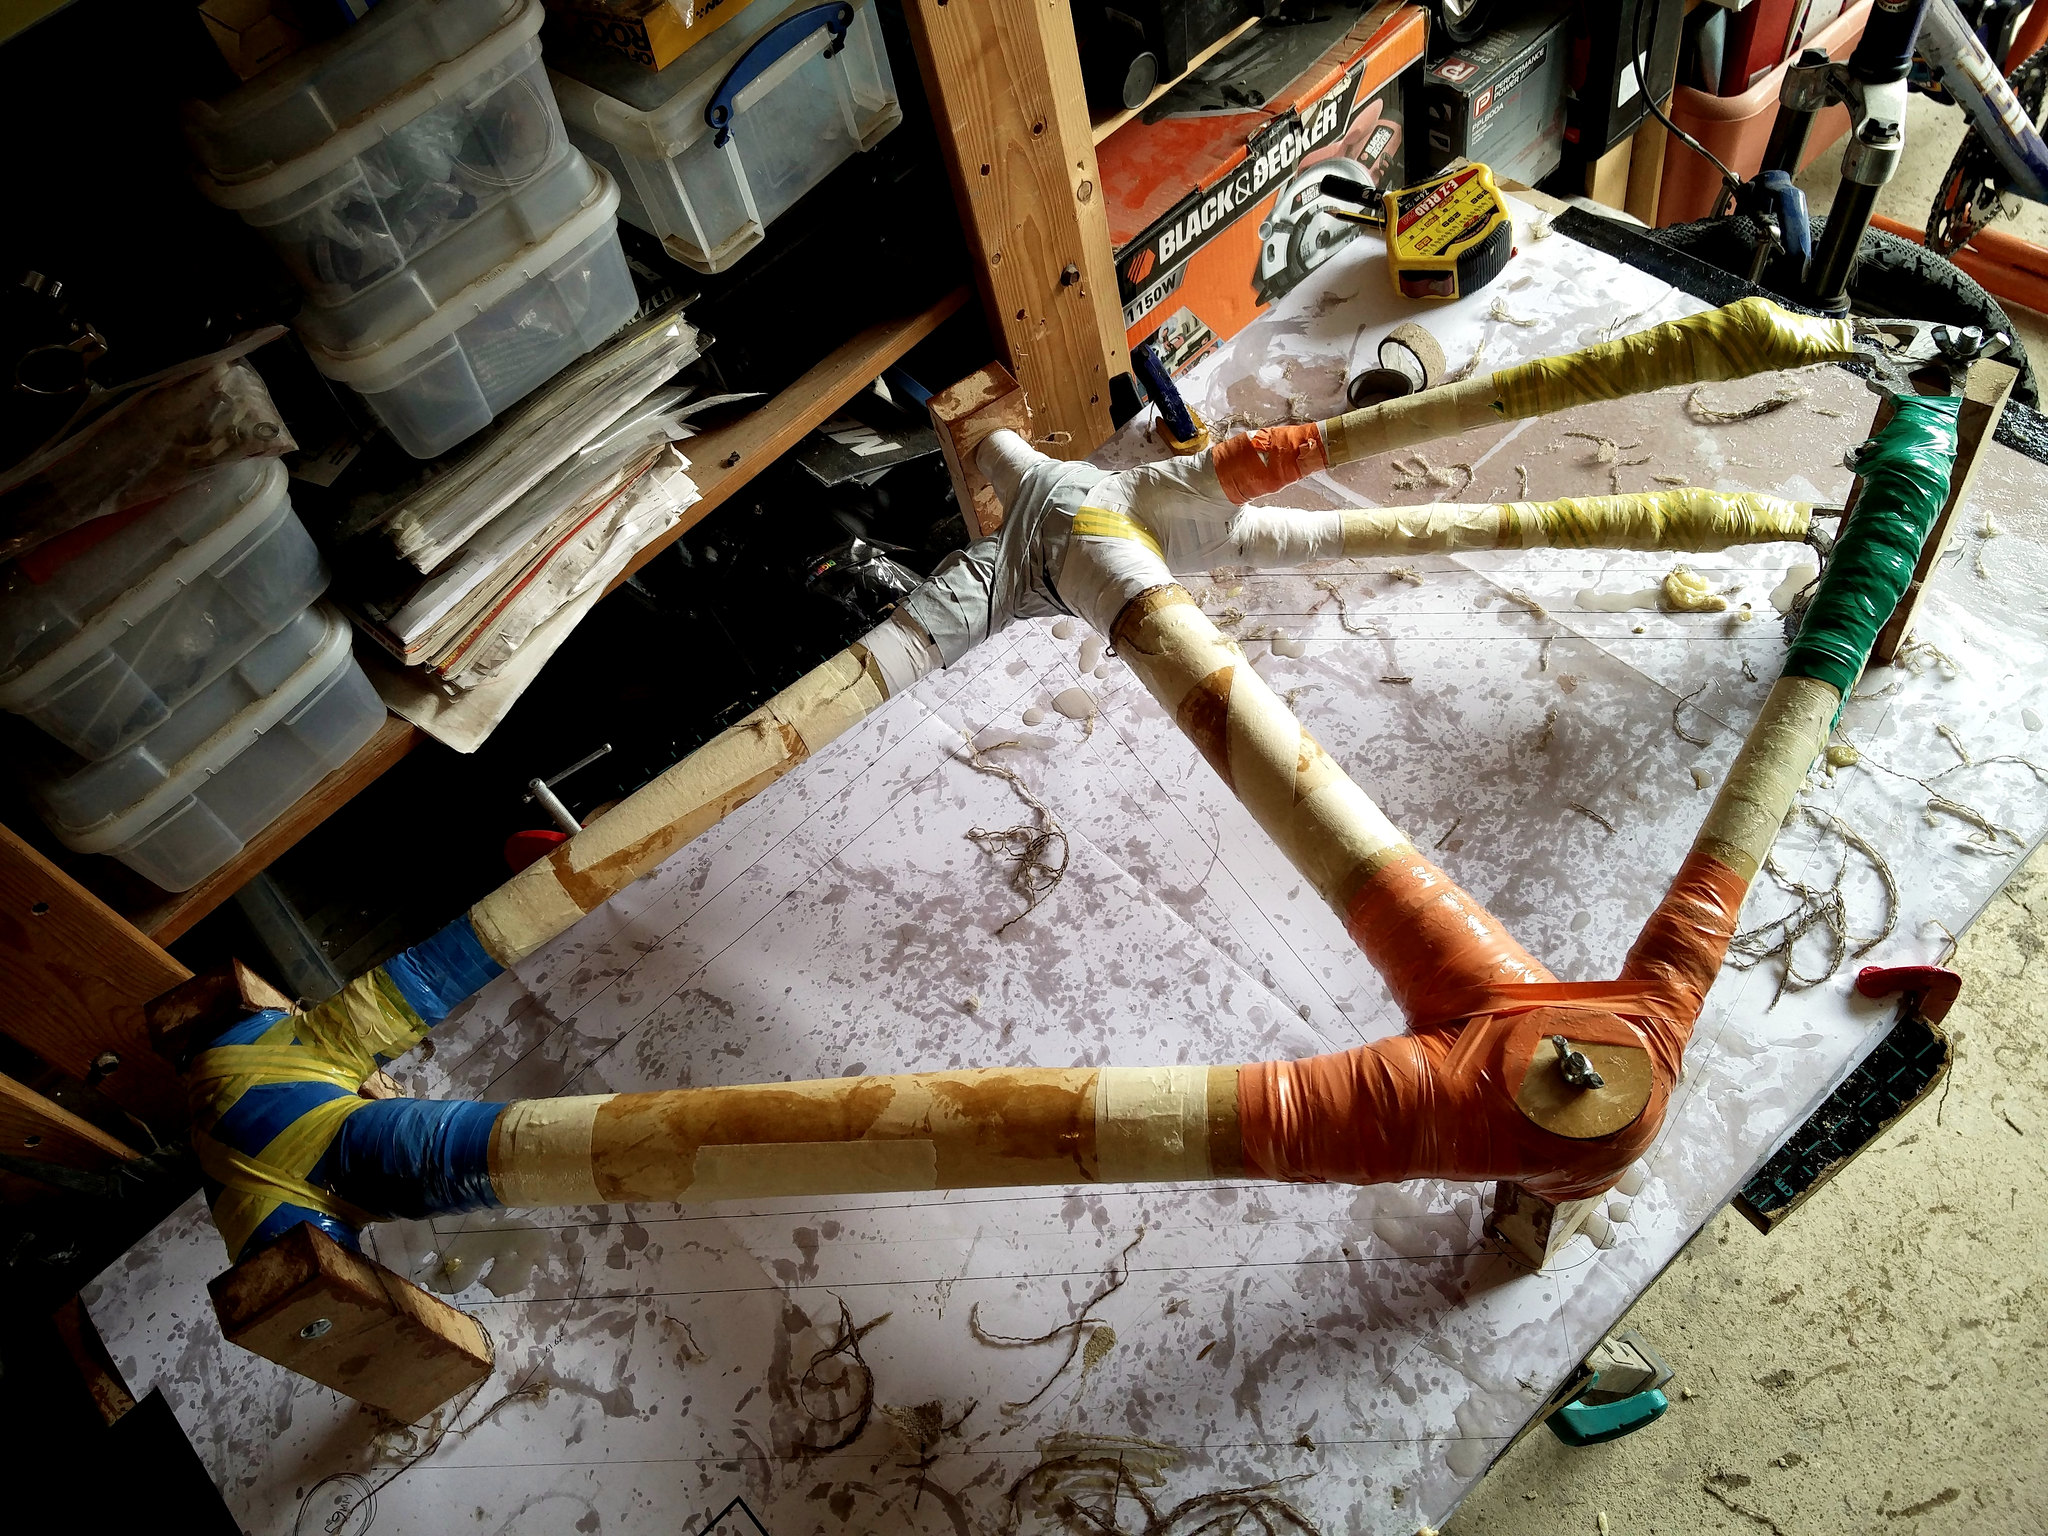
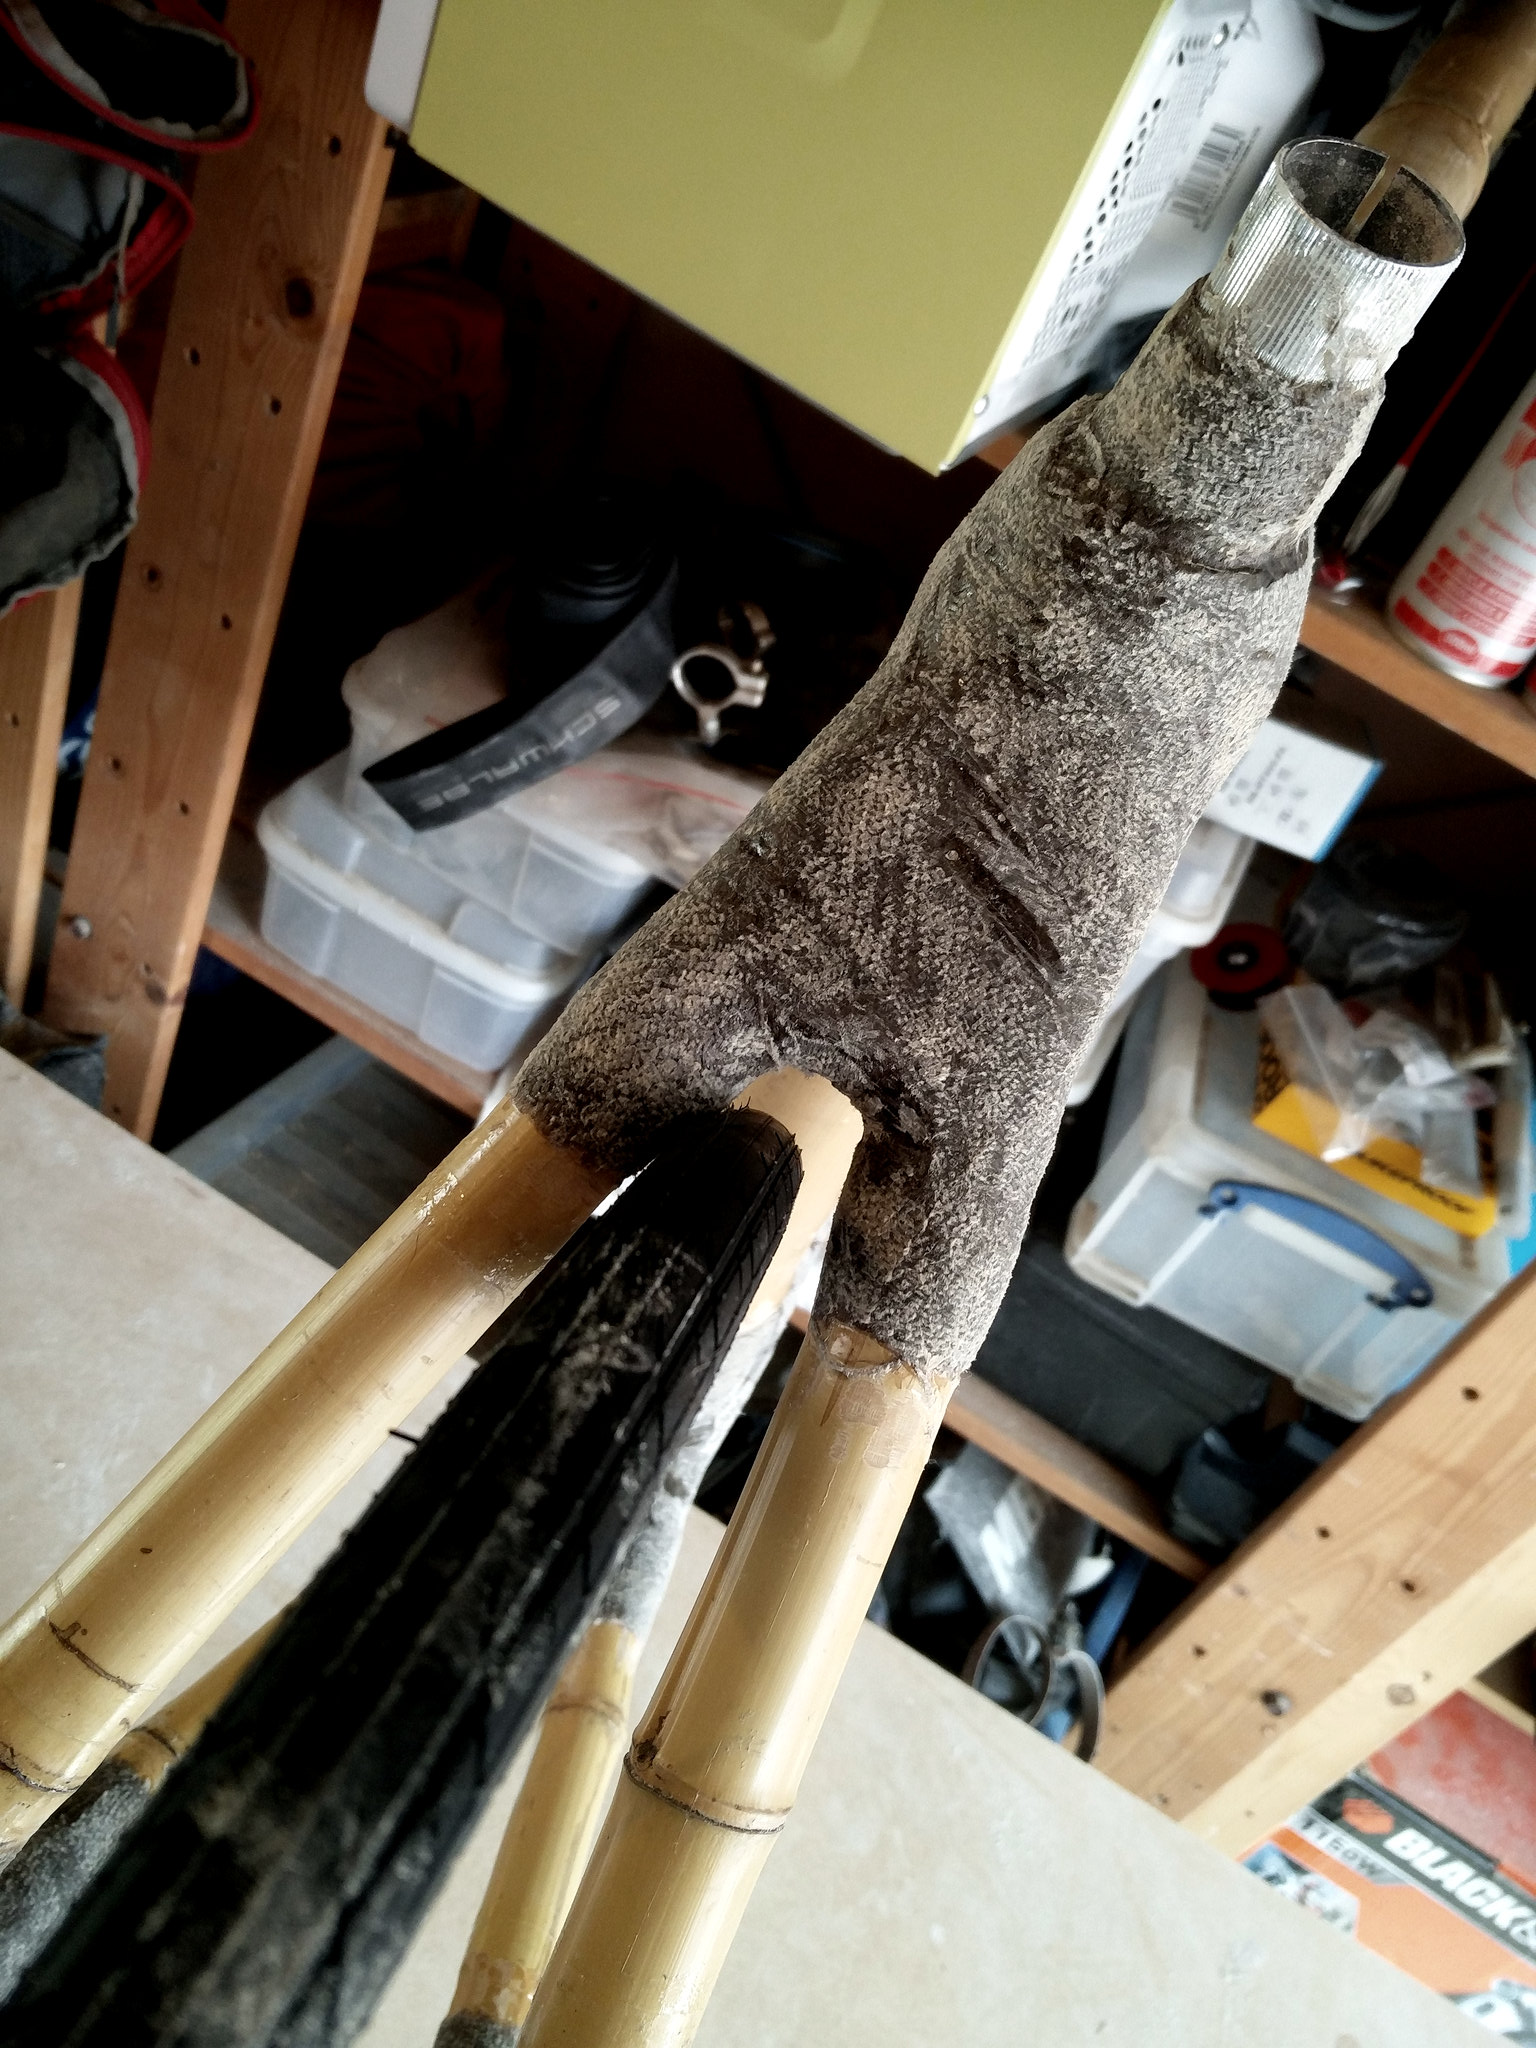
colournoiseFull MemberPosted 6 years agoObviously didn’t make it completely from scratch, but first time trying anything like this. Moment of truth will be about 6.00pm tonight when it should be finished curing and I will be tentatively unwrapping it…
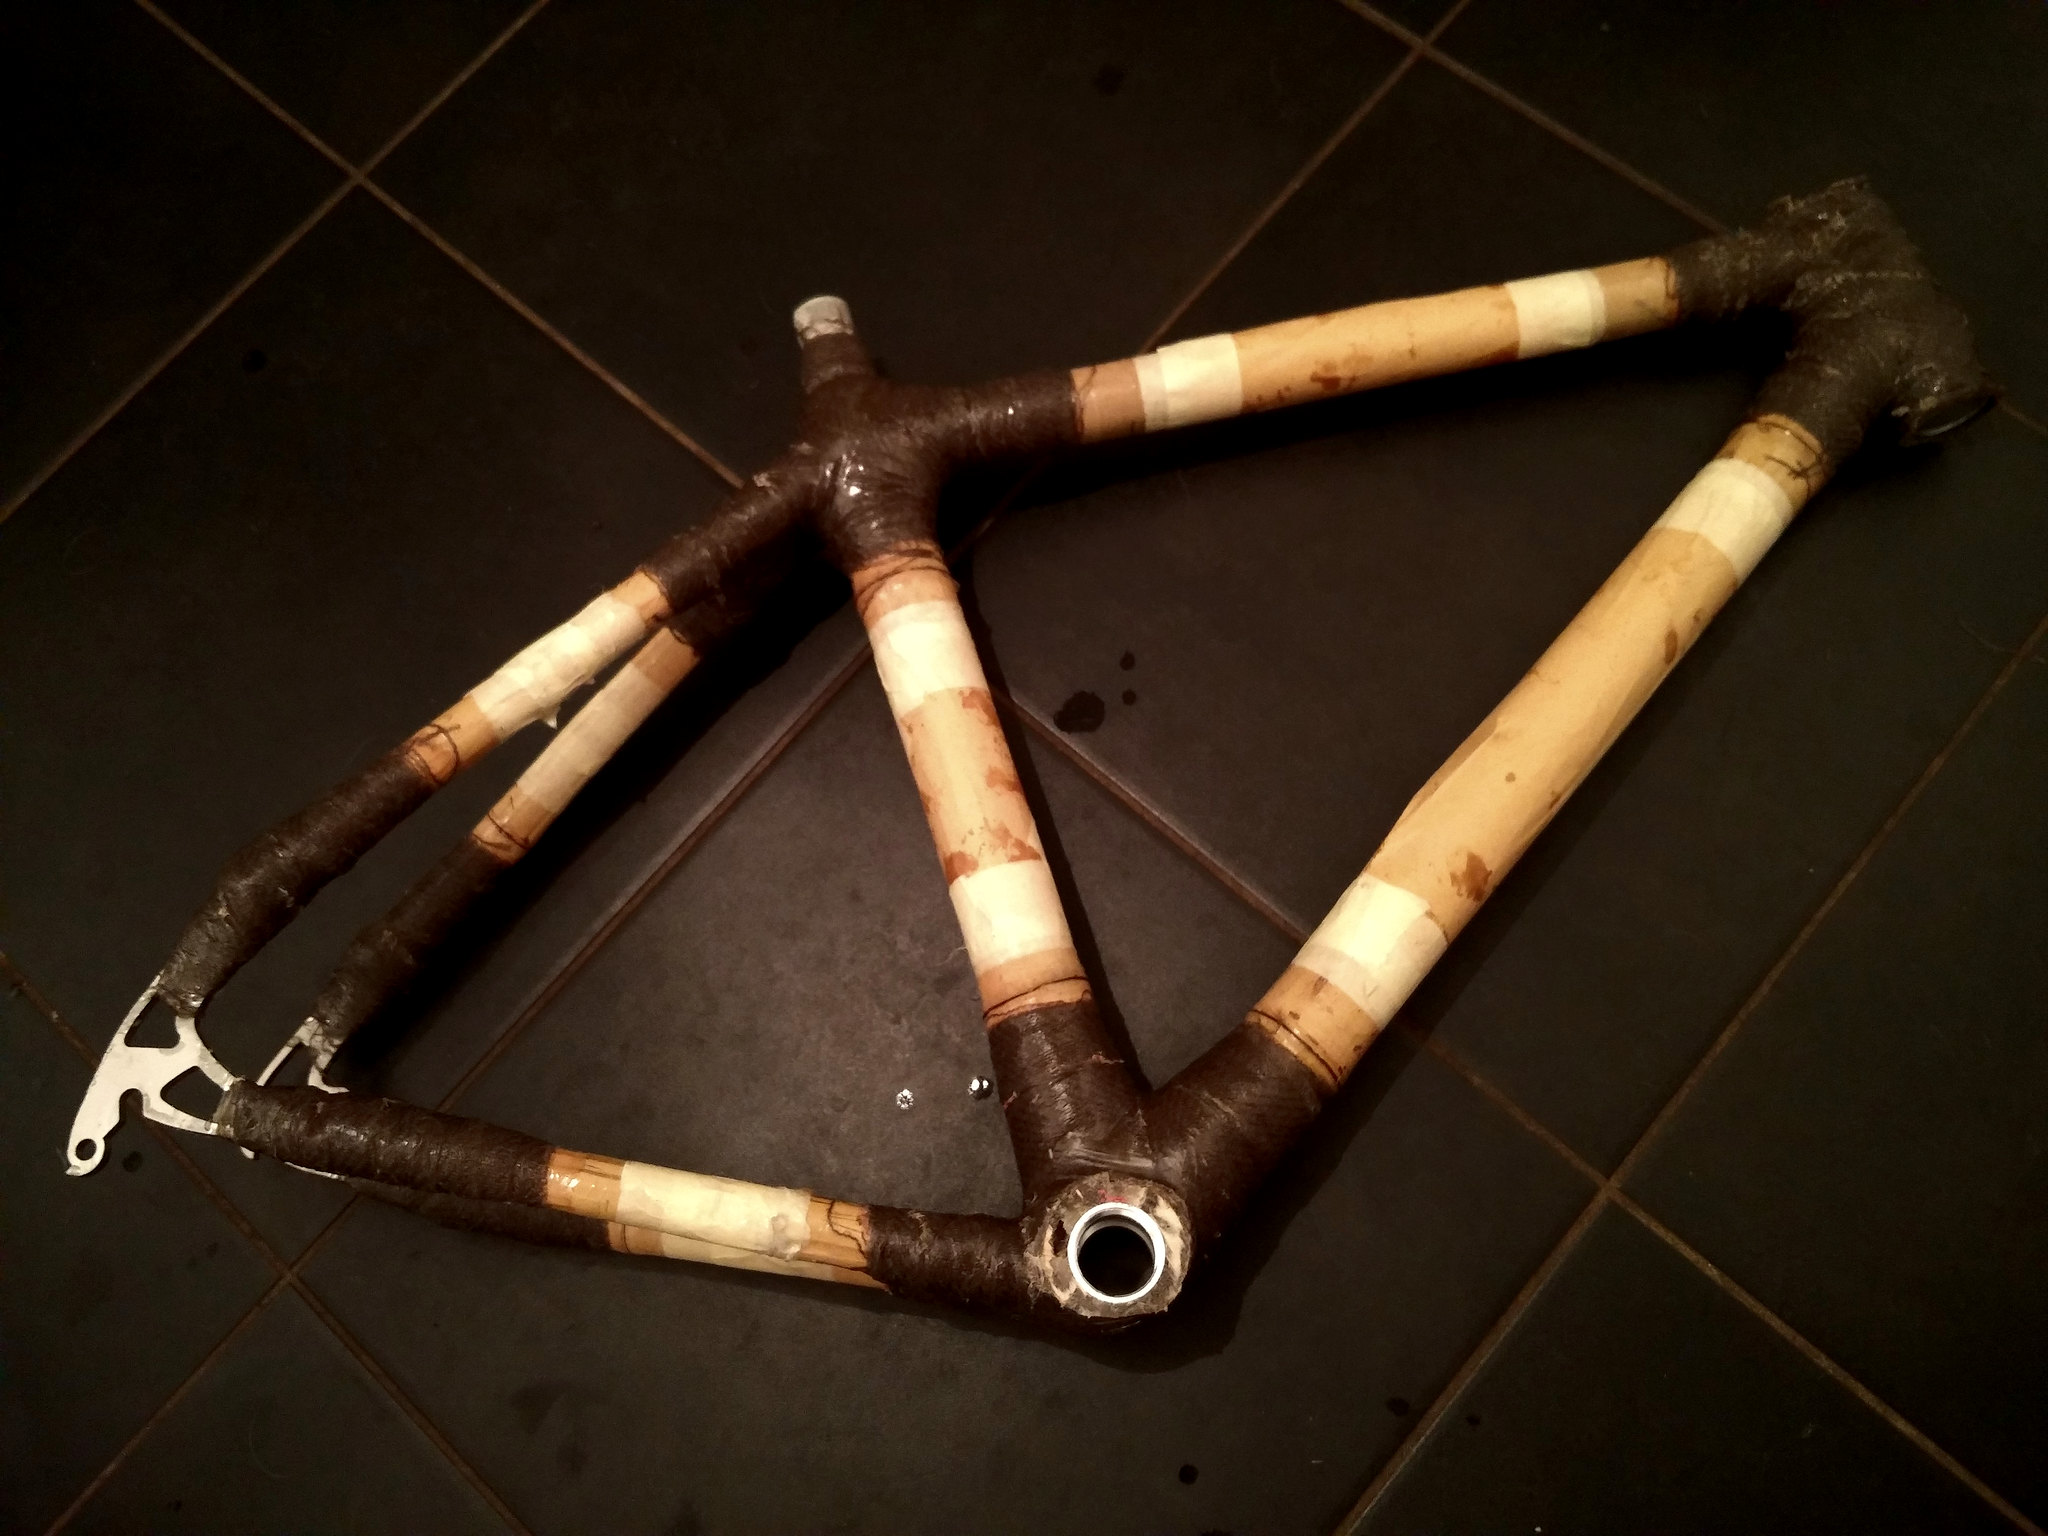
[url=https://flic.kr/p/XGZEU9]2017-09-01_03-16-39[/url] by Rob P, on Flickr[url=https://flic.kr/p/XGZPjq]2017-09-01_03-18-34[/url] by Rob P, on FlickrcolournoiseFull MemberPosted 6 years agoWell, it came off the jig in one piece. going to need a fair bit of work with the finger sander to get it looking less agricultural.
[url=https://flic.kr/p/XHz3xd]IMG_20170901_210224[/url] by Rob P, on FlickrBut at least it’s fairly straight…
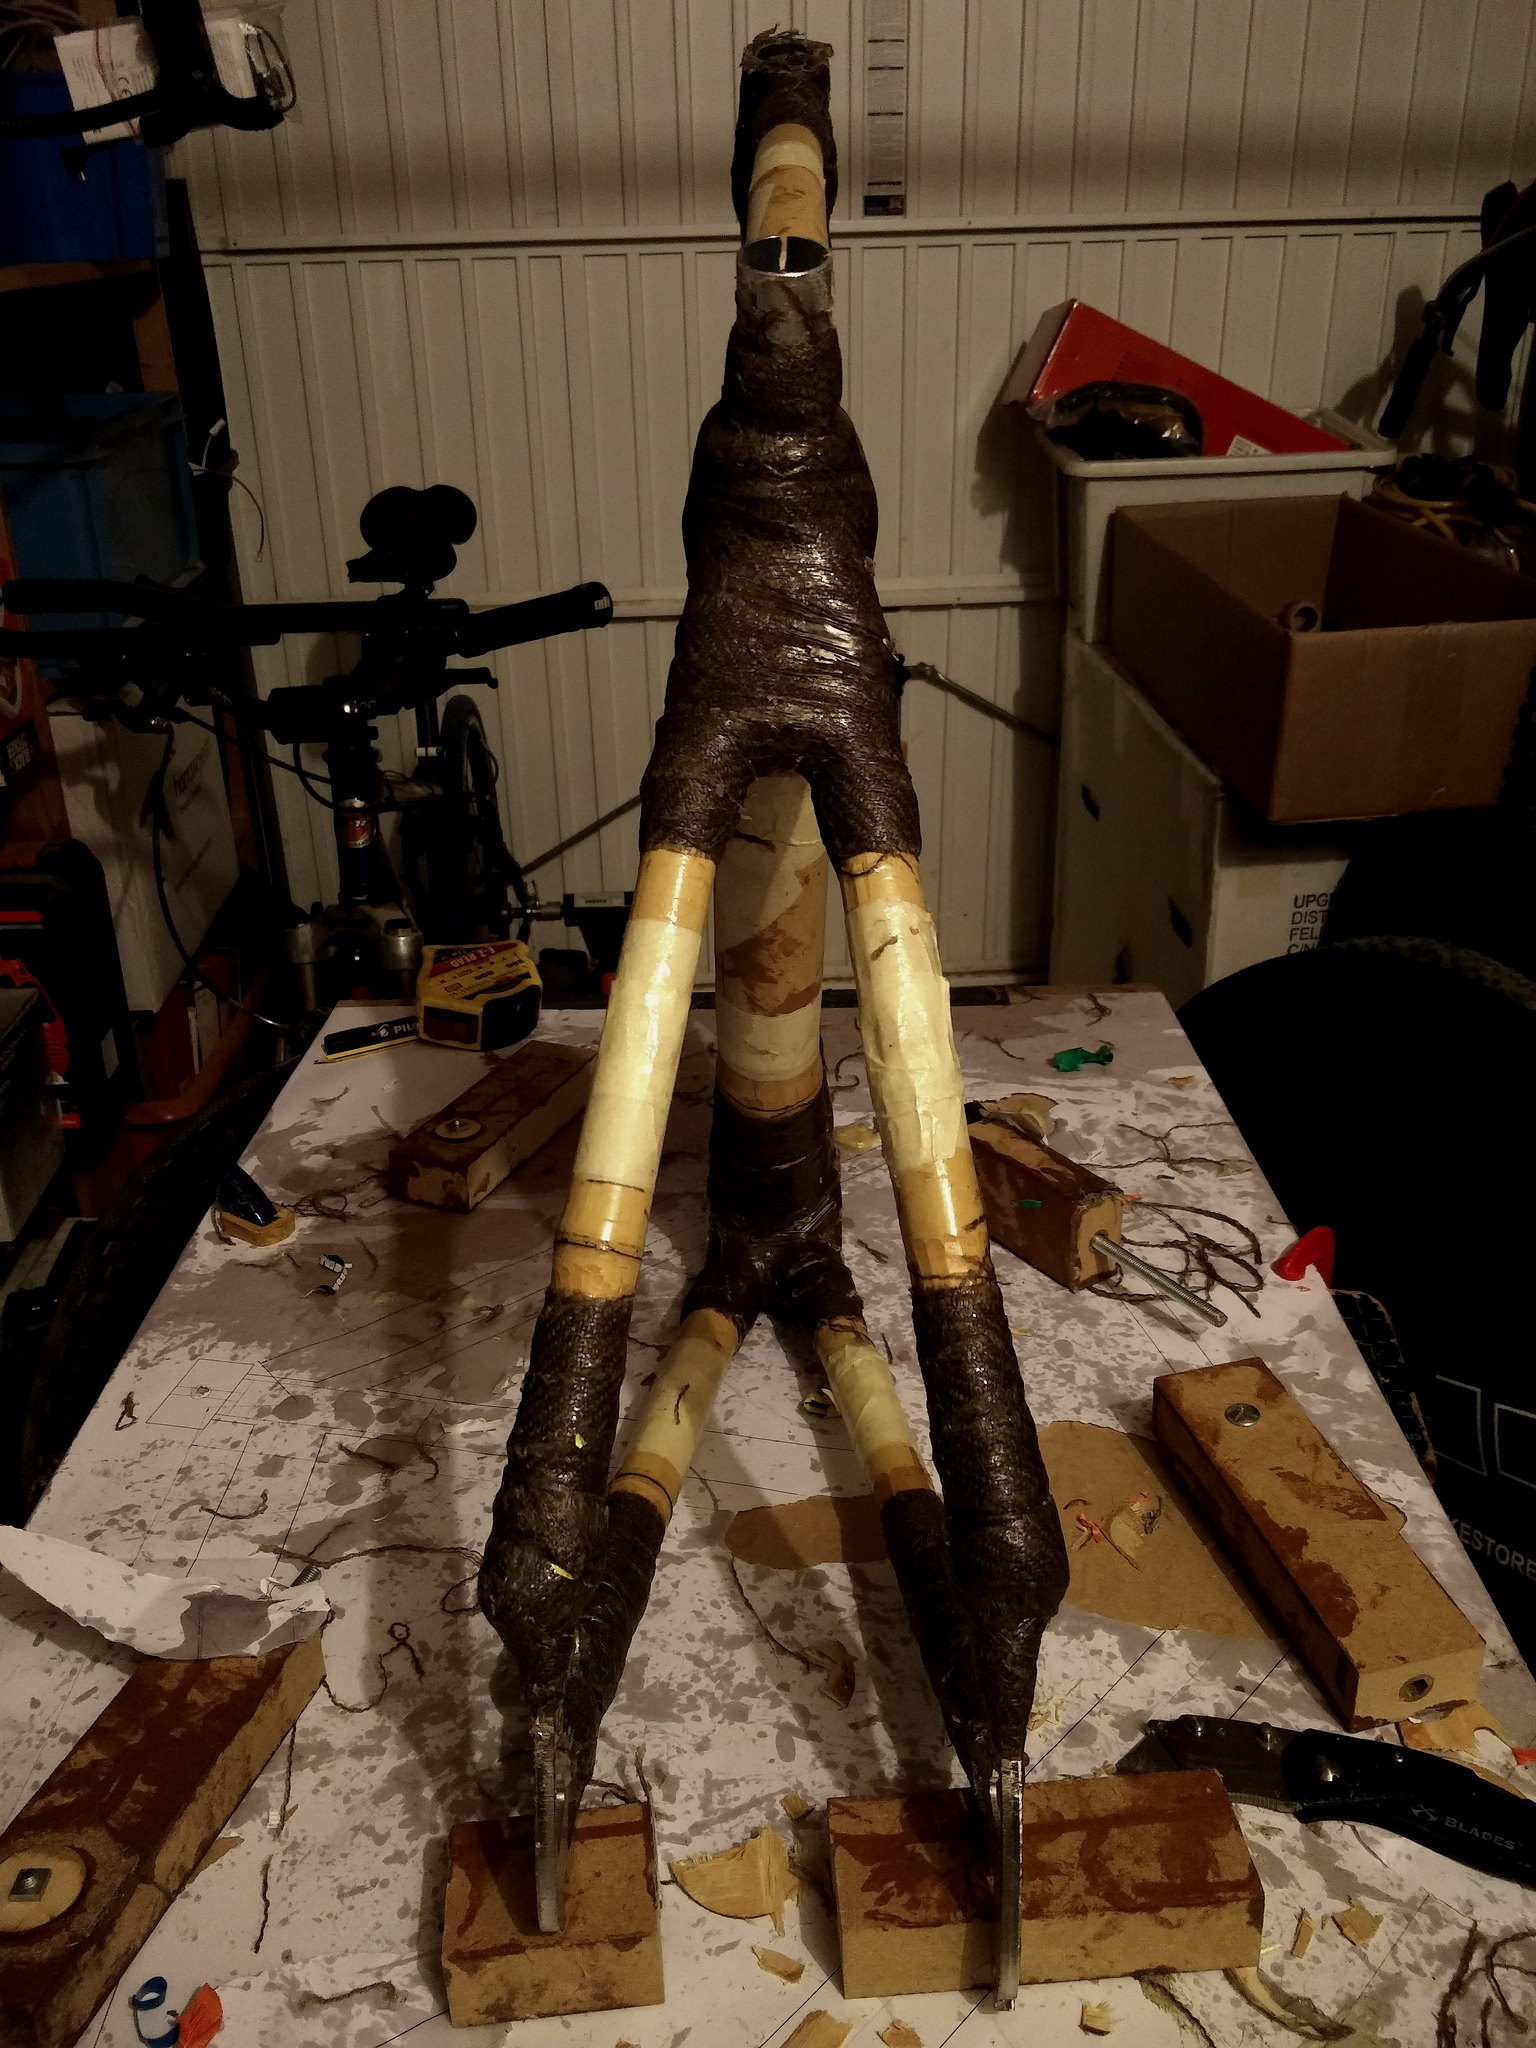
[url=https://flic.kr/p/X693CH]IMG_20170901_210449[/url] by Rob P, on FlickrcolournoiseFull MemberPosted 6 years agoAaaggghhh!!!
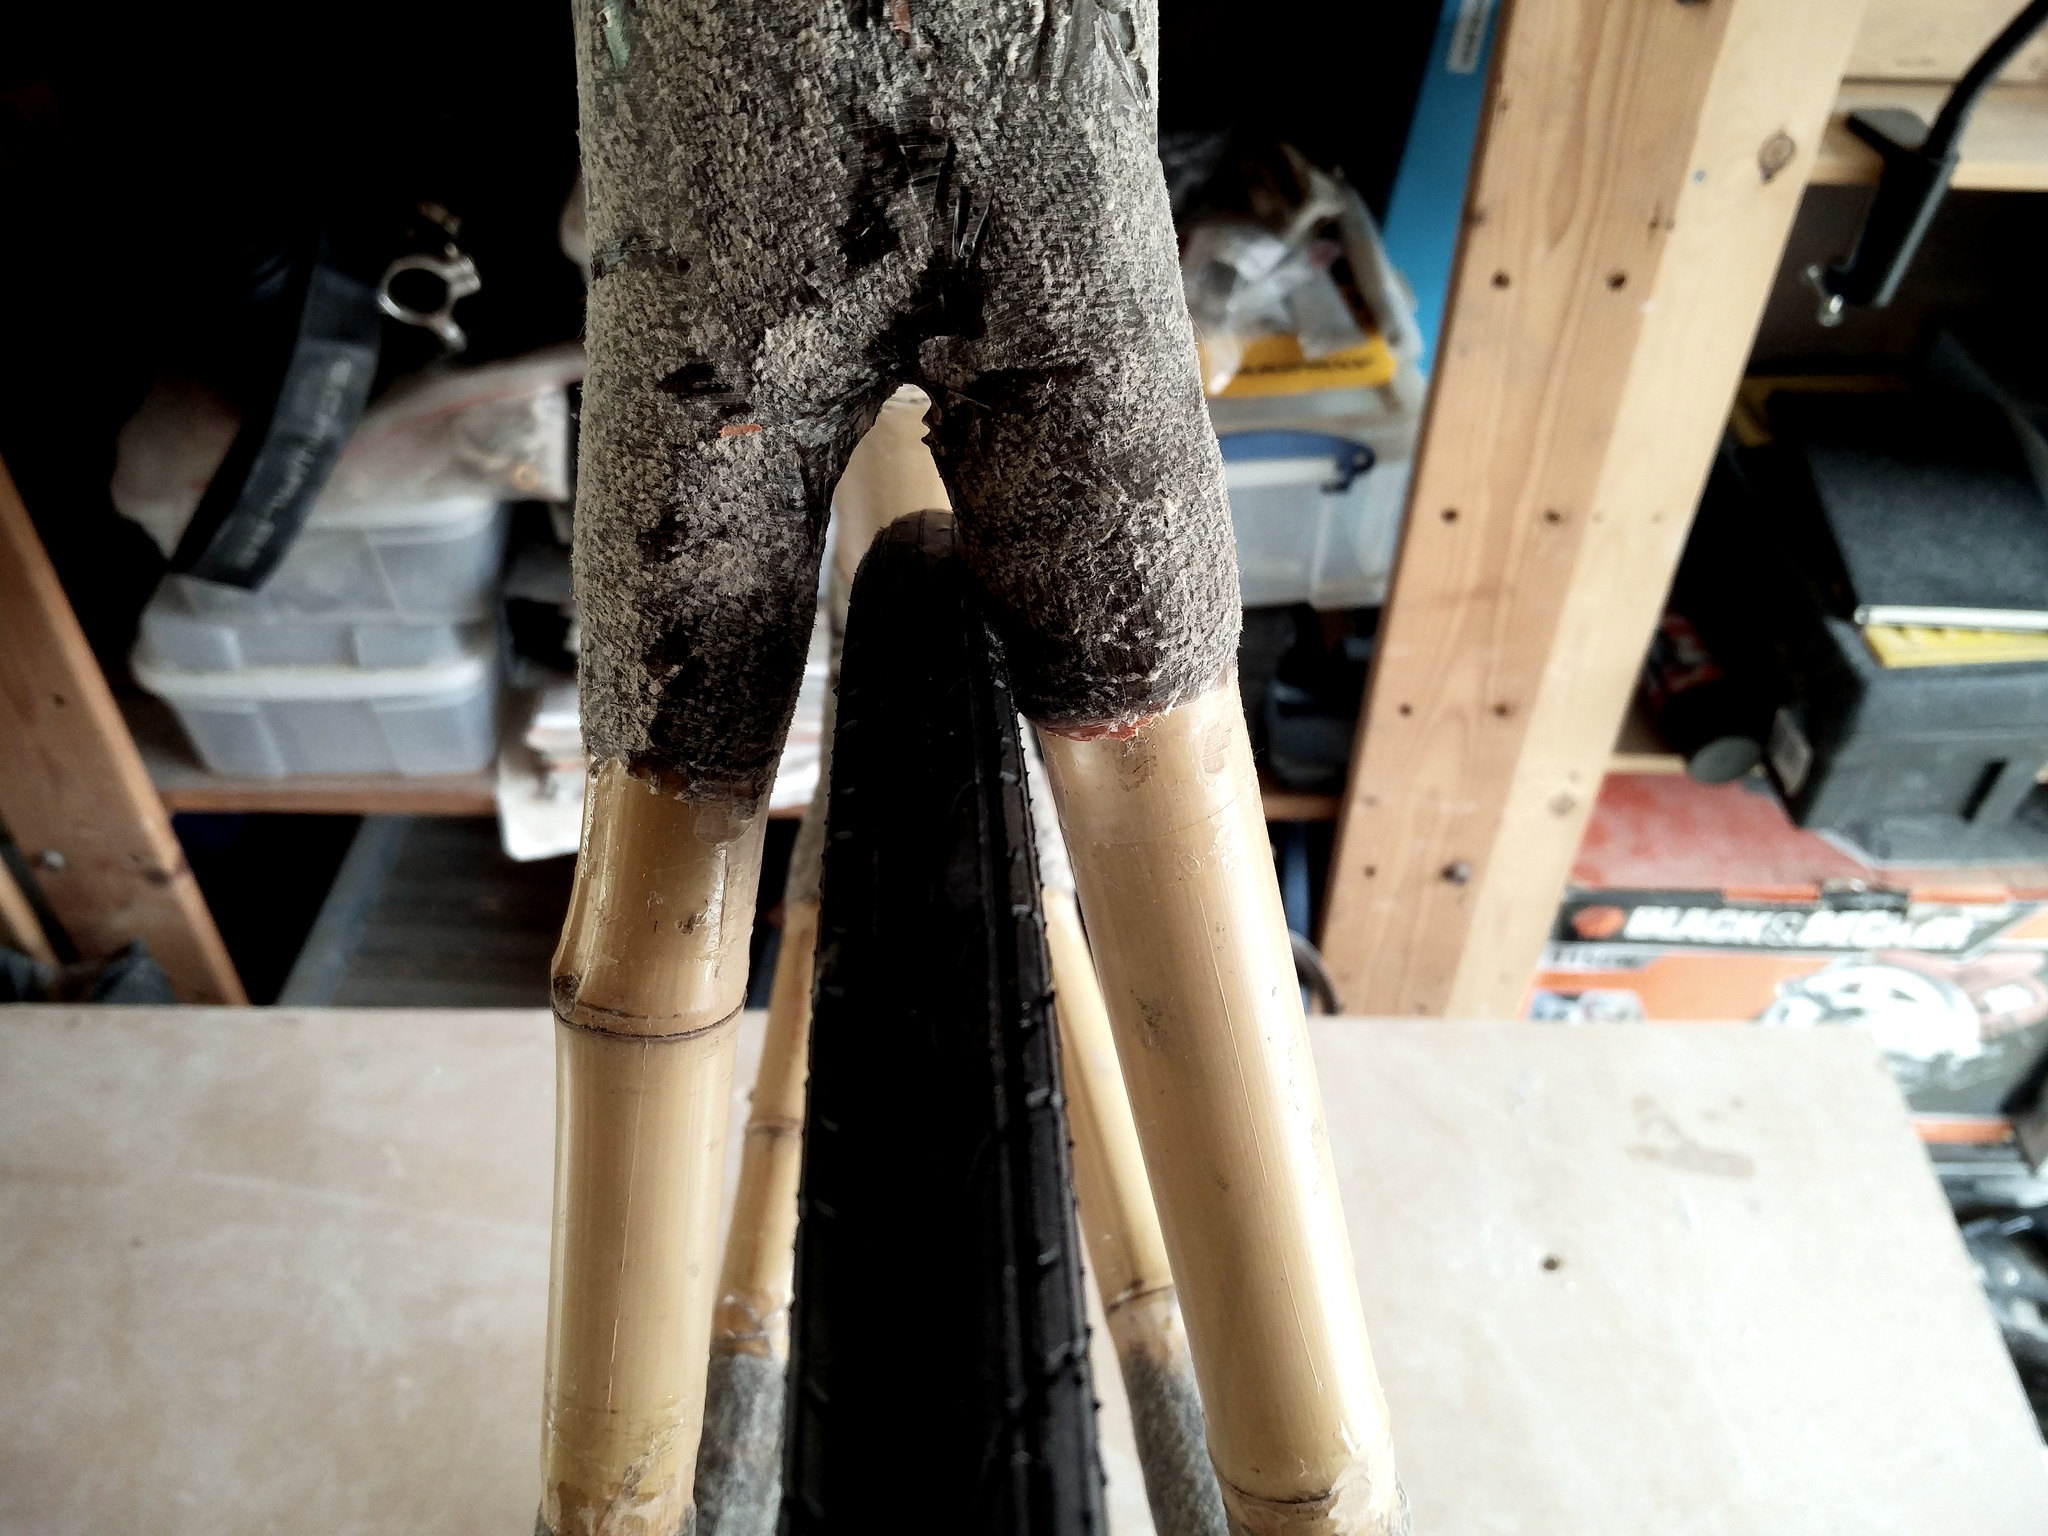
Started the clean up and rough shaping today (thankfully I got a finger sander for this – wouldn’t want to tackle it by hand!).
[url=https://flic.kr/p/Y7pn2w]IMG_20170903_120645[/url] by Rob P, on FlickrAll was going well until I thought I’d trial fit the rear wheel… Oh dear…
[url=https://flic.kr/p/X6GbxN]IMG_20170903_121216[/url] by Rob P, on FlickrNo more sanding until I’ve worked out whether I can fix that by bending the dropouts a bit since I can’t move the frame itself (will have to wait ’til I’m back at school with some proper vices).
richmarsFull MemberPosted 6 years agoThat’s a shame.
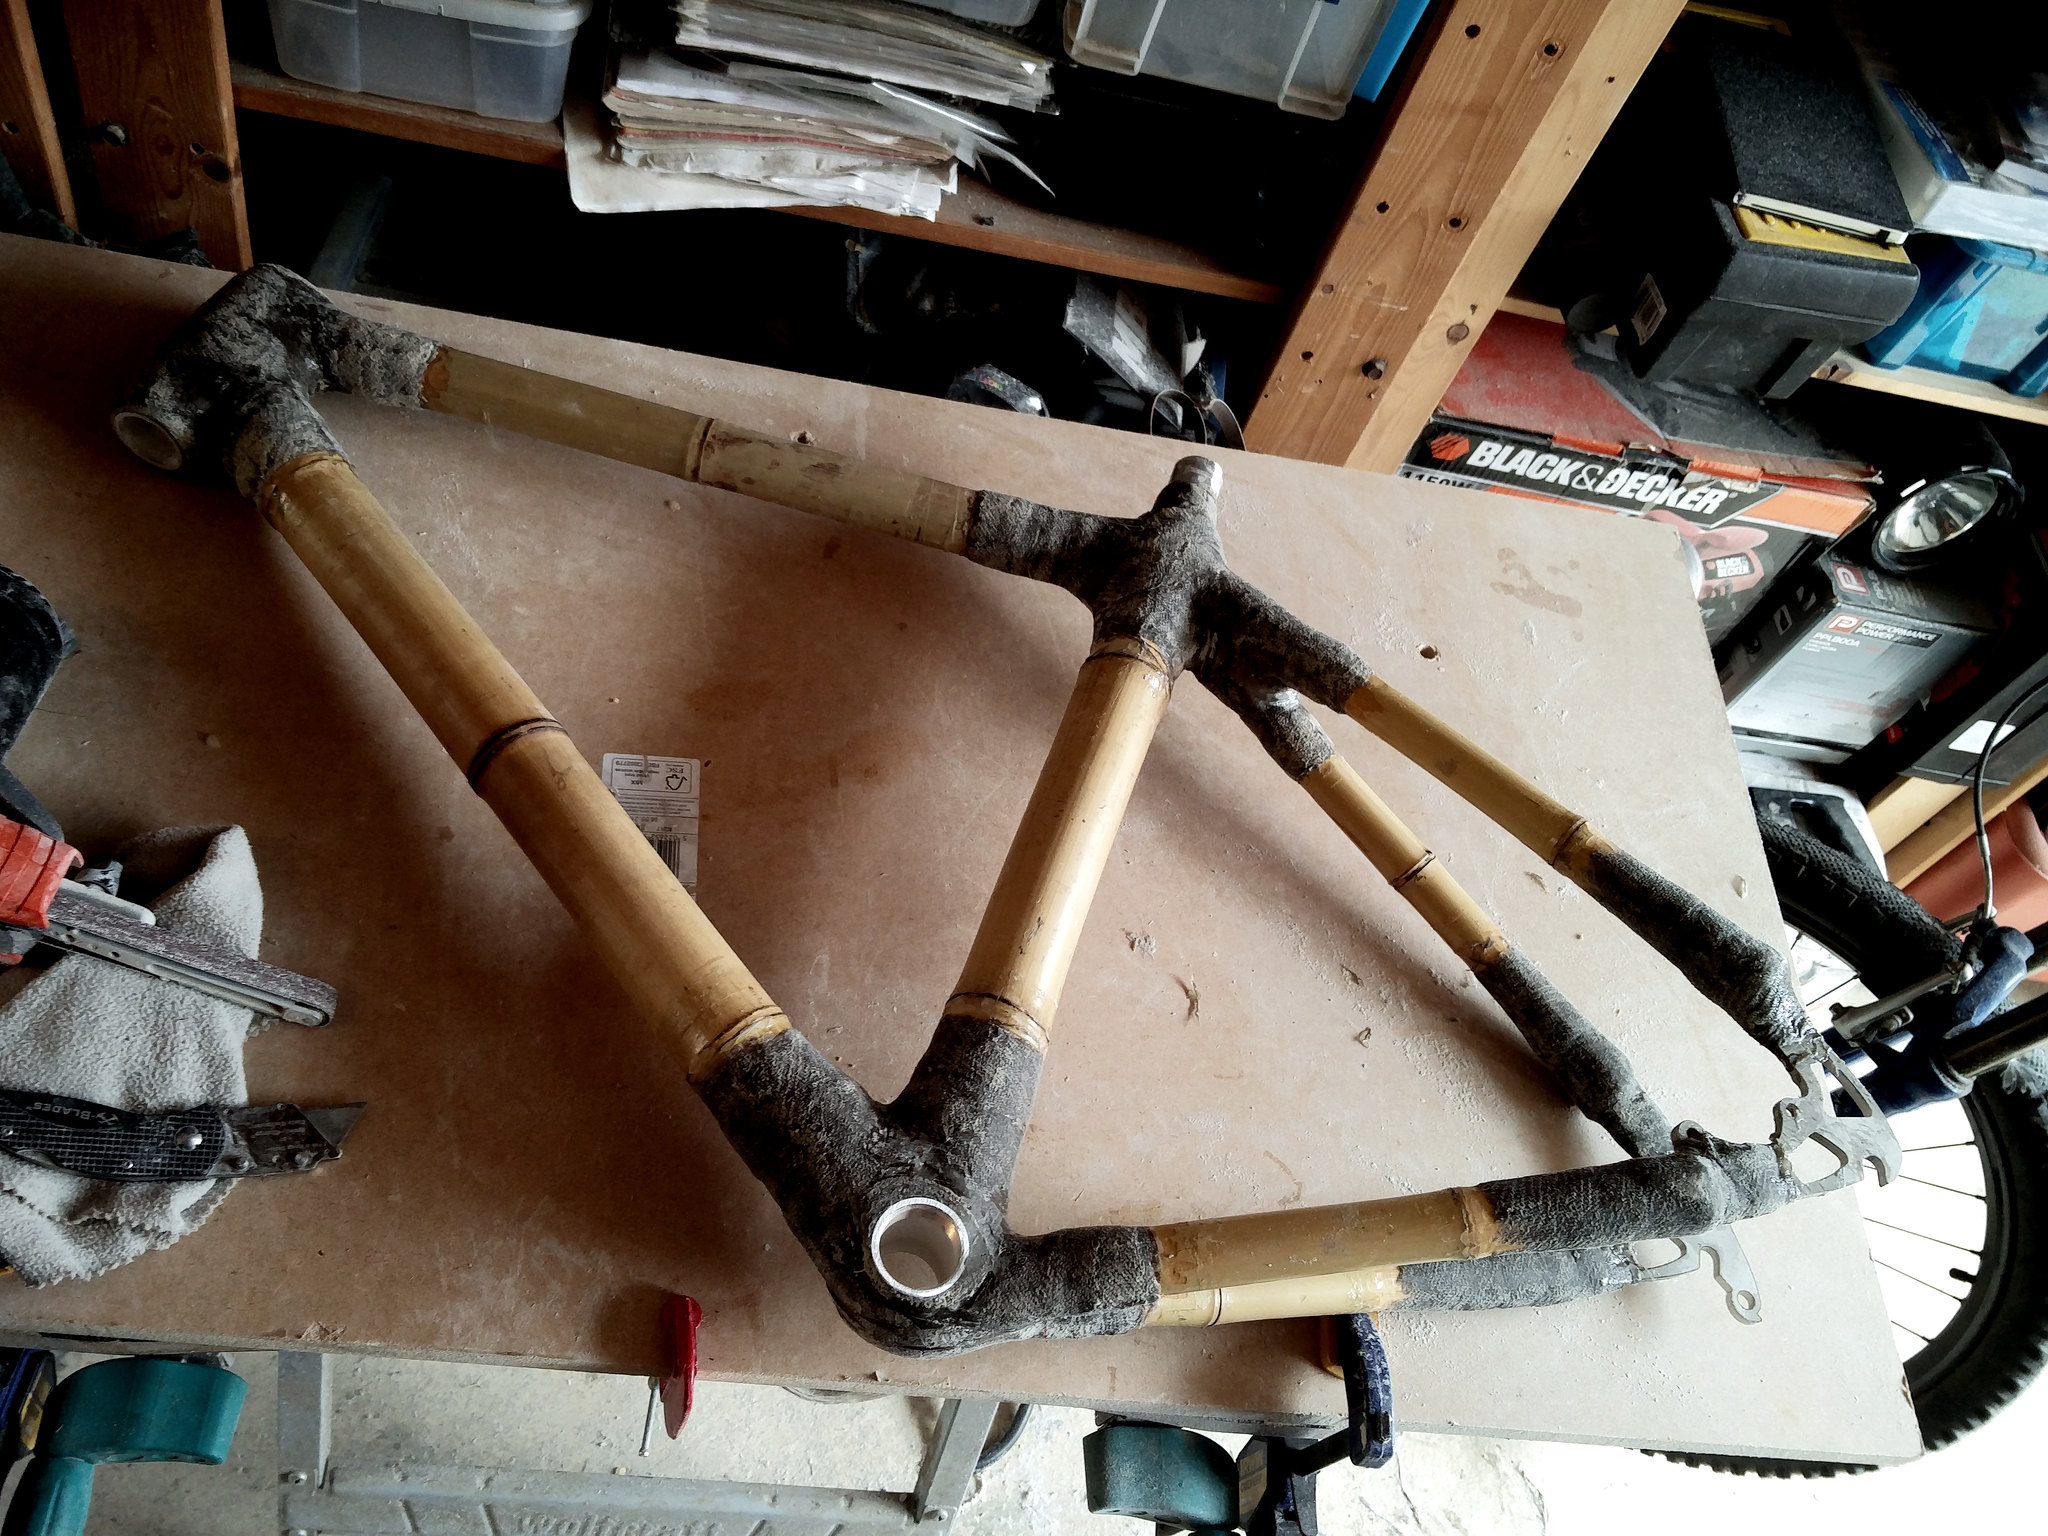
Can you file out the drop out a bit? I’d rather do that then bend them.colournoiseFull MemberPosted 6 years agoActually, that might be a better idea. Thanks. I’ll try that first.
Only slight further issue is that it’s out in the other axis too (this is the view from underneath).
[url=https://flic.kr/p/YaiT4i]2017-09-03_04-08-43[/url] by Rob P, on Flickr


You must be logged in to reply to this topic.