-
What is the last thing you made? (pics pls)
-
Malvern RiderFree MemberPosted 7 years ago
That boat is brilliant. The seabird tops it. Lucky recipient 🙂
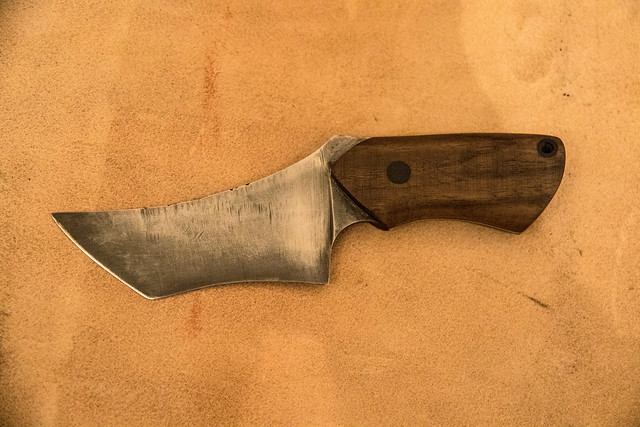
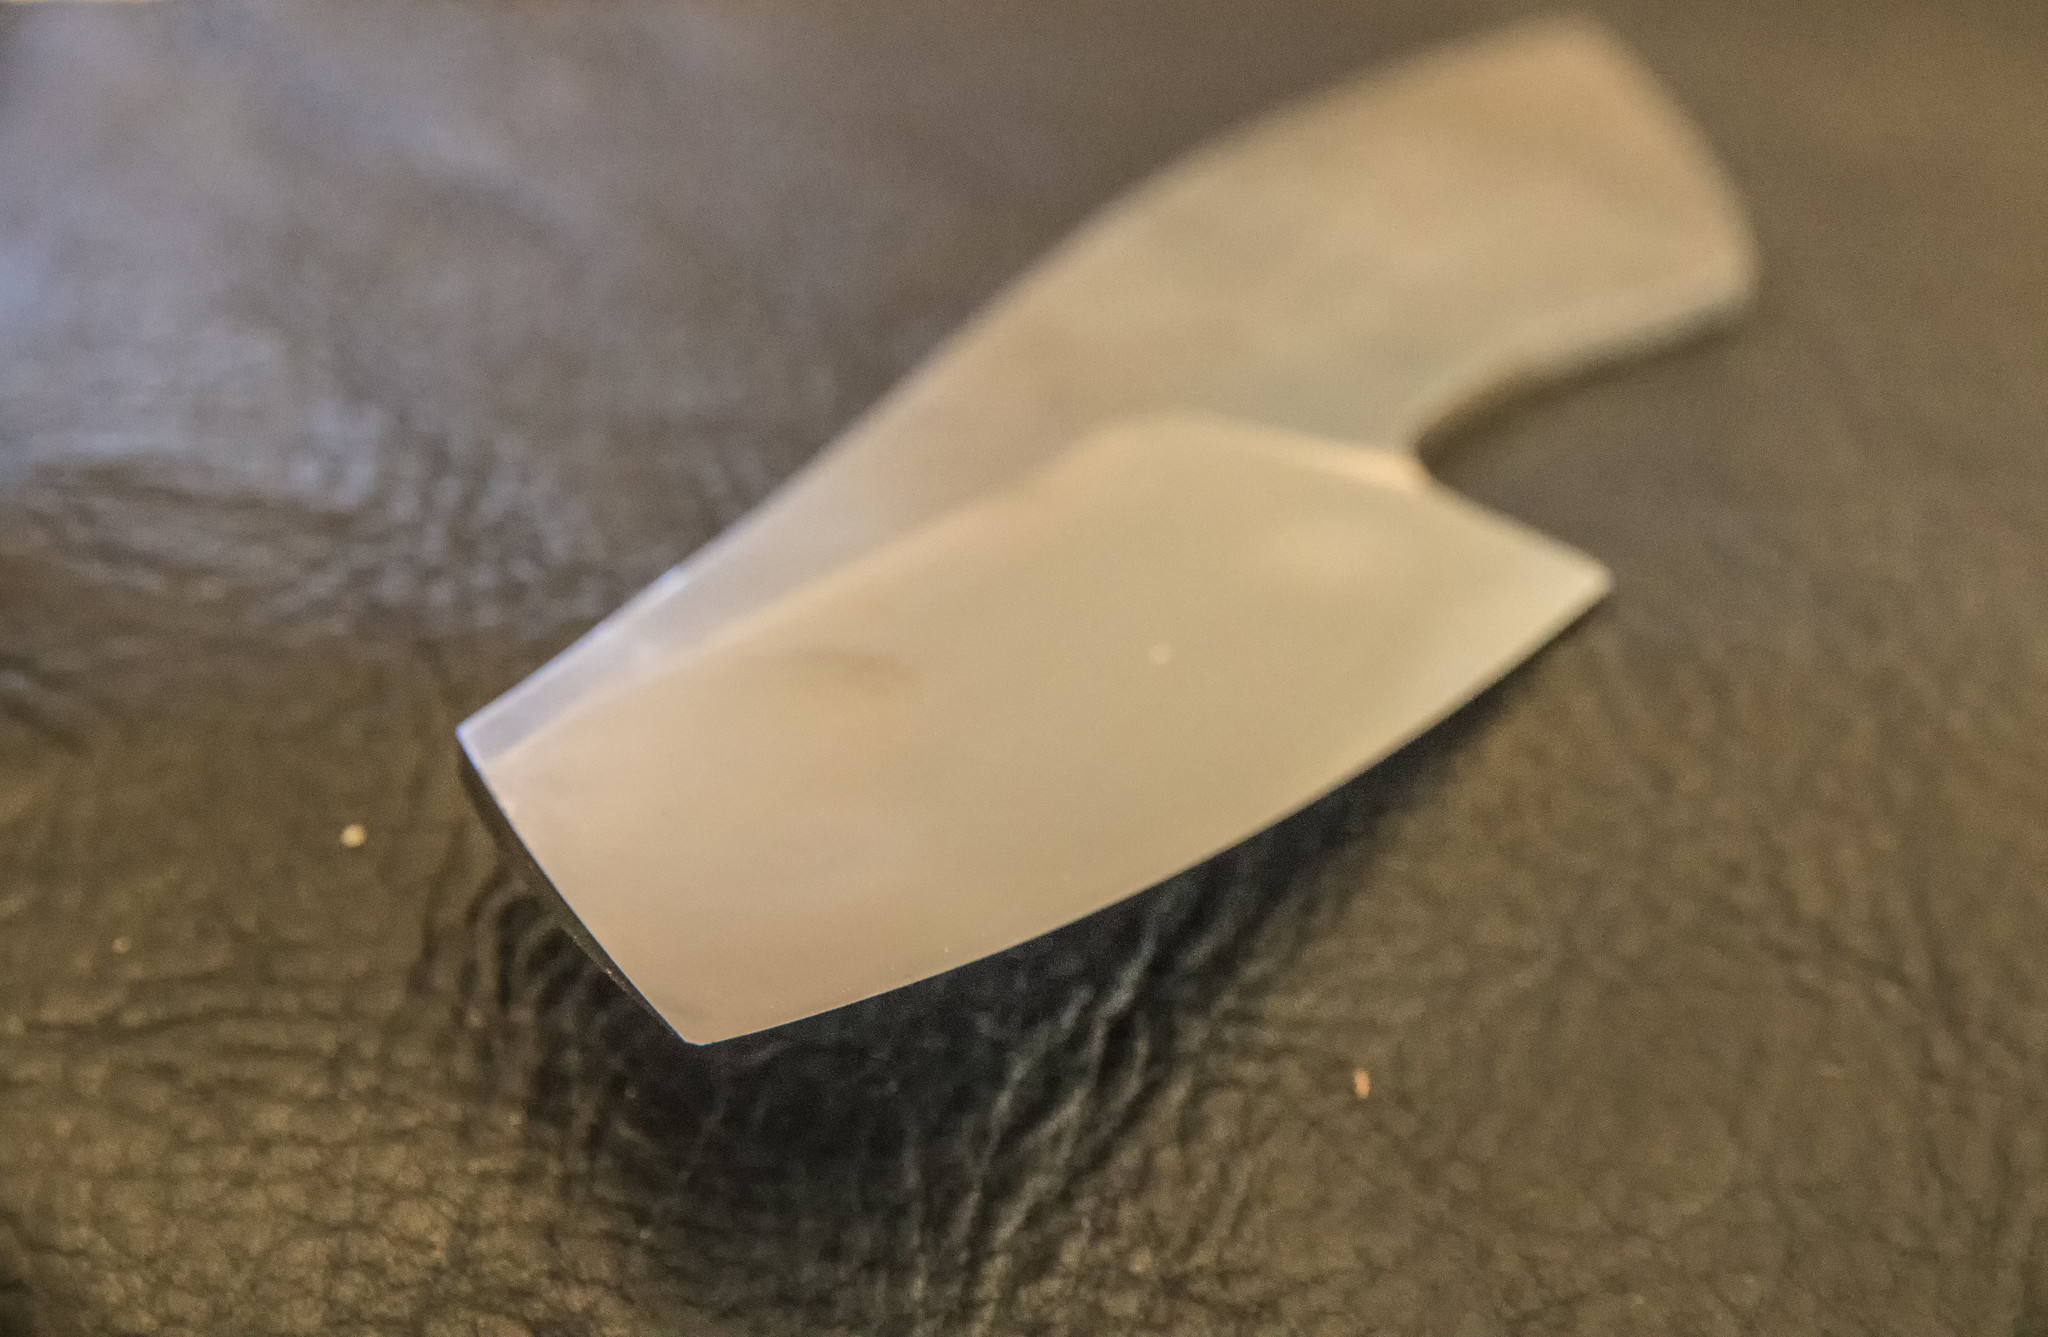
MikkelFree MemberPosted 7 years agoalmost finished a new knife
Left it a bit scratched as i did not want a high shine polish on this blade
tool steel and american walnut handle [url=https://flic.kr/p/SpCXwe]Rhino[/url] by msh_sco, on Flickrporter_jamieFull MemberPosted 7 years ago
jeans top button broke. i was at the unit mid way through a job and i didn’t have a belt on. battery drill, an m4 set screw and a couple of nuts (arf)not what i need when im in a hurry
Malvern RiderFree MemberPosted 7 years agoSpring has sprung but I’m still in winter mode for some reason. Small tonal study (acrylic on board)
‘Black Hill to Broad Down’
glasgowdanFree MemberPosted 7 years agoA climbing totem pole in the garden for when the kids are big enough.
StonerFree MemberPosted 7 years agoMalvern rider that’s fantastic and I know exactly from where that view is seen. Do you show your work anywhere in town?
redthunderFree MemberPosted 7 years agoNew bird box from a plywood offcut.
Tits moved in straight away 🙂
[video]https://youtu.be/rZE1fmsDOMI[/video]
[url=https://flic.kr/p/SyCAKR]P1420477[/url] by SGMTB, on FlickrredthunderFree MemberPosted 7 years agoFor those of you who prefer a bottle on the MTB.
May I present the AntiDogFlick Device 🙂
[url=https://flic.kr/p/TywMkw]P1420471[/url] by SGMTB, on Flickr[url=https://flic.kr/p/TywMgy]P1420469[/url] by SGMTB, on Flickr[url=https://flic.kr/p/SvWrHW]P1420467[/url] by SGMTB, on Flickr[url=https://flic.kr/p/SyCANB]P1420552[/url] by SGMTB, on FlickrIt look a bit shit, but a least the shits not on my bottle any more 🙂
redthunderFree MemberPosted 7 years agoAnother bird box made from an old CCTV case 🙂
[url=https://flic.kr/p/TywMp9]P1420476[/url] by SGMTB, on FlickrsiwhiteFree MemberPosted 7 years agoA bit of redneck engineering to add some weight to the front of my little tractor. Lifting more than about 250kgs on the rear arms used to lead to some very impressive wheelies – no longer!
[url=https://flic.kr/p/TM8735]Untitled[/url] by Scgwhite, on FlickrslackaliceFree MemberPosted 7 years agoNice gate glasgowdan. Hinges look a little small though, rule of thumb for tee-hinge and ride hinge length to be at least 1/3rd of the width of the door or gate.
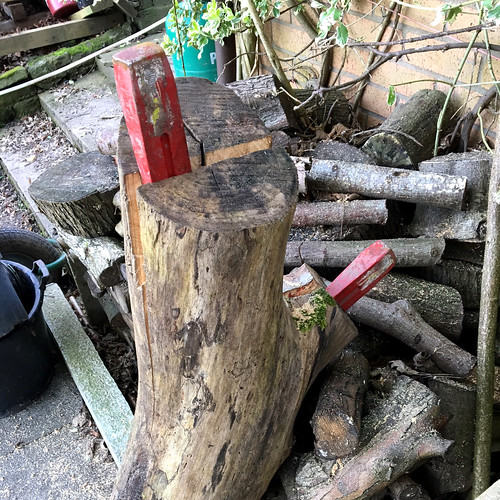
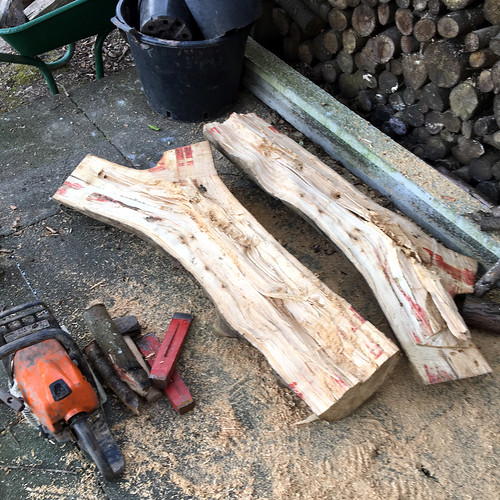
ebygommFree MemberPosted 7 years agoBusy using up all the wood we’ve been left with after building the cabin.
Malvern RiderFree MemberPosted 7 years agoDo you show your work anywhere in town?
Thnks Stoner. Not lately, need to get a larger body of work framed, which is this summer’s task. Looking for a decent venue, a bit thin on the ground hereabouts. Planning an exhibition this Autumn, maybe a ‘pop-up’ scenario 🙂
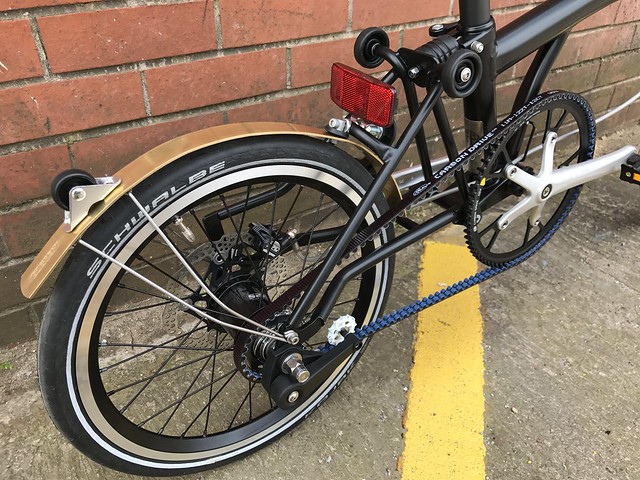
cynic-alFree MemberPosted 7 years agoBen is that your first belt drive?
I wonder if the tension will cause premature bushing wear.
lovewookieFull MemberPosted 7 years agoMalvern Rider, it really is very nice. I have a small collection of Malvern paintings scattered around my house, so I don’t get too homesick, plus my daughter loves Malvern and always looks forward to it when we go see friends and family.
🙂
bencooperFree MemberPosted 7 years agoBen is that your first belt drive?
I wonder if the tension will cause premature bushing wear.
It is, yes. Though I’ve built a few splitable rear triangles for other people who’ve built their own belt conversions, and they seem to be getting on okay. The main thing that’s sub-optimal is that the belt has to be folded when the bike folds – I’ve got it bending in as large a radius as possible.
glasgowdanFree MemberPosted 7 years agoThere’s not too much weight in the gate at all actually, the hinges should last but easily changed if not. We’ve a kid’s party coming up in 4 weeks and I had to make the back garden secure. The gate took under an hr, the posts about the same to cut into the drive. I went with metal supports for obvious reasons, though now I think about it I really should have gone for concrete posts cemented into the ground.
slackalice – Member
Nice gate glasgowdan. Hinges look a little small though, rule of thumb for tee-hinge and ride hinge length to be at least 1/3rd of the width of the door or gate.POSTED 9 HOURS AGO #
kayak23Full MemberPosted 7 years agoLoving the car part bits, especially the curtain finials.
Made myself a nut bowl practising with the new cnc router at work. 😀
LocoboyFree MemberPosted 7 years agoGeeforce monkey,
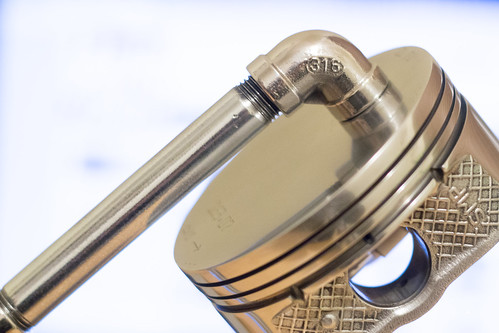
I’m a fan of upcycled car parts, did you run the cable behind the crank or figure out a way to conceal it?Here is my most recent lamp
[url=https://flic.kr/p/QctWcU]Ford Fiesta ST piston Lamp-6453[/url] by Colin MacColl, on Flickr[url=https://flic.kr/p/Px1Nwt]Ford Fiesta ST piston Lamp-6419[/url] by Colin MacColl, on FlickrMikkelFree MemberPosted 7 years agoanother knife
[url=https://flic.kr/p/TTJWwd]5J4A8476[/url] by msh_sco, on FlickrLocoboyFree MemberPosted 7 years agoMowgli,
Thanks,
Tubing and elbows from ebay I think.
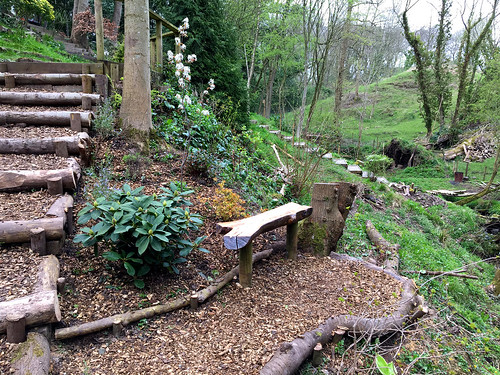
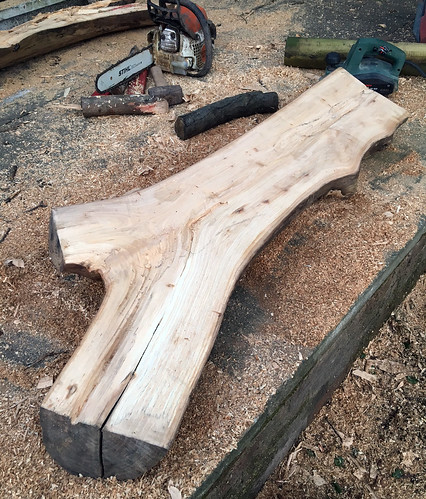
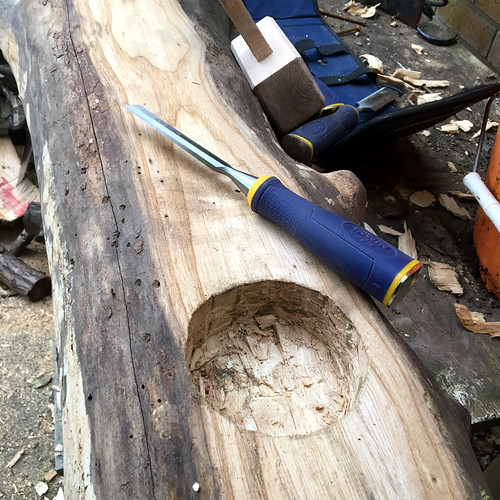
Elbows are stainless, tube was galvanised malleable iron, put the tube in a pillar drill and filed off the galvanising, then polished it and lacquered it.councilof10Free MemberPosted 7 years agoHad a big hunk of ash kicking about, so I split it down the middle, smoothed it off with a hatchet and then power-planed/belt-sanded it.
Chiselled a couple of round sockets on the underside to take some off-cuts of turned pole I had left over, bit of post-mix, a splash of cuprinol and a coat of varnish, bish-bash-bosh and I’ve a very comfy bench to sit and watch the kingfishers in my brook. 🙂
[/url]bencooperFree MemberPosted 7 years agoThat’s a lovely job – a bit posher than the path we built in our local park 😉
Hob-NobFree MemberPosted 7 years agoI made a coffee table from an old scaffolding board.
Never done anything like it before – wanted something a bit low and rustic looking. Cut the boards to size, belt then orbital sanded them down, glued & dowelled everything together & hey presto.
Bit of lime wax & it’s done.
Can’t believe it turned out even, square and level – might make something else now!
councilof10Free MemberPosted 7 years agoCheers Ben, what timber did you use for your steps? I read that Alder lasts very well in damp conditions, and had lots growing along the brook so used that. Started out using bought-in half-round stakes but at a quid a pop, it’s far cheaper to split 2′ lengths of alder and then sharpen a point with an axe…
Love the scaffold table! Really suits the room…
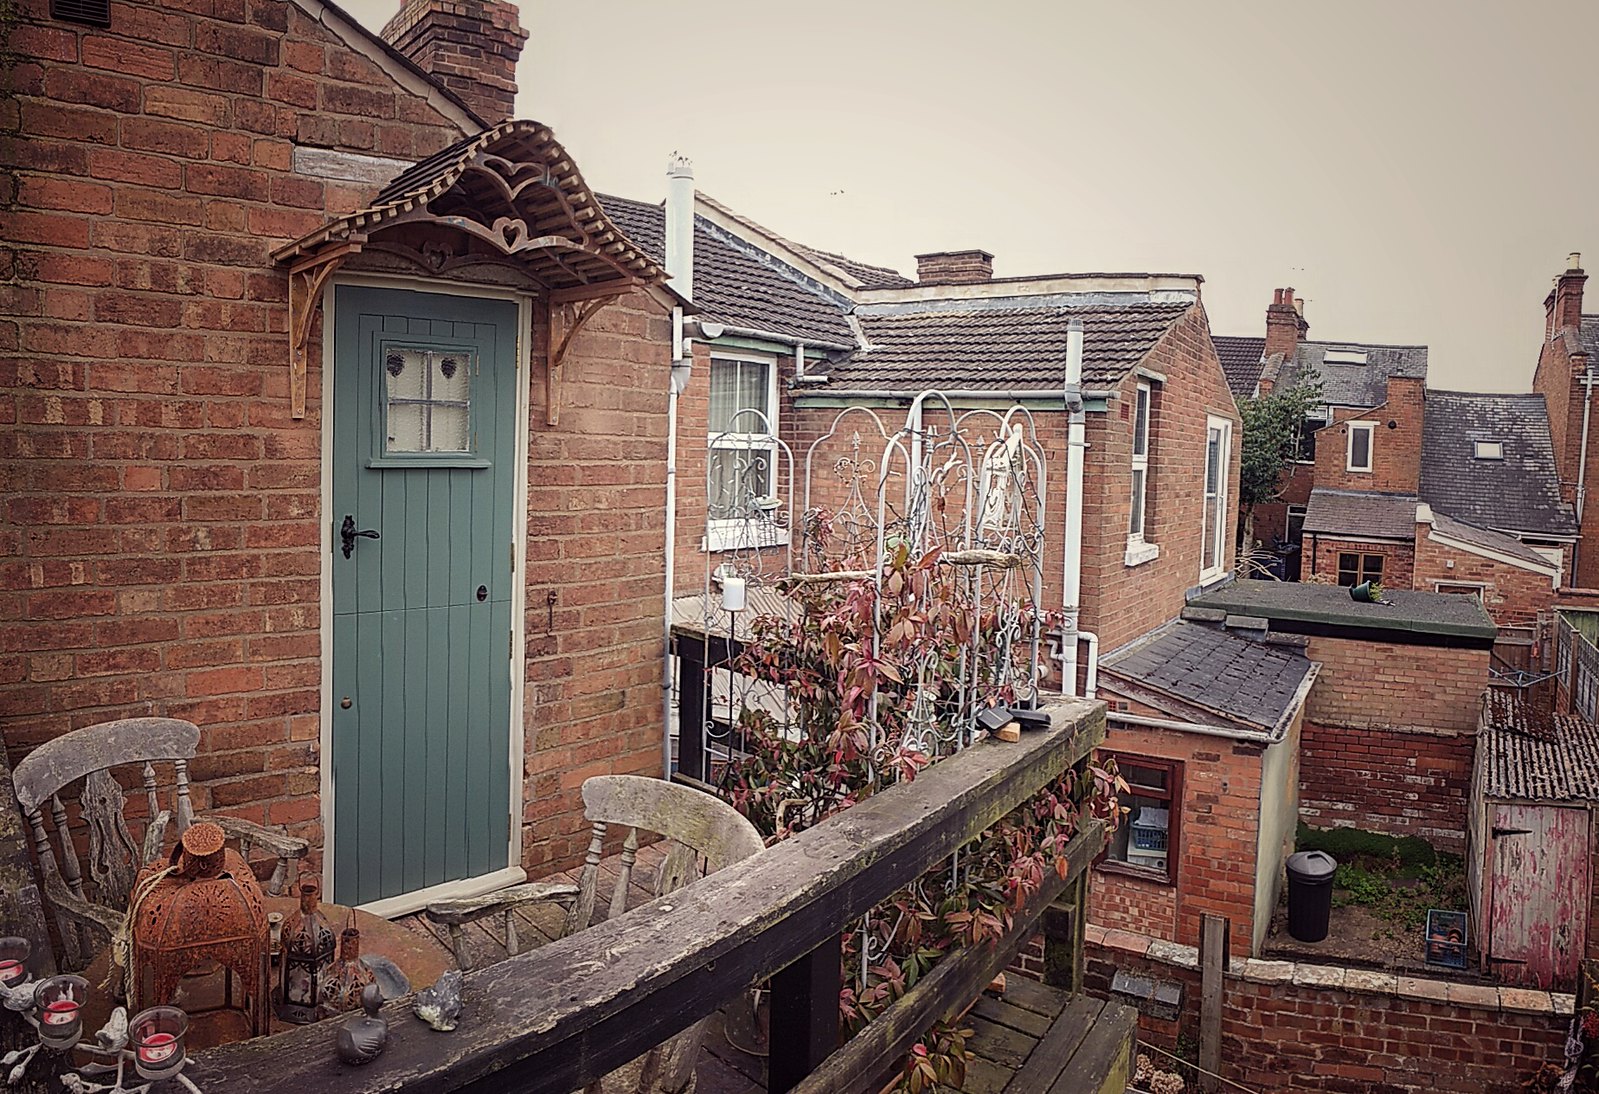
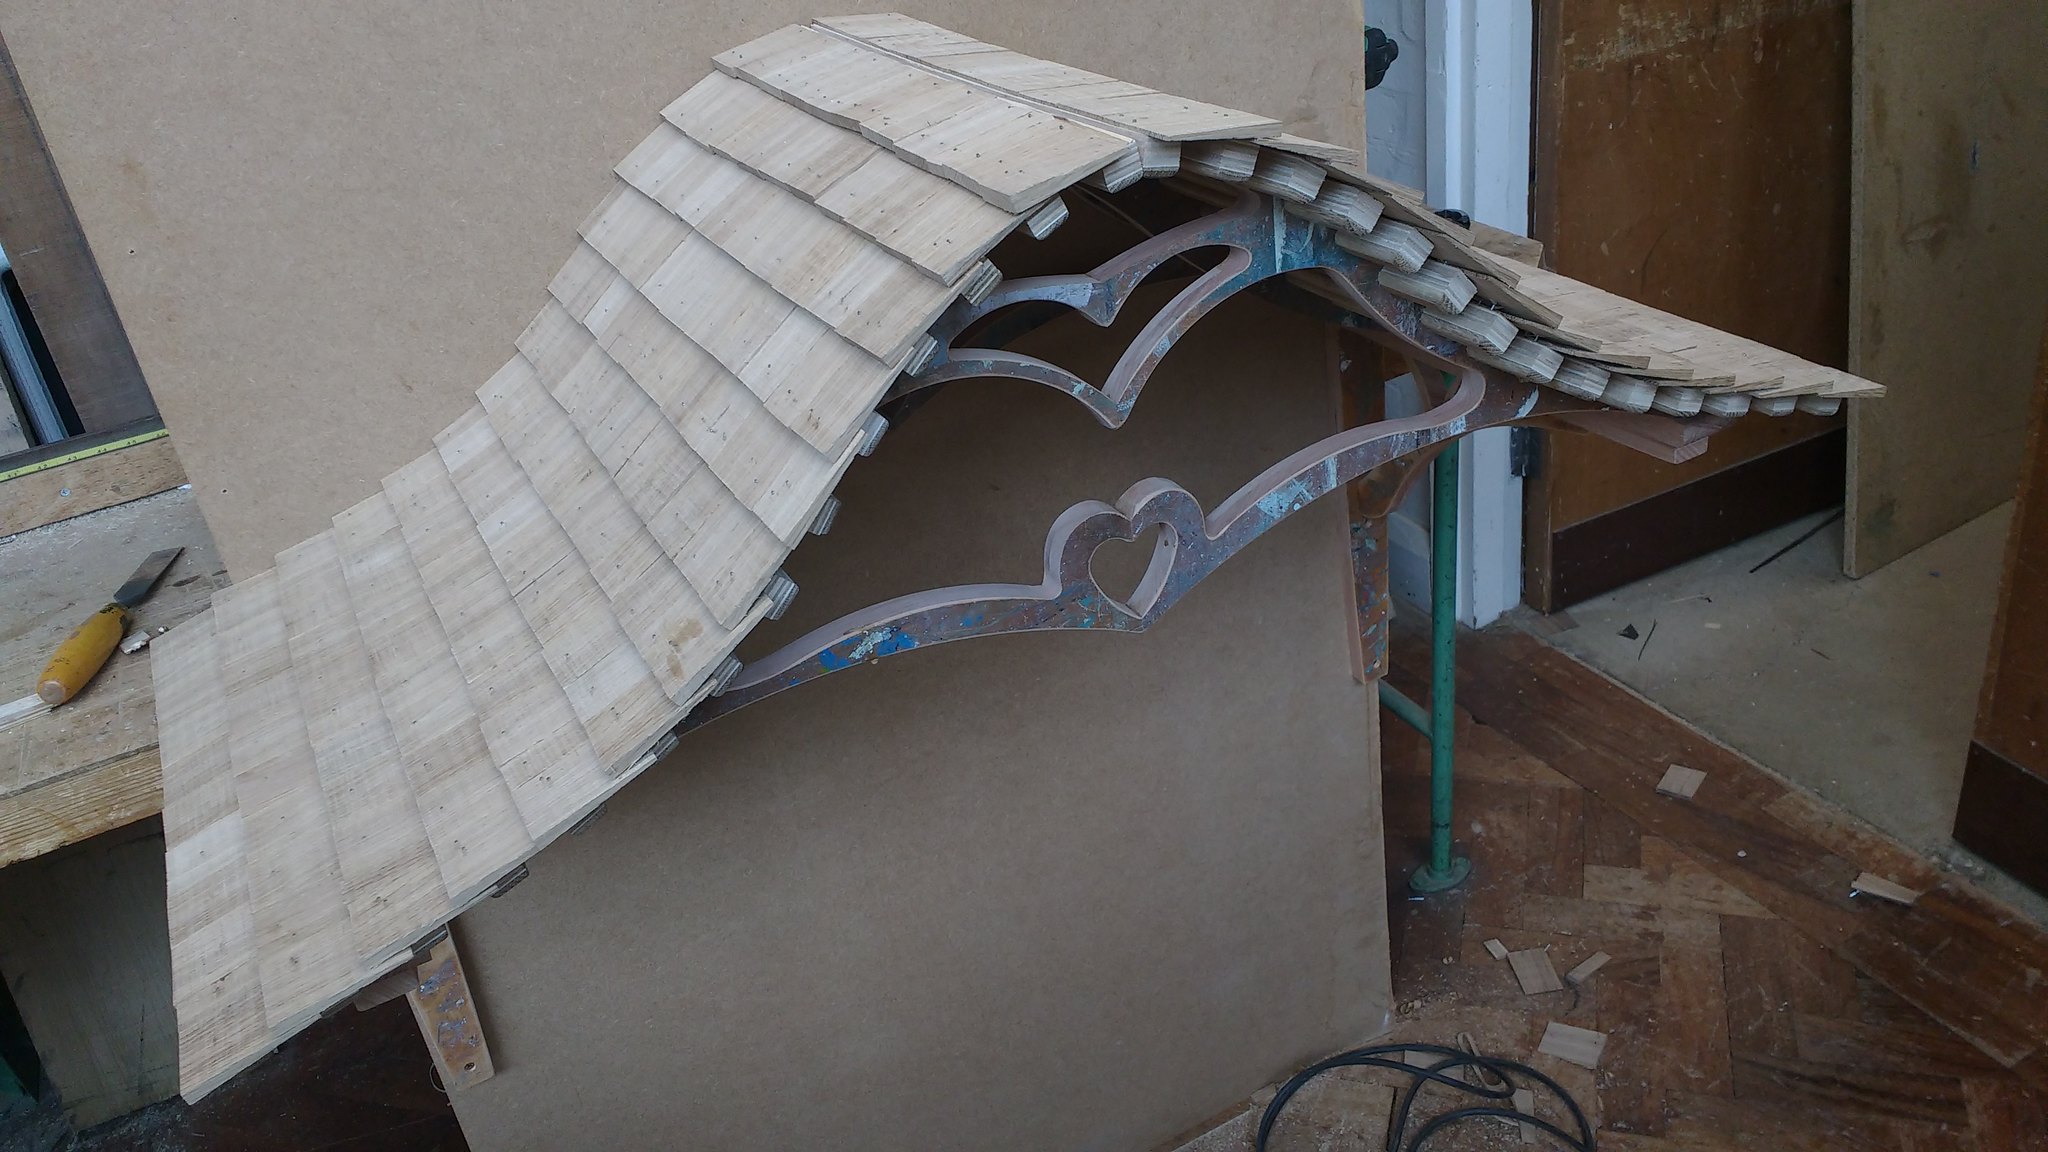
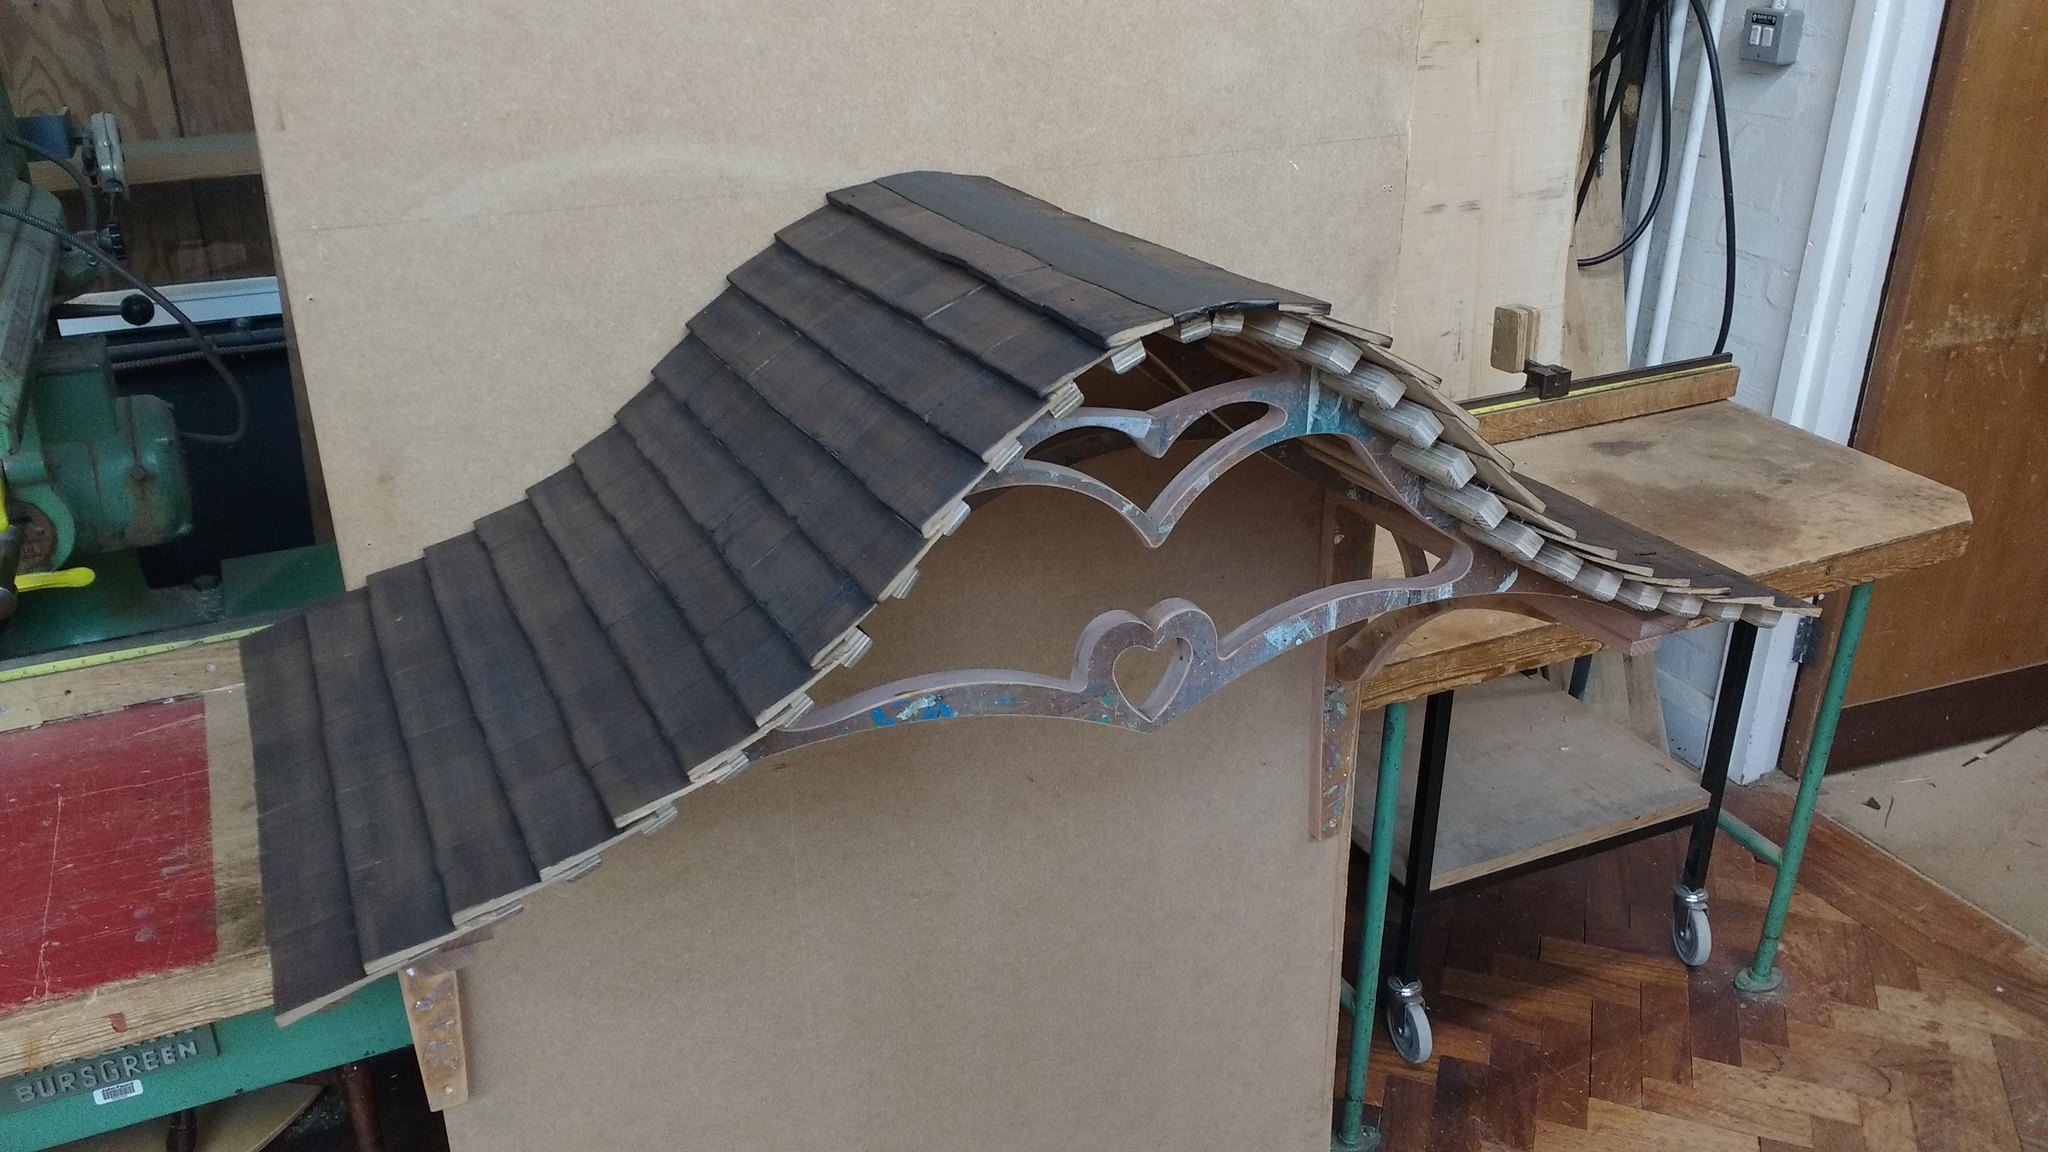
kayak23Full MemberPosted 7 years agoI made a door for a lady from work a couple of years or so ago. That lady became my other half, and now I’ve made her a door canopy to go over it.
Sadly I couldn’t now charge her for it!
😀I designed the framework in Sketchup picking up on the heart motif she originally asked for in the door shutters, imported it into cnc software and cut it out on the router. The frame is made from old bench tops from the painting and decorating dept where I work, hence the paint splatters.
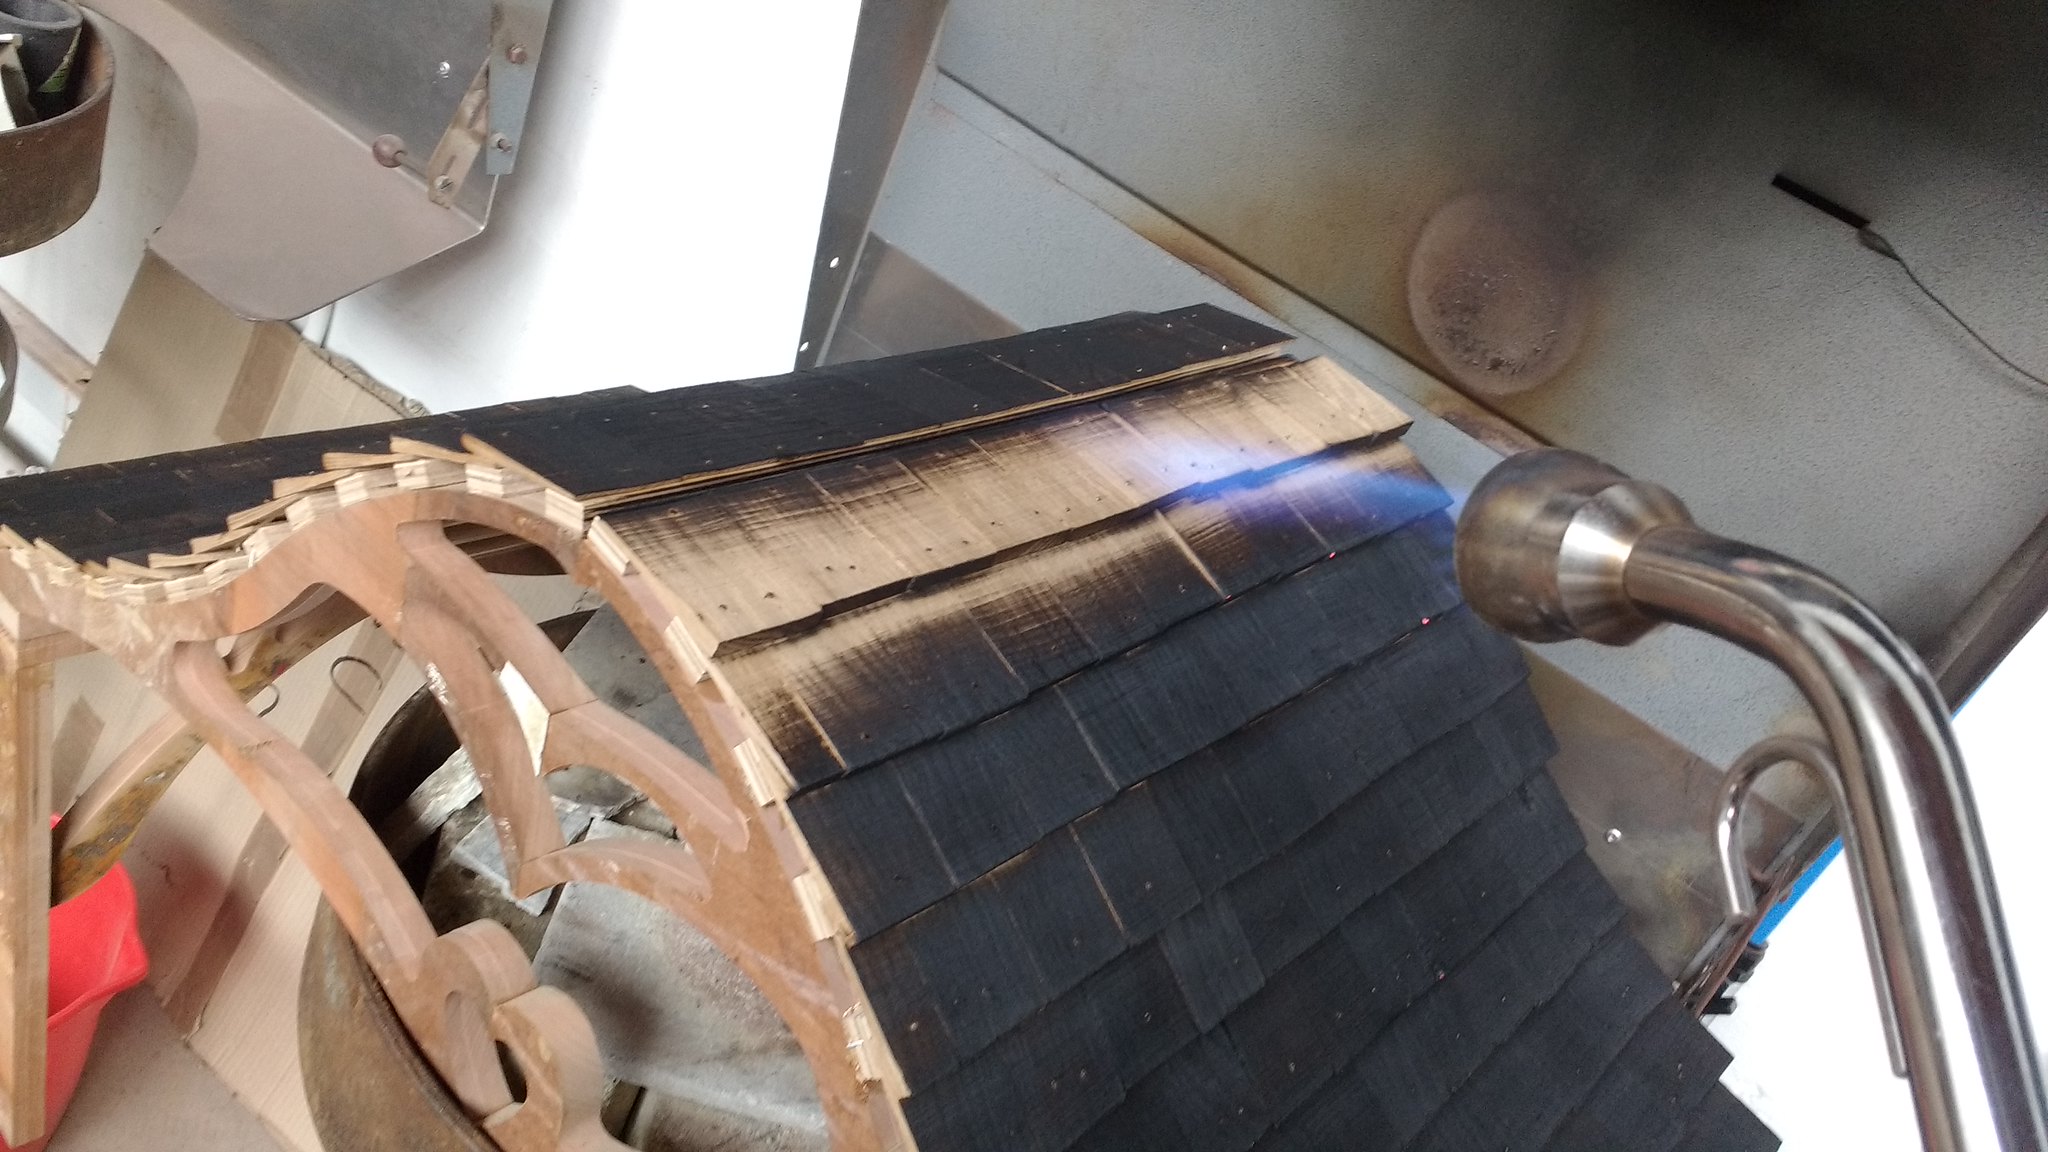
The ‘rafters’ are rescued engineered oak floor boards and I shingled it with bandsaw cut oak which I later scorched.
She loves it. 🙂The canopy in place(rear flat roof balcony area)
[url=https://flic.kr/p/U51FK6]Untitled[/url] by Kayak23, on FlickrCutting out the bits on’t cnc
[url=https://flic.kr/p/U3KsJx]Untitled[/url] by Kayak23, on FlickrFitting rafters
[url=https://flic.kr/p/SLivoq]Untitled[/url] by Kayak23, on FlickrFitting shingles. Pinned on
[url=https://flic.kr/p/TZ9qg5]Untitled[/url] by Kayak23, on FlickrScorching the Oak shingles
[url=https://flic.kr/p/TZ9wS1]Untitled[/url] by Kayak23, on FlickrDone
[url=https://flic.kr/p/TZ9zh1]Untitled[/url] by Kayak23, on FlickrI quite like it. Looks a bit art nouveau I think.
steviedFree MemberPosted 7 years agoSo much talent on here! Great stuff guys, loving the canopy Kayak 🙂
Made a few more bits for the 16″ wheel bike I’m making for my daughter. Got the dropout and chain/seat stays done. Starting to look like a bike now:
stumpy01Full MemberPosted 7 years agoThat bike is coming along nicely.
The chainstay/seatstays look like they used a fair amount of billet!!
kayak23 – loving that little porch canopy.
Can I ask what CNC router that is that you are using.
I would love to get a little CNC router for the garage (not that I have the space) to do my own stuff with & perhaps sell some bits & pieces on ebay.
I’ve been looking at the OOZNEST OX CNC – it seems very reasonable for what you get.kayak23Full MemberPosted 7 years agoOurs (College where I work) is from World of cnc.
It wasn’t cheap at around 8k, but it’s a seriously useful bit of kit and I’m learning more every week on it by doing lots of
foreignersimportant testing and research projects. 😆Edit; That Ooznest one looks awesome. I’d consider that for home I reckon. I like how it fits a hand router.
Ours is liquid cooled so is much quieter than a regular router.bencooperFree MemberPosted 7 years agoCheers Ben, what timber did you use for your steps?
It’s whatever we had spare in the park – some beech, some pine, nothing fancy 😉
stumpy01Full MemberPosted 7 years agokayak23 – Member
Ours (College where I work) is from World of cnc.Cheers. I’ve looked at the World Of CNC stuff and perhaps they are aimed at the industrial side of things. Probably well suited for your educational environment.
I have no idea where the CNC would go if I was to get one! I’ve just got loads of ideas of things I would want to do with it!
I could go for a small one, but then I’d probably find i wanted something larger within months….Just a pipedream at the moment… 😀
kayak23Full MemberPosted 7 years agoYeah, I pushed to have a smaller table due to workshop space, wish I’d gone full 8×4′ now.
Go big or go home 🙂


 [/url]
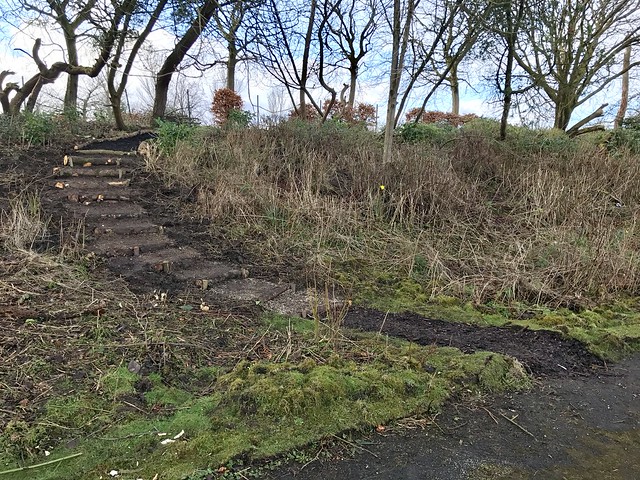


You must be logged in to reply to this topic.