- This topic has 31 replies, 17 voices, and was last updated 8 years ago by bearnecessities.
-
Shed base idea (sorry)
-
bearnecessitiesFull MemberPosted 8 years ago
8×6 shed, so hardly large.
(Clay soil) Level soil, dab some 4:1 mortar and lay 4, 4×4 tanalised fence posts down at 90 degrees to floor joists, so 4 posts covering a 2400mm span. (Mortar to just help leveling and slow any moisture ingress – I know it won’t bind to soil 🙂 )
Lay DPM on top, stick shed on top, screw down shed. Stand in shed, fart and giggle. (Then put some 16mm board on f&r of base to stop any critters making a home?)
What’s wrong’s with this idea? Airflow, cheap, level, protects shed and hardly likely move once a shed’s on it*, but I can’t find anything on such a theory on Google – only thing close is spiking in elaborate timber bases. It’s a half- decent shed and the floor’s already 16mm T&G.
Is it typical of the fashion to over-engineer everything, or am I missing something really obvious?!
*I suspect that may be the issue?
andylFree MemberPosted 8 years agoI used 7N concrete blocks as pad stones. Could also paving stones. Level with builders sand or mortar if more permanent.
easygirlFull MemberPosted 8 years agoI would put some hardcore down over the clay, then mortar, then dpc , then the 4×4
The dpc will stop the damo rising into the timbers, or block as above, even betterergarage-dwellerFull MemberPosted 8 years agoSimilar to what we have although I’d be aiming for some air circulation rather than blocking underneath.
Our bearers are crossways 6ft long.
Mid sections are resting on a concrete path and the ends presently rest on soil but when I get a free afternoon or two will be scraping out a little channel under the bearer ends and putting a sloppy concrete mix into it and leaving to set.
That way I expect the bearers to last as long as the shed and if they don’t I reckon I might manage to find a way of sliding replacements in with some leverage.
SaccadesFree MemberPosted 8 years agoCommon way to do it in the states – called a sled – normally uses more sleper sized wood though.
No mortar, just a coupla inches of pea gravel/aggregate as a base.
FrankensteinFree MemberPosted 8 years agoI’ve done what you folks suggested.
Last year I tried a plastic Lego type base and and it’s been awesome.
I still dug some turf out, added hard pack and gravel. Added shed 6×4 and heavy stuff without any subsidence or damp problems.
Took 4 hours including putting up the shed.
bearnecessitiesFull MemberPosted 8 years agoThanks all. Glad to know it’s not such a daft idea.
Andyl, are you saying lay the flags as the solid base, then just sit the posts ‘loose’ on them?
Saccades – now that’s the kind of simplicity I’m getting at 🙂
andylFree MemberPosted 8 years agoI set up a load of strings to mark the rows and levels and then dug in blocks laying on their sides using sand to level (has to be removable). In some places I used 2 or 3 blocks as the land has a slope.
I spaced them out so say 1 block (440mm) and then a gap of 1-1.5 blocks (400-600mm) under each floor bearer lengthways making sure the joints in the floor (3 sections as 16×10 shed) had a block under the join and then across the width every bearer had a block. There is just enough gap under the shed to slide spare waste pipe and timber underneath.
You could use a row of blocks butting up under each bearer if you want but I didn’t see the point. I have 18mm t&g chipboard on top of the 1″ thick floor planks and 3×2 bearers so the floor is reasonably stiff for a shed.
I also put strips of spare DPM on top of the blocks before putting the base down but make sure near the edges water can’t sit on the dpm and pool.
If you want to lift the shed up higher you could put down the pad stones and then lay fence posts at 90 degrees to your floor beams and then put the floor down but it seems a waste.
dirksdigglerFree MemberPosted 8 years agoMy 8×8 shed sits on 3 ladscape ties (pt 4×4) perpendicular to floor joists on 6 12×12″ slabs. Weed barrier and 1/2″ clear below shed to prevent weeds below.
bearnecessitiesFull MemberPosted 8 years agoAndy, I really do appreciate the time you’ve taken to write that, but you’re not getting me like bro’. 🙂
I want it simple!
It’s only an 8×6 shed and at least others have said I’m not a crazy fool, so I’ll just go with my original idea of bedding down the fence posts – I may lob a bit of hardcore down as a treat 🙂
Thanks.
squirrelkingFree MemberPosted 8 years agoI kinda did a mix of what has been suggested.
Clay soil dug down about 6 inches.
1 foot trench around sides.
Fill trench with large rocks.
3/4 fill remainder with red chip crap.
Tamp down.
Lay weed barrier.
Layer of builders sand.
Add proper 3×2 council grade flags.
Stick rubbish metal shed on top.After a few years like this I can confidently say there are zero drainage issues thanks to the perimeter soakaway and the base has been as solid as a rock (unlike the rubbish on top). Will be upgrading soon to a proper shed and would happily just lay some timbers across the exising base.
dvatcmarkFree MemberPosted 8 years agoIve done similar to what you are saying, the only thing I found was that as the soil moisture levels changed over the year the shed would twist slightly and this affected the door. I.e. tight at times loose at others
But this is STW so it needs massive over engineering, therefore I reccokend a 1 meter thick concrete slab on top of piles
glasgowdanFree MemberPosted 8 years agoIt’s just a shed. I’d go with a level plot, sharp sand, council 3×2 slabs then plonk shed on top. I put my shed on top of wedges and other random bits of wood over an old driveway. It’s fine 6 years on.
projectFree MemberPosted 8 years agoBefore you erect shed, treat underside of floor with many coats of creosote or similar, will keep floor like good for years, not suitable for the crap they call osb or strandboard.
Dont forget drainpipes and gutters, will save the base edge rotting from water run off, use water butts to save water.
ex shed errector
SaccadesFree MemberPosted 8 years agobearnecessities – It’s real simple, the wood will slowly rot (my sleepers are 8 years old and a bit squishy on the earth side, but are very easy to replace with a car jack. But the base is grand.
Simple and cheap – no need to put membrane down, just put some weedkiller down if stuff grows around (nowt’ll growth underneath – too dark). Just need to shuffle the sleepers/fence posts around to get level.
For cheap shed that’s not taking a car/motorbike it’s grand.
andylFree MemberPosted 8 years agoAndy, I really do appreciate the time you’ve taken to write that, but you’re not getting me like bro’.
I want it simple!
😆
this is simple.
Buy a boot full of concrete blocks and a bag of sand. Lay in strips leaving gaps and use sand to level them. Plop the shed base on. It’s only an 8×6 so a small base to lift around. Jump up and down on it and check for any rocking or bouncing and lift it back up and re-level any blocks as needed. You will have the same problem with getting fence posts level anyway and they will just get damp under there.
Assuming the floor beams run in the 8ft direction thats 2.4m so 6 blocks if butted up per floor beam or 4 if you space them as I would to save time. Then say there are 4 beams across the width then 4×4=16 blocks. £1 each or so + sand = £20 so cheap as chips and never going to rot.
maccruiskeenFull MemberPosted 8 years agoI want it simple!
Just ignore the bits about ley lines and astronomical calendars if you’re not wanting the dawn sun to shine through the shed keyhole on the winter solstice. – Your harvest may fail as a result though.
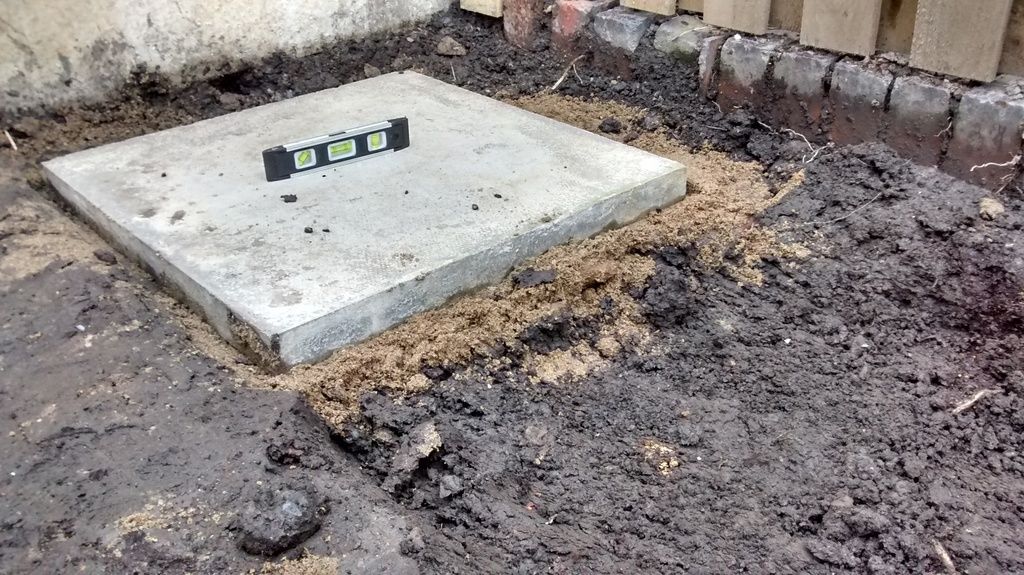
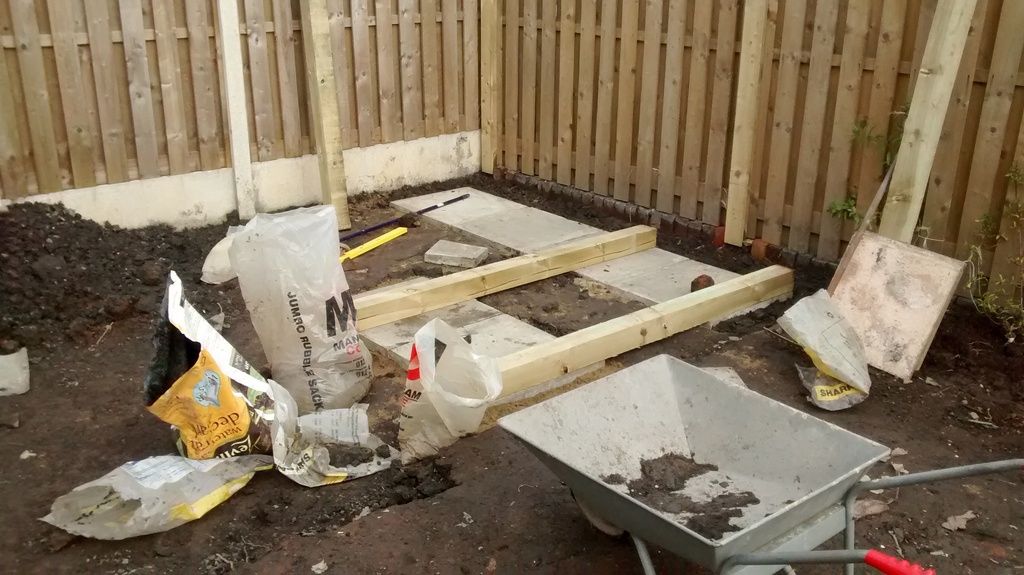
bearnecessitiesFull MemberPosted 8 years agoRight, how about this?
Dig down a bit more, put these flags onto a full mortar bed and lay the posts loose on the top – that’ll be fine won’t it?
(I’m a flag short to distribute posts evenly 🙂 )
 maccruiskeenFull MemberPosted 8 years ago
(I’m a flag short to distribute posts evenly )
Thats quite a big span to the outer posts – depends on how chucky the shed floor woodwork is – you could maybe cut a couple of the paving stones in half
andylFree MemberPosted 8 years agoYou need to distribute the load centrally on the flags. See the way that one in the front right corner is tipping already? That will get a lot worse as soon as you put the shed on it. Move the outer posts to the centres of the flag stones.
As for the missing flag either cut one in half or improvise with something else.
I would have also moved the flags a bit closer together in the fence post span – ie have the posts over hanging to reduce the unsupported span across the middle of each fence post.
Me thinks you are making this more complicated 😉
senorjFull MemberPosted 8 years agoI would hide of some of the wall you knocked down under there..
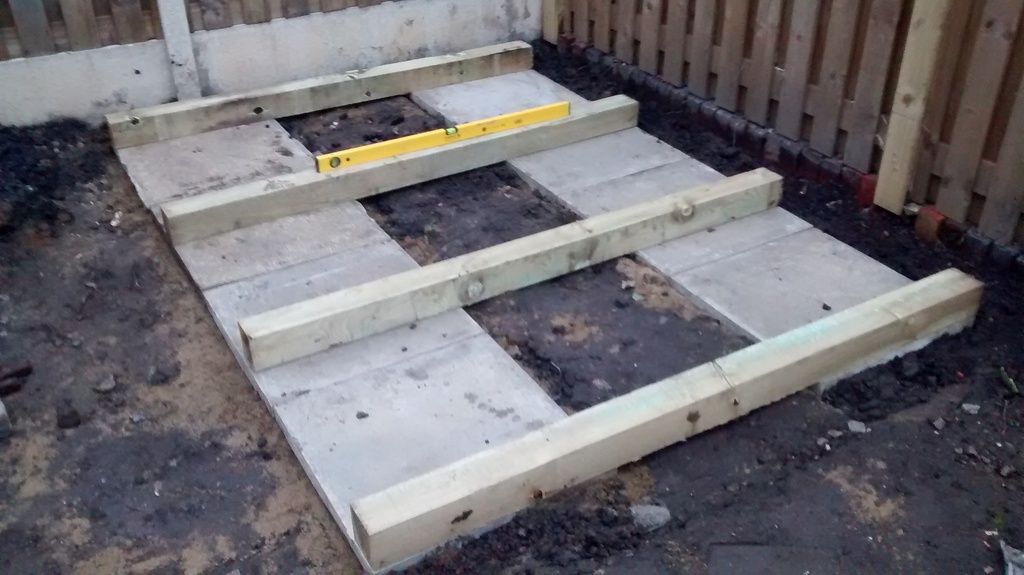
bearnecessitiesFull MemberPosted 8 years agoThat will get a lot worse as soon as you put the shed on it.
I was only setting it out for photo op – It would be eventually on a level base and mortar bed.
You need to distribute the load centrally on the flags.
Fine!
As for the missing flag either cut one in half or improvise with something else.
Stupidly, I just remembered I have an allotment full of the buggers.
flags a bit closer together in the fence post span
Good idea.
Me thinks you are making this more complicated
Mini-digger and full MOT1 base to follow shortly.
Cheers (and you too, G)
EDIT:
I would hide of some of the wall you knocked down under there
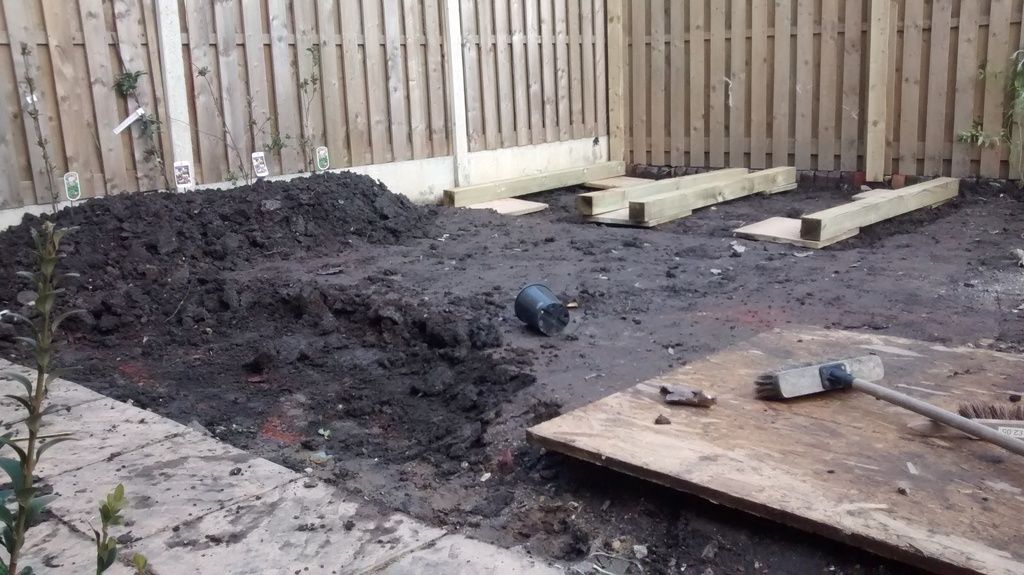
Wall destruction will build a border where I’ve piled up the soil that you can see (when I do knock it down). For now, I’ve just realised the challenge of levelling the garden 😯 – I’m running out of places to shove the soil – even knocked up a deep planter this morning to take some, but that’s already full. So any gaps under shed will be filled with soil!
Anyone want some shit soil?
bearnecessitiesFull MemberPosted 8 years agoRight. (Sorry again) – the ground is quite squidgy.
1.Whacker ground
2.Fill with dry mix & level & whacker down – let it go off.
3.Place slabs down on a tiny bit of sand to get completely level.
4. Timbers
5. ShedAny problems with that idea?
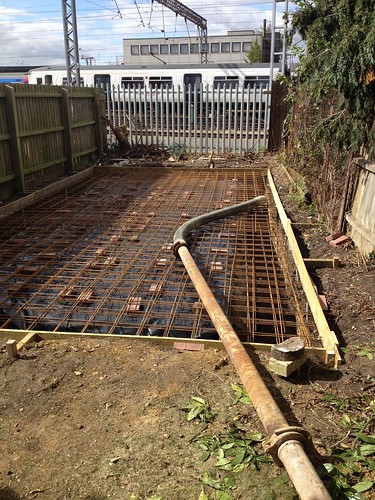
footflapsFull MemberPosted 8 years agoBut this is STW so it needs massive over engineering, therefore I reccokend a 1 meter thick concrete slab on top of piles
Small wooden shed you say?
As a bare minimum, a few tons of rebar and 20m3 of pumped concrete…
[url=https://flic.kr/p/daJjxc]Pumping concrete 60m[/url] by Ben Freeman, on FlickrbearnecessitiesFull MemberPosted 8 years agoNeedy bump 😳
Right. (Sorry again) – the ground is quite squidgy.
1.Whacker ground
2.Fill with dry mix & level & whacker down – let it go off.
3.Place slabs down on a tiny bit of sand to get completely level.
4. Timbers
5. ShedAny problems with that idea?
andypandy85Free MemberPosted 8 years agoJust following this, will be erecting (giggle) a shed later in the year 🙂
slackaliceFree MemberPosted 8 years agoYes BN, that’ll do it. Have faith in yourself!
Personally I wouldn’t bother with step 2. Its a shed.
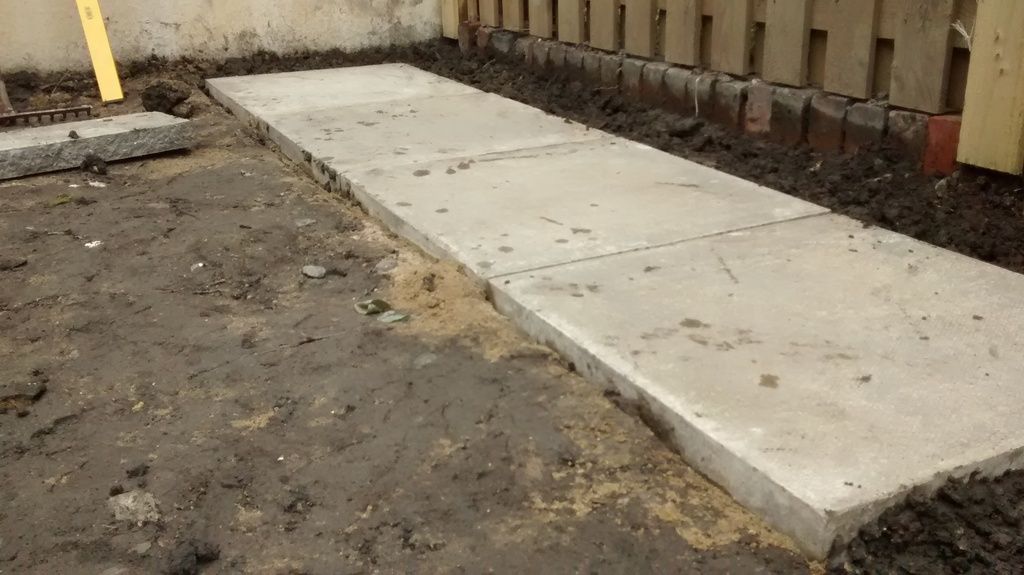
bearnecessitiesFull MemberPosted 8 years agoJust to shoot this thread in the head…
Where I’d dug for shed, ended up sitting proud after levelling the area in front of it.
Got hold of some real slabs and many bags of stones from allotmenters (remarkably well graded hardcore!)
Dug down again & filled about 4″ with stones – compacted, then levelled with sharp sand. (Free again 🙂 )
I’ll report back in 10 years how it held up. Thanks for advice.
slackaliceFree MemberPosted 8 years agoIt needs curtains. Preferably gingham.
Apart from that BN, it’s looking mighty fine and you’ve done a great job 8)
Noice 😀
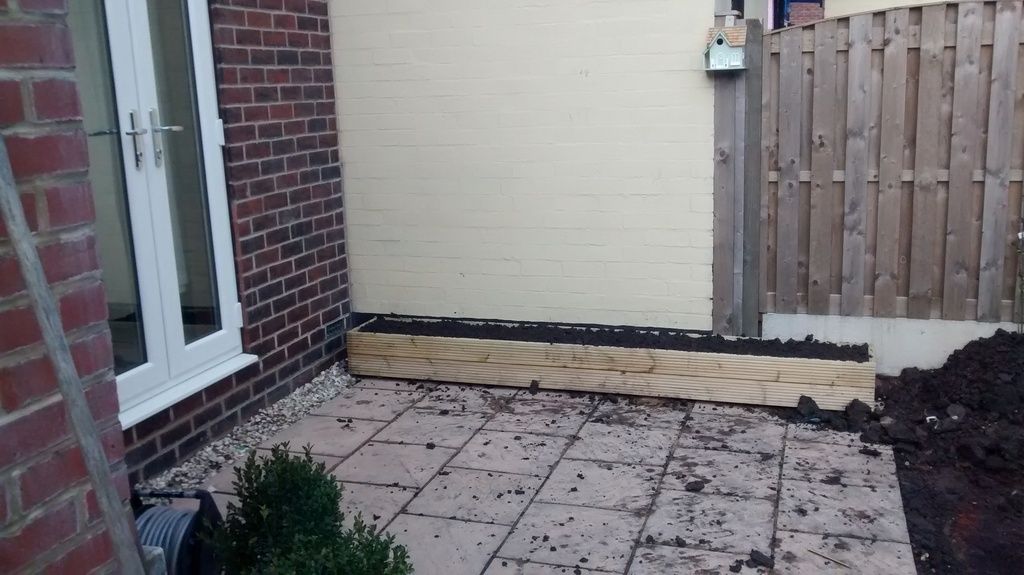
bearnecessitiesFull MemberPosted 8 years agoCheers SA 🙂 Just looked at the pic of that area from when I bought the place. Despite my ridiculous levels of procrastination, still feeling quite pleased!


The topic ‘Shed base idea (sorry)’ is closed to new replies.