- This topic has 30 replies, 16 voices, and was last updated 7 years ago by Bear.
-
Plumbing advice: slow leak in a radiator inlet pipe, DIY bodging planned
-
codybrennanFree MemberPosted 7 years ago
Morning.
WFH for the next couple of weeks at least, with a broken foot (running). And I’m getting annoyed by a leaking radiator inlet pipe in a bedroom. Its been like that for at least a year, but its such a tiny (seemingly) job that plumbers I’ve called just aren’t calling back.
So I’m thinking about doing it myself, while in my slightly incapacitated state.
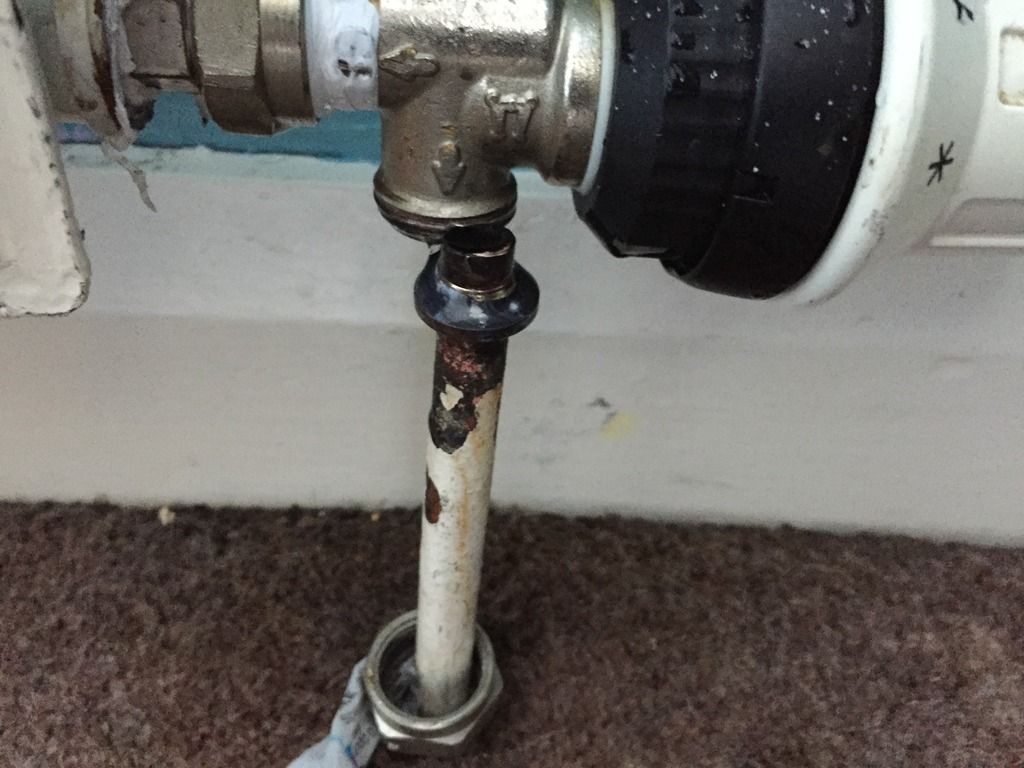
The leak is coming from a slightly bent/distorted pipe connection into the base of the thermostatic valve; at least, I’m surmising this from a)the obvious ‘streaks’ yo can see in the photo, and b)when touching it, I can feel a slight trickle of water coming down.
I’ve got pipe cutters, etc, and these look like 10mm copper, so should be easy to work with. But what I’d like to do is (if possible) use a plastic push-fit type connector into the valve.
I’ve got about 10 cm of existing pipe, so what I think I’d do is:
Cut the pipe maybe 4 inches above floor level
Install a push-fit connector inline
Install a short section of 10mm plastic pipe above, into the valve….does this sound sane?
thanks…… 🙂
 codybrennanFree MemberPosted 7 years ago
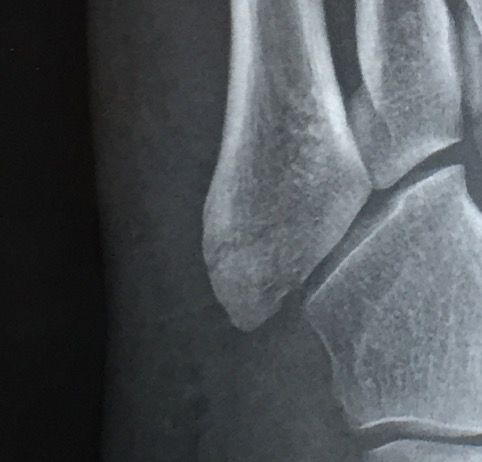
….here’s my avulsion fracture of the 5th metatarsal, if anyone’s interested. Moonboots FTW.
chorltonFree MemberPosted 7 years agoHave you not just tried tightening the coupling up?
Nice fracture picture.jam-boFull MemberPosted 7 years agothat fitting just has a compression olive in.
drain it down, disconnect. clean up the pipe, fit new olive. tighten
or just tighten it up and see if it dries up.
andybradFull MemberPosted 7 years agolooks like a crap job tbh.
Id take the trv off and get a proper one
http://www.screwfix.com/p/pegler-terrier-ii-white-chrome-angled-trv-elbow-10mm/88878
then id put a proper bit of pipe in and join it under the floor with a compression fitting.globaltiFree MemberPosted 7 years agoYes, don’t mess around with plastic. Just do as advised above, wrapping the olive with some PTFE tape to help the seal. Expect the old olive to have been compressed and to have crushed the end of the copper pipe, making it difficult to remove and difficult to get a good seal when you fit a new one. If this is the case you might be able to cut an inch off the end, pull the pipe up from the floor and start afresh.
TBH I would try these remedies in the following order:
1 – Just tighten the coupling a bit, not too much as your spanner will deliver huge torque and crush soft brass and copper.
2 – Holding the copper pipe up into the fitting, undo the collar, drop it down, wrap PTFE tape around the olive then re-make the coupling. Do this with the system cold and some towels around as water will leak out.
3 – If that fails go for draining then cutting off the end as I describe above, or fit a new length of pipe using a compression fitting. Be sure to clean off all that old paint.
dovebikerFull MemberPosted 7 years agoDrain system
Fit new radiator valve(s) with press-fit connectors
Lift floorboard to get underfloor access to pipe
Chop it off and fit new sections of pipe – press fit couplings are very reliable.
May as well do both sides with a nice piece of shiny chrome finish pipe.
Cost of parts less than a plumber’s call-out chargecodybrennanFree MemberPosted 7 years agoCheers all-
I was reluctant to just try tightening, as I can ‘feel’ a crumple in the pipe behind the valve and didn’t want to crush the pipe. But I’ll strip it and have a look.
New pipe might well be the way to go.
mrmonkfingerFree MemberPosted 7 years agoAll the plumbers are busy earning their years money fixing big £££ problems with failed boilers. You might get more luck in March.
I’d do what dovebiker suggests. Although I’d do copper pipe and a solder joint under the boards, with regular compression fittings on the TRV/valve.
bfjaeremFree MembercodybrennanFree MemberPosted 7 years agoThanks bjfaerem.
Got it drained etc, and it turns out there’s more than enough pipe to pull it up a bit; should be good to go.
I’m going to go out shortly (with my designated driver) and pick up a new TRV. I’ll then level off the end of the pipe and make it a nice flush finish, etc.
Before I plunge in…you see the olive a couple of cms below the end of the pipe? They never normally just slide off, so will I need a puller? Or should I just cut the pipe below?
trail_ratFree MemberPosted 7 years agoyou can cut the olive carefully – ive done it with a square nose multi cutter in 2 sides and then a small chisel in the gap …. or use an olive splitter or a puller…. many ways to skin the cat.
globaltiFree MemberPosted 7 years agoI would cut it off and clean the paint off below. The pipe will be crushed beneath the olive. Don’t forget to pick up some PTFE tape.
trail_ratFree MemberPosted 7 years agoif he has enough pipe that is what i would do …. but be wary of chopping it too short. becomes a pain in arse then.
codybrennanFree MemberPosted 7 years agoI’ve re-measured it just there, and if I cut the pipe cleanly just under the olive, I’ll be a bit short of pipe to get a good fit into the valve, even with pulling it up. So what I’m going to do is remove the olive and check for crushing; as you say GT, chances are that it will be compressed.
If it is, I’ll put a new bit of pipe in. If I’m lucky and its not, I’ll bung on the new TRV.
5labFull MemberPosted 7 years agoI’d just tighten the hell out of that as a first step. Worst case you have to chop off the top bit, best case you’ve saved yourself some time/hassle
codybrennanFree MemberPosted 7 years agoIt was already pretty tight, 5lab, and still leaking. I was tempted to slacken it, PTFE tape/sealant, and retighten though.
tjagainFull MemberPosted 7 years agoNever put ptfe / sealant on compression fittings – fix the issue instead. personally Id just chop out a bit of pipe and add in a new bit using compression fittings
andybradFull MemberPosted 7 years agotjagain has the right way of doing it imo.
take 15 mins with a hacksaw and a couple of fittings.
trail_ratFree MemberPosted 7 years agopersonally Id just chop out a bit of pipe and add in a new bit using compression fittings
In my house id just nip the floor board up and replace it at the T under the floor board up to the rad – or at least joint it under the floor.
Doing what you suggest is going to look awful no question about it.
Straight pipes from TRVs to the floor please.
jefflFull MemberPosted 7 years agoOne thing to be aware of. When I had to replace an olive in a TRV I handily found out that the olive was deeper than a standard olive, the standard olive wouldn’t compress enough to fill the void. Ended up purchasing a new TRV in the end so good call on getting one of those.
johndohFree MemberPosted 7 years agoOr you could try to source a TRV with slightly longer arms. We had to replace a leaking TRV recently and it was hell trying to get one with the same throws (I had assumed they would all be the same but alas no).
chorltonFree MemberPosted 7 years agoI had assumed they would all be the same but alas
Ha. No chance of that. It’s plumbing. They use metric and imperial on the same bits.
codybrennanFree MemberPosted 7 years agojohndoh – Member
Or you could try to source a TRV with slightly longer armsHow would the length of my arms help?
codybrennanFree MemberPosted 7 years ago….anyway, thanks for the help, all, really appreciated.
I ran out of time tonight (my driver wasn’t available) and so I’ve just nipped it back up tonight with PTFE tape- I’ve got another willing driver available for tomorrow.
MikeypiesFree MemberPosted 7 years agoI love it when people say lift a floor board like it’s the easiest thing in the world, tongue and groove floor board can be a faff and as for chip board floors they are a right pain to get up and get back down properly
trail_ratFree MemberPosted 7 years agothats why i said in “my house” .
but almost anything including just removing the radiator would be more appealing than sticking an extension on the pipe using compression fittings imo.
andylFree MemberPosted 7 years agoThe join from the radiator tail to the TRV elbow looks on the piss. In fact it all looks a bit crappy and why is the compression nut so much bigger than the pipe with what looks like a crown race below the olive? I am guessing it’s something quite old that’ not done anymore.
I fitted full bore hot water safe service valves to all my rads so I could close the TRV and close the valve to remove a radiator if there were any problems. Looks a bit ugly but works a treat.
BearFree MemberPosted 7 years agoit’s a reducing set usually supplied with the valve so you can use a 15mm valve on 10mm pipework. They are nasty things in my opinion, better to use the correct sized valve but that requires some thought and effort. The pipe does look crooked going into the valve and the most likely cause of the joint failure.
New TRV and short section of 15mm pipe into a reducer to 10mm.No idea why you would want to fit a valve to control a valve? also if they were screwdriver type valves then they are usually not suitable for central heating.

The topic ‘Plumbing advice: slow leak in a radiator inlet pipe, DIY bodging planned’ is closed to new replies.