- This topic has 70 replies, 26 voices, and was last updated 8 years ago by cruzcampo.
-
Painting kitchen cupboards…
-
stumpy01Full MemberPosted 10 years ago
cruzcampo – Member
@ stumpy have you got the same hob hood too? Thats the bit I wasnt sure about painting white, but it looks pretty good.If not the same, it looks bloody similar (from memory). I’ll be digging this thread out this evening when i get home & having a look. Although I won’t be showing it to her indoors until I’ve assessed how much work it will entail as we want to replace the kitchen in the next year or so. It would only be an interim spruce-up so don’t want to do it, if it’s too much work.
sausagefingersFree MemberPosted 10 years agoNot sure how I’ve missed these updates,some really good progress there Steve.
Looks like a nice finish on the paint,I think you’ll get a lot of job satisfaction out of it when completed.Those soft close hinges are a nice touch.
Keep the pics coming,for the cost it’s going to look very good indeedcheers_driveFull MemberPosted 10 years agoWow you’re motoring along. I’ve been doing mine for 4 weeks almost and I’m not even working at the moment. I think I’m paying for using cupboard paint which needs 4 coats, the wood was a lot darker than yours thoughthink I’ll get some soft close thingies too.
cruzcampoFree MemberPosted 10 years agocruzcampo – Member
@ stumpy have you got the same hob hood too? Thats the bit I wasnt sure about painting white, but it looks pretty good.
If not the same, it looks bloody similar (from memory). I’ll be digging this thread out this evening when i get home & having a look. Although I won’t be showing it to her indoors until I’ve assessed how much work it will entail as we want to replace the kitchen in the next year or so. It would only be an interim spruce-up so don’t want to do it, if it’s too much work.I’ve put a few handles on to assess finished look, and I don’t think i’ll want a new kitchen once its had the next coat, its looking pretty nice! 😯 The missus gives it the thumbs up too 😆
cruzcampoFree MemberPosted 10 years agosausagefingers – Member
Not sure how I’ve missed these updates,some really good progress there Steve.
Looks like a nice finish on the paint,I think you’ll get a lot of job satisfaction out of it when completed.Those soft close hinges are a nice touch.
Keep the pics coming,for the cost it’s going to look very good indeedHuge job satisfaction I reckon! Decorating is one of those things I always put off, but i’m quite enjoying this now i’m into it, helped by the fact its raining all the time and the trails now = gravy 😆
That ESP stuff is like liquid gold! 8)
cruzcampoFree MemberPosted 10 years agocheers_drive – Member
Wow you’re motoring along. I’ve been doing mine for 4 weeks almost and I’m not even working at the moment. I think I’m paying for using cupboard paint which needs 4 coats, the wood was a lot darker than yours thoughthink I’ll get some soft close thingies too.The best part of it is not being able to cook on the day i’ve painted so last weekend was cold buffet style, far too much of it! Going to finish it off this Saturday hopefully
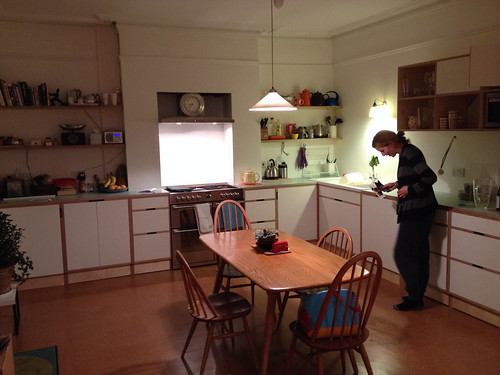
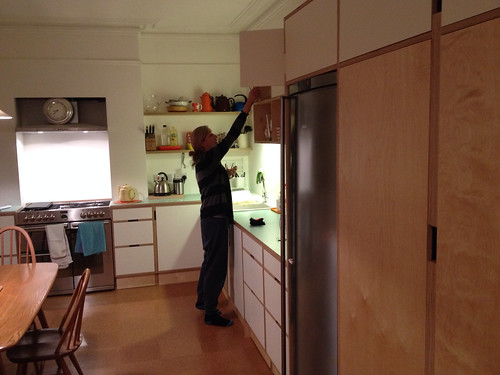
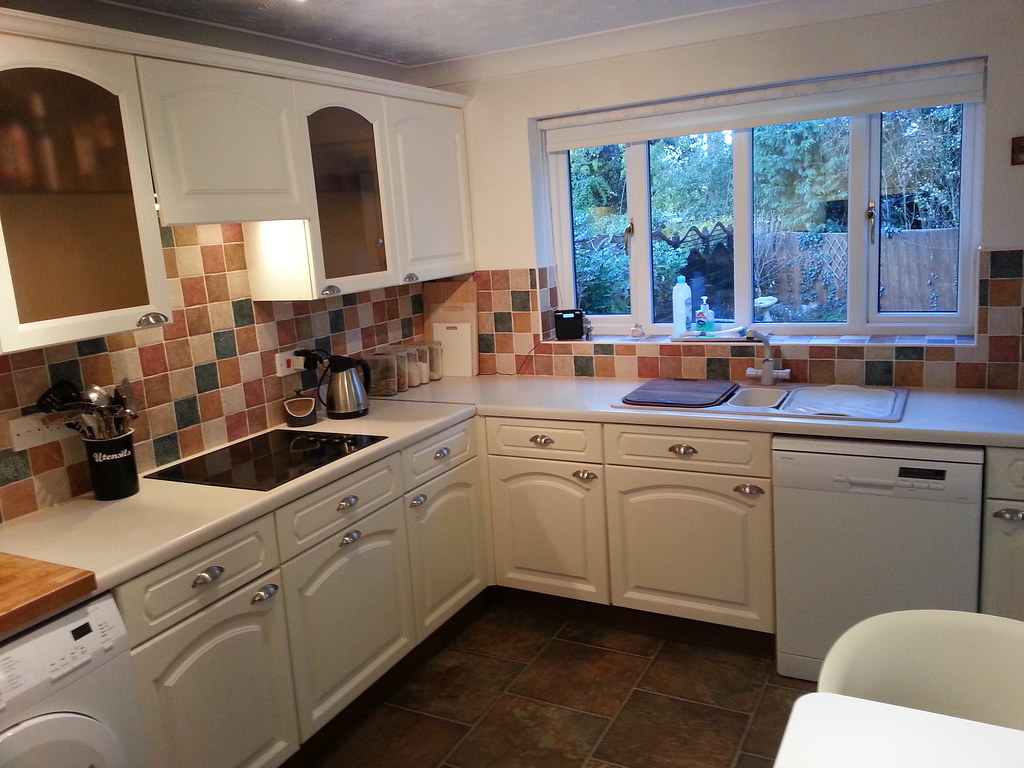
stumpy01Full MemberPosted 10 years agoTook a pic of our kitchen this evening, cruzcampo.
It’s not exactly the same, but it is to all intents and purposes. Same handles. Dunno how old the kitchen is; it was in when we moved in just under 3 yrs ago.
We think that the previous owner has replaced the tiles and worktops to spruce it up a bit…Anyway – here’s a pic:
 cruzcampoFree MemberPosted 10 years ago
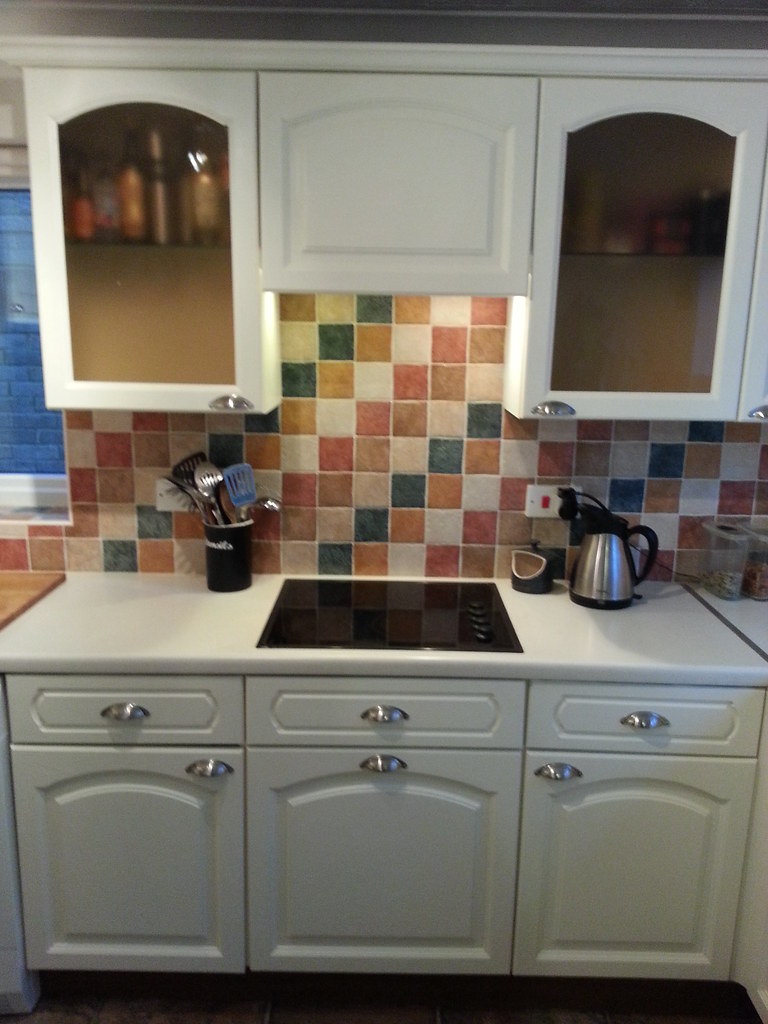
Cheers stumpy01! Looks identical, just different size cupboards/drawers tailored to a different space, same pattern on the hob etc. Reckon that would look supurb with a paintjob. Once I put final pics up this weekend see what you reckon 😆
stumpy01Full MemberPosted 10 years agoCool, pics would be good to see.
One difference I have noticed that could be a bit of a ball-ache is that the plinth above our cupboards has a square cut detail in it, almost like castellation around the whole thing. That might be a pain to get painted smoothly. I wonder how much it would cost to replace it with a less twiddly version like you have?
cruzcampoFree MemberPosted 10 years agoThe farrow eggshell is really nice to work with and applied thinly on that top run shouldn’t pose a problem. I’ve got a detailed spindle area that I didn’t think would paint well, but looks fantastic.
thomsonru84Full MemberPosted 10 years ago@sausagefingers would the ESP and eggshell take so well on fresh MDF? Got a few ideas for making bespoke storage / display units that i’d want to paint but never had a great finish on fresh MDF without loads of work in the past. Wash with ESP, primer and top coat in eggshell sounds easy.
TooTallFree MemberPosted 10 years agostumpy – it shouldn’t be too expensive.
I was going to ask whether anyone doing / planning this had costed jusr replacing the doors instead? I’ve put a couple of kitchens in to houses I owned over the years and they were both standard carcasses with only the doors and trims differing. Just asking in the interests of ease and cost.
stumpy01Full MemberPosted 10 years agoTooTall – Member
stumpy – it shouldn’t be too expensive.Yeah, I think I will cost up new handles, plinth, cost of paint, rollers etc. over the weekend. Don’t mind spending a bit, but if it’s looking like it’s gonna be too expensive then I’d rather put the cost towards the new kitchen and keep this one as it is for another year or so….
I looked at new doors in our last place but it was a very old kitchen and none of the doors were a standard size. Probably could have been done, but I don’t think it would have been cheap. We moved out before getting round to doing anyhing with it.
ianpvFree MemberPosted 10 years agoWe’ve got painted & bare ply in our kitchen – the paint is F&B James White, and it is surprisingly resilient to kids’ jammy fingers etc. which I was worried about, especially as we’ve got no handles…
just need to do the wall tiles, skirting, sort out the light fixtures under the shelves and box in the extractor and then it’ll be done – and I can move on to the rest of the house 🙁 . It’s taking forever – house projects with two toddlers seem to go slow, and this place was/is a state. we had no kitchen at all from July-early oct!
sausagefingersFree MemberPosted 10 years ago@ thomsonru84 – I’ve never used ESP on bare MDF.It’s quite expensive stuff and with the MDF being so porous it would just eat it up.
You can just use an acrylic primer which I’ve never had any problems with in the past or you could try a sanding sealer.Both will need a good sanding down before the eggshell goes on but will give you a good finish.
Obviously it’s all down to how you apply the paint,if you just larrup it on with a brush then you’re going to struggle.Get a couple of mini rollers,just use a brush for cutting in and take your time and you should be fine.Should be .. 😀cruzcampoFree MemberPosted 10 years agoWe’ve got painted & bare ply in our kitchen – the paint is F&B James White, and it is surprisingly resilient to kids’ jammy fingers etc. which I was worried about, especially as we’ve got no handles…
james white was the other colour I was considering, I think it mentioned there is a slight green hue in it, so great for spaces leading to gardens etc. Looks a great colour in your kitchen so far! Is that a pre packed kitchen or all hand made then?
cheers_driveFull MemberPosted 10 years agoI won’t be finished the kitchen until mid next week but the utility is done. It doesn’t show on the photo but the woodgrain shows through really nicely.
Untitled by
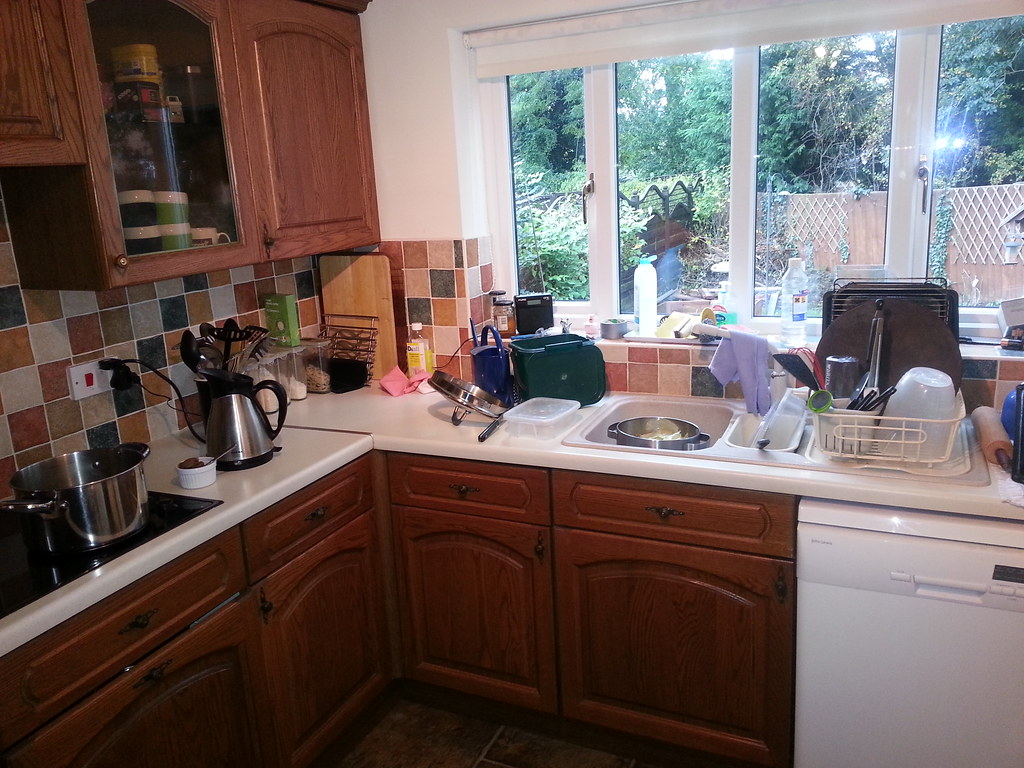
Untitled by Cheers Drive, on FlickrandylFree MemberPosted 10 years agoAll these people painting routed doors white makes me wonder if my kitchen in the flat is back in fashion:

note: duct now replaced with an aluminium, and glass shelves in place and tiles up to the extractor before I rented it.
Kitchen was a horrible lay out when I moved in with a cheap oven and hob and horrible worktops and stained sink. It’s amazing how much nicer you can make it look though on a budget.
I took all the cupboards down an base units out and moved them around, put the oven the other side instead of next to the door, fitted a 1 1/2 bowl sink and fitted new worktops in a U shape (did the joints properly – my first time) and made all the shelving out of cheap plain white doors I picked up from B&Q for 50p each and glass shelves from ikea.
Very satisfying to do it for a fraction of the cost of a new kitchen.
cheers_driveFull MemberPosted 10 years agoNot back in fashion just a lot of people who have good quality kitchens that are really dated so are painting them to update them a bit.
cruzcampoFree MemberPosted 10 years agoI won’t be finished the kitchen until mid next week but the utility is done. It doesn’t show on the photo but the woodgrain shows through really nicely.
what an improvement! I think theres a mass of STW’ers with pine retro handled kitchens 😆 Great handles you’ve chose too. What cupboard paint is that then?
Is that frog tape youve used too on the edge of wall? I’ve got the yellow stuff and its 100% paint proof claim has held true, compared to masking tape not a drop has got through.
cheers_driveFull MemberPosted 10 years agoCheers. It’s Crown champagne cupboard paint, the kitchen and utility will need over 5 time by the time I’m finished. Handles off of eBay. Total cost with paint, handles, and soft closes will be £150.
It is frog tape, I normally don’t mask when painting walls but needed to hear especially as some joins are between panels I don’t want to paint. I’ve used normal masking tape in some places and the frog stuff does appear better, so it should at the price!cruzcampoFree MemberPosted 10 years agoFinal coat tis done! Left to do spray the cooker handles silver, push the washer back, replace the gold tap with chrome.
Before
After
stumpy01Full MemberPosted 10 years agoNo way! Looks great!
Another thing to add to the to-do list….!
Cheers for the update pic.
cruzcampoFree MemberPosted 10 years agoThanks Stumpy 🙂
Any DIY plumbers on here?
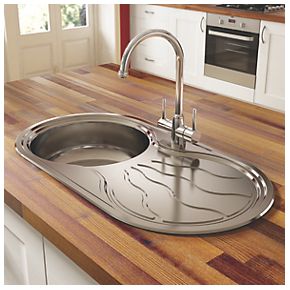
Want to fit this
http://www.screwfix.com/p/swirl-fresco-mono-mixer-kitchen-tap-chrome/21923?_requestid=336419
To replace this knackered old leaking mixerWhat tools would I need?
alibongo001Full MemberPosted 10 years agoThe easy way to do this is to get some flexible fittings and then use these to couple up the new taps with a short length of pipe in the bottom.
You can also get flexible fittings with stop valves on which can be helpful in emergency or when changing things around.
I used some speedfit ones and they have been fine.
(The other alternative is to use copper pipe all the way to the tap, this can be a little tricky as the pipe needs to be exactly right!)
Tools required pipe cutter (hacksaw) wire wool for cleaning edge and flexible fittings x2
cheers_driveFull MemberPosted 10 years agoThat looks brilliant Cruzcampo.
I finally finished mine today, very happy with the results but I have reservations about the toughness of the finish after damaging a couple of doors fitting them. It takes 2 weeks to fully harden so fingers crossed.
Oh and after praising Frog tape it ripped half the paint of the wall when removing it. Luckily the previous owners had left the tin of paint.
Before:
Untitled by Cheers Drive, on Flickr
After
Untitled by Cheers Drive, on Flickr
Untitled by Cheers Drive, on FlickrClose up of finish
Untitled by Cheers Drive, on FlickrcruzcampoFree MemberPosted 10 years ago@alibongo cheers for tap advice, will give it a bash 8)
@cheers drive, cracking transformation!
frog tape worked a treat here, particularly on the kick board, left a perfect clean line on the wooden floor where the two met. Although on the walls the roller went over end of the frog tape so had to touch up with emulsion LOL!
Sausagefingers was saying no need for lacquer with my F+B paint, but it does feel soft, although its only been a few days, so i’ll give it 2 weeks like yours and then debate whether to use some Morrels lacquer ❓
philyd1979Free MemberPosted 10 years agoHi guys.
Great looking cupboards I’m looking to do the same myself. Cheers drive those cupboards look fantastic I was looking for the same colour on the same wood. It will be my first time tackling such a thing.
Could you advise me what I need, what is best and what time time frame for everything.
Thank u 🙂
cruzcampoFree MemberPosted 9 years agoThought i’d tag this onto my Kitchen makeover thread, as this room adjoins at a right angle. A year later finally got round to the dining room. Bad weather, the only time I attempt DIY 😆
Skirting boards need doing and got a couple of pics to hang yet just deciding which walls.
teegs42Free MemberPosted 8 years agoSorry for opening up an old thread, but just wanted some advice from someone who’s used esp. I’m planning on redoing my kitchen cupboards which is all melamine. Before I did this and potentially made a mess of the whole thing, I decided to try esp out on a cheap shoe rack I had (also melamine). I followed the instructions for the esp, and painted it with farrow and ball eggshell. The first coat went on ok at first, but after a minute or so, it looked like it was pulling away from the melamine. It was sort of creating little beads of paint rather than a smooth coat. I let it dry, and applied another coat, the second one went on much better. Now however, after a week, you can still scrape the paint off with your finger nail. It’s like the paint is soft still. Any ideas what I’ve done wrong? Any help would be appreciated as I’d like to start with my kitchen, but I’m worried that it will all scratch off as soon as I’m done.
cruzcampoFree MemberPosted 8 years agoEvening Teegs, could it be you’ve got a bad batch of Farrow and Ball? I had to return my first tin to Homebase due to gloop at bottom of tin which wouldn’t mix and colour didn’t dry right. Second tin Homebase put in the mixing machine to shake all up as a further safeguard, and it was fine when opening.
My ESP application, I gave the cabinets a quick clean, with cloth and sugar soap, mainly to break into any surface grease etc, then literally brushed the ESP on after giving it a good shake, see page 1 of this thread for pics.
After the ESP had dried cracked on with the actual painting. I found the rollers with F+B left little bubbles in places, so preffered to paint it all by brush. Some large areas I used roller to cover then brushed out.
A year on the kitchen cupboards are still looking great no chips or marks.


The topic ‘Painting kitchen cupboards…’ is closed to new replies.