- This topic has 37 replies, 18 voices, and was last updated 15 years ago by coffeeking.
-
Lets see them!!
-
zokesFree MemberPosted 15 years ago
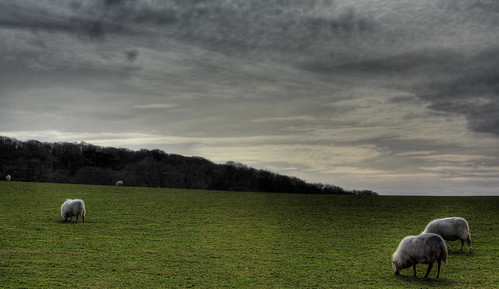
I was messing about on the internet the other day and came across a phenomenon known as HDR imaging. Well, after a bit of reading, I decided to give it a go myself, and am quite pleased with some of the results.

I’m sure there are plenty of folks on here who also have dabbled. So, in true STW style, post some images to let me see if I can improve….
GNARGNARFree MemberPosted 15 years agoCan I just say I hate them? Not those specific shots, although I’m not mad about them either, but “hdr” in general. Thank you.
chvckFree MemberPosted 15 years agoI likes the top one, but then I have a strange affection for clouds
zokesFree MemberPosted 15 years agoGNARGNAR – Member
Can I just say I hate them? Thank you.
You can, and you did. Amazing the things you can do on forums these days….
zokesFree MemberPosted 15 years agoI like the 2nd one Rich. Is that the Dales? Hadn’t really thought of doing B&W ones yet. Must experiment on my mountain this evening….
richpipsFree MemberPosted 15 years ago>Is that the Dales?
Peak District, Mill Hill L, edge of Kinder plateau R.
stumpy01Full MemberPosted 15 years agoSometimes they look OK and sometimes they look really, really artificial. I think you have to be careful on your subject choice and then use the technique subtley.
I keep meaning to get round to trying it.
PeterPoddyFree MemberPosted 15 years agoI’m not a fan of the ‘false’ looking ones like the OP or the dales shot either.
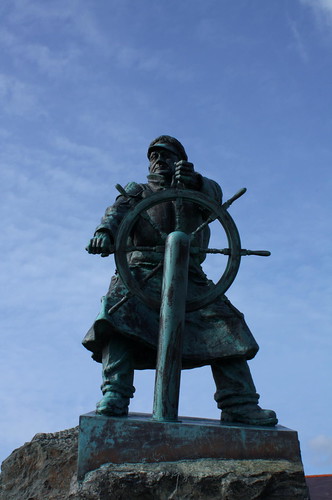
zokesFree MemberPosted 15 years agoWell, they were my first attempt. I guess my aim with the sheep and statue were to make them seem as saturated as possible to ‘posterise’ them. Some of the others on there I attempted more subtlety, but was still trying to extract more from the sky. I guess if I combine a grad filter with the technique, i’ll get good skies without having to overegg the rest of the frame. Alternatively, I could just learn how to use GIMP a bit better…
GNARGNARFree MemberPosted 15 years agoSorry Zokes, I didnt realise that you’d actually done those yourself. I have a pretty strong aversion to “HDR” because the net seems awash with totally hideous and totally pointless examples of the technique, which is nothing bloody new at any rate. The best examples are the ones where it’s as little as possible.
I give you…..
Thousands more where they came from.
BigDummyFree MemberPosted 15 years agoHow is this done? Did you know there were dead people’s souls in shot, or is it just luck whether you catch any?
theflatboyFree MemberPosted 15 years agobigD, you basically take a load of identically framed shots with different exposure settings to capture different levels of detail where normally you’d sacrifice detail on one thing to get the light right on something else. the shots are then all combined digitally on photoshop or similar.
jojoA1Free MemberPosted 15 years agoWhat is HDR then, and what does it change about a picture? I mean I can see that some of them have been ‘tweaked’ but what has been done? (In Layman’s terms please, eg, “you make the bright bits brighter” or you “take away all the red” etc.) Thanks 🙂
DezBFree MemberPosted 15 years agoWiki: techniques that allows a greater dynamic range of luminances between light and dark areas of a scene than normal digital imaging techniques. The intention of HDRI is to accurately represent the wide range of intensity levels found in real scenes ranging from direct sunlight to shadows.
Me: Trying to make a boring photo look interesting 🙂
richpipsFree MemberPosted 15 years agoHDR, and image with a high dynamic range, is usually a combination of 3 or more shots taken at different exposures.
Eg 1 @ EV 0, 1@ EV -2, 1 @ EV +2.
Combine the three and you can pick out the light and dark bits that you want.
coffeekingFree MemberPosted 15 years agoSome of you are getting some really pronounced effects there, what software are you using?
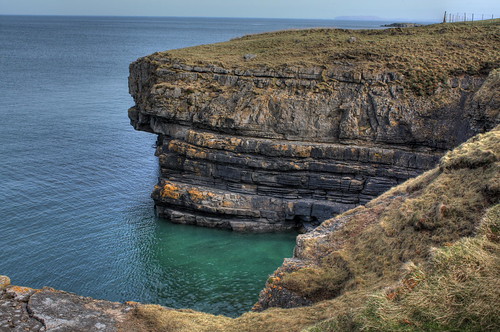
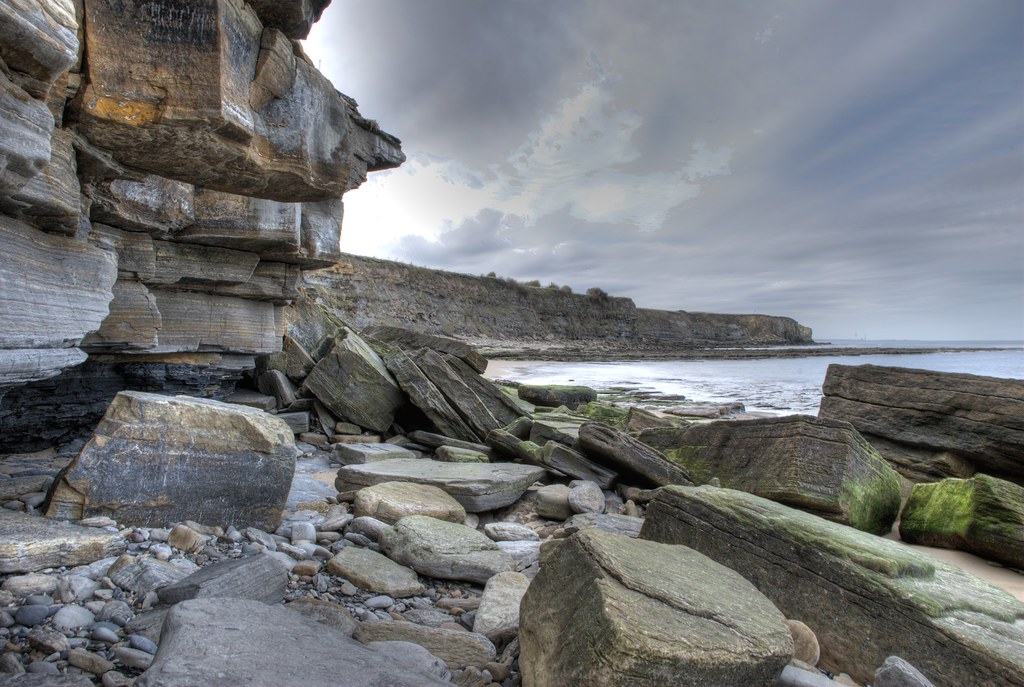
jojo – essentially you use multiple exposures to capture detail that would have been lost. Cameras can only recover a certain range of brightness values in each colour. Using tone mappign or HDR trickery you can take the bit of a dark photo thats under-exposed and map in the same bit thats brighter from an over-exposed image. This means you can get detail in your clouds while also having detail in your shadows. Makes a somewhat unrealistic image, or possibly a hyper-realistic image. Some can look wonderful, some can look aweful. In the photo below the dark shadowed bit was completely black in one image, and in the image I took where you coudl see that detail the sky and sand were whited out.
This is the only one I’ve ever done that turned out as I half expected. It got used on an online publication too lol.
coffeekingFree MemberPosted 15 years agoI’ve been trying photomatix but I tend to get a really grainy result for some reason, cant figure out why for the life of me. Plus it totally screws up the white balance from my canon raw images and everything goes green no matter what settings I use on them.
WhatWouldJesusRideFree MemberPosted 15 years agoSomebody should have had a word with the maniac responsible for the ‘blue glowing windmill shed-type-thing during the second coming’ photo.
Need to go and rest my eyes now.
Gaahhh….
richpipsFree MemberPosted 15 years agoOr if you can shoot in RAW format, you need just one image.
Yes, you can do a faux HDR using one image, but it will not have the dynamic range of a HDR image created using 3 shots with different exposures.
coffeekingFree MemberPosted 15 years agoI quite like that image, in a graphic sort of way, rather than as an accurate representation of life. I think it sort of reflects feeling as well as vision. In an arty mumbojumbo sense.
tomzo – shooting in raw still doesnt allow true HDR – all it does is increase the bit-per-pixel rating and give actual brightnesses, rather than the reduced gamut of a jpeg? If its under-exposed in the raw you still need a second image with a different exposure.
coffeekingFree MemberPosted 15 years agoI gave up trying to get the colours right on this one and decided it looked better in greyscale:
mogrimFull MemberPosted 15 years agoI quite like the obviously “fake” HDR images – they look almost airbrushed, a bit like the comic style used in 300.
That said, I could certainly live without ever seeing another purple sky + empty wooden jetty photo.
theflatboyFree MemberPosted 15 years agonot quite changing the topic, but I can’t work this out – is this hdr? Anybody any clues?
looks to me like silicon and a lot of makeup!
skiFree MemberPosted 15 years agocoffeeking, where was that taken? Is that an offshore windfarm in the distance?
Nice photograph btw, not an easy shot to expose for normally.
I really like the sky in the windmil picture, just a shame the windmill looks as if it has been superimposed onto the roof of the building 😉
coffeekingFree MemberPosted 15 years agoski – cheers, it’s Formby beach, and yup in the background is the North Hoyle windfarm. URL on flickr for larger image shows up slight focus issues and movement due to two exposures.
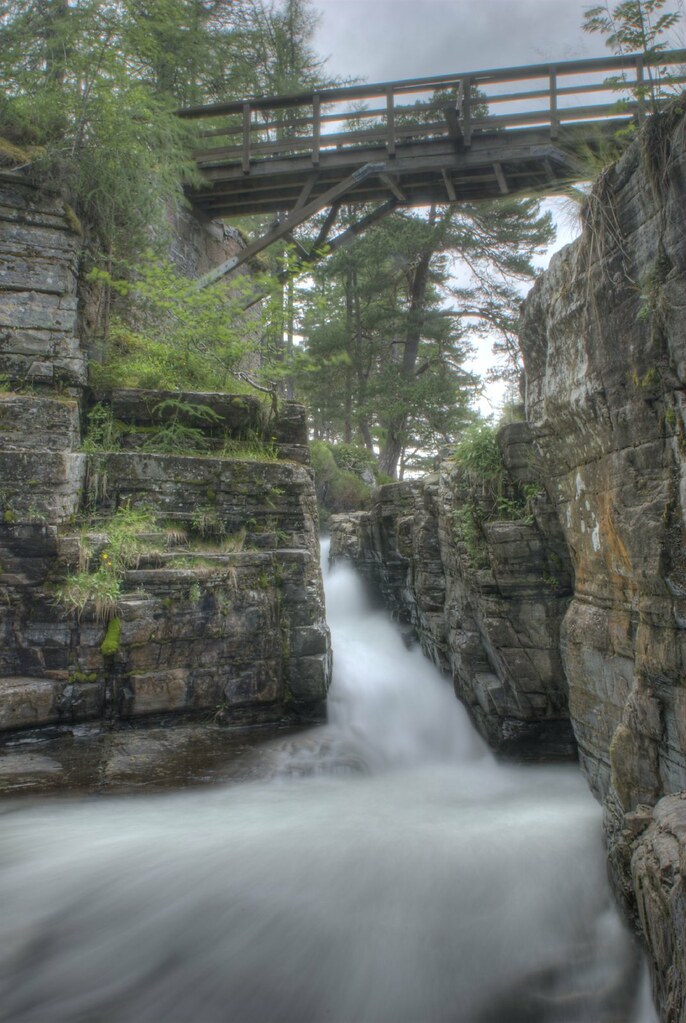
P20Full MemberPosted 15 years agoI’ve played about with a few HDRs. Not entirely sure i’ve got it right, but here you go 😀
The sky is wrong in the 2nd one, but it could be copied out 🙂
The 1st one uses 9 shots!!!
coffeekingFree MemberPosted 15 years agoP20 I like the first shot, its really hard to do HDR on images with moving items (trees etc).
MilkieFree MemberPosted 15 years agoHDR is sooo passe.. :roll
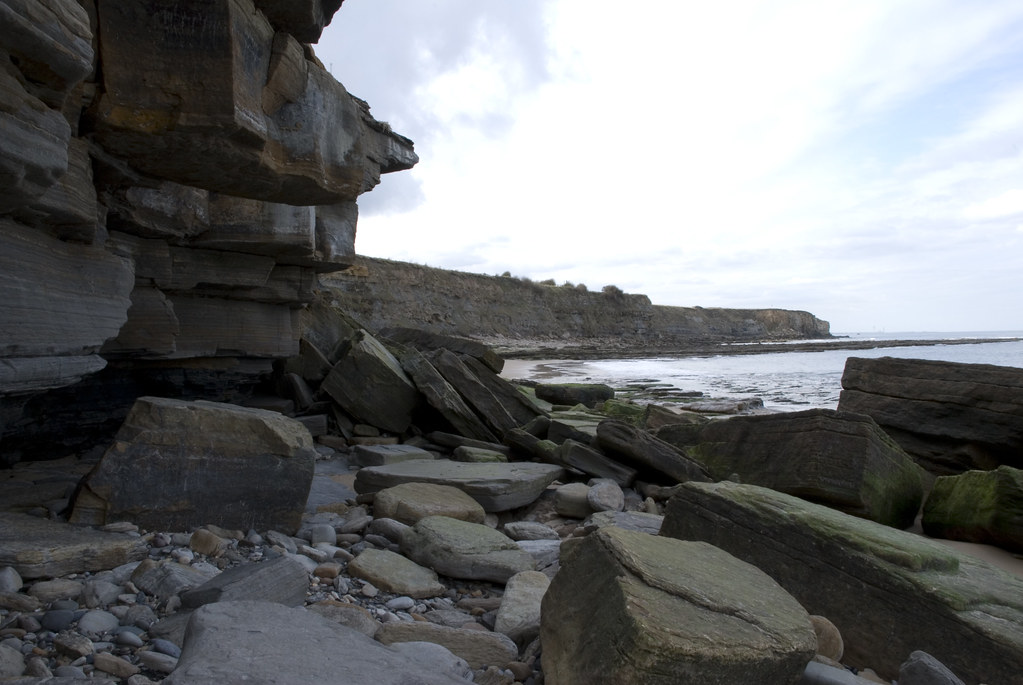
Personally I love em, but not the over done ones.P20Full MemberPosted 15 years agoMy understanding on how to shoot the photos, were to point you camera at the darkest and lightest areas whilst on apeture setting. Then take a photo for every two shutter stops, hence the waterfall took 9 shots. This video probably explains it better and they only use 3 photos, the two extremes and a middle range. My main use is to highlight the whole subject, bringing the darker areas out. The 1st one is the normal photo, single shot.
The HDR as posted above to compare against:
I personally like the rocks better in the hdr, but the sky needs work, and i haven’t been bothered 🙄
coffeekingFree MemberPosted 15 years agoNot entirely sure HDR can be any more passe than the use of a camera can be – really it is just the use of all available information rather than binning some due to inadequacies in the media.
lol I love this from one of the tutorials:
Friends don’t let friends do HDR on Drugs
Above, you can see the options I selected. It’s way overdone. The key setting is that “Light Smoothing” with the 5 radio buttons underneath it. Don’t choose anything to below the fourth bubble. Please! For the sake of humanity


The topic ‘Lets see them!!’ is closed to new replies.