- This topic has 110 replies, 16 voices, and was last updated 10 years ago by kayak23.
-
Green Timber structures- Any experts in the house?
-
i_like_foodFull MemberPosted 11 years ago
I know nothing about wood, but am loving this thread 🙂 can’t wait to see the finished product..
slackaliceFree MemberPosted 11 years agoHey Kayak, those joints are looking very tidy. I’m not convince about the angled pegs though, sorry. I see your thinking with the half-lap scarf’s, however, you’re asking the pegs to do a lot in terms of both longitudinal and lateral strength – if you get my drift? The tenon would take care of resisting the lateral movement, leaving the pegs to work solely on resisting longitudinal separation.
May I ask? Do you have a skill saw / circular saw? The joints I detailed would be much easier to cut with one. Preferably a 9″ saw that will give you a 75mm depth of cut, so by turning the tenon stock by 180 degrees, the tenons can be fleshed out in very short time, 1st cut set at 50mm for one side of 45 deg shoulder, turn stock over 90 deg and with max depth, rip cut full length of tenon on both sides of cheeks. Turn stock 90 deg and reset to 50mm for the other shoulder cut and then turn again with max cut along cheeks. Finish cheek cuts with hand saw and job done.
The mortice joint could be done in the same way, except with a series of longitudinal cuts and remove the slithers with a broad chisel and then use a chisel to remove the final bit at the end to your scribe line, unless of course if you have access to a chain morticer, in which case it will be even quicker as you’ll be able to take the flesh out up to the 45 degree shoulder.
Looking good!!
kayak23Full MemberPosted 11 years agoI know what you’re getting at slackalice. The tenons or in fact any part of the joint on the square stock was not a problem at all.
When you come to the logs however, it is incredibly difficult to take a reference from anything.
Every one is a different size, diameter, length, plus obviously they are all a few metres long.
We found trying to cut two parallel 45 degree shoulders, square to the tenon/mortise and a further one and then marry up all six was……. Not really happening. You can’t just invent what is 45 degrees either as there is no reference. You have to try to sight an imaginary line running through the two components and imagine a plane to estimate 45 degrees off.We then found digging the waste out of the mortise was very hard as our chisels are way too short. We do have a chain mortiser but can’t mount the logs on it as they would foul on surrounding machinery. Plus the mortise needs that 45 degree shoulder in it anyway, not vertical.
All in all, for the amount and variation of what we’re dealing with, and the time constraints, we thought we might get away with a halving, albeit with 45 degree shoulders. I’ll maybe have more of a think about the separation thing but I’m thinking angled pegs will certainly help……. Maybe 🙂
bajsyckelFull MemberPosted 11 years agoNice updates and I think it will look good once it comes together. I’m not 100% convinced by how the joints will bear up over time, or of the angled pegs value, but know exactly what you mean about sometimes being limited by space, tools and the material and having to get something that works done as best you can with what you have and it looks like a good job with something of a learning curve to it.
It’s all progressing well though – it’s really a shame you don’t have more full lengths to work with (it’s not like they are high value so shame they couldn’t have offered more) as it would have been a good/fun exercise to work through a series of jointing techniques as a sort of experimental/ “educational” process.
Still looking forward to the next update…
kayak23Full MemberPosted 11 years agoThinking out loud here….
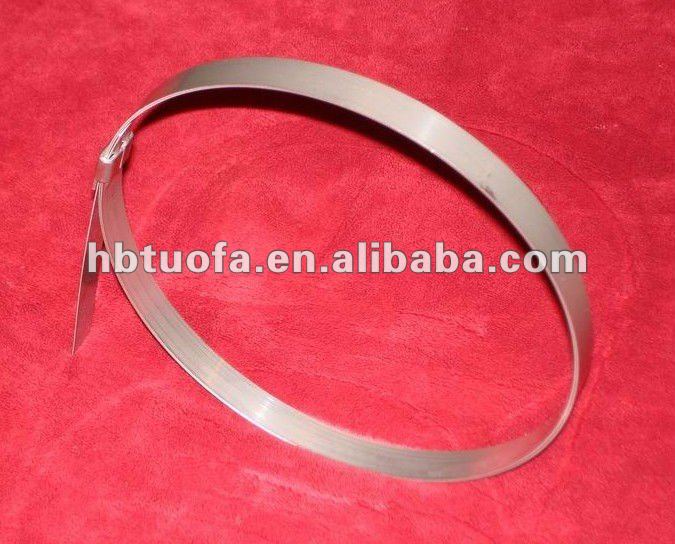
You know how on big packs of plywood etc and packing of large items you get those tensioned steel bands?
Compromise?….. Could work/help…
scotiaFree MemberPosted 11 years agokayak – loving this thread – looks great and the idea is unique! I have no help im afraid with regards to joint strength..infact i have a question for your cabinet making skills.. can i be cheeky and ask you some advice?
email should be in profile..
slackaliceFree MemberPosted 11 years agoMorning kayak! With irregular shaped beam stock, the datum’s or reference’s can be determined by snapping a chalk line along the length of the stock on each quadrant. Whilst not exactly 90deg from each other, they will aid your efforts. Alternatively, you can square off the section of stock that will receive the joint and as it looks like its the ash tentacles that are proving difficult to mark out, these are the tenons, so squaring off need only be done to the upper and lower surfaces.
It’s much easier to spout forth from here – 100 miles away – so please forgive me if you’ve already tried the above!
Likewise, trying to explain how to cut the mortice with the chain morticer and still achieve the 45deg angle is easier for me to show, rather than explain in type written words, so sorry for my deficiency there!
I would not use the bands, nice idea however, they kinda take away from the whole natural wood feel that this has and will have. Instead, I think the joints will be fine so long as you stagger them. It’s only the top beams that will be really vulnerable, as the lower layers will be supported by the layer above, no? In which case, use the mortise and tenon joints for the three top beams. You also have the spacer battens, so is it possible to use these as some form of structural rigidity? I mentioned in one of my previous posts that these could be 60x60mm and rebated into the beams and located with pegs themselves. It maybe that with some positioning, they can also provide a measure of support after the joints?
I’m loving the look of the tentacles you’ve fashioned already, the end result will look unique and stunning and I’m really quite envious!!
Have a great day.
wwaswasFull MemberPosted 11 years agoYou could run some of this through with washers to spread the load and then countersink and put wooden plugs on the surface so they just looked like the pegs.
kayak23Full MemberPosted 11 years agoI would not use the bands, nice idea however, they kinda take away from the whole natural wood feel that this has and will have. Instead, I think the joints will be fine so long as you stagger them
I know what you mean, but actually the student was talking about using some sort of banding here and there as a decorative ‘addition’. A bit like a tribal armband sort of thing… Not sure, anyway, if we see that it’s a problem then I guess it’s an option.
Maybe we’ll try another Mortise and Tenon joint soon then now we’ve got a bit more confident…
This is something I did many moons ago at University where I used stainless steel wire and bound the foot joint of a pair of tables to add decoration but also to add strength and rigiity…
slackaliceFree MemberPosted 11 years agoI do like the use of stainless steel with natural wood! Those tables look gorgeous!
From aesthetic view, I see the value of the bands.
I was involved in a frame a few years ago where we used 3/4″ dia s/s pins instead of oak pegs in some of the more visible joints (I also remember there being a Grand Designs where a similar approach was used too). The effect was lovely, though could be a bit much if they were used in all the joints!
kayak23Full MemberPosted 11 years agoChopping out the waste on a mortise/bridle component.
Little bandsaw jig we made. The component rests on the ‘cradle’ so that in theory we have some sort of square, mitred shoulder cut with the inside of the bridle as the reference ‘plane’…
Pegging a finished mortise and tenon joint.
Slackalice, don’t know if you can see but the joint has it’s shoulders on opposite mitres. We thought about it and thought the shoulder at the furthest end of the post would resist the tentacle dropping, the the opposite shoulder would resist it lifting in its cantilever…
The nearest face there ends up as the top face.
Blending the joint in on the bandsaw.
Getting there..
The mortise and tenon joint takes significantly longer to do with significantly more head scratching… 😀
beaker2135Full MemberPosted 11 years agoI’m loving the look of the tentacles you’ve fashioned already, the end result will look unique and stunning and I’m really quite envious!!
Here, here, wish I had a ‘proper’ job still. I really miss the thrill of turning something 2D into a 3D object for the first time. It’s is immensely satisfying
Thanks again to you all for such an intriguing threadkayak23Full MemberPosted 11 years agoHear, hear, wish I had a ‘proper’ job still. I really miss the thrill of turning something 2D into a 3D object for the first time. It’s is immensely satisfying
If only the pay was as satisfying for ‘manual’ work as it is for office-based… 🙄
But yeah, my job is fun sometimes… 🙂
slackaliceFree MemberPosted 11 years agoThis is what it’s all about! Great thinking about the reverse / opposite mitred shoulders – that’s border line genius! I’m gonna remember that one!
Your 2″ butt mortice chisel looks like one of my framing chisels and certainly man enough for the task. Out of interest, what angle do you sharpen it to? I’ve found around 35deg works well for heavy work like that. Along with a big heavy mallet!
The bandsaw jig looks like an inspired bit of work too and probably reduces the number of people needed to lift and hold and guide the beam stock through.
Your joints are looking very tidy, how much draw are you finding works well for these?
Nice work there kayak, looks like you’re getting the measure of the job in every sense.
scotiaFree MemberPosted 11 years agokayak or slackalice – would it be ok to contact you with regards to a project im trying to draw up? Just to get your opinion – wont take long.
i see SA has an email in profile – can i send one out ok?
cheers!
slackaliceFree MemberPosted 11 years agoHi scotia, no probs, mail away. I’m in all day today, waiting for Parcelfarce to collect a return to CRC…
The “..it won’t take long…” always makes me chuckle tho!! 😉
kayak23Full MemberPosted 11 years agoHi Scotia, yes of course contact me.
I couldn’t find your email in your profile though unless I’m missing it..scotiaFree MemberPosted 11 years agook i’ll send a mail then 🙂 yeah i prob shouldnt have put the shouldnt take long bit in.. 😉
ok so i cant see my email either! its andrew*dot*gunstone*at*gmail*dot*com
AlexSimonFull MemberPosted 11 years agoThought I’d look in on this to see if it’s progressed. Any news?
kayak23Full MemberPosted 11 years agoYeah it’s Easter break so the students are not here.
The student doing the bench has also had to catch up on some curriculum obligations too so there has been a bit of a break.
I’m not complaining actually as It’s hard work! 😀Back to it after Easter though. We have some catching up to do…
AlexSimonFull MemberPosted 11 years agoGood stuff – looking forward to seeing it in it’s proper home.
kayak23Full MemberPosted 11 years ago*Update*
Back after the Easter break to something of a disaster to be honest.
Virtually all of the tentacles have now split, some worse than others.
🙁Where this is in big section I guess it won’t matter too much but if this is happening further on down the taper then obviously it presents a problem.
Bit of a nightmare to be honest after all the work we’ve put in.
The tentacles were all outside so have had whatever the Easter weather threw at us, but I guess they were going to go whatever.Releasing tension by cutting bits away like that in an uneven manner such as these twisting tapers must have been the doing of it.
Below is the worst one, which actually started to split weeks ago..
My first thought
was to chuck it all in the skip!!!was to go back to what I was talking about before with the metal bands tensioned around in various places.
It would be a shame as they are not so in keeping with the whole thing but I suspect would be a fairly ok compromise. Can’t see what other options we have at the moment really and a bit gutted and hissed off with the whole thing..
😕kayak23Full MemberPosted 11 years agoThis is what we need, but can’t find anything like it in the UK to hire or buy…
[video]http://www.youtube.com/watch?v=3xKmO78x7sQ[/video]
timberFull MemberPosted 11 years agoOne of the places we sell fencing blanks to uses steel bands, as do a few of the others actually, could be worth a try of local fencing suppliers or mills for a borrow, or at worst may have to take the material to them.
We and quite a few others use fabric straps which probably aren’t of as much use (or clean looking) but suit our requirements.kayak23Full MemberPosted 11 years agoAre these for round packs though? There are loads who do steel strappers for flat-faced items, but can’t find any for round section as per the video above.
slowoldgitFree MemberPosted 11 years agoIt’s been very dry in the cold spell. With the change of weather some of the shrinkage may revert part-way, don’t rush into any action.
Yonks ago I used ‘band-it buckles’ which work on steel straps. A quick google suggests they are still available.
kayak23Full MemberPosted 11 years agoYonks ago I used ‘band-it buckles’
Ah thanks Slowoldgit. They are available, though the tool is £190!!!
If I could hire one it’d be great.I agree with you regarding the weather, but I suppose part of the problem is the timber will continue to expand and contract…Not sure how we get around that. 😕
timberFull MemberPosted 11 years agoMmm, not sure. The bundles of stakes are round, but rather larger curves of 1m dia. minimum, so probably what you mentioned.
In previous job, marquee king poles had steel reinforcement rings top and bottom, installed just like pick-axe heads, slide to fit on taper.
AlexSimonFull MemberPosted 11 years agooh man – that’s a shame.
Hope you find a solution.
Good luck!kayak23Full MemberPosted 11 years agoFirst little try this morning with the stainless steel strapping tool we got. Hopefully this will help, as you can get a fair bit of tension onto it.
The clip ‘heads’ will be sited underneath, and the ends are actualy not sharp as I can run my hands over them pretty roughly.
The student is still working on essential coursework and so we’ve not started into the bench again properly yet.
kayak23Full MemberPosted 11 years agoFixing the clips with the tensioning tool
Closing the clip-ends.
We’re managing to get a pretty good amount of tension onto the bands, and we are then securing them with two screws each so if the wood shrinks the band should stay in position until it expands again..
tonyplymFree MemberPosted 11 years agoCould you apply some additional clamping to close the splits a little before you put the strapping on ? – then release the additional clamping and as the wood recovers it’ll tension the straps a little more.
kayak23Full MemberPosted 11 years agoYeah it’s a good idea. Those bands of three we put together, each successive one makes the previous one a tiny bit looser, but in reality, the wood is incredibly strong and very, very difficult to close the crack up at all!
slackaliceFree MemberPosted 11 years agoHmmm, the wood is going to do what it wants really, especially with the Ash you’re working with. Even when I’ve made masts and spars from straight-grained spruce or fir, they can still split in places, although not to the degree you’ve got there!
I wonder if you treat these splits as you would in any other wood? I.e. drill a small dia hole at the end of each split to prevent them from getting longer and possibly running the full length of a tentacle causing it to tear apart?
In days of yore, splits in spars would be filled with linseed oil putty and then varnished over to prevent/minimise water ingress. From your pics kayak, it doesn’t look like putty would be an option as some of them look to be quite sizeable. However, the modern equivalent would be WEST system epoxy or SP epoxy resins and again, I’m wondering if a resin mix with some micro fibres (or better still, same coloured dust from your sanding operations) and a bit of colloidal silica towards the narrower ends of the splits would help to stabilise them and reduce the potential for them increasing. This does carry a risk that the wood may well start splitting along another part of the grain…
Another alternative if the epoxy approach deems too rigid, would be Sikaflex caulking.
If none of the above appeal, then my other thought at the moment would be for you to apply liberal amounts of a boiled linseed oil and white spirit mix 50:50 to the tentacles as soon as they have been shaped and sanded. This will slow down the drying out process and whilst will not prevent the natural splitting arising from the tension, it is more than likely the splits will not be as violent.
kayak23Full MemberPosted 10 years agoThanks Slackalice. All good ideas. I’ve been looking into the epoxy idea but I think the cost would be astronomical, to fill all of those gaping splits.
I’ve done some very small-scale filling of knot holes etc with pourable resins and the problem of it running out of very fine cracks is always a bad one. I imagine it would be much worse on a split like this where you can’t see all the little exits it may have.I think preserving the area like you say perhaps with Linseed may be the way to go. We only have limited budget on this. In fact, aside from the wood itself, all other things we need have had to come from the students actual prize money(£400) which seems unfair, but we don’t want to have to eat into that too much. I guess the compromise will be longevity, but may be they’ll sponsor another prize in a few years and off we go again!
kayak23Full MemberPosted 10 years agoLittle update.
We have done the bulk of the jointing and most of the banding, both structural and decorative. It all looks a bit stark at the moment but once it all starts to weather down I reckon it’ll look rad.Starting to lay the components out very roughly to get a sense of scale and position. Nothing is fixed in terms of final positioning yet. We think that rather than decide now and number up everything, we’ll go to site and lay it out as we go.
The ends of all the components are yet to be squared off yet. It’ll look much neater when done.
The tentacle section leading into the square section. The square section will be longer than this. We need more timber as it turns out…
So, once we have some more timber we can crack on with making more square section. We then need to figure out the dimensions and therefore the gaps between each component with the bearers we use. We need to figure out how we are going to ‘unify’ the whole stack on site as obviously there are a lot of cantilever forces going on here.
Currently we are working our way through squaring off the ends of all the components… Big stuff!
AlexSimonFull MemberPosted 10 years agoLooks fantastic! Bigger/longer than I imagined.
That bottom-front piece looks superb.
kayak23Full MemberPosted 10 years agoWe need to figure out how we are going to ‘unify’ the whole stack on site as obviously there are a lot of cantilever forces going on here.
I think we are going to use ‘Landscaping screws’ which are used to screw railways sleepers together, to tie the whole thing together on site. 250mm long should give a good bite. Though we may only use them in the lower layers where they won’t be seen. The top layer we could perhaps peg on with the dowel method we’ve used for jointing so far.
kayak23Full MemberPosted 10 years agoSpent several days last week waiting on collection of more sycamore logs so that we could make more square section. Once that was done we could have a go trying to lay it out initially. Nothing is fixed at this point, just chocked up.
Pictured here a bit longer than it will actually end up. We have to wait until we’re on site to cut all the ends down. He has not decided yet on having a straight and square cut at the end or to angle it or whatever…
It’s over 30 feet long there and looking pretty imposing in the flesh already.If you look at his original model, it has some sculpting to the edges, softening them and introducing more curves and waves. This is something we plan to do on site with a combination of chainsaws and anglegrinder discs etc.
He is currently toying with the idea of creating a sort of back rest that would rise up near the tentacle join and flow down, curving into the square section…
Personally, I quite like the simplicity of it currently but I’m sure whatever he decides will work very well.We’ve got all that to sort out, we have some massive screw bolts to join it all, and all this while counting down the days to the end of year show/exhibition in June which I have to set up and build and a workshop full of second year students starting to get frayed nerves…. 😯
It’s all good though…By the way, if anyone commutes through Leamington on the train to Birmingham. As you pass the park and then cross the viaduct and river, look down to the right of the train and you’ll probably see this monster evolving out the back of our workshop. After that, Coombe Abbey park this summer. 😀
kayak23Full MemberPosted 10 years agoA lady and a pug testing out the bench. The pug seems to approve.


The topic ‘Green Timber structures- Any experts in the house?’ is closed to new replies.