- This topic has 392 replies, 23 voices, and was last updated 3 years ago by AlexSimon.
-
Family-friendly bike-carrying camper build
-
camperversionsFree MemberPosted 8 years ago
Hi Guys,
Just noticed this thread regarding campervans, we actually build them!
We’ve just done a few specifically for cyclists.
#imagine_yours
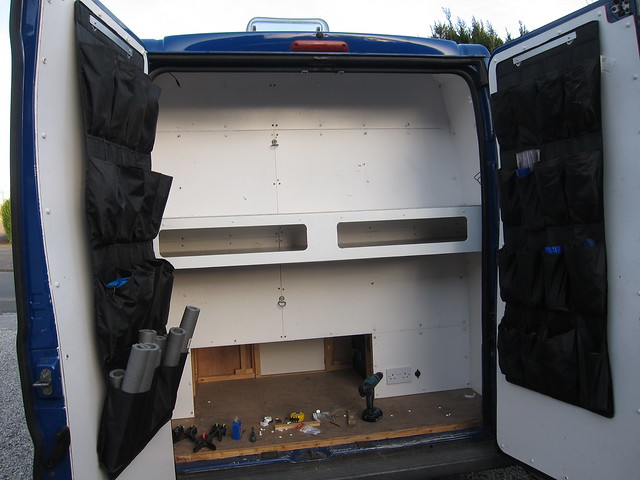
tomasoFree MemberPosted 8 years agoI am selling my old MWB Sprinter campervan and have just bought a big Ducato XLWB extra high roof. And so the works begins…
I bottled it and had someone else chop big holes in the roof and sides. I did however take the bulkhead out and get the side and back doors to seal.
 AlexSimonFull MemberPosted 8 years ago
hmmm that high roof looks more rigid inside that I imagined hmmm
Mike_DFree MemberPosted 7 years agoWe looked at the high roof ones, but they were thin on the ground when we were buying and considerably over budget. Masses of space, though, good choice 🙂 Just watch your payload, there’s a fair bit of extra steel up top but the MGW is the same as all the others…
tomasoFree MemberPosted 7 years ago@climbingKev kendal windscreens did the windows and roof lights. Including the vat big windows @250 and roof lights @£400 each.
jus77Free MemberPosted 7 years agoHi Mike, I finally got around to registering on Singletrack.
I stumbled upon your thread after Googling. I’ve been viewing your thread a lot for inspiration since we also bought a a Ducato XLWB (a black one!) and are doing a similar build to you (we also going for rear bulkhead with load area for bikes very similar to yours). We are not going to go to the same extent as you with a bathroom, hot water etc etc though.
We have already stripped it out, put in rear windows, rear seats, front swivels and 2 roof lights (which are leaking a bit arrgh!)
I was wondering what thickness ply you used on the floor, walls and ceiling?
On the floor we are thinking 12mm ply on top of 9mm ply batons stuck on the floor with Sikaflex. I don’t think we need the service trench as you have mentioned as we are not going to have pipes going along or across the van. Did you use any primer on the metal before applying the Sikaflex?
Mike_DFree MemberPosted 7 years agoDon’t beat yourself up about the rooflights, ours have all been in and out at least twice 🙂
Floor is 12mm ply on 25mm battens with insulation between. Walls (and most of the furniture) are 4mm. Ceiling is 3mm. Basically everything is as light as seems reasonable, although I’m still wondering if we could have got away with 9mm on the floor. Bit late now, mind 😉
Black will look good, although a couple of weeks in the south of France last year reminded us of one reason why most professionally-built vans are white…
I know a washroom and hot water might seem like excessive frippery (and to a degree they are), but as children get older a degree of privacy becomes worthwhile. Also once you’ve got water and gas on board, hot water is but a small step 😉
Have fun!
Mike_DFree MemberPosted 7 years ago/tap tap
Is this thing still on?
Found some pics that don’t seem to have made it onto this thread. Wibbly-wobbly flashback effect to summer 2015 when the van made a brief appearance on the telly:
About 2km from the top of the Col de Cabre – minor climbs for the being-able-to-see-anything win 🙂
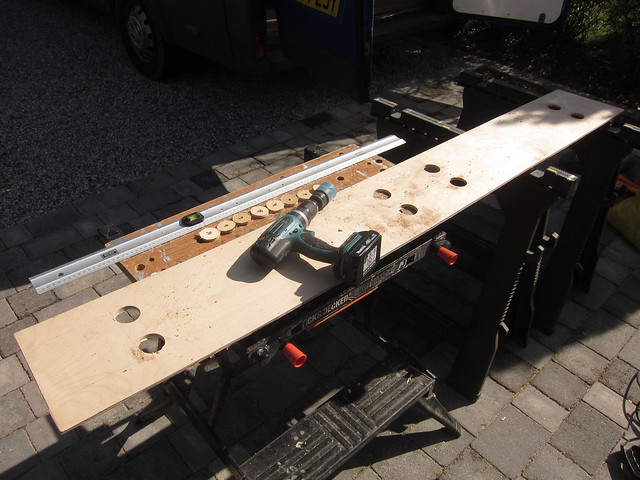
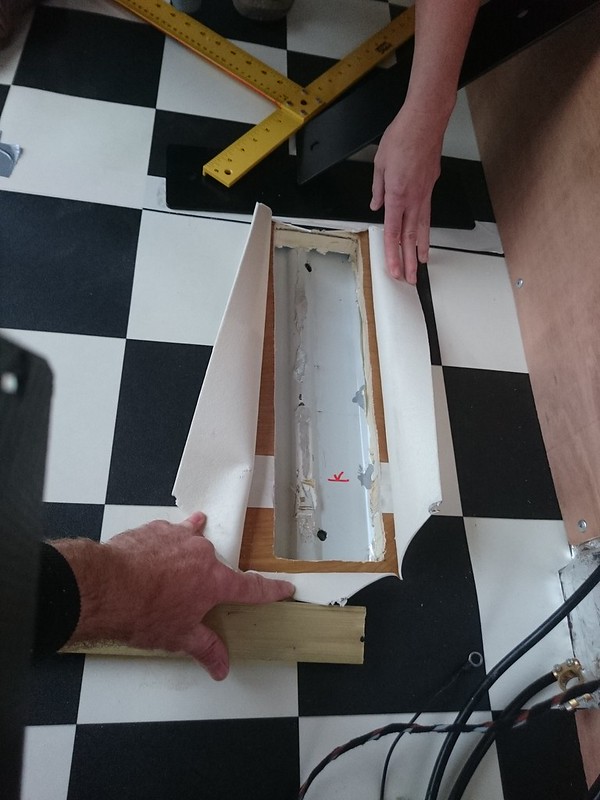
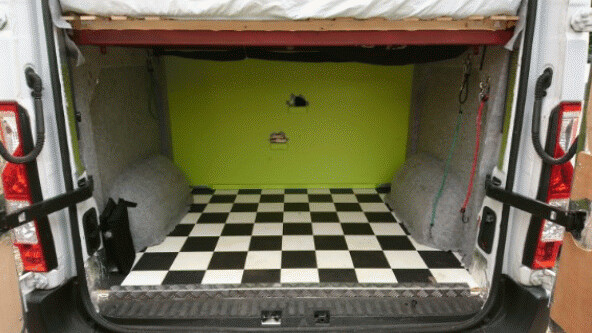
Nothing much happened then until spring, when I sorted out the hitherto rather temporary boot shelf. Dug out a bit of 6mm ply and enholerised:
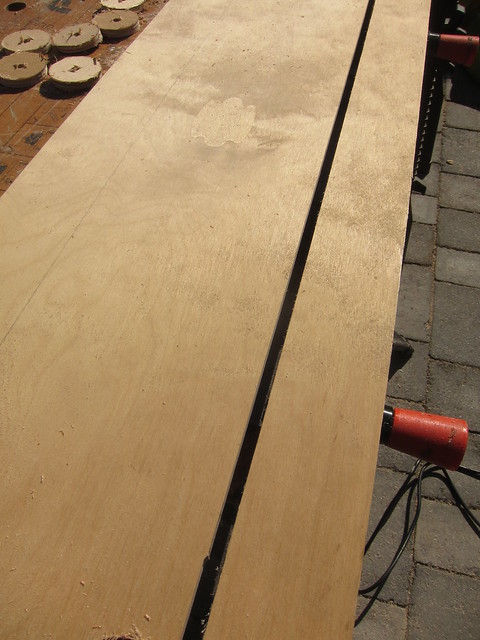
Used the router to join the holes:
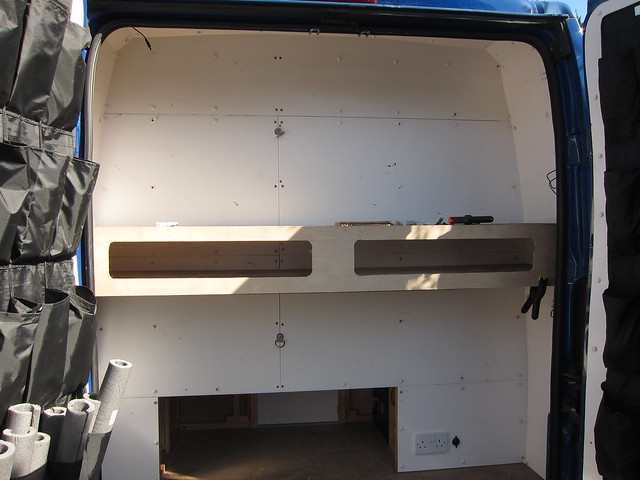
Offered up to check the fit:
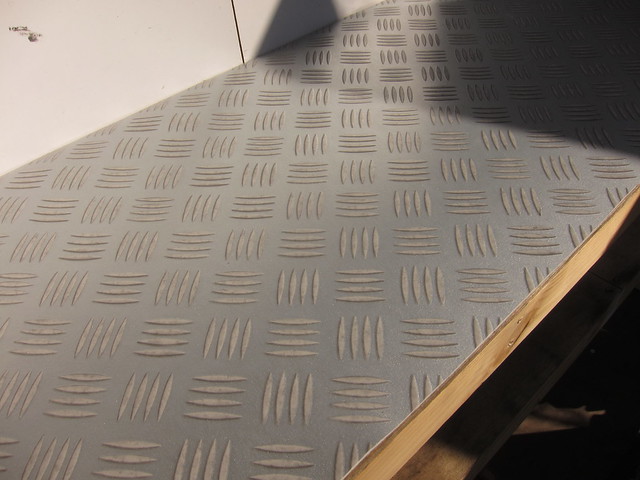
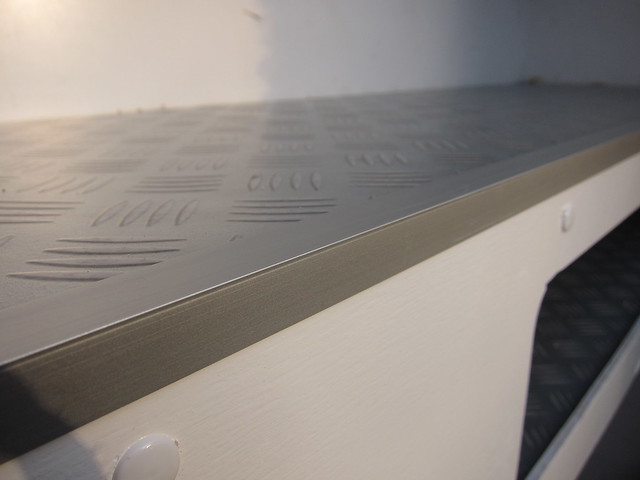
After pondering lots of options to cover the shelf (and floor), I took a chance on some checkerplate-style vinyl because it was cheap:
Lasting OK so far. Painted the panel and attached it properly:
Added some anodised aluminium angle to finish off the corner:
Still a few finishing touches to come, stick with it 🙂
pocpocFree MemberPosted 7 years agoMike, excellent thread.
Makes me want to do it all, but no money at the moment!I may have missed it, but did you ever get the (almost?) finished vehicle weighed?
I’m generally concerned about weight as I passed my test after 1997 so am stictly limited to the 3500kg.
Also, I seem to have had a part in the creation of 3 children, so would need an extra seat and bunk! 😯AlexSimonFull MemberPosted 7 years agoAlso, I seem to have had a part in the creation of 3 children, so would need an extra seat and bunk!
The L4H3 version of the van with the even higher roof would sort the extra bunk. To get the seats you could just leave the standard 3 up front.
Mike_DFree MemberPosted 7 years agoAh yes, weight. Erm, not yet 🙂 My eyeballing of the suspension when fully laden and back-of-envelope calcs suggest that it’s fine. I plan to weigh it next week, in fact, before adding the last few bits. You know, in case I have to leave them out 😉
As Alex says, the extra high top would probably help, although with the extra metal they’re a bit heavier again – I forget how much, 50-60kg springs to mind. That said, if you get one with the smaller engine you’ll get that back – our 3.0l lump apparently adds 90kg compared to the 2.2 :/
If you tweaked the layout a bit you might get a triple seat in the back, or fit a rear-facing one behind the front seats, or as suggested leave the double passenger seat in (although they’re not very adjustable or massively comfy). Five berths in a panel van conversion is tricky 🙂
Mike_DFree MemberPosted 7 years agoOoh, crikey, an update!
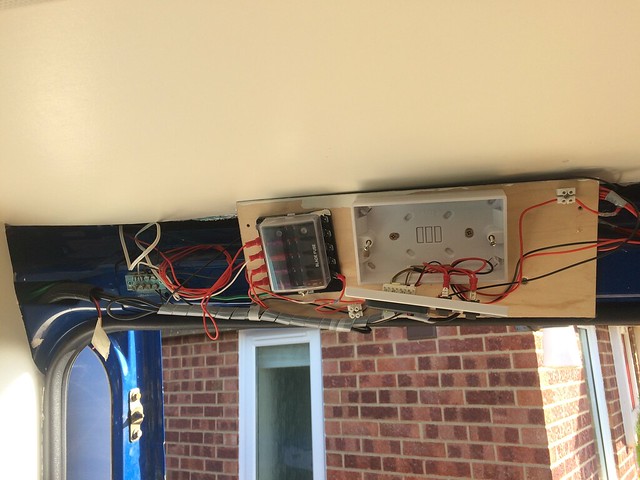
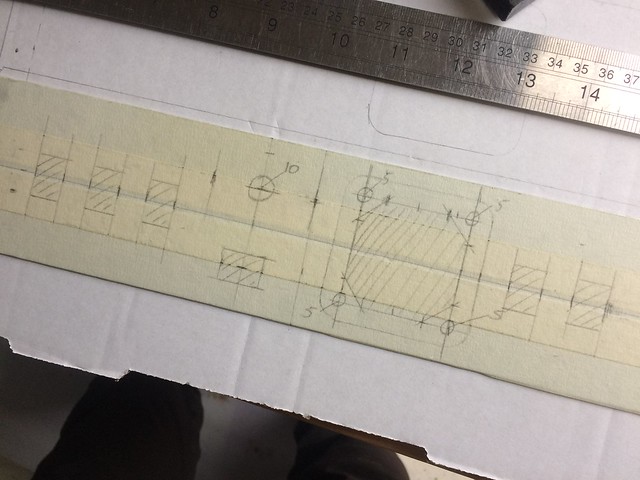
Hidden from the casual observer for coughcough years has been this nasty jumble of nastiness that passes for a “switch panel” (there are switches, you just can’t see them because I undid the panel before taking the picture).
Various companies will charge zillions of pounds for switch panels, but I already had the actual switches and gauges and things, so just needed a tidy panel to mount them all in. A trip to Wickes yielded an aluminium door push plate for the princely sum of £3. Bargain.
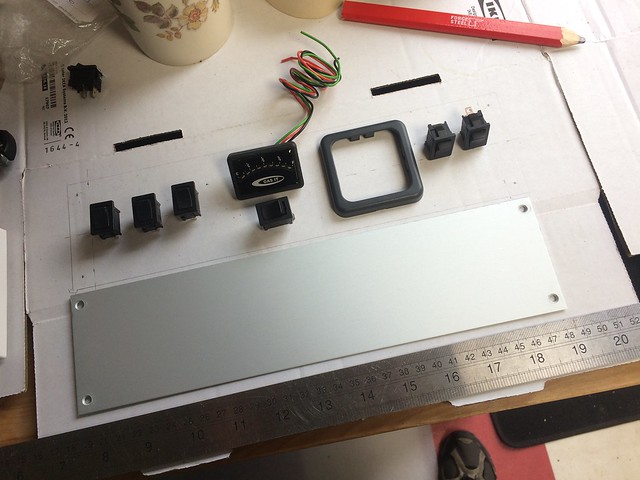
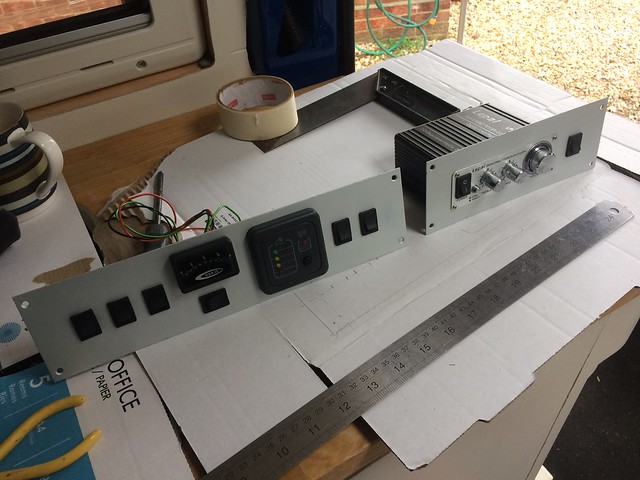
Having decided where everything will go (L to R: light switches, gas tank gauge, water and waste tank gauge, fridge, water pump) I smothered the plate in masking tape and marked it up:
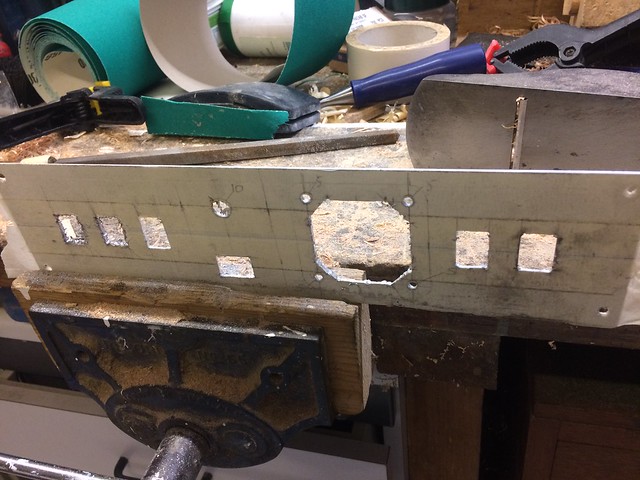
Drilled lots of holes, attacked with a Dremel, filing:
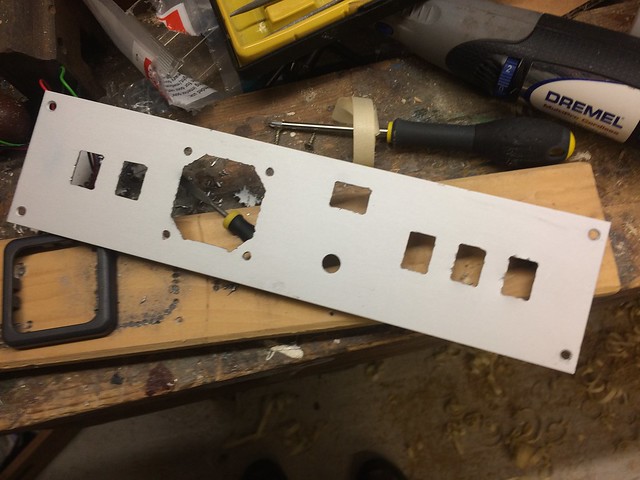
Peel the tape off, clean up, decide more filing needed:
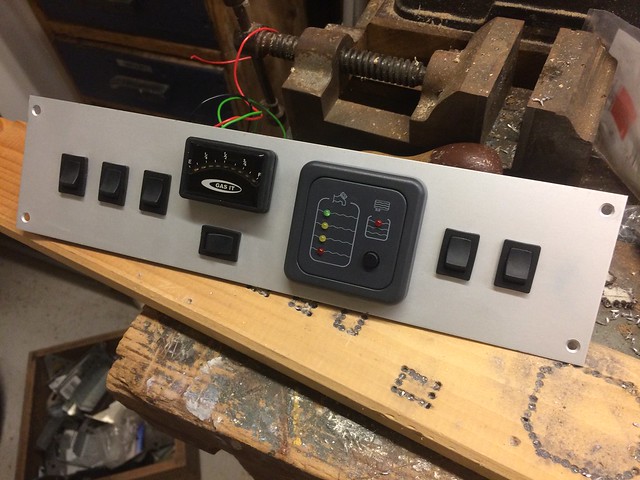
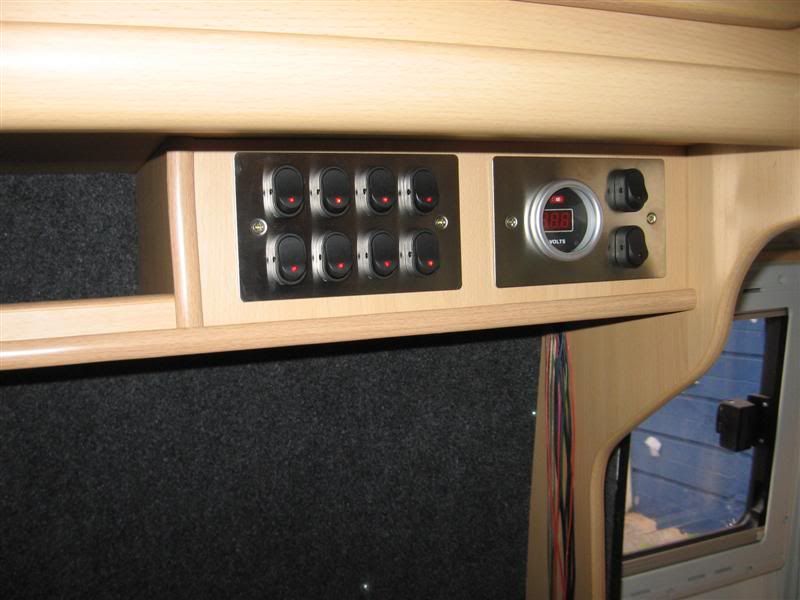
And then put all the bits in, with this actually rather pleasing result:
I used another plate (cut down a bit) to mount this little amplifier in:
There’ll be a Bluetooth audio receiver tucked away so we can stream music from phones and tablets and things.
Side by side:
Looking OK, I think. Obviously they need somewhere to go in the van, which is the next bit…
andy8442Free MemberPosted 7 years agoMike, I’m sure you only come here to show off! Still…..my favorite thread ever.
AlexSimonFull MemberPosted 7 years agoExcellent Mike!
What maintenance have you had to do on the base van (apart from that water drain pipe)?mark90Free MemberPosted 7 years agoLooks good. Nice use of the door push panels. I used a couple of double gang socket blanks (that matched the sockets I put in the van)
Mike_DFree MemberPosted 7 years agoAlex: Routine servicing (which is a bit of a dilemma, as the official service intervals are over 20,000 miles which would be about every four years, so it gets done slightly more often than it ought…), brake pads, tyres. Needed a new engine battery a few weeks back (the one that came out was the original, so nearly 10 years old) and I’m about to embark on replacing the wiper motor. Also replaced a couple of catches and rollers on the sliding door.
Mark: That was Plan A, and I actually have marked-up blanking plates in the garage. But they’re stainless steel and having fitted one 12V outlet into one of them I decided life was too short 😉 Yours are v.tidy.
trail_ratFree MemberPosted 7 years agoWhat’s the time based service ?
Vehicles are milage or time.
I’d imagine it’s 20k or 2 years. Servicing it every 4 is fools folly as the oil will have a heap of water in from condensation from sitting and won’t be doing its job and fuel filters can gunge up from sitting ESP with biofuels contents these days
Like wise rubbers – belts and dampers with a service intervals don be fooled into thinking you have only done half the milage in 10 years or what ever the number is that it doesn’t need doing
Probably preaching to the converted but it’s a pet hate when someone says I’ve only done 4000,miles in last 2 years so not going to get it serviced.
AlexSimonFull MemberPosted 7 years agoYes, I always service annually regardless of mileage. It’s not a big cost in the grand scheme of things.
Glad your van is being reliable Mike!I have cash in pocket to buy an L4 now too, so if you see anything around, let me know. Up to around 6.5k.
(I’m already on Ebay/Autotrader/Gumtree, but it’s still easy to miss things).trail_ratFree MemberPosted 7 years agoKeep an eye on Facebook sales groups as well.
That’s where I got mine.
mark90Free MemberPosted 7 years agoBut they’re stainless steel and having fitted one 12V outlet into one of them I decided life was too short
Ah yes, very good point, especially as your holes aren’t round.
chapps123Free MemberPosted 7 years agoHi Guys, Have been reading the thread with great interest, great job. I couldn’t imagine being able to do it myself, very impressive.
I had a LWB Ducato done by a camper van converter guy. I bought a H2L3 with 28k on the clock in 2010. I wanted the garage big enough for bikes at the back, so we had a permanent double bed installed above the bike sized garage, you can get 3 bikes on with the front wheels off. The problem is the van starts to narrow the higher you go and it’s about 10cms too narrow to stretch out in. But it’s fine for the Mrs and our son. If I did it again I wouldn’t have had the bed mounted so high, as it doesn’t need to be, with the front wheels off bikes they are quite low and more space in the bed area would be useful.
It’s got two single seats at the front on swivels, I bought a Ducato single seat off Ebay. And then two belted seats in the back on a raised floor. Shower room, toilet, two burner stove and fridge.
The front section converts into a big double. I’ve had a few problems with condensation in it, but a rotating van vent thing made that better.
Also had a leak from the van roof which was a bugger to find and wrecked some of the interior.
Heating is from Gaslo on LPG which is excellent and runs for ages.
Best thing is it’s quite stealth like, so you can sleep anywhere and not get noticed.
trail_ratFree MemberPosted 7 years agoGood stuff. You don’t get the skills to do a conversion like this without picking up some mechanical sympathy.
Just waiting on the equipment to do the timing belt water pump and a full filters and fluids service on my iveco daily conversion.
Mike_DFree MemberPosted 7 years agoI wasn’t feeling very mechanically sympathetic when my efforts to replace a fuel leak-off pipe resulted in a sea of diesel across the drive and down the road 😉
tooFATtoRIDEFree MemberPosted 6 years agoHi, can someone give me a short lecture on how to add extra seats to a campervan conversion, both from the technical/mechanical requirements point of view but also from the legal point of view (getting the paperwork organised)?
The current situation is the usual setup as found in Mercedes Vario (1 – 2 seats up front). Eventually I would like to have two additional seats added in the living quarters so the total would be 5.
Thanks
tomasoFree MemberPosted 6 years agoMy XLWB Ducati maxi extra high roof camper weighed in with full tanks etc at 2.9 tonnes. I drove down to the local scrap dealers and they weighed it for me.
Mike_DFree MemberPosted 6 years agotooFATtoRIDE: If you’re still looking, go to https://www.gov.uk/government/uploads/system/uploads/attachment_data/file/210809/changes-to-seatbelt-installations-guide.pdf , scroll down to page 9 and look at “Specific requirements for M2 panel van conversions”. It’s actually the requirements for minibus converters, but the physics is the same. Perhaps weirdly, if you’re doing this for your own use there are no legal hoops to jump through.
TheBrickFree MemberPosted 6 years agoHow is this conversion still going?
Any mechanical problems with the base van?
Mike_DFree MemberPosted 6 years agoIt’s nearly finished, I should probably do an update 😉 Mechanical problems over the last four years (other than usual wear and tear): Breakdown in France caused by water ingress to ECU wiring (additional sealing and drainage added subsequently). Front brake calipers seized (due to too much time spent standing and not moving, most likely). Wiper motor needed replacing. Rear door lock broke. I think that’s it 🙂
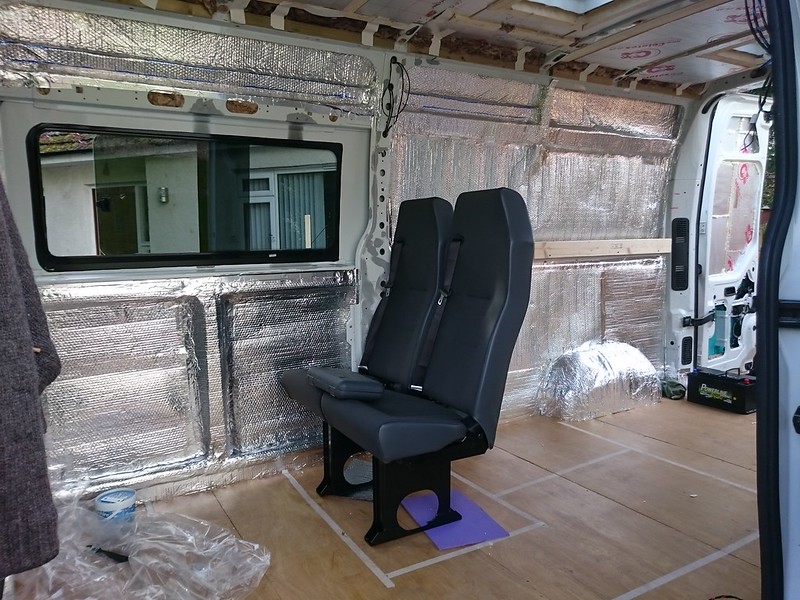
surroundedbyhillsFree MemberPosted 6 years ago@tFtR – I fitted these to my van
Marked out the footprint – the tricky bit was taking a bead up the inside of the van window, then copying it down the outside to ensure I had it all lined up and was not hitting any crossmembers in the chassis underneath. I spent AGES doing this and in the end it worked…
You can see the “legs” attached now to the floor in the back ground – they have a long flat plate on the inside, which doubles as a template and each bolt under the floor has a singular spreader plate.
These are the seats http://www.vanbitz.co.uk/A2-High-Back-Double-Minibus-Van-Seat/7119.htm
The red frame that my OH is sitting on is the steel frame for the bed, I got that made to measure in 2″ box steel at my local fabricators which only cost £120!
It now more regularily looks like thissurroundedbyhillsFree MemberPosted 6 years agoBTW I should again also say that @ MikeD was the inspiration for my build! Cheers buddy!


The topic ‘Family-friendly bike-carrying camper build’ is closed to new replies.