- This topic has 392 replies, 23 voices, and was last updated 3 years ago by AlexSimon.
-
Family-friendly bike-carrying camper build
-
spooky_b329Full MemberPosted 9 years ago
Love it, turning out really well 🙂
My current van is on its second incarnation, still not ‘finished’ after owning it for around six! Next years plan is to tidy it up ready to sell, there’s no rush as the van that ticks all the boxes has only just been released and I need to wait at least two years for the eye watering £25-30,000 plus VAT price tag to become affordable.
I reckon a used one will be under £10k within a couple of years as thankfully they depreciate really really fast!

P.S For the boot floor, how about that heavy duty rubber stud moulded flooring? I plan to use it throughout the van next time as I’ve had various floor coverings which have turned out to be dirt magnets or susceptible to ripping.
rockhopper70Full MemberPosted 9 years agoGreat thread….
Are you keeping a tally of hours spent/costs etc.
Whatever the figures, I’m sure it’ll be a great investment.Mike_DFree MemberPosted 9 years agojwt: Went to that show last year, it’s a good opportunity to pick up ideas. We made a couple of changes based on what we saw there, although mainly to avoid things we didn’t like in pro vans — originally the fridge was going to be on the floor, but having looked at a few we decided that we didn’t want to be grovelling in a narrow aisle to get things out of it.
We did think of getting an extra-high van and putting in a drop-down bed at the front, but the vans were too expensive. Maybe next time 😉
mick_r: Good tip, thanks — looks ace 🙂 We went through France on this occasion, I’ve got relatives near Dijon so we did a stopover there. Definitely planning to do Switzerland again, though…
As for finished, I suspect they’re never really finished. If we can get the rest of the interior in and painted by the first anniversary of getting the van (ie middle of December) I’ll be pretty happy.
spooky: That looks ANGRY. Have they changed much beyond the front? Dimpled rubbery stuff is on the shortlist for a boot floor.
rockhopper70: There’s a massive pile of receipts that we’ll pluck up the courage to add up one day. Kind of lost track of hours, beyond “a lot”. I reckon we’re looking at £12-13k (including the base van) by the time it’s done. I don’t think DIYing is in any way a profit-making exercise, but if and when we sell it I’m hoping the net cost of ownership will become very reasonable. The plan is to get a good few years use out of it 🙂
thebunkFull MemberPosted 9 years agoWay better than Grand Designs this. Thank you Mike.
Mike_D – Member
if and when we sell itDibs!
spooky_b329Full MemberPosted 9 years agoMike, the blurb reckons its 80% new components, but how that’s measured…
+1 point for a new indicator stalk, -1 point for the original ladder chassis? Who knows, but I bet its measured in their favour!
Anyway, its largely new, has some very powerful engines and still pulls 3.5 tons which is the critical bit for me, but the main advantages is the wheelbase is now longer with less overhang so should be more stable and safer for towing and give less grounding issues, and you can get a locking rear diff. Just need to tweak my layout as the ideal wheelbase/body length combo for towing is 50cm shorter than my current mwb van.
I too have a couple of box files stuffed with receipts, the conversion came to more than the £5k cost of the van…
AlexSimonFull MemberPosted 9 years agoBeen away in Autumn/Winter Mike?
Learning anything about the build, now that it’s getting used?Mike_DFree MemberPosted 9 years agoCrikey, I’ve neglected this thread. Where was I? /reads back.
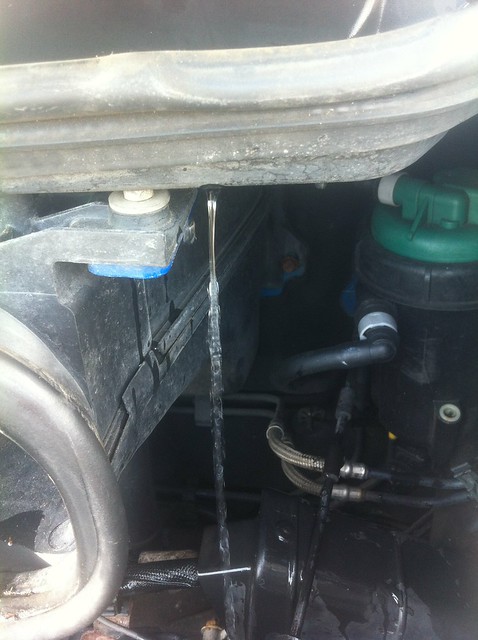
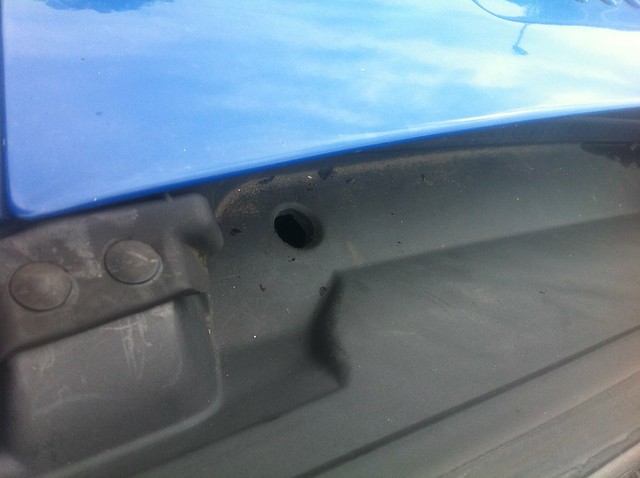
Oh yes, the saga of the flooding engine bay. Investigations (based largely around tipping buckets of water down the windscreen) revealed that a healthy proportion of rainwater would end up here:
That’s a bracket hanging off the middle of the scuttle that holds some sort of actuator that’s something to do with the EGR valve. Yeah, showing off my MAD MECHANICAL KNOWLEDGE there. The water coming off there ends up on top of the engine and is trapped by the shape of the head. Genius. But not as good as where most of the rest of the water goes:
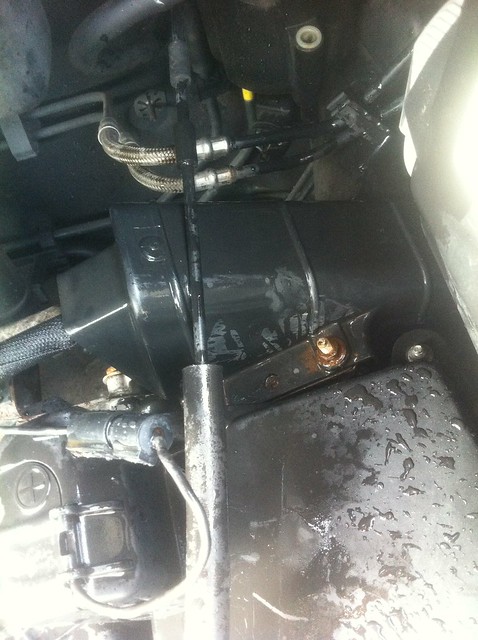
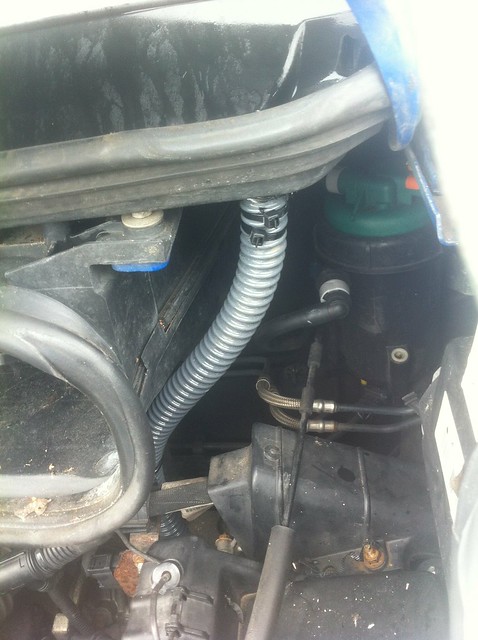
That’s the nearside of the engine bay. Look down a bit at where that stream’s ending up:
It’s aimed with unerring accuracy straight at the plastic cover over the connector between the main wiring loom and the ECU. Hmph.
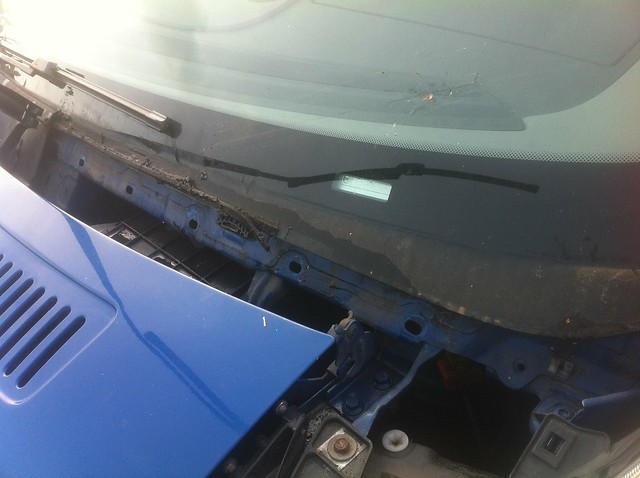
There’s a plastic cover over the scuttle at the bottom of the screen, which I took off for a closer look. I guess there’s a semblance of a seal in there. OK, no, there isn’t:
The cover’s also in two pieces, overlapped in the wrong direction so that water attempting to run off along the designed-in slope towards the offside tends to go through the gap instead — that’s where the dribble onto the top of the engine is from. Much Sikaflexage later and the cover was sealed to its other half, sealed to the windscreen on the back and for good measure, sealed along the top edge too:
Next order of business was to get rid of the water that should now be gathering in the scuttle cover. As I said, it’s supposed to run off to the offside and through a drain hole, but there’s only a hole on one side, the slope isn’t that substantial and if the van’s not dead level (like, for instance, parked on the camber on the left of a road, as if that could ever happen…) the water just sits there.
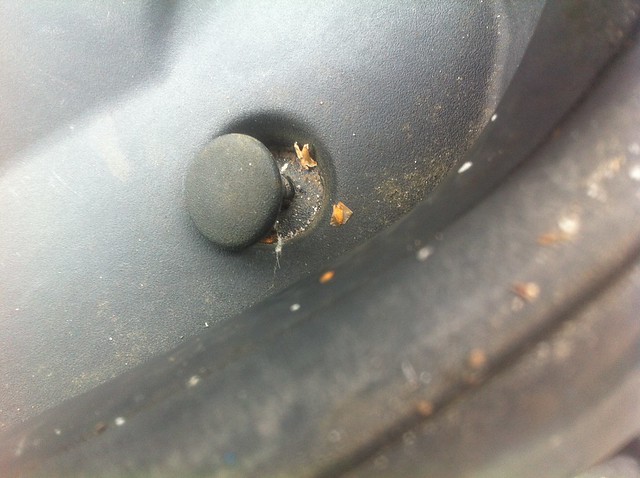
Fortuitously, there’s a blanking plug stuck in a handy-looking hole on the nearside, so I took that out:
Drilled the hole out a bit bigger:
And gooped in a usefully-sized spigot tube thing I found in the plumbing box (it’s actually an insert that you push into PVC pip before using push-fit connectors):
More rummaging in boxes of left-over tat revealed a handy length of corrugated pipe, which got gooped and ziptied onto the pipe insert thusly:
It’s routed down through the engine bay to exit by the front wheel, pretty much mirroring how the standard drain on the other side works:
Yeah. FACTORY. Kinda.
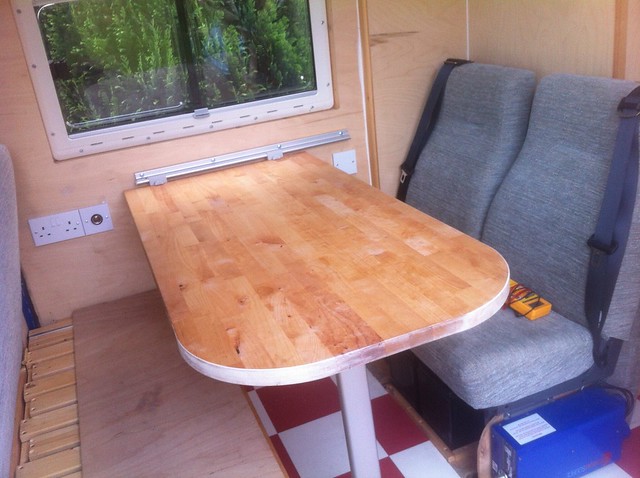
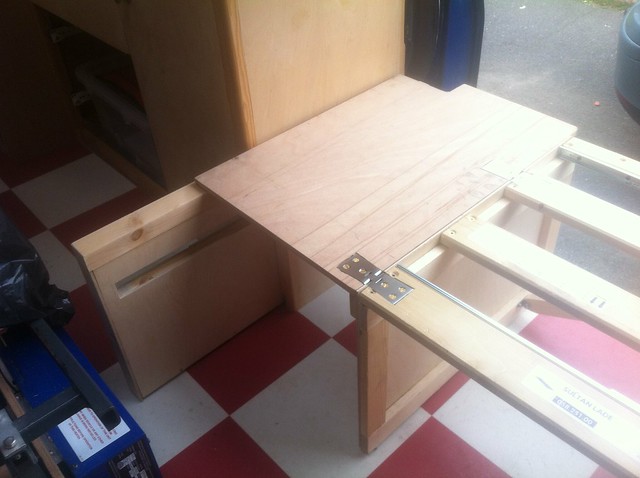
Buoyed by this achievement, I tackled a little “tidying” job. The table top still had square corners and was a bit wide to boot, so I attacked it with a circular saw to narrow it a bit and then rounded the corners with a router. Those of a delicate tool-use sensibility may wish to look away:
That’s the router fence with the plate reversed and inverted, a couple of blocks of wood glued together and a random bolt stuffed into a blind hole on the back of the table top to rotate around. Surprisingly, it kept the alignment pretty well:
Repeat on the other corner, put the leg back on:
Much better, especially for moving into the back part of the van which was a bit of a squeeze between table and kitchen before. The table still needs a load of weight taking out of it, it weighs as much as a small child at the moment.
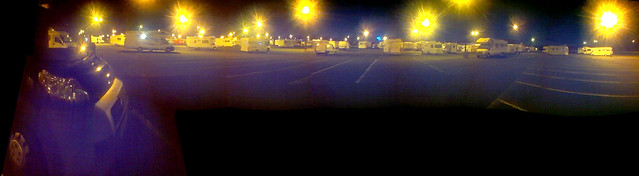
In amongst all this we returned to France at October half-term — we were meant to go to Disneyland in the summer but the breakdown scuppered that, so we’d promised the kids we’d go back. Did it on the (relative) cheap by taking food with us and camping in the car park. Which turns out to be quite a popular option:
It actually worked really well — parking’s included with the annual passes we bought, it’s really close to the entrance so we went in first thing, came out at lunchtime when it got busy, had a meal, chilled out for a bit and went back later in the afternoon when it was quieter again. Beats overpriced hotels and crappy grub 🙂
Mike_DFree MemberPosted 9 years agoOh, and long-time followers will have noticed that we didn’t manage to get the interior finished and painted within a year — we’ve now had the van for 13 months. We did manage 33 nights away in it in 2014, though, which seems like a result to me 🙂
Mike_DFree MemberPosted 9 years agoProbably finishing the washroom — put in shower tray, finish lining the inside, add lighting, basin, cupboard. Will mean dropping the waste tank to add another inlet. Also still need a lot of drawers and cupboard fronts making for the rest of the interior. And another overhead locker. And lining the space over the cab. And lining the sliding door. Boxing in under the travel seats. Tidying wiring. Control panel for lights and level gauges and stuff. MANY THINGS 🙂
AlexSimonFull MemberPosted 9 years agoWe did manage 33 nights away in it in 2014, though, which seems like a result to me
Definitely – congratulations!
Probably finishing the washroom — put in shower tray, finish lining the inside, add lighting, basin, cupboard. Will mean dropping the waste tank to add another inlet. Also still need a lot of drawers and cupboard fronts making for the rest of the interior. And another overhead locker. And lining the space over the cab. And lining the sliding door. Boxing in under the travel seats. Tidying wiring. Control panel for lights and level gauges and stuff. MANY THINGS
Blimey – makes my shed seem very simple indeed.
Mike_DFree MemberPosted 9 years agoThat’s just the stuff I can remember 😉 There’s a new incentive in that we want to get rid of our tatty conservatory, which is currently employed as a storeroom for van bits and sheets of plywood…
Mike_DFree MemberPosted 9 years agoSo after something of an over-winter hiatus, we’re back on it 🙂
First up, the washroom rooflight sprung a leak. Which was annoying. The only way to be sure of sorting it was to pull the whole lot out and start again:
Seems to have worked.
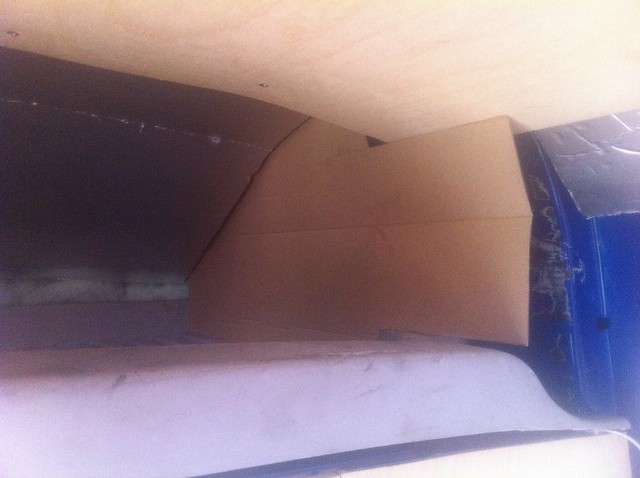
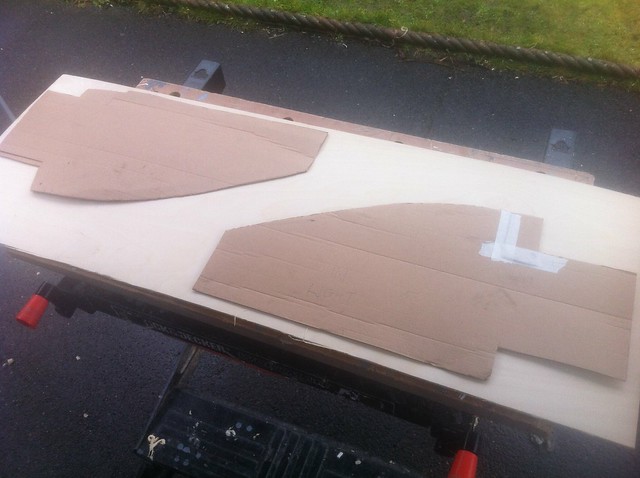
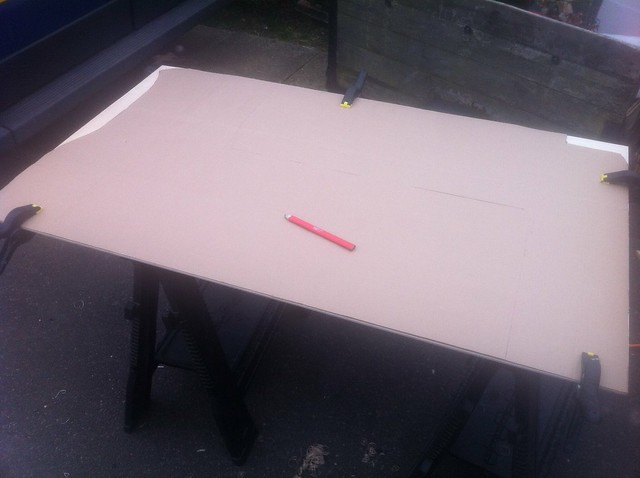
After that, we looked at tidying up the shelf over the cab a bit. Thus far it’s all been exposed insulation and a slightly manky plastic shelf. Made some cardboard templates:
Transferred to a handy plywood offcut that was about the right size:
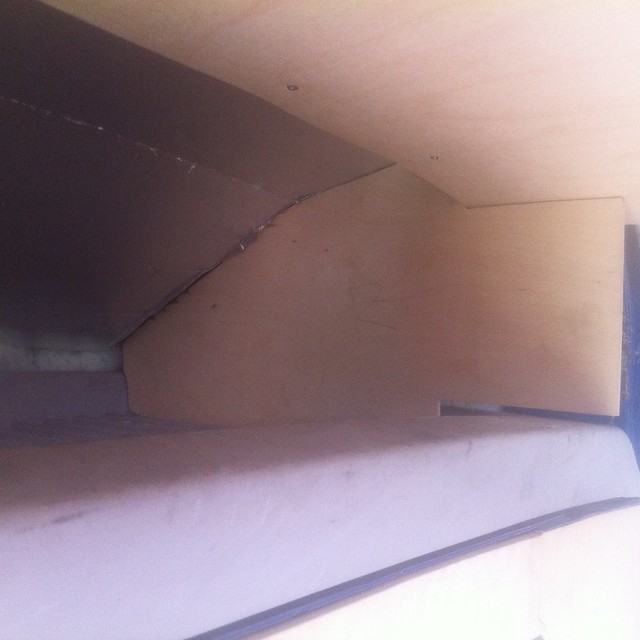
Cut out and stuck in:
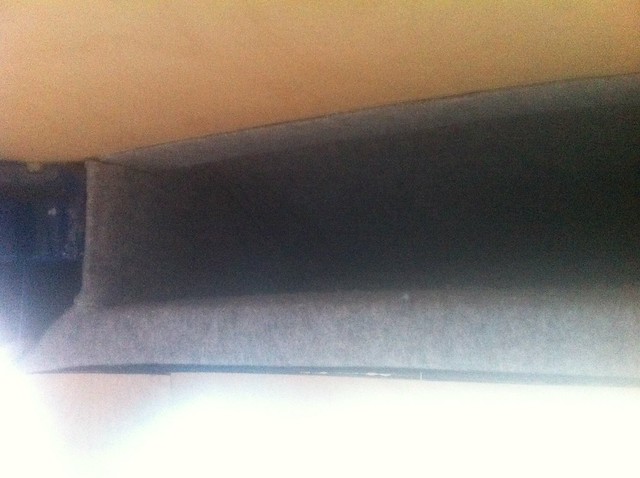
They’re Sikaflexed to blocks stuck to the van roof, and to the side of the plastic luggage shelf. Once they were set, Mrs D spent an afternoon getting dizzy on spray glue and lined the whole lot with magic stretchy carpet:
At some point there’ll be another ply panel as a face to the whole thing, we’ll come back to that…
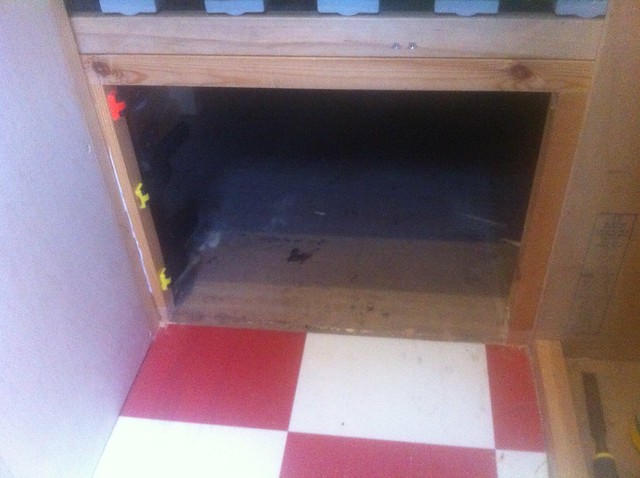
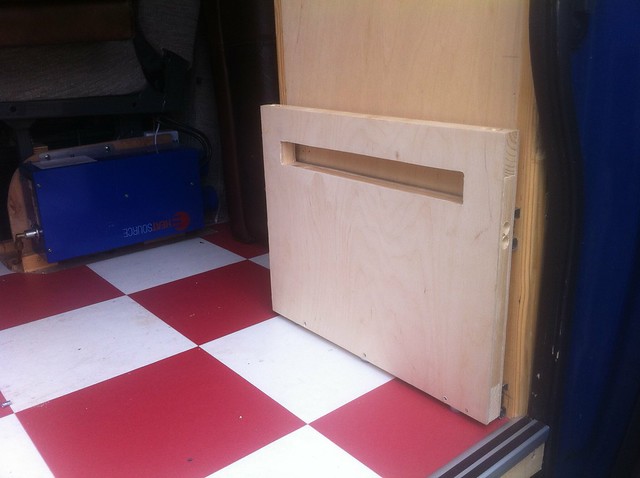
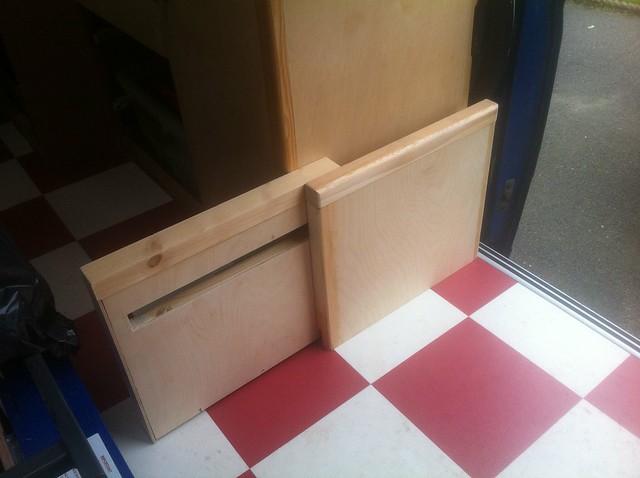
Made a start on an access hatch to go under the bottom bunk. At the moment there’s just a hole to the boot space. Put some new uprights in the appropriate places, chopped out the batten that ran across the floor:
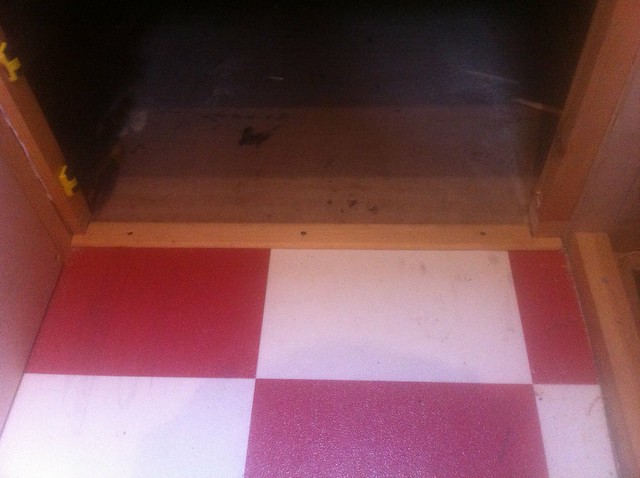
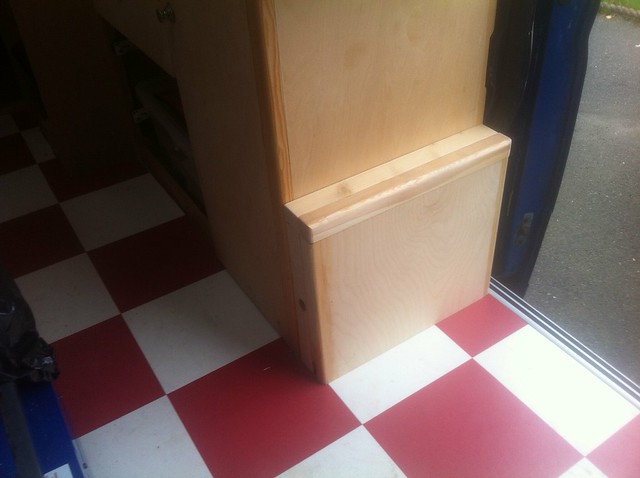
Put in a timber moulding to cover the edge of the floor — this’ll come out and go back in again once we’ve put some flooring in the boot.
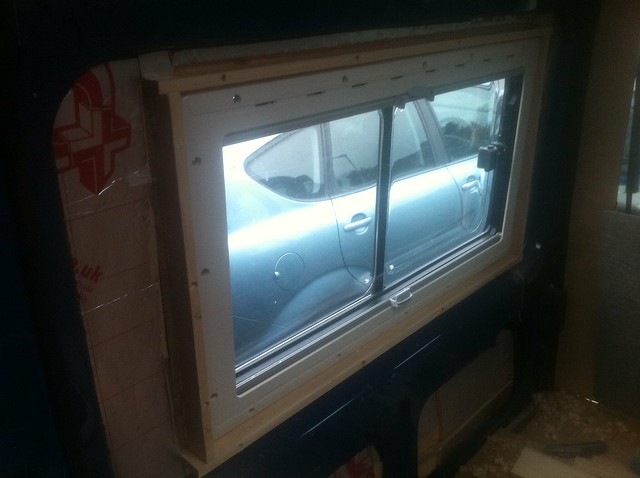
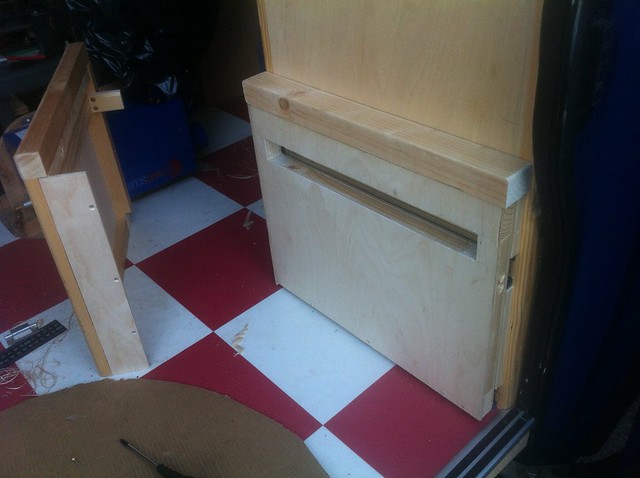
Started to make a door, but thus far it’s just two bits of wood so not really very interesting. Moved on to lining the sliding door, which I keep forgetting hasn’t been done:
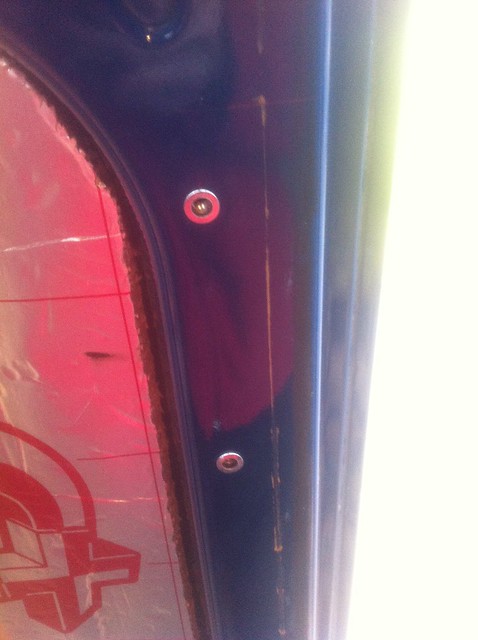
I’ve made a reveal around the window as per the other side of the van — the panel will be further in than the face of the window, so something needs to bridge the gap. Also boshed in a couple of rivnuts for an extra handle to make the door easier to shut from the inside. It’s big and heavy and not that easy to fully close:
After much measuring, marking, faffing and cutting:
Had to do it in two pieces, because the door’s 95mm wider than a standard sheet of plywood. Although it works better on that orientation anyway because the ply’s bendier on that axis and fits the curve of the door. The window aperture was marked out as close as I dared but left a few mm extra all round and will plane/sand it down flush later.
At this stage the bottom of the door still looked like this:
Oh yes. Homely. More cardboard, more plywood:
Fitting the lower panel was challenging, because with the door shut the front half is obscured by the bench seat. And with it open it’s outside the van. I ended up Sikaflexing half the door with it half open and the other half with it shut, then half opening it again to slide the panel in and holding it with one hand while boshing in a couple of temporary self-tappers to keep it all in place while the glue goes off. End result:
Marvellous. The join between the two sheets will be filled and sanded, and there’ll also be a padded panel across there which will hide it.
siwhiteFree MemberPosted 9 years agoLove this conversion – just killed an hour of my night shift reading it, so thanks for the distraction!
Out of interest, where did you buy the long-ruler-spirit-level-with-handle thing?
Mike_DFree MemberPosted 9 years agoYou’re welcome 🙂
Big level was borrowed from my Dad, he got it from a local hardware shop I think. It’s suffered a bit during this job and doesn’t have a handle any more. Or a level. So really it’s just a giant ruler now. Still v useful. Must find a replacement…
Mike_DFree MemberPosted 9 years agoExpect one or two more updates shortly – heading to the Alps at Easter so keen to add a few things first. We’re not staying in it (except a night on the way down and a couple more at Disney on the way back), so I don’t need to worry about tank insulation or anything. Thankfully…
Mike_DFree MemberPosted 9 years agoExtra update ‘cos I found some stuff I’d not posted..
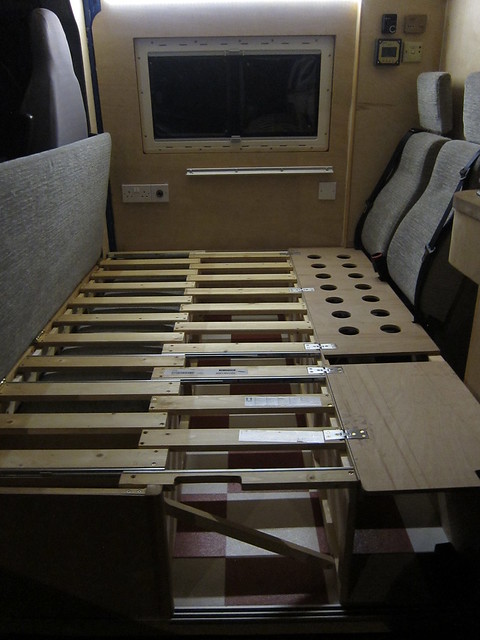
Ages ago I started making a slide-out support for part of the bed. The smaller hinged flap needs supporting at the end of the kitchen, and there needs to be an extending piece to come out into the aisle to hold up one end of the large flap. My first pass used crappy runners, so step one was to take it all apart again and use some better runners that actually hold it straight:
I’m not sure now why I decided to make the fixed part of the support sit outboard of the sliding part. Maybe because I just want to make things unnecessarily difficult? Here’s the fixed part before fitting:
It’s held on by the ply closing panel at one side and by the timber stub at the other, which goes through the slot in the sliding piece. The finished thing looks like this when closed:
Opens like this:
And the bed flaps rest on it like so (just one shown here, I was standing in the way of the other one):
I had to do a bit of trimming and notching of the large flap so it cleared various corners and seatbelt brackets and could actually extend far enough to reach the support. While I was at it I drilled a bunch of holes in it:
This is mainly in the interests of getting some air circulating under the mattress, but it also saved about 400g in weight. Pretty trivial in the context of a 3,500kg van, but that’s a couple of extra bottles of beer we can carry 😉
The fully-deployed bed platform now looks like this:
Pretty pleased with that 🙂
PickersFull MemberPosted 9 years agoThis really is the thread that keeps on giving, fantastic work.
mikey-simmoFree MemberPosted 9 years agoI’m getting back to work on our van this morning thanks to your thread!
twangFree MemberPosted 9 years agoSuperb skills mike D. That bed support is the work of someone with way too much time on their hands. 😀
Keep em coming..AlexSimonFull MemberPosted 9 years agoExcellent! – what width have you managed to get on that bed?
Mike_DFree MemberPosted 9 years ago🙂
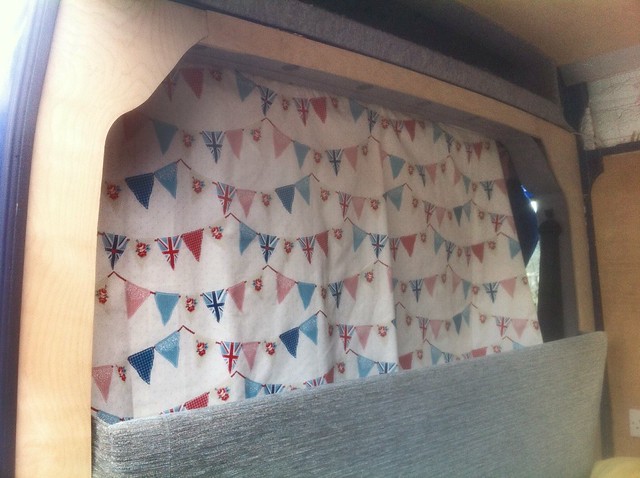
There’s this as well — MiL has been busy and made a cab curtain. We wanted it completely out of the way when driving, so it’s held up by
neodymiumyumneodiumyymypowerful magnets stitched into pockets at the top and some steel washers self-tappered into a handy bit of trim:It does go all the way to the side, it was mid-putting-up in the picture…
Mike_DFree MemberPosted 9 years agoAlex: Bed is 130cm wide, so 7cm narrower than a standard double. It’s substantially wider than the rock’n’roll bed in our previous van 🙂
grenosteveFree MemberPosted 9 years ago🙂 great work!
That’s one hell of a conversion you’ve done.
(it’s about time I sorted a bed out for the back of my T4!)
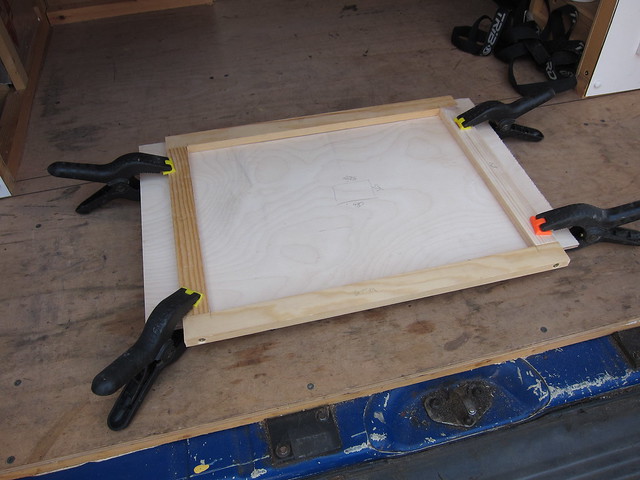
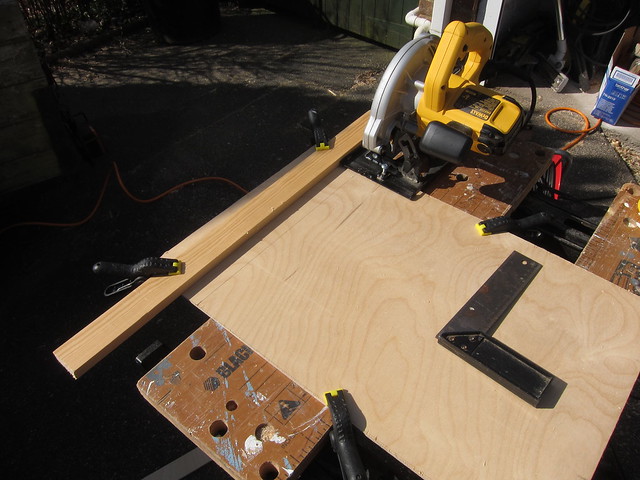
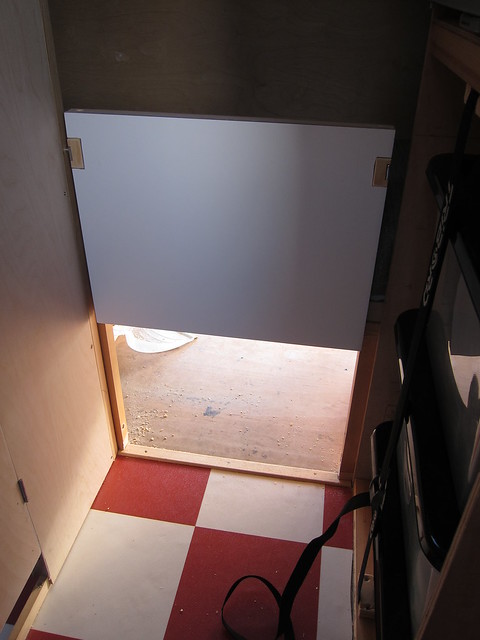
Mike_DFree MemberPosted 9 years agoUPDATE. We have a big boot space under the lower bunk, which was just open to the main accommodation. To stop stuff ending up in the wrong place (and to reduce draughts), I made a hatch. Frame:
(here clamped to a bit of thick ply to keep it straight while the glue dries)
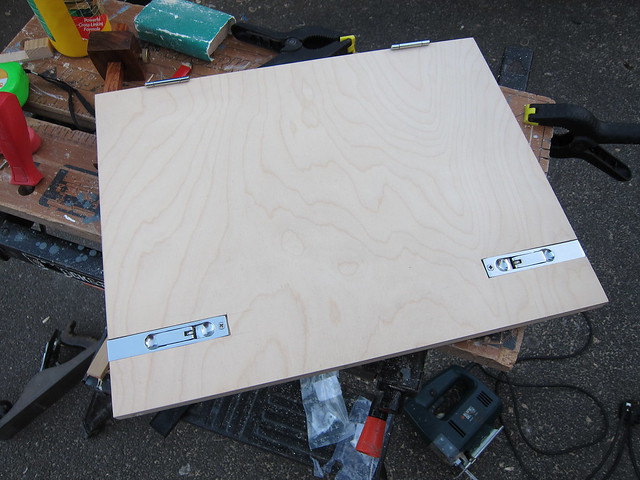
Cut out a piece of thin ply to glue to the frame:
Needed something to keep it shut, and after a bit of deliberation went for flush bolts, usually used on one half of French doors. Looks quite sleek:
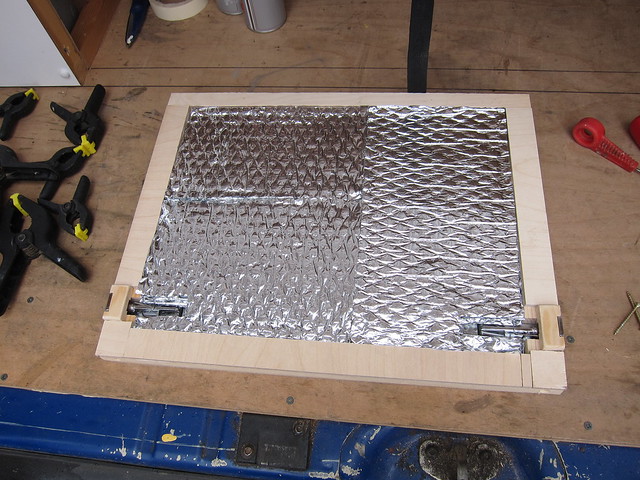
Filled with insulation:
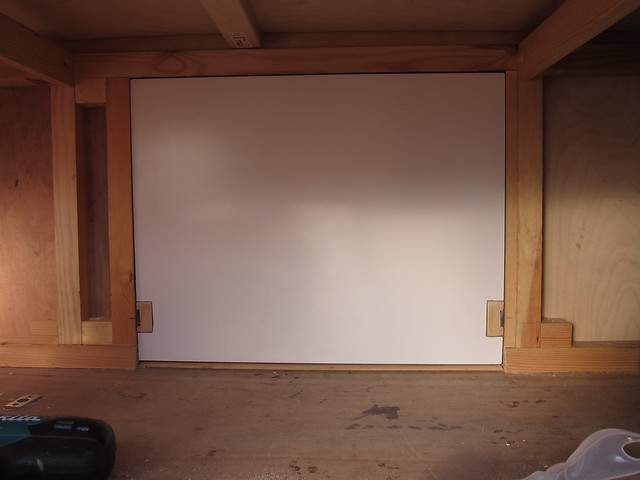
And in place, having glued a piece of the PVC-coated ply onto the back:
As it looks from inside the boot:
I drilled an extra hole so that one of the bolts can be used to hold the hatch open when needed:
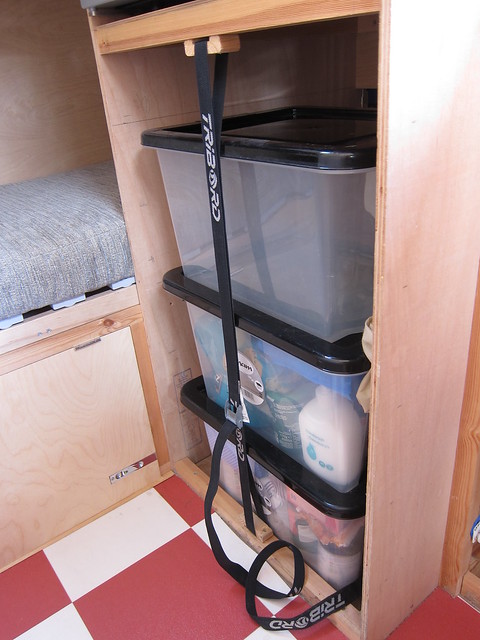
While I was rummaging around in the aisle, I remembered that this bit really needs some proper drawers eventually, although actually the temporary bodge works pretty well 🙂
In other news, we drove to the Alps to go skiing. Didn’t actually stay in it in resort, because the water tanks aren’t insulated and bad things would happen in consistent sub-zero temps. We did a night in an aire on the way down, one in Bourg St Maurice after our cheeky seventh day on the slopes, the inevitable couple of nights in the Disney car park and another aire night closer to Calais. It snowed a surprising amount for Easter:
1,700 mile round trip, didn’t break down, happy with that 🙂
welshfarmerFull MemberPosted 9 years agoHI Mike
do you have a good online source for those nice fold-flat hinges on the bed and the french door bolts etc? Oh, and the runners you used on the slidy out bits too. Need some similar for my project
Cheers
Mark
Mike_DFree MemberPosted 9 years agoThe hinges are counterflap hinges, mine came from Screwfix:
(always found that the tricky thing with hinges is knowing what all the different sorts are called…)
Bolts were Screwfix too:
I’ll have to look back to find where the runners came from, will get back to you on those 🙂
welshfarmerFull MemberPosted 9 years agoDamn, didn’t even realise Screwfix did stuff like that. Brilliant as we have a branch in my local town. Might change out those hinges for the silly piano hinge I have used so far. And those bolts look great for what I want.
Cheers Mike
Mark
SidneyFree MemberPosted 9 years agoKudos to you!
Keep the updates coming (I only really posted so it was easily available in forum activity!)


The topic ‘Family-friendly bike-carrying camper build’ is closed to new replies.