Viewing 32 posts - 121 through 152 (of 152 total)
  • DIY Carbon full suss- attempt
  • bigdean
    Full Member

    So again print out bits, this time though had a little experiment with hollow parts and some with infill.

    The hollow part is only a few grams lighter but way too flexible to be of any use.

    A spot the difference showing some modifications made.

    I’ve also printed a new top tube as a test (which probably means i’m doing another front triangle).

    So under 100grams for the core will be good to monitor how much weight is added as we go.

    bigdean
    Full Member

    Also been playing with the camera. here’s a vid of the swing arm fitting together.

    [video]https://www.youtube.com/watch?v=7HD6NITZeoU&t=9s[/video]

    FunkyDunc
    Free Member

    Fantastic ! How many £1,000’s have you spent so far though ? 😆

    damascus
    Free Member

    You can’t put a price on a hobby!

    bigdean
    Full Member

    Fantastic ! How many £1,000’s have you spent so far though ?

    Not in the £1000’s but if you dont count you can’t say 😉

    molgrips
    Free Member

    Good thread.

    Any of you carbon fibre fabbers want to make me something really simple? Possible product to be made?

    bigdean
    Full Member

    Ok bit of a while since an update, fortunately summer has been both good and bad for progress. Hols with family get in the way but got some time on the machines.

    Managed to make the linkages and new bearing axels spacer and bolts.

    School boy error with the bolts though as both were aluminium. bare aluminium to aluminium = cold welded (bugger!)

    So i found some Titanium bar ends I’ve had for ages and had a good day remembering to machine something interesting.

    bigdean
    Full Member

    Managed to get fusion to produce a usable program, plus have made some progress on the swing arm, have been trying to film some of the process so no pics at the min.

    gofasterstripes
    Free Member

    Swadding excellent dude.

    *Shares with engineering/MTB buds*

    dirkpitt74
    Full Member

    What a great thread!
    Looking forward to seeing the next instalment.

    thisisnotaspoon
    Free Member

    So under 100grams for the core will be good to monitor how much weight is added as we go.

    Out of interest, why not print in PVA then soak it out of the frame afterwards?

    cokie
    Full Member

    Great project! Nice to see you getting stuck into this.
    How many miles did you cover on Mk1 before it cracked?

    Out of interest, why not print in PVA then soak it out of the frame afterwards?

    Never knew that was possible. Very cool idea.

    thisisnotaspoon
    Free Member

    Never knew that was possible. Very cool idea.

    It’s the clever way of printing overhangs without having to sand off the supourt afterwards, you print in two materials with PVA being used to print the support.

    Only problem is, you’ve then got to design your parts with no overhangs, and build some sort of pumped warm water bath as it usually takes a good few hours to dissolve that much solid PVA.

    fifeandy
    Free Member

    I had never seen this thread before, but now I have, got to give a huge thumbs up. Can’t wait for the next instalment!

    bigdean
    Full Member

    [/quote]
    Out of interest, why not print in PVA then soak it out of the frame afterwards?

    Don’t have a dual head printer, bought a cheap kit some years ago and built a new frame for it. dual extruder is a planned improvment but that will have to wait.
    Plus pla is actually quite strong, good elongation till failure.

    **Note string and cable ties! missing duct tape though.

    How many miles did you cover on Mk1 before it cracked?

    Not that many but i cracked it hanging up on some dirt jumps deliberatley abusing it. It road around the peak district fine (up hope brink, potato alley and over to fairhomes)

    Poopscoop
    Full Member

    Just read this, start to end.

    Very interesting read. Wish I had a tenth of the talent!

    bigdean
    Full Member

    ^ Thanks, think of carbon fibre as expensive paper mashie and it becomes simpler. Need to include glitter and dry pasta!

    bigdean
    Full Member

    Right then a last big push before i get busy with work and Christmas takes over.

    Didn’t take any photos of laying up the new swing arm, i did try to make some videos but that was taking way too much time. I did get some but need to sort that out another day.

    A lot of sanding and cutting and sticking have resulted in this!

    It’s +100 grams lighter than the old swingarm and a lot stiffer.

    bigdean
    Full Member

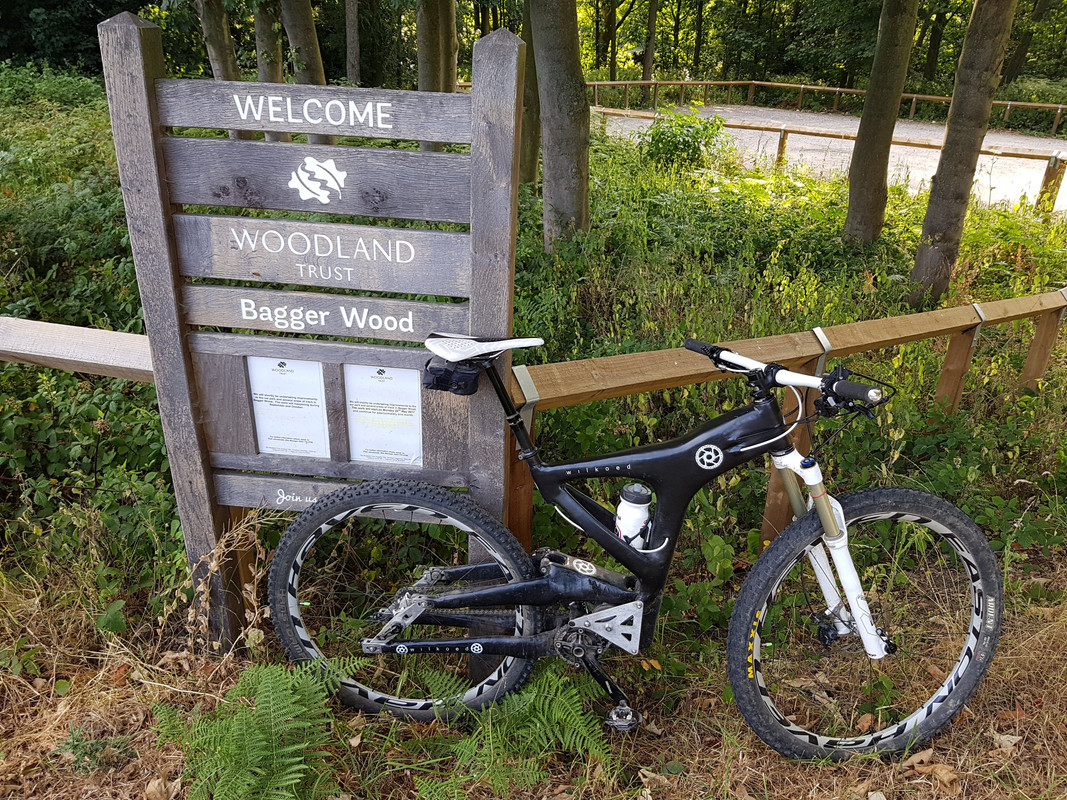
    Have spent most of the weekend bike building and final fitting but it’s all built up..

    The cable routing is now along the bottom links as that is where the least rotation (growth) is. It’s a bit close to the chain un-sagged but doesn’t touch. Note the temporary cable guides- some plastic pneumatic tube helli-tapped to the swingarm.
    There was a bit of fine tuning to get all the linkages to play nicely bit all works now.

    Quick pedal about and pedals nicely. proper ride coming soon.

    Ming the Merciless
    Free Member

    Love this thread. Keep going.

    bigdean
    Full Member

    We had a holiday at Castleton over the summer and the bike survived!

    There are things i’d change but currently fixing/ restoring a car so just riding it.

    Edit: Note as it my bike and not too precious about it, the holes drilled through the swing arm (in a suitable place mind) to hold the mud guard on.

    stumpy01
    Full Member

    Very cool! Kinda got me thinking perhaps I need to put my 3d printer to better use!

    daern
    Free Member

    Edit: Note as it my bike and not too precious about it, the holes drilled through the swing arm (in a suitable place mind) to hold the mud guard on.

    I trust you checked with the manufacturer first! 😉

    Great build and it’s brilliant to see it actually being ridden and working well. OOI, did you ever add up how much time your spent on this project, or is that one of those numbers that noone needs to know…?

    Oblongbob
    Full Member

    Brilliant! Very impressive. Great to get an update.

    bigdean
    Full Member

    Thanks for the comments  cost and time are two things not to add up. The CAD time alone would make you weep.

    MaryHinge
    Free Member

    Top work BigDean

    Paul@RTW
    Free Member

    Missed this thread last year but that looks awesome. Castleton isn’t far from me, if I’d known, we could have had a DIY composite frame convention!Alfino Bombino

    wwaswas
    Full Member

    bloody hell, there’s a lot going on in the back half of that frame!

    wwaswas
    Full Member

    follow up comment: Does it have a rear brake?

    thisisnotaspoon
    Free Member

    follow up comment: Does it have a rear brake?

    I’m guessing ‘gearbox’ behind that aluminium cover and brake mounted there?

    Paul@RTW
    Free Member

    Not wishing to detract/distract from bigdean’s thread but yes, Alfine and brake between two plates, fixed drive to the rear (front) wheel. More photos on instagram (its.wilkoed) and I’ll start my own thread when I get some more useful information into my blog.

    It’s just great to see someone else going through similar challenge and successes to what I’ve been doing and out riding their own creation. Like bigdean has said, you can’t put a price on it.

    chiefgrooveguru
    Full Member

    Great work! Definitely don’t add up the hours you’ve spent! 😉

Viewing 32 posts - 121 through 152 (of 152 total)

The topic ‘DIY Carbon full suss- attempt’ is closed to new replies.