- This topic has 39 replies, 13 voices, and was last updated 7 years ago by Northwind.
-
Affordable 3D printers
-
oliverracingFull MemberPosted 7 years ago
I’ve been looking at 3d printers for the past year as I have a growing selection of projects where having easy access to one would be great.
I’ve looked into open source designs due to ideally wanting to spend less than £200 for the machine and have pretty much narrowed it down to something like a prusa i3, due to delta type designs apparently being harder to setup. One snagging point is that I have read that a lot of the cheaper versions will need a fair amount replacing pretty quickly due to poor quality negating the original cost savings.
I’ve been round in circles on 3d printer forums with some saying that you have to spend anything upwards of £400 to get anything near useable but others saying the £147 eBay specials are fine…
Anyone got any experience on this that they are willing to share?
If you have any other suggestions, I’m only after a build are of about 180*180*150 and being able to print pla and abs would be ideal!
MilkieFree MemberPosted 7 years agoIf you want to be tinkering, playing with settings, upgrading parts, etc then get a cheap £200, but I wouldn’t recommend one.
Even a £400 you will be playing about with settings, but the quality & speed of the prints will be better and the settings shouldn’t change too much, and may not need setting up everytime you print something.
With all 3D printers, I say all but maybe not the £100k+ bracket, you need to know about 3D printing, we are a long way off being able to just press print like a paper printer.
I have a Wanhao D5S and its great, perfect for prototypes, making GoPro brackets, models, etc and the settings don’t drift and prints are consistent. I hear good things about the Wanhao i3+ and D4S. You need to narrow down what you want from a printer, then look at what printers would fit your needs.
You really do get what you pay for, but knowledge will take you from having an average printer to “oh my God I can’t believe you printed that on an i3!”.
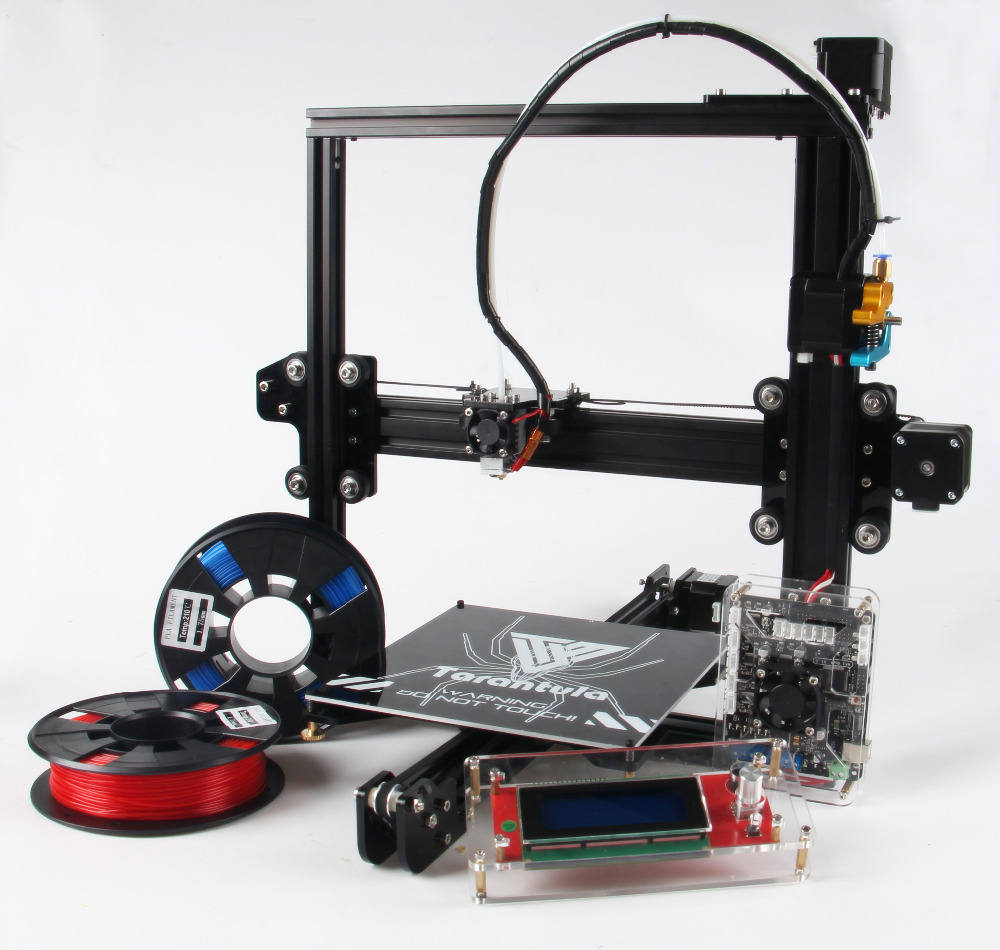
NorthwindFull MemberPosted 7 years agoI’ve not finished building mine but I got very strong recommendations for a Tevo Tarantula i3. Basically it’s just your standard i3 clone, but it’s all metal chassis at a price that usually gets you plastic. They have good (if slow) parts support, they’ve doen rolling revisions to improve the machine (no critical ones I have to say, just sensible user-led upgrades) and lots of options- heated bed as standard, I upgraded mine to an oversized bed but you can also do dual extrusion, and they have a hotend upgrade for fancy filaments etc. It’s still a cheap i3 but it’s a hell of a cheap i3 by all accounts. Oh, the wiring layout is a disaster but that’s par for the course I think, mine is going to consume a lot of cable ties.
But I think most important is the user group, there’s a facebook group of utter mad scientists who’ve latched onto this machine in particular, tbh it’s now gone over the event horizon and I no longer understand anything they say but if you have an issue, they’ll help. You’ll feel a wee bit like you asked a question about the cantis on your 1992 carrera on here, mind “OK this is how you fix it, but you’re distracting me from my project of 3D printing a human soul” All this best personified with the youtube build videos; I’m a handy dude but I couldn’t have built mine without the videos some punter made, the manufacturer instructions aren’t up to scratch.
They’ve just launched a new machine but I don’t know much about that.
Here’s one of the threads that influenced me… I got mine from ebay and after tax, with 2 reels of filament (which by reputation, may not be very good), and the print size upgrade, it was about £210. Though that was pre-brexit pound crash…
andybradFull MemberPosted 7 years agoive got a mojo one sat here.
Its expensive and not much use apart for making rudimentary stuff. The cheap ones are proper shit.
oliverracingFull MemberPosted 7 years agoSo I decided I don’t mind playing around with settings (that’s part of the fun in my opinion) so have gone for a Tevo Tarantula i3! I had short listed it as an one of my favorites but after visiting the facebook page I decided that that support level offered there would be hard to beat!
I went for the basic spec on the basis that I can upgrade later if I feel the need to but think it should cover everything I want to print short term.
Now the wait for it to arrive begins!
NorthwindFull MemberPosted 7 years agoIt was about 2 weeks for mine. Then it got stuck in customs for a week obviously!
You’re going to need this
https://www.youtube.com/user/ArcadEd/videos
Just as a wee update to the vids, ignore all the stuff about putting washers between the roller wheels, they’ve revised the kit now and it has them fitted as standard. His vids aren’t perfect and you’ll probably see some ways of improving it as you go but still absolutely fantastic.With a little luck I might actually get mine up and running this weekend, mine you I said that in June. I only actually have to build the displays and calibrate it but every step forward takes me further out of mechanicking and further towards software and design and I get The Fear 😆
NorthwindFull MemberPosted 7 years agoIt’s alive! Haven’t printed anything yet, more calibration and a wee bug fix to do first, but it moves and makes noise and all that good stuff.
(main bug; they’ve changed the layout of the lcd screen unit slightly, and the acrylic frontplate is slightly the wrong shape. It uses a push-button dial to control the printer, and as it comes out of the box you can’t push the button… So that needs a wee tweak, I’ll just oval the hole probably. But otherwise, pretty pain free)
oliverracingFull MemberPosted 7 years agoMine arrived in the post today, I hope to get it built up early August as have a crazy few days at work coming up so doubt I’ll get any time to build it up.
Let me know if you have any success!
stumpy01Full MemberPosted 7 years agoCool!
I’d love to get one, but have no real need to print plastic stuff…
How do you control it? Laptop? Does it come with the software, or is that extra?
And with regards to the actual file that is required…? Is it an stl file?
I could create a 3d model with pro/e but then how to get it to the printer…?oliverracingFull MemberPosted 7 years agoNot 100% sure yet, but I think you make an stl file in CAD software, which you export to a slicer program which converts it to a 3d printable file. I think you then put on an sd card to print.
I’ve got a kit car which is missing a lot of interior trim bits and the bits it has are in pretty rough and modded condition, so I’m going to print them and make a feature of them.
allthepiesFree MemberPosted 7 years agoWanhao i3 here.
Not used it for a few months now but a great bit of kit.
I installed Octoprint onto a Raspberry Pi clone and used that to control the printer. Or you could just put the gcode onto a SD card and load that into the printer and print from that.
Create/download model (stl etc) -> Run through a slicer -> Produce gcode -> Print.
DaffyFull MemberPosted 7 years agoI’ve got an old 3DS u print, and a newer 3DS cube. The 8 year old U-print is substantially better.
codybrennanFree MemberPosted 7 years agoHas anyone got a 3d printer to print a 3d printer yet?
Von Neumann machine style?
bigdeanFull MemberPosted 7 years agoI bought an i3 kit last year. Didn’t even use it as the threaded bar frame couldn’t be aligned accuratly. So i built a new frame and extruder housing.
The thing i dont see talked about a lot on the internet is manipulation of models to get the best print.
Flat faces make good bottom surfaces than rafts and support.
Avoiding sharp angles in z can help control warping during printing.
And i’ve had better results from properly setting up the bed level than using a proxy sensor anx auto bed leveling.MilkieFree MemberPosted 7 years agoOctoPi is great, I have it installed along with a 4″ touchscreen and a camera, great for keeping an eye on the print.
I use Simplify3D for translating the STL’s to gCode, it costs money, but my print quality has improved with it.
Here is a helpful print quality guide:
https://www.simplify3d.com/support/print-quality-troubleshooting/
And another one:
http://support.3dverkstan.se/article/23-a-visual-ultimaker-troubleshooting-guide
Over extrusion, under extrusion, not sticking to print bed, etc, etcoliverracingFull MemberPosted 7 years agoManaged to get the bits out of the box last night and all looks good, if a little daunting! The printing process seems to be pretty simple once you’ve got your head around it, although I guess a fair amount of tuning will be needed!
Those guides look good as I guess there’s going to be a pretty steep learning curve! Especially as I’m looking to mod mine to fit a e3d V6 and maybe even a volcano for some of my mold making where there will be smooth curves and not too much detail!
NorthwindFull MemberPosted 7 years agoCeremoniously produced a 10mm cube. Then unceremoniously failed to produce something I downloaded from thingiverse because of a lack of supports. Very satisfying to watch though 😆 My dimensions are just marginally out but the resolution’s good, I don’t think it’s going to need too much troubleshooting.
Now to learn how to work modern 3D design software. Or find an acorn archimedes.
oliverracingFull MemberPosted 7 years agoGot the structure of mine built over the past few days, now need to get the last few wires connected and I should be good to go! I’m hoping to get a test cube printed this evening and then onto bigger projects!
MilkieFree MemberPosted 7 years agoOnce you have the basic settings dialed in, try printing the 3DBenchy. Gives you a really good idea if your printer is dimensionally accurate and what it can and can’t handle.
NorthwindFull MemberPosted 7 years agoIf you figure out how to remove the ptfe tube once fitted, let me know!
oliverracingFull MemberPosted 7 years agoHaha, I was about to ask the same question! I think I put to long a feed pipe on there but will see when it’s running!
mcFree MemberPosted 7 years agoNW I demand pictures! 😉
I was looking at kits over the weekend, as I’ve got a couple ideas that would be good to prototype on a 3D printer, but I should really spend my time on more productive things.
NorthwindFull MemberPosted 7 years ago@oliverracing- sorted, but it’s fiddly. You have to push down the black plastic bit on top of the metal fitting, then pull. But when I first installed mine, the black bit stuck down on both fittings, so there was a fair amount of pushing and pulling needed to release it. I ended up unscrewing the fittings entirely from the printer to make it easier and avoid messing up all the setup etc. Kind of a pain in the ass- I guess I’ll find out if it gets easier.
No pics til I make the wiring less terrible 😆 But it looks exactly like the promotional pics really. (@MC, once i’ve got it printing to a good standard, happy to knock stuff out for you, I owe you a couple…)
 mcFree MemberPosted 7 years ago
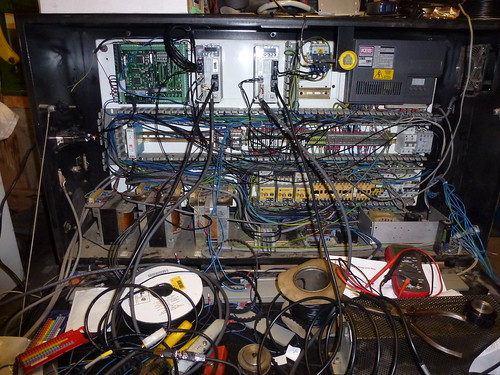
You’re worried about the wiring looking bad?
It can’t be any worse than this-
PS, you got your image tags wrong!
oliverracingFull MemberPosted 7 years agoGot mine printing last night and printed a 10mm cube, but when trying to print a larger cube the nozzle blocked, looks like it was the PTFE tube not being in far enough so managed to get it out (worked out how o do it by accident) not had time to try it since as had to go to work but the print quality was great is a little slow so I’m going to see if I can get away with a faster/lower quality!
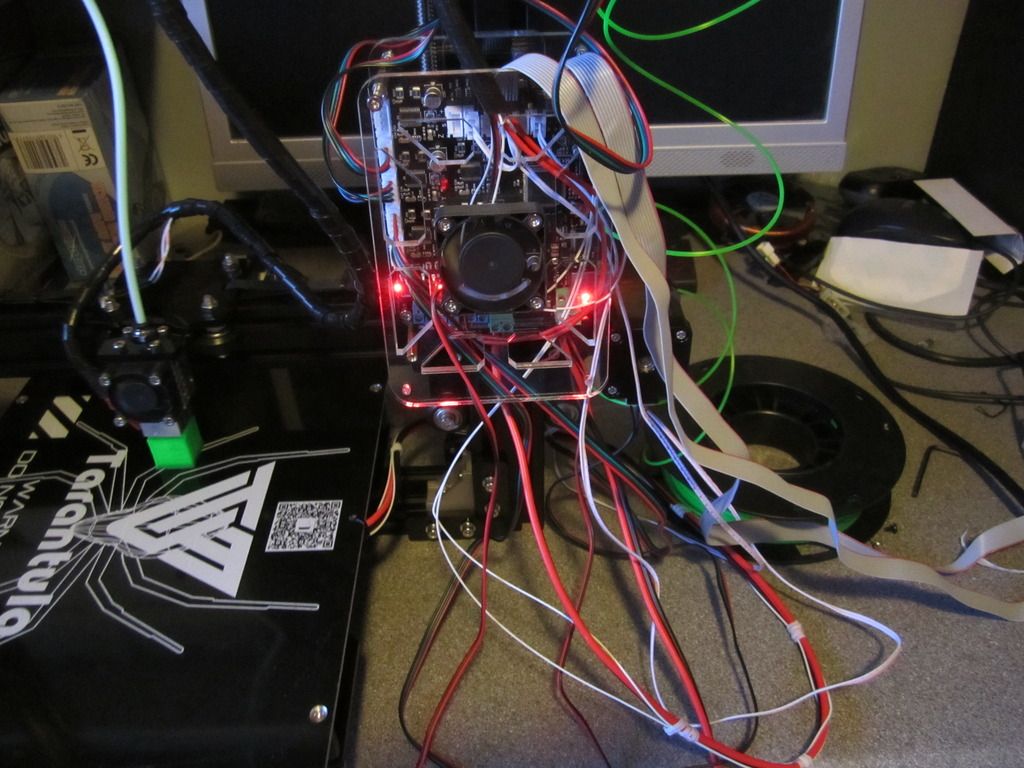
Also – I hadn’t noticed previously but in that picture a lot of the wires aren’t actually plugged in!
NorthwindFull MemberPosted 7 years agoObviously no chance of this going on fire
This is post wiring cleanup btw 😆
Did quite a bit of setup tonight, it’d just generally got a bit baggy and out of shape from constant movement in building so squared it off again, much better. Found a wee error in my slicr setup too so that’s helped quality. Pretty pleased tbh! Wee bit too much elephant’s footing but that’s just practice/setup I think, just a little tweak to bed height and temp might achieve that. TBH it’s not a kick in the balls off some 3d printed parts I’ve bought in the past, still needs the sizing perfected.
Just printing in pla at the moment, the printer comes with 2 reels of apparently fairly crappy filament so I’m using that to practice.
km79Free MemberPosted 7 years agoThat looks like a lot of effort to go through just to print out a little monopoly house?
oliverracingFull MemberPosted 7 years agoI like your level of ambition!
I managed a 20mm cube but had a little bit of a rough top so will drop my print temp a little, I’m also going to print a cooling duct tonight if time allows. Got a few 40mm fans in the post so can experiment with what works best.
MilkieFree MemberPosted 7 years agoI found once I switched to a decent PLA filament, the prints were a lot better and had less “issues”. I currently use ColorFabb, also found Indigo quite good, but the colours where quite pale.
With your i3, you might find it better if you can bolt it down to a bit of wood, so it doesn’t get out of alignment so quick. It also means you can move it about easier.
Where’s the photo’s of everyone’s prints!? I’ll start:
This was with the rubbish filament, just before the printer was returned due to undersized rods, there was a lot of play in the head.NorthwindFull MemberPosted 7 years agoMilkie – Member
With your i3, you might find it better if you can bolt it down to a bit of wood, so it doesn’t get out of alignment so quick. It also means you can move it about easier.
Aye, seems a good idea- mine’s getting bolted to a bit of old worktop I have, might build a full enclosure for it. But I need to figure out how all the temperature management works first. It’s too big for the classic ikea besta enclosure.
Oh- I think I’m going to whack a PC fan onto the PSU too, it gets pretty hot and I can’t say it inspires much confidence. In theory I could print something ingenious and efficient; in practice, duct tape.
oliverracingFull MemberPosted 7 years agoOh- I think I’m going to whack a PC fan onto the PSU too, it gets pretty hot and I can’t say it inspires much confidence. In theory I could print something ingenious and efficient; in practice, duct tape.
I’m using a couple of elastic bands to hold a 100mm fan on mine – I’ll be using a box to put the PSU into which I hope to cool using a couple on smaller/quieter fans as the 100mm unit is louder than the machine!
mcFree MemberPosted 7 years agoDoing one of these later
I now fully expect to see that at the next trailfairy session!
NorthwindFull MemberPosted 7 years agoThey let me have a go on it, riding it around the event hall like a cock in my work clothes, but I decided probably best not to nick it.
I got fed up making cubes
so I made a cube.
Mostly came out pretty well- support structure came away just right, the top’s a little rough but tolerable. You can see a defect near the top- I had a filament feed issue that meant it just didn’t feed quite enough material, there’s a few thin/weak layers
So, hmm. Thoughts so far- the build guide said give it the thickness of a sheet of standard paper between nozzle and bed, I’ve lifted it up a little, that was too close and was causing a bit of distortion. I’m not using tape or anything, adhesion has been fine with the pla on the heated bed at 60. I’ve got a 120mm PC fan blowing across the bed which cured the early slumping issue, the printing temperature seems right but the print was staying too hot I think. It’s not elegant but it works. Oh and I’ve built a wee reel dispenser as I was having misfeed issues (the reels provided seem a bit twisted, not sure if it’s just this cheap filament)
Things are coming out fractionally undersized- the test cubes came out 19.8mm not 20mm on all sides. I can fix that but haven’t bothered yet.
NorthwindFull MemberPosted 7 years agoHaving a lot of fun with this, got all the bits to mount it to a board for better stability, ordered an e3d hotend for it, doesn’t seem a lot to pay if it gives the upgrade people report… So I’m entering stage 2 of printer ownership- printing things for the printer. A wee bracket for the hotend, a spool dispenser thing (because as excellent as my sharpie taped between 2 video cassettes is, it lacks elegance), brackets and brackets and brackets…
The e3D mini I ordered isn’t a full metal end, so it won’t give me much more capability than the stock one, but should do the same job better. (it’s just about hot enough to print petg and possibly controlled enough to print flexible filaments) And it’s upgradable to full metal if I want to print hotter materials etc in future. There’s e3d copies out there for peanuts but I’m not cool with that…
Minor successes:
A simple Dredd movie badge purely to show the printer off to my little brother, printed about 80mm across with the pla included in the box (so it’s pretty transparent). I’m getting a bit of smearing when the hotend relocates across the piece (it’s really bad if trying to print 2 pieces at once) so that’s the main defect to chase down for now… Think I may be over-extruding but tbh I can’t be assed to fix that for this setup then immediately change parts.
And major fails:
You have to do a benchy, it’s the law. It’s supposed to print with no bridges/supports, but the roof didn’t hold together. We will meet again, Benchy.
NorthwindFull MemberPosted 7 years agoOh and make yourself some thumbscrew extensions for the leveller screws, seriously. Not sure why nobody tells you this, it should be literally the first thing you print that’s not a bloomin cube.


The topic ‘Affordable 3D printers’ is closed to new replies.